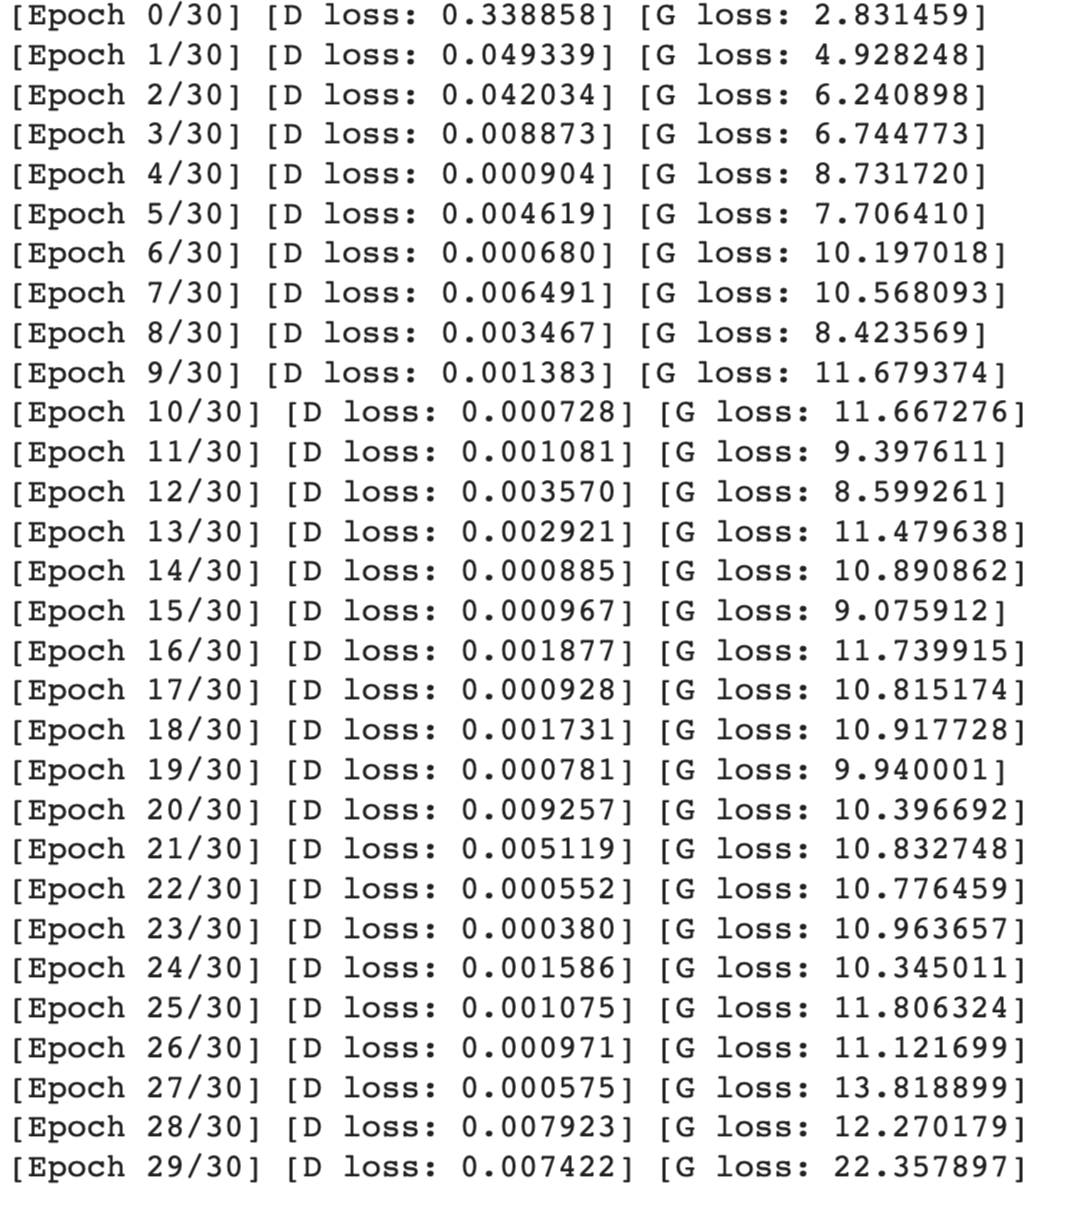
CGAN and DCGAN代码实现
CGAN
首先实现CGAN。下面分别是 判别器 和 生成器 的网络结构,可以看出网络结构非常简单,具体如下:
生成器:(784 + 10) ==> 512 ==> 256 ==> 1
判别器:(100 + 10) ==> 128 ==> 256 ==> 512 ==> 784
可以看出,去掉生成器和判别器那 10 维的标签信息,和普通的GAN是完全一样的。下面是网络的具体实现代码:
class Discriminator(nn.Module):
	'''全连接判别器,用于1x28x28的MNIST数据,输出是数据和类别'''
	def __init__(self):
		super(Discriminator, self).__init__()
		self.model = nn.Sequential(
			  nn.Linear(28*28+10, 512),
			  nn.LeakyReLU(0.2, inplace=True),
			  nn.Linear(512, 256),
			  nn.LeakyReLU(0.2, inplace=True),
			  nn.Linear(256, 1),
			  nn.Sigmoid()
		)

	def forward(self, x, c):
		x = x.view(x.size(0), -1)
		validity = self.model(torch.cat([x, c], -1))
		return validity

class Generator(nn.Module):
	'''全连接生成器,用于1x28x28的MNIST数据,输入是噪声和类别'''
	def __init__(self, z_dim):
		super(Generator, self).__init__()
		self.model = nn.Sequential(
			  nn.Linear(z_dim+10, 128),
			  nn.LeakyReLU(0.2, inplace=True),
			  nn.Linear(128, 256),
			  nn.BatchNorm1d(256, 0.8),
			  nn.LeakyReLU(0.2, inplace=True),
			  nn.Linear(256, 512),
			  nn.BatchNorm1d(512, 0.8),
			  nn.LeakyReLU(0.2, inplace=True),
			  nn.Linear(in_features=512, out_features=28*28),
			  nn.Tanh()
	 	)

	def forward(self, z, c):
		x = self.model(torch.cat([z, c], dim=1))
		x = x.view(-1, 1, 28, 28)
		return x
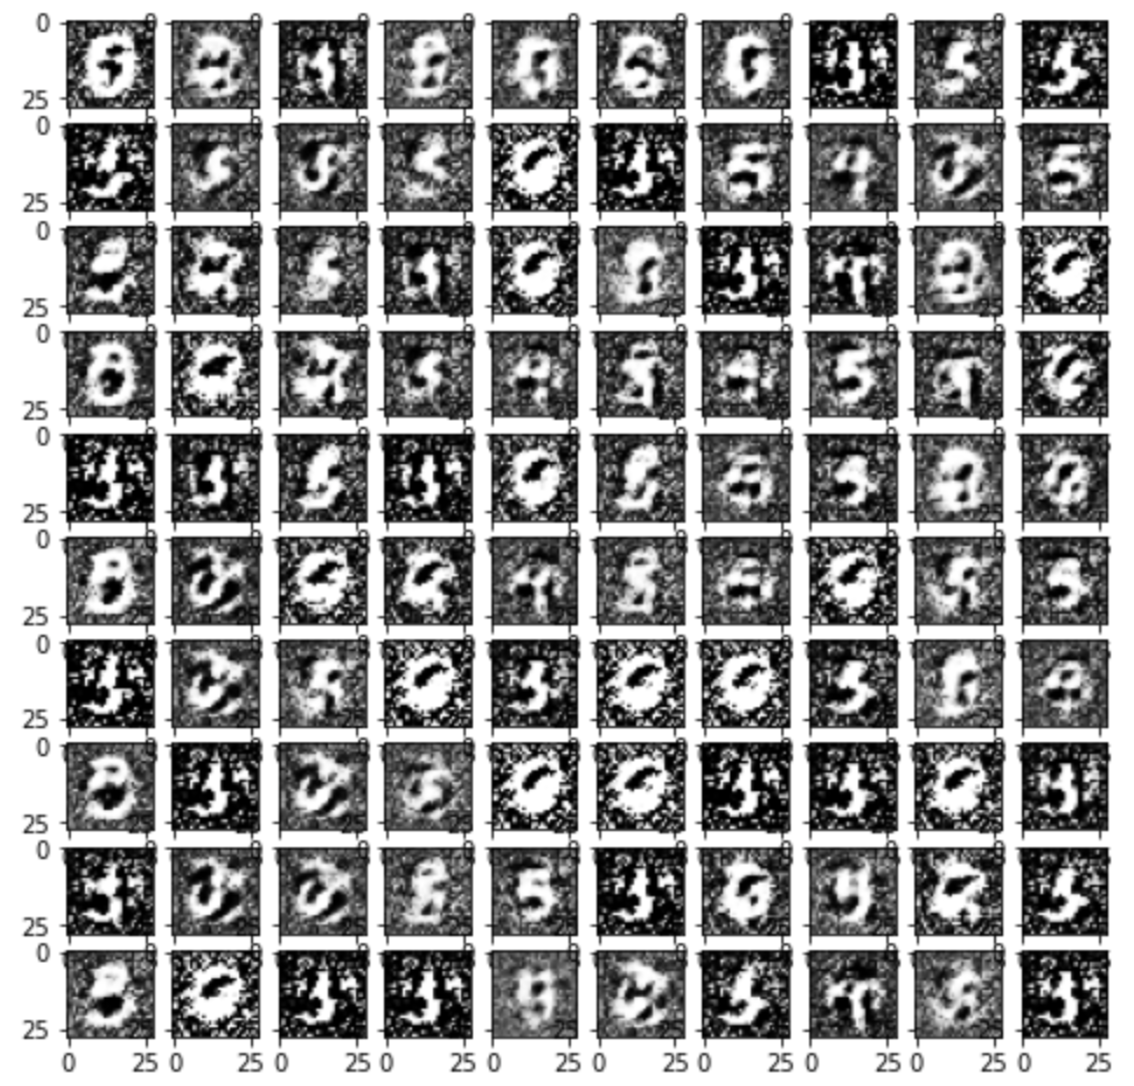
下面我们用随机噪声生成一组图像,看看CGAN的效果:
DCGAN
下面我们实现DCGAN。下面分别是 判别器 和 生成器 的网络结构,和之前类似,只是使用了卷积结构。

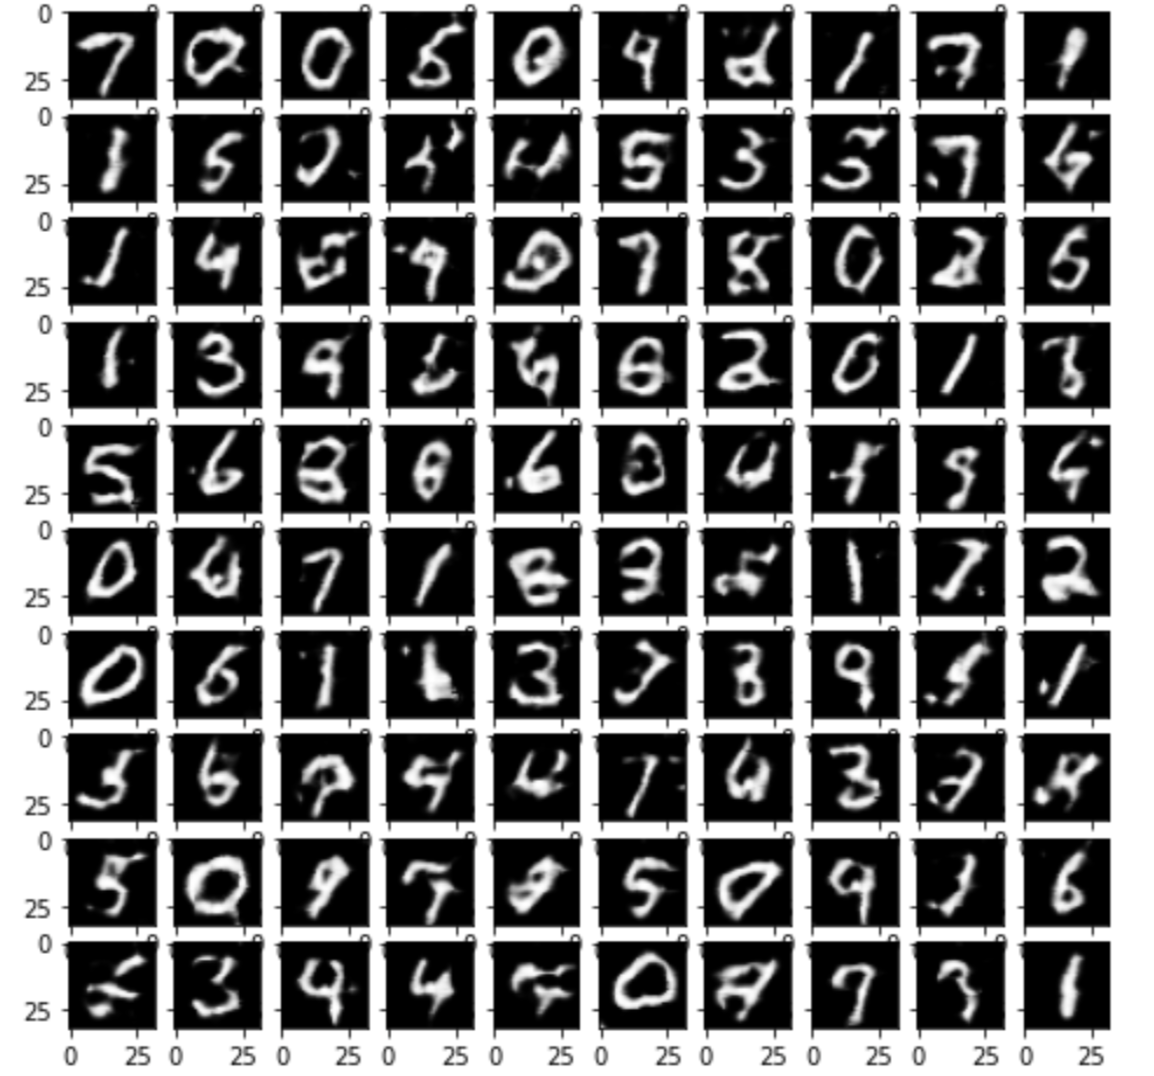
下面我们用一组随机噪声输出图像,看看DCGAN的效果:

 浙公网安备 33010602011771号