NAT模式·LVS搭建(nginx安装)
NAT模式·LVS搭建
NET模式下,调度器需要有两个IP,一个公网IP一个内网IP,真实服务器只需要内网IP。此架构需要准备三台虚拟机。三台虚拟机的IP分配如下:
调度器dir:192.168.233.83(内网IP,vmware为NAT模式),192.168.133.0(公网IP,vmware仅主机模式)。
真实服务器rs1:192.168.233.84(内网IP)
真实服务器rs2:192.168.233.85(内网IP)
其中调度器上有两块网卡,作为内网的这块网卡使用的是NAT的网络,而作为“公网”的网卡使用的是仅主机网络。需要注意,所谓的公网其实仅仅是模拟的,并不是真正意义上的公网。在配置LVS之前,需要做一些准备工作。首先,真实服务器rs1(192.168.200.131)和rs2(192.168.200.132)上要把内网的网关设置为dir的内网IP(192.168.200.130),否则实验无法成功。
安装nginx
关闭防火墙、关闭SELinux、配置yum源
nginx安装
nginx官网地址:nginx: download
这两个随便下载一个,传到你的服务器上

yum这几个包
[root@nginx ~]# yum -y install pcre-devel openssl openssl-devel gcc gcc-c++
开启nginx
[root@nginx ~]# ll
总用量 1056
-rw-------. 1 root root    1311 12月 20 22:36 anaconda-ks.cfg
-rw-r--r--  1 root root 1073364 2月  28 17:32 nginx-1.21.6.tar.gz
[root@nginx ~]# tar -zxvf nginx-1.21.6.tar.gz
[root@nginx ~]# cd nginx-1.21.6
[root@nginx nginx-1.21.6]# ./configure
[root@nginx nginx-1.21.6]# make && make install
[root@nginx nginx-1.21.6]# cd /usr/local/nginx/sbin/
[root@nginx sbin]# ./nginx
[root@nginx sbin]# netstat -lntp |grep nginx
tcp        0      0 0.0.0.0:80              0.0.0.0:*               LISTEN      4539/nginx: master
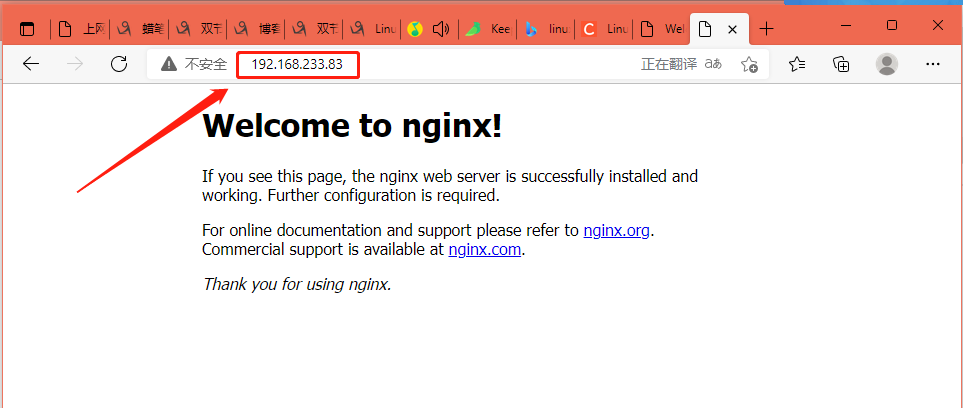
访问服务器
用浏览器访问服务器,然后是这样的话,那么你成功了。 192.168.233.83:80端口

把三台服务器上的iptables规则清空并保存,命令如下:
# iptables -F; iptables -t nat -F; service iptables save //三台机器上都要执行
在dir上安装ipvsadm,这是实现LVS的核心工具:
[root@dir ~]# yum install -y ipvsadm
继续在dir上编写一个脚本:
[root@dir ~]# vim /usr/local/sbin/lvs_nat.sh

#! /bin/bash

# director 服务器上开启路由转发功能

echo 1 > /proc/sys/net/ipv4/ip_forward

# 关闭icmp的重定向

echo 0 > /proc/sys/net/ipv4/conf/all/send_redirects

echo 0 > /proc/sys/net/ipv4/conf/default/send_redirects

# 注意区分网卡名字

echo 0 > /proc/sys/net/ipv4/conf/ens33/send_redirects

echo 0 > /proc/sys/net/ipv4/conf/ens34/send_redirects

# director 设置nat防火墙

iptables -t nat -F

iptables -t nat -X

iptables -t nat -A POSTROUTING -s 192.168.233.0/24  -j MASQUERADE

# director设置ipvsadm

IPVSADM='/usr/sbin/ipvsadm'

$IPVSADM -C

$IPVSADM -A -t 192.168.233.83:80 -s wlc -p 300

$IPVSADM -a -t 192.168.233.84:80 -r 192.168.200.131:80 -m -w 1

$IPVSADM -a -t 192.168.233.85:80 -r 192.168.200.132:80 -m -w 1
脚本编写完成后,直接执行,命令如下:
[root@dir ~]# bash /usr/local/sbin/lvs_nat.sh
下面测试LVS的效果,如果dir上有Nginx服务器,需要先把它关闭,否则会影响实验效果:
[root@dir ~]# killall nginx
为了更容易方便区分,分别需要给84、85设置一个默认主页,命令如下:
[root@rs1 ~]# echo "rs1" > /usr/share/nginx/html/index.html    //84上执行

[root@rs2 ~]# echo "rs2" > /usr/local/nginx/html/index.html    //85上执行
在dir上分别访问两个rs,如下所示:
[root@dir ~]# curl 192.168.233.84

rs1

[root@dir ~]# curl 192.168.233.85

rs2
这样就区分了rs1和rs2,然后直接在dir上访问dir的外网(192.168.147.144),结果如下:
[root@dir ~]# curl 192.168.200.100

rs2

[root@dir ~]# curl 192.168.200.100

rs2

[root@dir ~]# curl 192.168.200.100

rs2

[root@dir ~]# curl 192.168.200.100

rs2

[root@dir ~]# curl 192.168.200.100

rs2

[root@dir ~]# curl 192.168.200.100

rs2

[root@dir ~]# curl 192.168.200.100

rs2
连续多次访问,一直请求在rs2上,是因为脚本中有设置-p参数,理论上在300秒内会一直请求在rs2上。重新编辑/usr/local/sbin/lvs_nat.sh脚本把-p参数删除,然后再次测试,结果如下:
[root@dir ~]# curl 192.168.200.100

rs2

[root@dir ~]# curl 192.168.200.100

rs1

[root@dir ~]# curl 192.168.200.100

rs2

[root@dir ~]# curl 192.168.200.100

rs1

[root@dir ~]# curl 192.168.200.100

rs2

[root@dir ~]# curl 192.168.200.100

rs1
这样就做到了均衡访问。


【推荐】国内首个AI IDE,深度理解中文开发场景,立即下载体验Trae
【推荐】编程新体验,更懂你的AI,立即体验豆包MarsCode编程助手
【推荐】抖音旗下AI助手豆包,你的智能百科全书,全免费不限次数
【推荐】轻量又高性能的 SSH 工具 IShell:AI 加持,快人一步
· 震惊!C++程序真的从main开始吗?99%的程序员都答错了
· 别再用vector<bool>了!Google高级工程师:这可能是STL最大的设计失误
· 单元测试从入门到精通
· 【硬核科普】Trae如何「偷看」你的代码?零基础破解AI编程运行原理
· 上周热点回顾(3.3-3.9)