lnmp-wordpress
创建一台虚拟机并开启,自行配置网卡(我的网卡配置的是:192.168.233.11)
关闭防火墙
# setenforce 0
# systemctl stop firewalld
挂载yum源
# mount /dev/sr0 /opt/centos
第一步、安装Nginx
1.执行以下命令,在 /etc/yum.repos.d/ 下创建 nginx.repo 文件
# vi /etc/yum.repos.d/nginx.repo
2.按 i 切换至编辑模式,写入以下内容
[nginx]
name = nginx repo
baseurl = https://nginx.org/packages/mainline/centos/7/$basearch/
gpgcheck = 0
enabled = 1
3.按 Esc,输入 :wq,保存文件并返回
4.执行以下命令,安装 nginx
# yum install -y nginx
5.执行以下命令,打开 default.conf 文件
# vim /etc/nginx/conf.d/default.conf
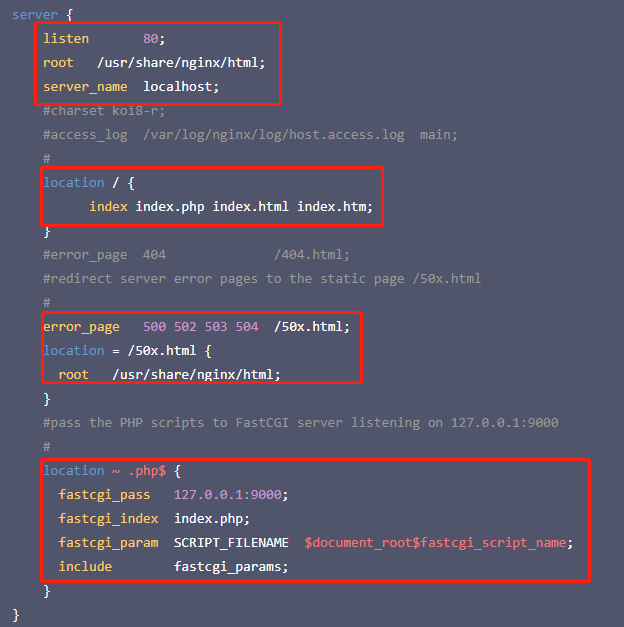
6.找到 server{...},并将 server 大括号中相应的配置信息替换为如下内容。用于取消对 IPv6 地址的监听,同时配置 Nginx,实现与 PHP 的联动(注意修改红框内信息“注意 ' # ' !!!”)

7.启动 Nginx,并设置Nginx为开机自启动
# systemctl start nginx
# systemctl enable nginx
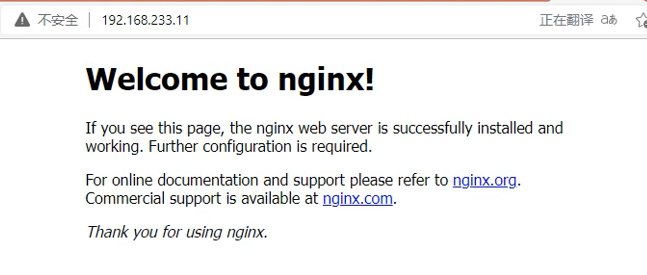
8.在本地浏览器中访问"http://192.168.233.11",查看Nginx服务是否正常运行,如下图配置成功

第二步、安装数据库
1.查看系统中是否已安装MariaDB,为避免安装版本不同造成冲突,移除已安装的MariaDB(若返回结果为空,则说明未预先安装,则执行下一步)
# rpm -qa | grep -i mariadb //查看是否安装
# yum -y remove 包名(mariadb) //移除
2.添加Mariadb软件库
# vi /etc/yum.repos.d/local.repo
# MariaDB 10.4 CentOS repository list - created 2019-11-05 11:56 UTC
# http://downloads.mariadb.org/mariadb/repositories/
[mariadb]
name = MariaDB
baseurl = https://mirrors.cloud.tencent.com/mariadb/yum/10.4/centos7-amd64
gpgkey=https://mirrors.cloud.tencent.com/mariadb/yum/RPM-GPG-KEY-MariaDB
gpgcheck=1
3.安装 MariaDB。此步骤耗时较长,请关注安装进度,等待安装完毕。
# yum -y install MariaDB-client MariaDB-server

第三步、安装配置PHP
1.依次执行以下命令,更新 yum 中 PHP 的软件源
# rpm -Uvh https://mirrors.cloud.tencent.com/epel/epel-release-latest-7.noarch.rpm
# rpm -Uvh https://mirror.webtatic.com/yum/el7/webtatic-release.rpm
第四步、搭建lnmp+wordpress环境
[root@xserver1 ~]# mysql -uroot -p123456
Welcome to the MariaDB monitor. Commands end with ; or \g.
Your MariaDB connection id is 4
Server version: 5.5.44-MariaDB-log MariaDB Server
Copyright (c) 2000, 2015, Oracle, MariaDB Corporation Ab and others.
Type 'help;' or '\h' for help. Type '\c' to clear the current input statement.
MariaDB [(none)]> create database wordpress;
Query OK, 1 row affected (0.00 sec)
MariaDB [(none)]> grant all privileges on *.* to "wordpress"@"localhost" identified by '123456';
Query OK, 0 rows affected (0.00 sec)
MariaDB [(none)]> flush privileges;
Query OK, 0 rows affected (0.00 sec)
# 重启服务
[root@xserver1 ~]# systemctl restart nginx php-fpm mariadb
# 删除nginx默认文件
[root@xserver1 ~]# rm -rf /usr/share/nginx/html/*
# 解压
[root@xserver1 ~]# yum install -y unzip
[root@xserver1 ~]# unzip wordpress-4.7.3-zh_CN.zip
# 部署
[root@xserver1 ~]# cp -rf wordpress/* /usr/share/nginx/html/
[root@xserver1 ~]# cd !$
cd /usr/share/nginx/html/
[root@xserver1 html]# ls
index.php wp-blog-header.php wp-includes wp-settings.php
license.txt wp-comments-post.php wp-links-opml.php wp-signup.php
readme.html wp-config-sample.php wp-load.php wp-trackback.php
wp-activate.php wp-content wp-login.php xmlrpc.php
wp-admin wp-cron.php wp-mail.php
# 修改配置文件,根据MySQL授权信息填写配置文件
[root@xserver1 html]# cp wp-config-sample.php wp-config.php
[root@xserver1 html]# vim wp-config.php
// ** MySQL 设置 - 具体信息来自您正在使用的主机 ** //
/** WordPress数据库的名称 */
define('DB_NAME', 'wordpress');
/** MySQL数据库用户名 */
define('DB_USER', 'wordpress');
/** MySQL数据库密码 */
define('DB_PASSWORD', '123456');
/** MySQL主机 */
define('DB_HOST', 'localhost');
/** 创建数据表时默认的文字编码 */
define('DB_CHARSET', 'utf8');
[root@xserver1 html]# chmod -R 777 /usr/share/nginx/html/
[root@xserver1 html]# netstat -ntlp
Active Internet connections (only servers)
Proto Recv-Q Send-Q Local Address Foreign Address State PID/Program name
tcp 0 0 127.0.0.1:9000 0.0.0.0:* LISTEN 4238/php-fpm: maste
tcp 0 0 0.0.0.0:3306 0.0.0.0:* LISTEN 4460/mysqld
tcp 0 0 0.0.0.0:139 0.0.0.0:* LISTEN 3118/smbd
tcp 0 0 0.0.0.0:111 0.0.0.0:* LISTEN 2739/rpcbind
tcp 0 0 0.0.0.0:80 0.0.0.0:* LISTEN 4236/nginx: master
tcp 0 0 0.0.0.0:20048 0.0.0.0:* LISTEN 2754/rpc.mountd
tcp 0 0 0.0.0.0:22 0.0.0.0:* LISTEN 1112/sshd
tcp 0 0 127.0.0.1:25 0.0.0.0:* LISTEN 1605/master
tcp 0 0 0.0.0.0:445 0.0.0.0:* LISTEN 3118/smbd
tcp 0 0 0.0.0.0:45758 0.0.0.0:* LISTEN -
tcp 0 0 0.0.0.0:2049 0.0.0.0:* LISTEN -
tcp 0 0 0.0.0.0:52550 0.0.0.0:* LISTEN 2730/rpc.statd
tcp6 0 0 :::139 :::* LISTEN 3118/smbd
tcp6 0 0 :::111 :::* LISTEN 2739/rpcbind
tcp6 0 0 :::20048 :::* LISTEN 2754/rpc.mountd
tcp6 0 0 :::21 :::* LISTEN 2640/vsftpd
tcp6 0 0 :::22 :::* LISTEN 1112/sshd
tcp6 0 0 ::1:25 :::* LISTEN 1605/master
tcp6 0 0 :::56316 :::* LISTEN -
tcp6 0 0 :::445 :::* LISTEN 3118/smbd
tcp6 0 0 :::2049 :::* LISTEN -
tcp6 0 0 :::43140 :::* LISTEN 2730/rpc.statd
[root@xserver1 html]# curl localhost
<!DOCTYPE html>
<html lang="zh-CN" class="no-js no-svg">
<head>
<meta charset="UTF-8">
<meta name="viewport" content="width=device-width, initial-scale=1">
<link rel="profile" href="http://gmpg.org/xfn/11">
<script>(function(html){html.className = html.className.replace(/\bno-js\b/,'js')})(document.documentElement);</script>
<title>myblog – 又一个WordPress站点</title>
<link rel='dns-prefetch' href='//192.168.100.11' />
<link rel='dns-prefetch' href='//fonts.googleapis.com' />
<link rel='dns-prefetch' href='//s.w.org' />
<link href='https://fonts.gstatic.com' crossorigin rel='preconnect' />
<link rel="alternate" type="application/rss+xml" title="myblog » Feed" href="http://192.168.100.11/?feed=rss2" />
<link rel="alternate" type="application/rss+xml" title="myblog » 评论Feed" href="http://192.168.100.11/?feed=comments-rss2" />
<script type="text/javascript">
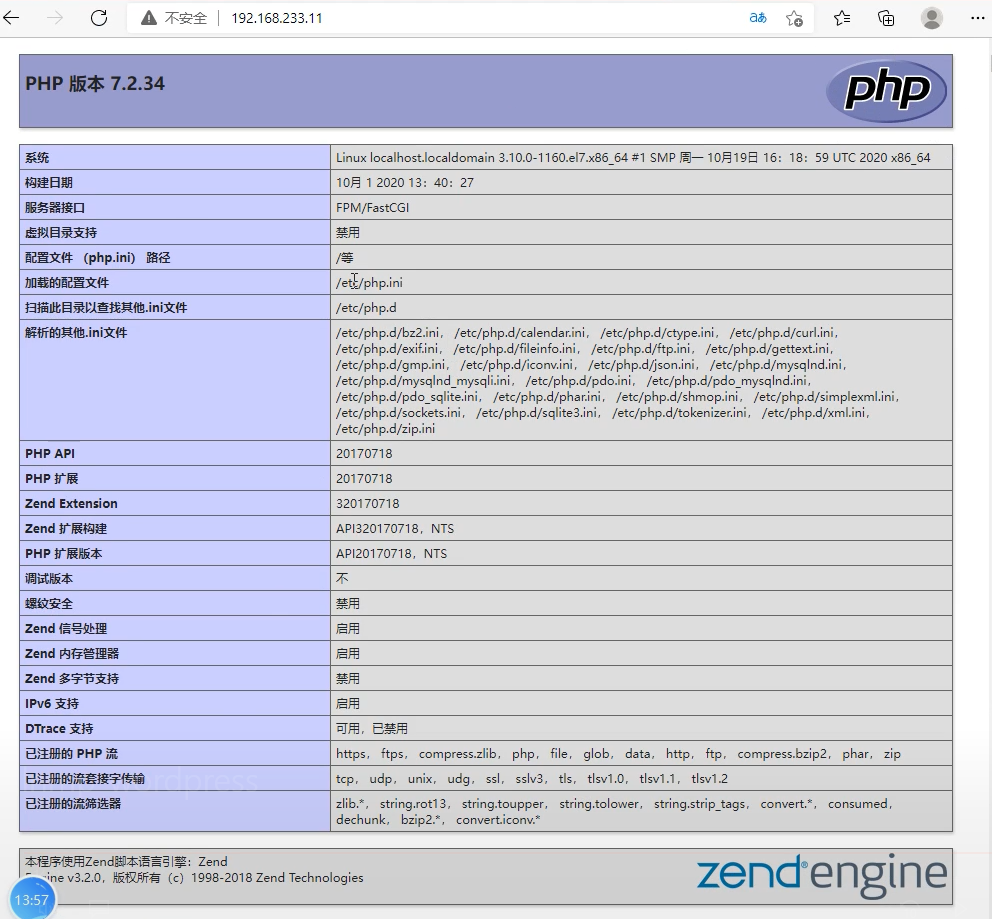
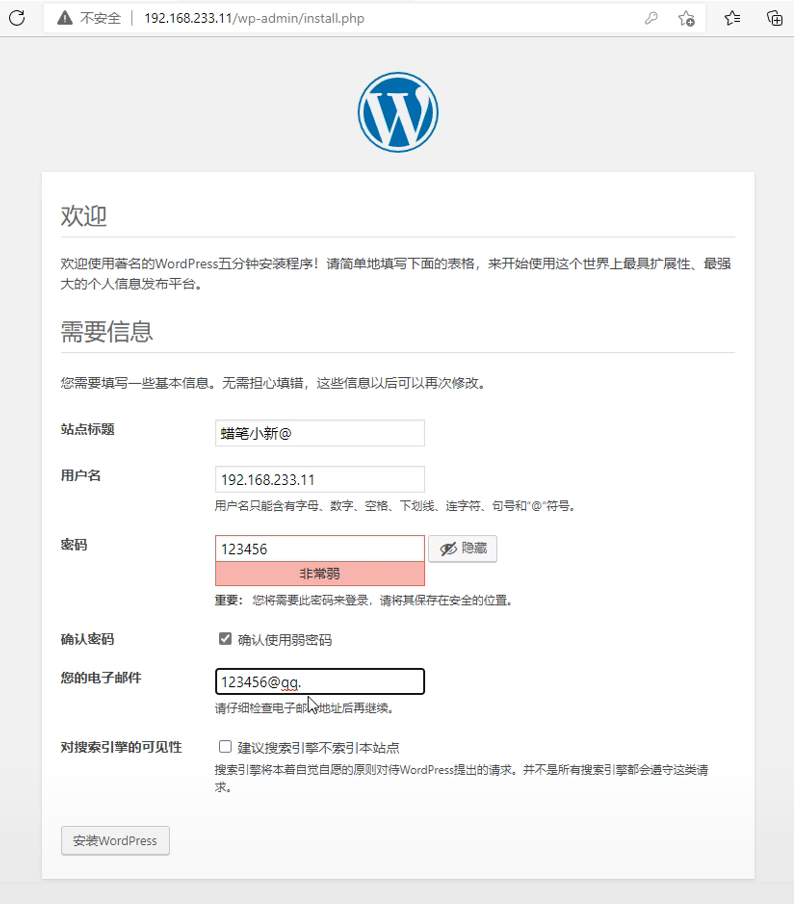
搭建成功之后会出现以下界面(如果80端口和9000端口没出来的话尝试登录网页,如果不成功排查错误)


