Elastic Stack:Java客户端连接ElasticSearch
一.pom.xml
1 2 3 4 5 6 7 8 9 10 11 12 13 14 15 16 17 18 19 20 21 22 23 24 25 26 27 28 29 30 31 32 33 34 35 36 37 38 39 40 41 42 43 44 45 46 47 | <?xml version="1.0" encoding="UTF-8"?><project xmlns="http://maven.apache.org/POM/4.0.0" xmlns:xsi="http://www.w3.org/2001/XMLSchema-instance" xsi:schemaLocation="http://maven.apache.org/POM/4.0.0 http://maven.apache.org/xsd/maven-4.0.0.xsd"> <parent> <artifactId>elasticsearch</artifactId> <groupId>com.wj</groupId> <version>1.0-SNAPSHOT</version> </parent> <modelVersion>4.0.0</modelVersion> <artifactId>ESDemo</artifactId> <dependencies> <!-- https://mvnrepository.com/artifact/org.elasticsearch.client/elasticsearch-rest-high-level-client --> <dependency> <groupId>org.elasticsearch.client</groupId> <artifactId>elasticsearch-rest-high-level-client</artifactId> <version>7.7.1</version> <exclusions> <exclusion> <groupId>org.elasticsearch</groupId> <artifactId>elasticsearch</artifactId> </exclusion> </exclusions> </dependency> <!-- https://mvnrepository.com/artifact/org.elasticsearch/elasticsearch --> <dependency> <groupId>org.elasticsearch</groupId> <artifactId>elasticsearch</artifactId> <version>7.7.1</version> </dependency> <!-- https://mvnrepository.com/artifact/org.springframework.boot/spring-boot-starter-test --> <dependency> <groupId>org.springframework.boot</groupId> <artifactId>spring-boot-starter-test</artifactId> <version>2.3.0.RELEASE</version> <scope>test</scope> </dependency> <!-- https://mvnrepository.com/artifact/org.springframework.boot/spring-boot-starter --> <dependency> <groupId>org.springframework.boot</groupId> <artifactId>spring-boot-starter</artifactId> <version>2.3.0.RELEASE</version> </dependency> </dependencies></project> |
二.基本步骤
1 2 3 4 5 6 7 8 9 10 11 12 13 | public class TestDemo { public static void main(String[] args) throws IOException { //获取连接客户端 RestHighLevelClient client = new RestHighLevelClient(RestClient.builder(new HttpHost("192.168.10.138", 9200, "http"))); //构建请求 GetRequest request = new GetRequest("book", "1"); //执行 GetResponse fields = client.get(request, RequestOptions.DEFAULT); //获取结果 System.out.println(fields.getId()); System.out.println(fields.getSource()); }} |
执行结果:

三.使用springboot测试
配置文件 application.yml:
1 2 3 4 5 6 7 | spring: application: name: search-servicetest: elasticsearch: address: 192.168.10.138 port: 9200 |
配置类:
1 2 3 4 5 6 7 8 9 10 11 12 13 14 15 | @Configurationpublic class EsConfig { @Value("${test.elasticsearch.address}") private String address; @Value("${test.elasticsearch.port}") private Integer port; @Bean(destroyMethod = "close") public RestHighLevelClient restHighLevelClient(){ return new RestHighLevelClient(RestClient.builder(new HttpHost(address, port, "http"))); }} |
测试类:
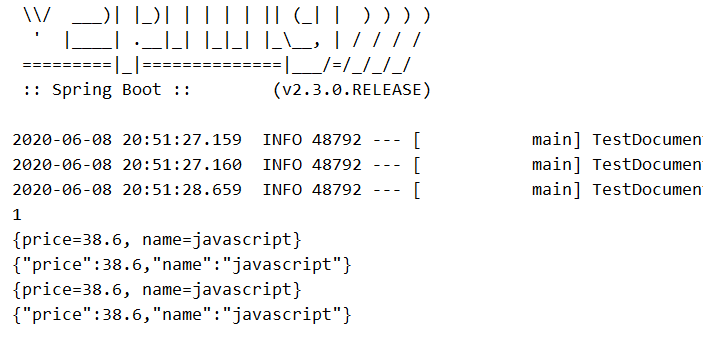
1 2 3 4 5 6 7 8 9 10 11 12 13 14 15 16 17 18 19 20 21 22 23 24 25 26 27 28 29 30 31 32 33 34 35 36 37 38 39 | @SpringBootTest(classes = SearchApplication.class)@RunWith(SpringRunner.class)public class TestDocument { @Qualifier("restHighLevelClient") @Autowired RestHighLevelClient client; @Test public void test() throws IOException, InterruptedException { //构建请求 GetRequest request = new GetRequest("book", "1"); //设置可选参数 FetchSourceContext context = new FetchSourceContext(true, new String[]{"name", "price"}, Strings.EMPTY_ARRAY); request.fetchSourceContext(context); //同步执行 //GetResponse fields = client.get(request, RequestOptions.DEFAULT); //异步执行 client.getAsync(request, RequestOptions.DEFAULT, new ActionListener<>() { //成功时的操作 @Override public void onResponse(GetResponse documentFields) { //获取结果 System.out.println(documentFields.getId()); System.out.println(documentFields.getSource()); System.out.println(documentFields.getSourceAsString()); System.out.println(documentFields.getSourceAsMap()); System.out.println(new String(documentFields.getSourceAsBytes())); } //失败的操作 @Override public void onFailure(Exception e) { e.printStackTrace(); } }); Thread.sleep(5000); }} |
查询结果:
四.测试文档新增
构建文档数据的四种方法:
直接使用json字符串构建:
1 2 3 4 5 6 7 8 9 10 11 12 13 14 15 16 17 18 19 20 21 22 23 24 | //构建请求IndexRequest request = new IndexRequest("test_add");request.id("2");//构建文档数据//方法1:直接写json字符串String jsonStr = "{\n" + " \"name\": \"php\",\n" + " \"description\": \"php是世界上最好的语言\",\n" + " \"studymodel\": \"201002\",\n" + " \"price\":38.6,\n" + " \"timestamp\":\"2019-08-25 19:11:35\",\n" + " \"tags\": [ \"php\", \"开发\"]\n" + "}";request.source(jsonStr, XContentType.JSON);//设置超时时间request.timeout(TimeValue.timeValueSeconds(2L));//手动维护版本号request.version(2);request.versionType(VersionType.EXTERNAL);//执行IndexResponse indexResponse = client.index(request, RequestOptions.DEFAULT);System.out.println(indexResponse.getIndex());System.out.println(indexResponse.getId());System.out.println(indexResponse.getResult()); |
运行结果:

使用map构建:
1 2 3 4 5 | Map<String, Object> map = new HashMap<>();map.put("user","john");map.put("age","18");map.put("time","2020-12-12");request.source(map); |
使用XContentBuilder构建:
1 2 3 4 5 6 7 8 | XContentBuilder builder = XContentFactory.jsonBuilder().startObject(); { builder.field("user","john"); builder.field("age",18); builder.timeField("time","2020-12-12"); } builder.endObject(); request.source(builder); |
直接在request中构建:
1 | request.source("user","john").source("age","18").source("time","2020-12-12"); |
异步:
1 2 3 4 5 6 7 8 9 10 11 12 13 | Cancellable cancellable = client.indexAsync(request, RequestOptions.DEFAULT, new ActionListener<>() { @Override public void onResponse(IndexResponse indexResponse) { System.out.println(indexResponse.getIndex()); System.out.println(indexResponse.getId()); System.out.println(indexResponse.getResult()); } @Override public void onFailure(Exception e) { e.printStackTrace(); }}); |
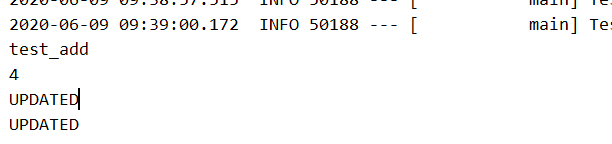
也可以进行更新操作:
1 2 3 4 5 6 7 8 9 10 11 12 13 14 15 16 17 18 19 20 21 22 23 24 25 26 27 28 29 30 31 32 33 34 35 36 37 | //构建请求 IndexRequest request = new IndexRequest("test_add"); request.id("4"); //构建文档数据 Map<String, Object> map = new HashMap<>(); map.put("user","john"); map.put("age","19"); map.put("time","2020-12-12"); request.source(map); //设置超时时间 request.timeout(TimeValue.timeValueSeconds(2L)); //手动维护版本号 request.version(3); request.versionType(VersionType.EXTERNAL); //执行 //IndexResponse indexResponse = client.index(request, RequestOptions.DEFAULT); Cancellable cancellable = client.indexAsync(request, RequestOptions.DEFAULT, new ActionListener<>() { @Override public void onResponse(IndexResponse indexResponse) { System.out.println(indexResponse.getIndex()); System.out.println(indexResponse.getId()); System.out.println(indexResponse.getResult()); if(indexResponse.getResult()== DocWriteResponse.Result.CREATED){ DocWriteResponse.Result result = indexResponse.getResult(); System.out.println(result); }else if(indexResponse.getResult()== DocWriteResponse.Result.UPDATED){ DocWriteResponse.Result result = indexResponse.getResult(); System.out.println(result); } } @Override public void onFailure(Exception e) { e.printStackTrace(); } }); Thread.sleep(5000); |
对结果进行监控:
1 2 3 4 5 6 7 8 9 10 11 | ReplicationResponse.ShardInfo shardInfo = indexResponse.getShardInfo();if(shardInfo.getTotal()!=shardInfo.getSuccessful()){ System.out.println(shardInfo.getSuccessful()); System.out.println(shardInfo.getTotal()); System.out.println("处理成功的分片少于总分片");}if(shardInfo.getFailed()>0){ for (ReplicationResponse.ShardInfo.Failure failure : shardInfo.getFailures()) { System.out.println(failure.reason()); }} |
五.测试修改:
1 2 3 4 5 6 7 8 9 10 11 12 | //创建请求UpdateRequest request = new UpdateRequest("test_add","3");Map<String, Object> map = new HashMap<>();map.put("age","33");request.doc(map);//设置重试次数request.retryOnConflict(4);//执行UpdateResponse response = client.update(request, RequestOptions.DEFAULT);//获取结果System.out.println(response.getId());System.out.println(response.getResult()); |
六.测试删除
1 2 3 4 | DeleteRequest request = new DeleteRequest("test_add", "3");DeleteResponse response = client.delete(request, RequestOptions.DEFAULT);System.out.println(response.getId());System.out.println(response.getResult()); |
七.测试bulk批量操作
1 2 3 4 5 6 7 8 9 10 11 12 13 | BulkRequest request = new BulkRequest();request.add(new IndexRequest("test_add").id("6").source(XContentType.JSON,"address","3"));request.add(new DeleteRequest("test_add").id("4"));BulkResponse responses = client.bulk(request, RequestOptions.DEFAULT);for (BulkItemResponse respons : responses) { DocWriteResponse response = respons.getResponse(); switch (respons.getOpType()){ case INDEX: System.out.println(response); case DELETE: System.out.println(response); }} |


【推荐】国内首个AI IDE,深度理解中文开发场景,立即下载体验Trae
【推荐】编程新体验,更懂你的AI,立即体验豆包MarsCode编程助手
【推荐】抖音旗下AI助手豆包,你的智能百科全书,全免费不限次数
【推荐】轻量又高性能的 SSH 工具 IShell:AI 加持,快人一步
· 开发者必知的日志记录最佳实践
· SQL Server 2025 AI相关能力初探
· Linux系列:如何用 C#调用 C方法造成内存泄露
· AI与.NET技术实操系列(二):开始使用ML.NET
· 记一次.NET内存居高不下排查解决与启示
· Manus重磅发布:全球首款通用AI代理技术深度解析与实战指南
· 被坑几百块钱后,我竟然真的恢复了删除的微信聊天记录!
· 没有Manus邀请码?试试免邀请码的MGX或者开源的OpenManus吧
· 园子的第一款AI主题卫衣上架——"HELLO! HOW CAN I ASSIST YOU TODAY
· 【自荐】一款简洁、开源的在线白板工具 Drawnix