RabbitMQ:生产者消费者模型构建/为消息自定义属性/自定义消费者
一.pom.xml
1 2 3 4 5 6 7 8 9 10 11 12 13 14 15 16 17 18 19 20 21 22 23 | <dependencies> <dependency> <groupId>org.springframework.boot</groupId> <artifactId>spring-boot-starter</artifactId> </dependency> <dependency> <groupId>org.springframework.boot</groupId> <artifactId>spring-boot-starter-test</artifactId> <scope>test</scope> <exclusions> <exclusion> <groupId>org.junit.vintage</groupId> <artifactId>junit-vintage-engine</artifactId> </exclusion> </exclusions> </dependency> <dependency> <groupId>com.rabbitmq</groupId> <artifactId>amqp-client</artifactId> <version>3.6.5</version> </dependency></dependencies> |
二.生产者
1 2 3 4 5 6 7 8 9 10 11 12 13 14 15 16 17 18 | public class Producer { public static void main(String[] args) throws IOException, TimeoutException { //创建一个连接工厂 ConnectionFactory connectionFactory = new ConnectionFactory(); connectionFactory.setHost("192.168.10.132"); connectionFactory.setPort(5672); connectionFactory.setVirtualHost("/"); //创建连接 Connection connection = connectionFactory.newConnection(); //通过连接创建一个Channel Channel channel = connection.createChannel(); //通过Channel发送数据 channel.basicPublish("","hello",null,"hello world".getBytes()); //关闭连接 channel.close(); connection.close(); }} |
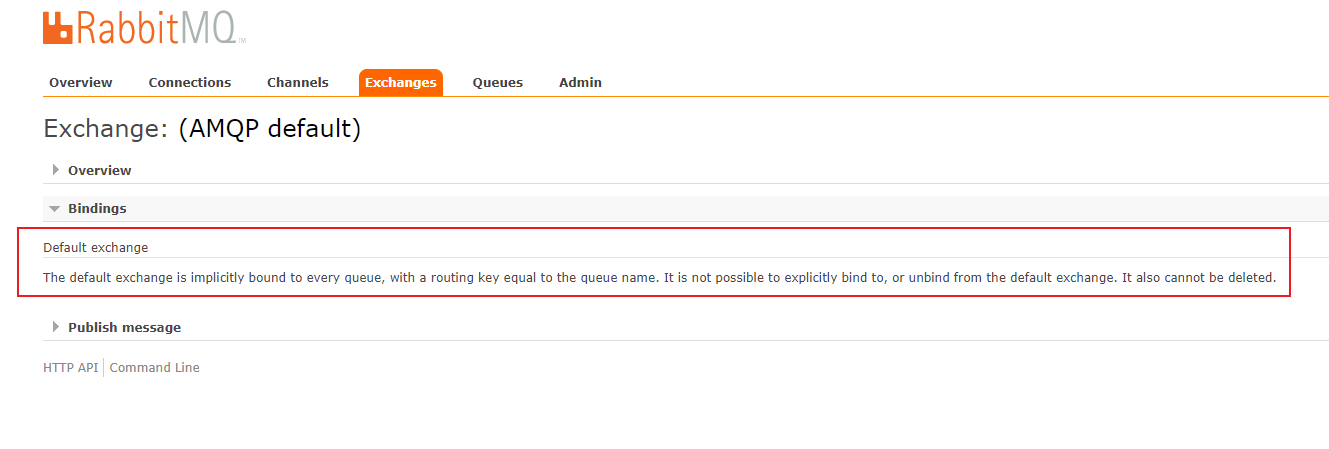
这里注意channel.basicPublish方法的第一个参数(exchange)和第二个参数(routingKey),如果没有指定exchange,指定了routingKey,而routingKey与消费者类中指定的queue的name相同,会通过RabbitMQ的默认Exchange(AMQP default)进行路由。
三.消费者
1 2 3 4 5 6 7 8 9 10 11 12 13 14 15 16 17 18 19 20 21 22 23 24 25 26 27 | public class Consumer { public static void main(String[] args) throws IOException, TimeoutException, InterruptedException { //创建一个连接工厂 ConnectionFactory connectionFactory = new ConnectionFactory(); connectionFactory.setHost("192.168.10.132"); connectionFactory.setPort(5672); connectionFactory.setVirtualHost("/"); //创建连接 Connection connection = connectionFactory.newConnection(); //通过连接创建一个Channel Channel channel = connection.createChannel(); //创建一个队列 String queueName = "hello"; channel.queueDeclare(queueName,true,false,false,null); //创建一个消费者 QueueingConsumer consumer = new QueueingConsumer(channel); //设置Channel channel.basicConsume(queueName,true,consumer); //获取消息 while (true){ QueueingConsumer.Delivery delivery = consumer.nextDelivery(); String msg = new String(delivery.getBody()); System.out.println("消费端:"+msg); } }} |
四.运行
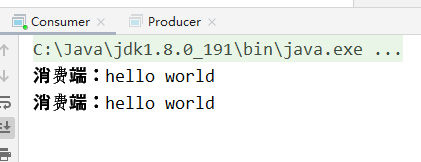
先运行消费者,再运行生产者。
在消费者的控制台可以接收到生产者发送的消息。
五.为消息定义属性
1.在生产者这边:
先设置properties:
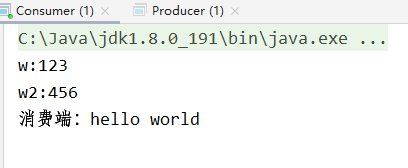
1 2 3 4 5 6 7 8 9 10 11 | //自定义属性Map<String, Object> headers = new HashMap<>();headers.put("w","123");headers.put("w2","456");//为消息定义属性AMQP.BasicProperties properties = new AMQP.BasicProperties.Builder() .deliveryMode(2) //为1时,则不持久化,为2持久化消息 .contentEncoding("UTF-8") .expiration("100000")//过期时间 .headers(headers)//自定义属性 .build(); |
再将properties作为参数,传到basicPublish方法中
1 | channel.basicPublish("","hello",properties,"hello world".getBytes()); |
2.消费者
消费者这边,需要通过Delivery获取properties的相关属性。
1 2 3 4 5 6 7 | while (true){ QueueingConsumer.Delivery delivery = consumer.nextDelivery(); String msg = new String(delivery.getBody()); Map<String, Object> headers = delivery.getProperties().getHeaders(); headers.forEach((x,y)-> System.out.println(x+":"+y)); System.out.println("消费端:"+msg);} |
打印结果:
六.自定义消费者
可以继承DefaultConsumer类,实现handleDelivery方法
1 2 3 4 5 6 7 8 9 10 11 12 13 14 15 16 17 | public class MyConsumer extends DefaultConsumer { public MyConsumer(Channel channel) { super(channel); } @Override public void handleDelivery(String consumerTag, Envelope envelope, AMQP.BasicProperties properties, byte[] body) throws IOException { System.out.println(consumerTag); System.out.println(envelope); System.out.println(properties); System.out.println(new String(body)); }} |
在消费端创建消费者的时候,就可以使用自定义的消费者。
1 2 3 4 5 6 7 8 9 10 11 12 13 14 15 16 17 | //创建一个连接工厂ConnectionFactory connectionFactory = new ConnectionFactory();connectionFactory.setHost("192.168.10.132");connectionFactory.setPort(5672);connectionFactory.setVirtualHost("/");//创建连接Connection connection = connectionFactory.newConnection();//通过连接创建一个ChannelChannel channel = connection.createChannel();//创建一个队列String queueName = "myConsumer";channel.queueDeclare(queueName,true,false,false,null);//创建一个消费者//QueueingConsumer consumer = new QueueingConsumer(channel);MyConsumer consumer = new MyConsumer(channel);//设置Channelchannel.basicConsume(queueName,true,consumer); |
运行结果:


【推荐】国内首个AI IDE,深度理解中文开发场景,立即下载体验Trae
【推荐】编程新体验,更懂你的AI,立即体验豆包MarsCode编程助手
【推荐】抖音旗下AI助手豆包,你的智能百科全书,全免费不限次数
【推荐】轻量又高性能的 SSH 工具 IShell:AI 加持,快人一步
· 开发者必知的日志记录最佳实践
· SQL Server 2025 AI相关能力初探
· Linux系列:如何用 C#调用 C方法造成内存泄露
· AI与.NET技术实操系列(二):开始使用ML.NET
· 记一次.NET内存居高不下排查解决与启示
· Manus重磅发布:全球首款通用AI代理技术深度解析与实战指南
· 被坑几百块钱后,我竟然真的恢复了删除的微信聊天记录!
· 没有Manus邀请码?试试免邀请码的MGX或者开源的OpenManus吧
· 园子的第一款AI主题卫衣上架——"HELLO! HOW CAN I ASSIST YOU TODAY
· 【自荐】一款简洁、开源的在线白板工具 Drawnix