


Vue的常用语法操作入门
利用 vue-cli 生成的项目的结构如下:
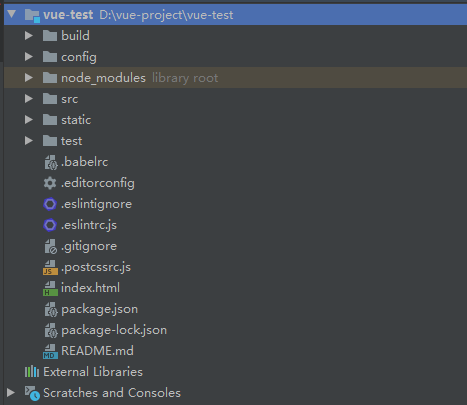
基于这个工程。我这里主要介绍一些常用的基础入门操作,帮助小白快速了解 Vue。更加详细的请参阅 Vue官方文档。内容如下:
- v-model、v-bind、v-if、v-else、v-for、v-on、v-once
- Class 与 Style 绑定
- 计算属性
- 侦听器
- 实现路由的页面跳转
- 基于Axios发送ajax跨域请求
- vue的生命周期函数
环境准备:
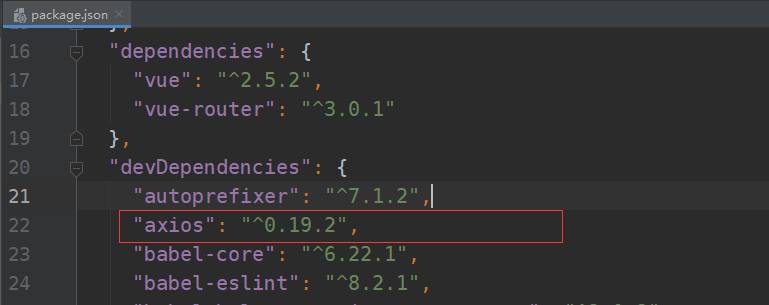
基础的开发环境就不介绍了,这里主要还需要安装一个 Axios 模块 :cnpm install axios --save-dev

安装完成查看工程目录下 package.json 文件:
首先直接贴上的我 demo 所对应的 HelloWorld.vue 文件,忽略style相关。只是为了排版。以下的一些基础操作都基于该文件。
<template xmlns:v-on="http://www.w3.org/1999/xhtml" xmlns:v-bind="http://www.w3.org/1999/xhtml">
  <div class="hello">
    <h1>{{ msg }}</h1>
    <div>
      <div style="height: 300px;width: 300px;float: left">
        <h2>这是一个标题h2</h2>
        <h3>这是一个标题h3</h3>
        <button v-on:click="tiaozhuan">页面跳转按钮</button>
        <img src="../images/head.jpg" width="100" height="100" />
        <a href="https://www.baidu.com">这是一个跳转链接</a>
      </div>
      <div style="height: 300px;width: 200px;float: left">
        <h4 style="color: firebrick">有序列表:</h4>
        <ol>
          <li v-for="todo in todos" v-bind:key="todo.text">
            {{ todo.text }}
          </li>
        </ol>
      </div>
      <!--border: black 2px solid;-->
      <div style="height: 300px;width: 200px;float: left">
        <h4 style="color: firebrick">无序列表:</h4>
          <ul>
            <li>Coffee</li>
            <li>Tea</li>
            <li>Milk</li>
          </ul>
      </div>
      <div style="height: 300px;width: 300px;float: left">
        <h4 style="color: firebrick">表格:</h4>
        <table style="height: 100px; width: 250px;border-collapse: collapse" border="2" >
          <tr align="center">
            <th>姓名</th>
            <th>年龄</th>
          </tr>
          <tr align="center">
            <td>wuzz</td>
            <td>11</td>
          </tr>
          <tr align="center">
            <td>jack</td>
            <td>22</td>
          </tr>
        </table>
      </div>
      <div style="height: 300px;width: 340px;float: left">
        <h4 style="color: firebrick">表单:</h4>
        <form>
          输入框: <input type="text" name="firstname" v-model="modelPassworld">{{modelPassworld}}<br>
          密码框: <input type="password" name="pwd"><br>
          单选框:
          <input type="radio" name="sex" value="male">Male
          <input type="radio" name="sex" value="female">Female<br>
          复选框:
          <input type="checkbox" name="vehicle" value="Bike">I have a bike
          <input type="checkbox" name="vehicle" value="Car">I have a car<br>
          Username: <input type="text" name="user"><br>
          提交按钮:
          <input type="submit" value="Submit">
        </form>
      </div>
    </div>
    <div id="app-2" v-if="seen" style="height: 300px;width: 560px;float: left">
      <h4 style="color: firebrick">动态绑定,计算属性及侦听器:</h4>
      <button v-on:click="clickTest">测试按钮</button>
      <button v-on:click="reverseMessage">反转消息</button>
      <span v-bind:title="message">
        鼠标悬停几秒钟查看此处动态绑定的提示信息!
      </span><br/>
      <span v-once>这个将不会改变: {{ message }}</span><br/>
      <p>Using v-html directive: <span v-html="rawHtml"></span></p>
      <h3>计算属性:{{computeFiled}}</h3>
    </div>
    <div id="app-3" v-if="seen" style="height: 300px;width: 200px;float: left">
      <h4 style="color: firebrick">Class 与 Style 绑定:</h4>
      <div class="static"
           v-bind:class="{ active: isActive, 'text-danger': hasError }">class-style</div>
      <div style="margin-top: 10px"
           v-bind:class="[{ active: isActive }, errorClass]">class-style array</div>
    </div>
    <div id="app-4" v-if="seen" style="height: 300px;width: 600px;float: left">
      <h4 style="color: firebrick">条件渲染:</h4>
      <button @click="awesomeTest(message,seen)">条件渲染按钮切换</button>
      <!-- 点击事件将只会触发一次 -->
      <button v-on:click.once="awesomeTest(message,seen)">点击事件将只会触发一次</button>
      <h1 v-if="awesome">Vue is awesome!</h1>
      <h1 v-else>Oh no 😢</h1>
    </div>
  </div>
</template>

<script>
export default {
  name: 'HelloWorld',
  data () {
    return {
      msg: 'Welcome to Your Vue.js App',
      message: '页面加载于 ' + new Date().toLocaleString(),
      seen: true,
      todos: [],
      modelPassworld: '',
      rawHtml: '<span style="color: red">aaaa</span>',
      isActive: true,
      hasError: true,
      errorClass: 'text-danger',
      awesome: false
    }
  },
  methods: {
    tiaozhuan: function () {
      this.$router.push('/home')
    },
    clickTest: function () {
      this.message = '22222222222'
      // this.seen = false
      this.todos = [
        { text: '学习 JavaScript' },
        { text: '学习 Vue' },
        { text: '整个牛项目' }
      ]
      this.rawHtml = '<span style="color: red">This should be red</span>'
    },
    reverseMessage: function () {
      this.msg = this.msg.split('').reverse().join('')
    },
    awesomeTest: function (message, seen) {
      alert(message + '  ' + seen)
      this.awesome ? this.awesome = false : this.awesome = true
    }
  },
  computed: {
    // 计算属性的 getter
    computeFiled: function () {
      // `this` 指向 vm 实例
      return this.msg + ' Wuzz'
    }
  },
  watch: {// 侦听器
    msg: function (newMsg, oldMsg) {
      alert(oldMsg + '==============>' + newMsg)
    }
  }, // 以下时vue生命周期函数
  beforeCreate: function () {
    console.group('------beforeCreate创建前状态------')
    console.log(this.todos)
  },
  created: function () {
    console.group('------created创建完毕状态------')
    console.log(this.todos)
  },
  beforeMount: function () {
    console.group('------beforeMount挂载前状态------')
    console.log(this.todos)
  },
  mounted: function () {
    console.group('------mounted 挂载结束状态------')
  },
  beforeUpdate: function () {
    console.group('beforeUpdate 更新前状态===============》')
  },
  updated: function () {
    console.group('updated 更新完成状态===============》')
  },
  beforeDestroy: function () {
    console.group('beforeDestroy 销毁前状态===============》')
  },
  destroyed: function () {
    console.group('destroyed 销毁完成状态===============》')
  }
}
</script>
<!-- Add "scoped" attribute to limit CSS to this component only -->
<style scoped>
</style>
其中跳转涉及到路由的配置,修改 src\router\index.js:
import Vue from 'vue'
import Router from 'vue-router'
import HelloWorld from '@/components/HelloWorld'
import Home from '@/components/Home'

Vue.use(Router)

export default new Router({
  routes: [
    {
      path: '/',
      name: 'HelloWorld',
      component: HelloWorld,
      meta: {
        title: '测试Hello World'
      }
    },
    {
      path: '/home',
      name: 'Home',
      component: Home,
      meta: {
        title: '首页'
      }
    }
  ]
})
对应的跳转目标模板对象 Home.vue:
<template xmlns:v-on="http://www.w3.org/1999/xhtml">
    <div id="app">
      <button  v-on:click="send">发送ajax请求</button>
    </div>
</template>
<script>
import axios from 'axios'
/* eslint-disable no-new */
export default {
  name: 'Home',
  data () {
    return {
      msg: 'Welcome to Your Vue.js Home'
    }
  },
  methods: {
    send: function () {
      axios({
        method: 'get',
        url: '/api/wuzz/get.json?name=' + 'wuzz'
      }).then(function (res) {
        let data = res.data.success
        alert(JSON.stringify(data))
        // console.log(res)
      }).catch(function (err) {
        alert(err)
      })
    }
  }
}
</script>
还需要配置 src\main.js 进行路有变化修改title,导入Axios模块的配置:
// The Vue build version to load with the `import` command
// (runtime-only or standalone) has been set in webpack.base.conf with an alias.
import Vue from 'vue'
import App from './App'
import router from './router'
import axios from 'axios'

Vue.prototype.$axios = axios
Vue.config.productionTip = false

/* eslint-disable no-new */
new Vue({
  el: '#app',
  router,
  components: {App},
  template: '<App/>'
})
/* 路由发生变化修改页面title */
router.beforeEach((to, from, next) => {
  if (to.meta.title) {
    document.title = to.meta.title
  }
  next()
})
还有关于跨域请求的配置 config\index.js:
module.exports = {
  dev: {

    // Paths
    assetsSubDirectory: 'static',
    assetsPublicPath: '/',
    proxyTable: {
      '/api': {
        target: 'http://localhost:8889/', //需要代理的网址
        changeOrigin: true,
        pathRewrite: {
          '^/api': ''
        }
      }
    },
    .........
}
然后跨域启动一下项目,点击点击 看看效果。接下去介绍一些其中涉及到的vue的相关操作。
v-model、v-bind、v-if、v-else、v-for、v-on、v-once:
v-model:
你可以用 v-model 指令在表单 <input>、<textarea> 及 <select> 元素上创建双向数据绑定。它会根据控件类型自动选取正确的方法来更新元素。尽管有些神奇,但 v-model 本质上不过是语法糖。它负责监听用户的输入事件以更新数据,并对一些极端场景进行一些特殊处理。
例如:
<input type="text" name="firstname" v-model="modelPassworld">{{modelPassworld}}
v-bind:
v-bind attribute 被称为指令。指令带有前缀 v-,以表示它们是 Vue 提供的特殊 attribute。可能你已经猜到了,它们会在渲染的 DOM 上应用特殊的响应式行为。在这里,该指令的意思是:“将这个元素节点的 title attribute 和 Vue 实例的 message 属性保持一致”。
例如:
<span v-bind:title="message">鼠标悬停几秒钟查看此处动态绑定的提示信息!</span>
<div class="static" v-bind:class="{ active: isActive, 'text-danger': hasError }">class-style</div>
说明:这里涉及到的 message 作为本模板(template)的一个成员属性定义在 data(){} 中。修改该属性的值即可以看到不一样的效果。同样的 isActive、hasError 也是一样的,但是这里这两个成员变量的值应该时 true or false。对应的效果是是否为对应标签渲染上对应的class。
v-if、v-else:
因为 v-if 是一个指令,所以必须将它添加到一个元素上。但是如果想切换多个元素呢?此时可以把一个 <template> 元素当做不可见的包裹元素,并在上面使用 v-if。最终的渲染结果将不包含 <template> 元素。v-else 元素必须紧跟在带 v-if 或者 v-else-if 的元素的后面,否则它将不会被识别。
例如:
<h1 v-if="awesome">Vue is awesome!</h1>
<h1 v-else>Oh no 😢</h1>
说明:这里的 awesome 也是作为成员变量,通过这个变量的变化来切换标签的显示。
v-for:
我们可以用 v-for 指令基于一个数组来渲染一个列表。v-for 指令需要使用 todo in todos 形式的特殊语法,其中 todos是源数据数组,而 todo则是被迭代的数组元素的别名。
例如:
<ol>
    <li v-for="todo in todos" v-bind:key="todo.text">
        {{ todo.text }}
    </li>
</ol>
说明:其中 todos 作为成员变量, todo.next是 todo 对象的一个属性而已。
v-on、v-once:
事件处理更多参考官方说明:https://cn.vuejs.org/v2/guide/events.html
可以用 v-on 指令监听 DOM 事件,并在触发时运行一些 JavaScript 代码。v-once 只能触发一次对应的事件,点击完当前事件相当于无效了。
例如:
<button v-on:click="clickTest">测试按钮</button>
// 也可以写作
<button @click="awesomeTest(message,seen)">条件渲染按钮切换</button>
<button v-on:click.once="awesomeTest(message,seen)">点击事件将只会触发一次</button>
说明:这里通过v-on/@click来绑定对应的点击事件,这里的message、seen都是成员属性,可以作为参数传进去。对应的方法定义在 methods:{} 里面。
Class 与 Style 绑定:
官方说明:https://cn.vuejs.org/v2/guide/class-and-style.html
操作元素的 class 列表和内联样式是数据绑定的一个常见需求。因为它们都是属性,所以我们可以用 v-bind 处理它们:只需要通过表达式计算出字符串结果即可。不过,字符串拼接麻烦且易错。因此,在将 v-bind 用于 class 和 style 时,Vue.js 做了专门的增强。表达式结果的类型除了字符串之外,还可以是对象或数组。
例如:
<div class="static"
           v-bind:class="{ active: isActive, 'text-danger': hasError }">class-style</div>
      <div style="margin-top: 10px"
           v-bind:class="[{ active: isActive }, errorClass]">class-style array</div>
说明:这里 isActive、hasError 都是作为成员属性进行解析渲染对应的class,当值为true时,就会渲染对应的class。而这里的 static、errorClass时一定会渲染上去的。相信这个不会有疑问。
计算属性:
官方说明:https://cn.vuejs.org/v2/guide/computed.html
模板内的表达式非常便利,但是设计它们的初衷是用于简单运算的。在模板中放入太多的逻辑会让模板过重且难以维护。所以,对于任何复杂逻辑,你都应当使用计算属性。
例如:
<h3>计算属性:{{computeFiled}}</h3>
computed: {
    // 计算属性的 getter
    computeFiled: function () {
      // `this` 指向 vm 实例
      return this.msg + ' Wuzz'
    }
  },
说明:其实这里就是将 computeFiled 渲染成成员属性 msg + Wuzz 的值。
侦听器:
官方说明:https://cn.vuejs.org/v2/guide/computed.html#%E4%BE%A6%E5%90%AC%E5%99%A8
虽然计算属性在大多数情况下更合适,但有时也需要一个自定义的侦听器。这就是为什么 Vue 通过 watch 选项提供了一个更通用的方法,来响应数据的变化。当需要在数据变化时执行异步或开销较大的操作时,这个方式是最有用的。
例如:
watch: {// 侦听器
    msg: function (newMsg, oldMsg) {
      alert(oldMsg + '==============>' + newMsg)
    }
  }
说明:就是当成员属性 msg 的值由于某些操作发生变化的时候进行一些处理。
实现路由的页面跳转:
要实现路由的跳转其实很简单。基于原有的基础工程对src\router\index.js进行配置修改。代码已经在上面贴出来了。
基于Axios发送ajax跨域请求:
跨域请求主要配置允许跨域。对应代码参照上文。
说明:对于上面的代码,大家可以看到 main.js 中导入了 Axios 模块,且配置了全局属性 Vue.prototype.$axios = axios ,其实在 Home.vue中就可以不用导入了,不用导入的写法改成下面这样就OK了:
this.$axios({
  method: 'get',
  url: '/api/wuzz/get.json?name=' + 'wuzz'
}).then(function (res) {
  let data = res.data.success
  alert(JSON.stringify(data))
  // console.log(res)
}).catch(function (err) {
  alert(err)
})
vue的生命周期函数:
下图展示了实例的生命周期。你不需要立马弄明白所有的东西,不过随着你的不断学习和使用,它的参考价值会越来越高。
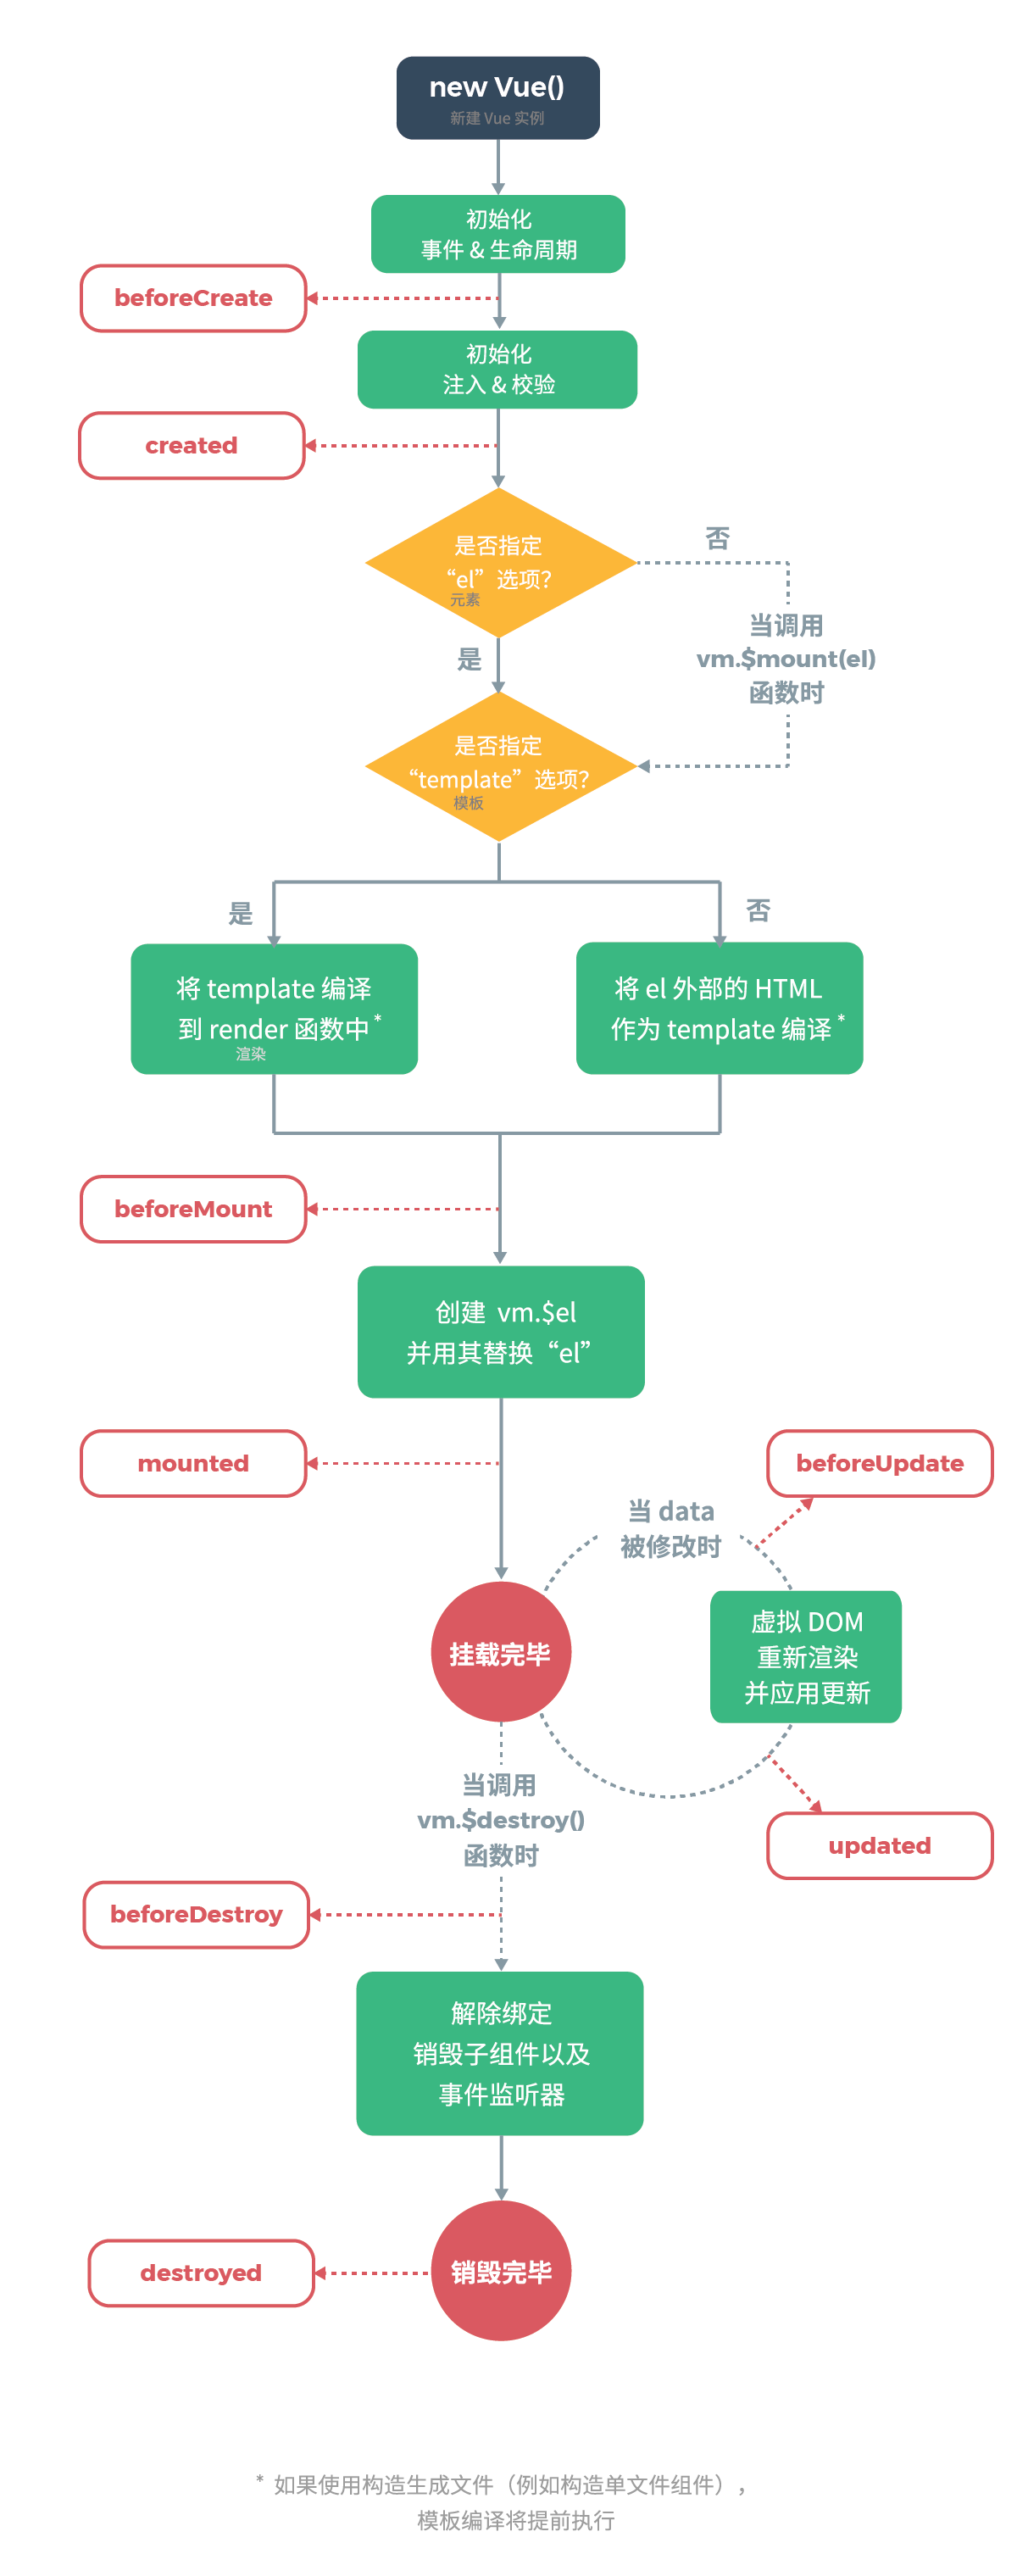
对应的方法参照上文的 HelloWorld.vue中的代码。
对于 Vue的更多的特性还需要我们深入的去研究,随着时间的沉淀那么我们对Vue的理解一定会更深入。

