01:SpringBoot2入门
1、系统要求
- Java 8 & 兼容java14 .
- Maven 3.3+
- idea 2019.1.2+(示例采用的idea2023.01)
- Spring Boot 的文档:https://spring.io/projects/spring-boot
- SpringBoot2.7.13版本文档:https://docs.spring.io/spring-boot/docs/2.7.13/reference/html/
1.1、修改maven配置settings.xml
 1 <mirrors>
 2       <mirror>
 3         <id>nexus-aliyun</id>
 4         <mirrorOf>central</mirrorOf>
 5         <name>Nexus aliyun</name>
 6         <url>http://maven.aliyun.com/nexus/content/groups/public</url>
 7       </mirror>
 8   </mirrors>
 9
10   <profiles>
11          <profile>
12               <id>jdk-1.8</id>
13               <activation>
14                 <activeByDefault>true</activeByDefault>
15                 <jdk>1.8</jdk>
16               </activation>
17               <properties>
18                 <maven.compiler.source>1.8</maven.compiler.source>
19                 <maven.compiler.target>1.8</maven.compiler.target>
20                 <maven.compiler.compilerVersion>1.8</maven.compiler.compilerVersion>
21               </properties>
22          </profile>
23   </profiles>
2、建HelloWorld项目
需求:浏览发送/hello请求,响应 Hello,Spring Boot 2
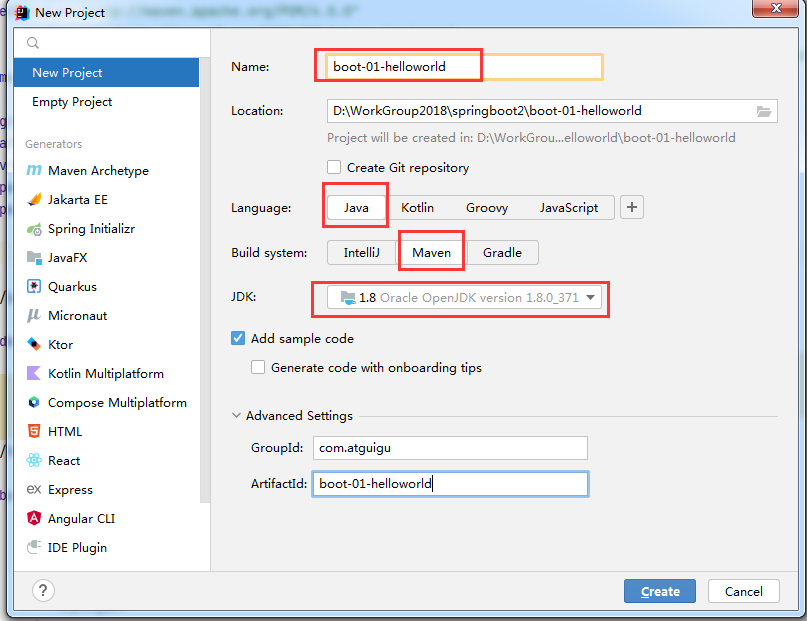
2.1、创建boot-01-helloworld工程
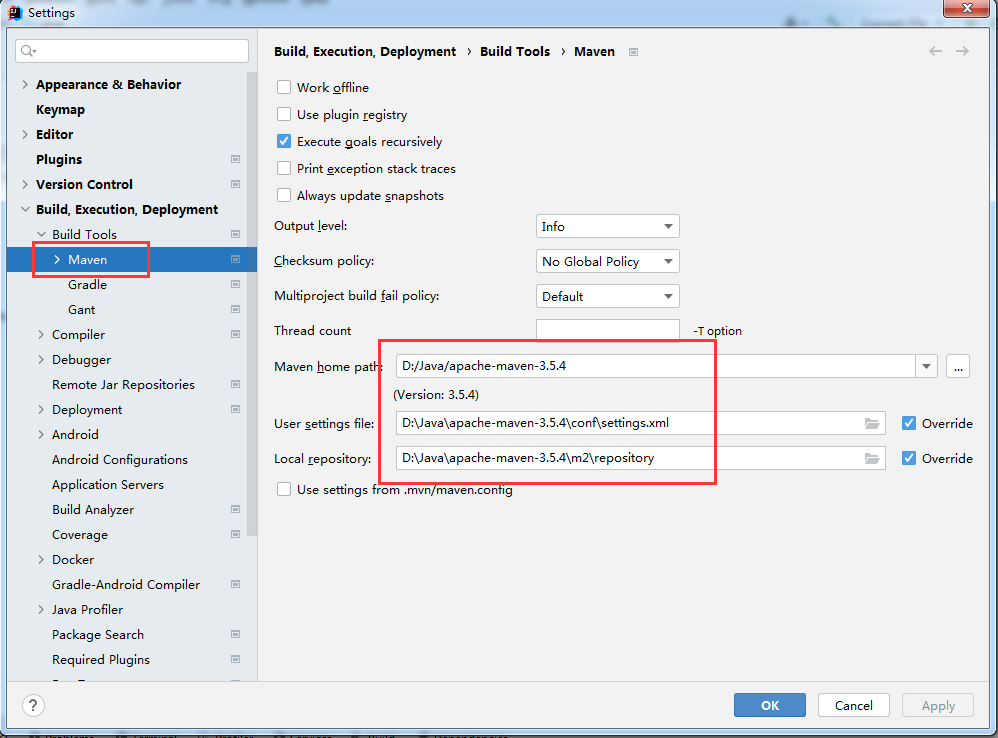
2.2、修改Maven配置
2.3、引入依赖(修改pom)
 1 <?xml version="1.0" encoding="UTF-8"?>
 2 <project xmlns="http://maven.apache.org/POM/4.0.0"
 3          xmlns:xsi="http://www.w3.org/2001/XMLSchema-instance"
 4          xsi:schemaLocation="http://maven.apache.org/POM/4.0.0 http://maven.apache.org/xsd/maven-4.0.0.xsd">
 5     <modelVersion>4.0.0</modelVersion>
 6
 7     <groupId>com.atguigu</groupId>
 8     <artifactId>boot-01-helloworld</artifactId>
 9     <version>1.0-SNAPSHOT</version>
10     <packaging>jar</packaging>
11     <!--采用的是2.0的最后一个版本-->
12     <parent>
13         <groupId>org.springframework.boot</groupId>
14         <artifactId>spring-boot-starter-parent</artifactId>
15         <version>2.7.13</version>
16     </parent>
17
18     <dependencies>
19         <dependency>
20             <groupId>org.springframework.boot</groupId>
21             <artifactId>spring-boot-starter-web</artifactId>
22         </dependency>
23     </dependencies>
24
25     <build>
26         <plugins>
27             <plugin>
28                 <groupId>org.springframework.boot</groupId>
29                 <artifactId>spring-boot-maven-plugin</artifactId>
30             </plugin>
31         </plugins>
32     </build>
33
34 </project>
2.4、创建主程序MainApplication
 1 package com.atguigu;
 2
 3 import org.springframework.boot.SpringApplication;
 4 import org.springframework.boot.autoconfigure.SpringBootApplication;
 5
 6 @SpringBootApplication
 7 public class MainApplication {
 8     public static void main(String[] args) {
 9         System.out.println("Hello world!");
10         SpringApplication.run(MainApplication.class,args);
11     }
12 }
2.5、编写业务类
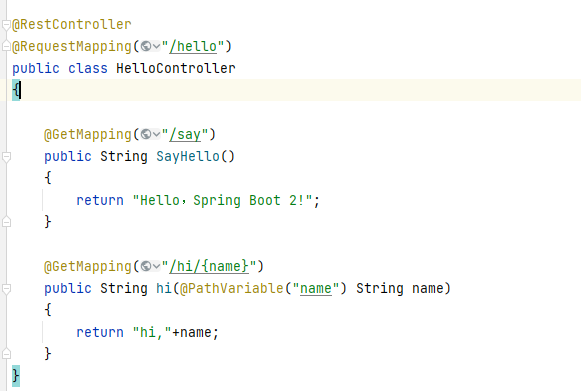
代码:
 1 package com.atguigu.controller;
 2
 3 import org.springframework.web.bind.annotation.GetMapping;
 4 import org.springframework.web.bind.annotation.PathVariable;
 5 import org.springframework.web.bind.annotation.RequestMapping;
 6 import org.springframework.web.bind.annotation.RestController;
 7
 8 @RestController
 9 @RequestMapping("/hello")
10 public class HelloController
11 {
12
13     @GetMapping("/say")
14     public String SayHello()
15     {
16         return "Hello,Spring Boot 2!";
17     }
18
19     @GetMapping("/hi/{name}")
20     public String hi(@PathVariable("name") String name)
21     {
22         return "hi,"+name;
23     }
24 }
2.6、测试
直接运行MainApplication方法

2.7、简化配置
在resources文件夹下新建application.properties配置文件
配置上端口:server.port=8888
运行项目,启动后在8888下测试
2.8、简化部署,将项目打成jar包
pom将打包方式修改
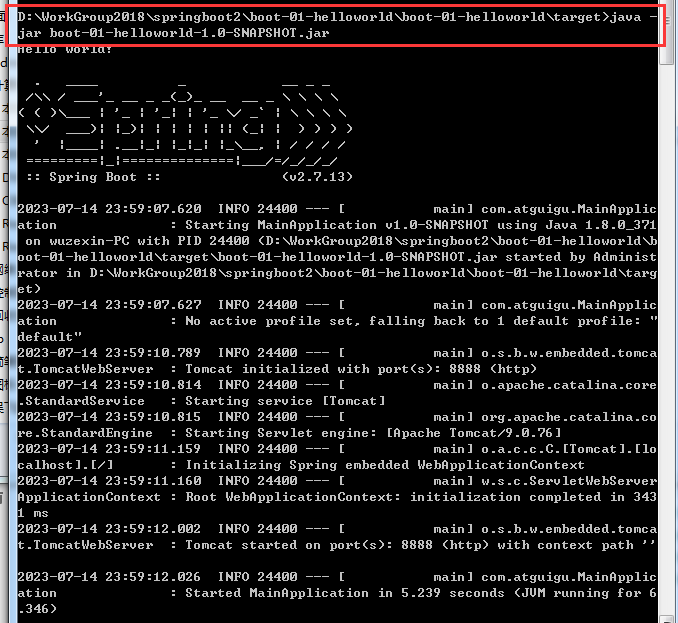
打成jar包好处:部署环境不需要安装Tomcat,只需要直接运行jar包,命令为:java -jar 文件名.jar
 1 <!--打包方式-->
 <packaging>jar</packaging>
 2
 3 <!---->
 4 <build>
 5         <plugins>
 6             <plugin>
 7                 <groupId>org.springframework.boot</groupId>
 8                 <artifactId>spring-boot-maven-plugin</artifactId>
 9             </plugin>
10         </plugins>
11     </build>
使用idea打包,打开idea右侧的Maven,双击package
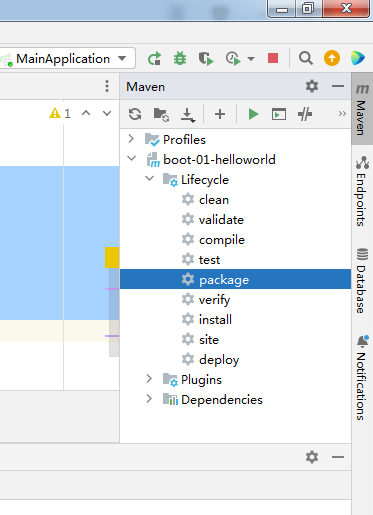
打好的包在项目的target文件夹下

使用java -jar 文件名.jar运行启动。
