
Maven 入门实战(4)--dockerfile-maven 插件使用
本文主要介绍如何通过 dockerfile-maven-plugin 插件把 Java 服务构建成 docker 镜像;文中所使用到的软件版本:Docker 20.10.17、Java 1.8.0_341、SpringBoot 2.7.12、Maven 3.8.4、dockerfile-maven-plugin 1.4.13。
1、dockerfile-maven 插件信息
使用如下命令查看插件概要信息:
mvn help:describe -DartifactId=dockerfile-maven-plugin -DgroupId=com.spotify -Dversion=1.4.13 -Ddetail
1.1、插件目标
该插件包含 4 个目标:
| 目标 | 说明 | 默认绑定阶段 |
| dockerfile:build | 构建镜像 | package |
| dockerfile:help | 显示帮助信息 | |
| docker:push | 上传镜像 | deploy |
| docker:tag |
给镜像打标签,因为是根据镜像 id 来打标签的,所以需要先 dockerfile:build(会缓存镜像 id),然后才能 dockerfile:tag mvn clean 所以信息都会清除,需要重新打包及构建镜像 |
package |
1.2、常用配置参数
1.2.1、dockerfile:build 参数
| 参数 | 说明 |
| buildArgs | 定义 docker build 时的参数,可以在 Dockerfile 文件中使用这些参数 |
| contextDirectory | 构建镜像的工作目录,通常是包含 Dockerfile 文件的目录,默认为:${project.basedir} |
| noCache | 构建镜像时是否使用缓存,默认:false |
| pullNewerImage | 是否自动更新基础镜像,默认:true |
| repository | 镜像的仓库源 |
| tag | 镜像的标签 |
1.2.2、dockerfile:tag 参数
| 参数 | 说明 |
| repository | 镜像的仓库源 |
| tag | 镜像的标签 |
1.2.3、dockerfile:push 参数
| 参数 | 说明 |
| repository | 镜像的仓库源 |
| tag | 镜像的标签 |
| useMavenSettingsForAuth | 是否使用 Maven 配置来认证,默认:false |
2、dockerfile-maven 插件使用
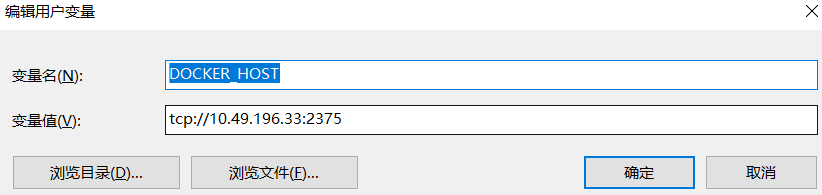
2.1、设置 DOCKER_HOST 环境变量
2.2、新建 SpringBoot 工程

<groupId>com.abc</groupId>
<artifactId>demo-general</artifactId>
<version>1.0.0</version>

<parent>
    <groupId>org.springframework.boot</groupId>
    <artifactId>spring-boot-starter-parent</artifactId>
    <version>2.7.12</version>
    <relativePath />
</parent>
2.3、新建 Dockerfile
在该目录下新建 Dockerfile 文件:
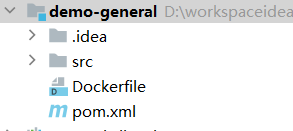
Dockerfile 文件文件内容为:
From adoptopenjdk/openjdk8:latest
ARG jarFile
COPY target/${jarFile} /root/${jarFile}
EXPOSE 9090
CMD ["java", "-jar", "/root/${jarFile}"]
2.4、插件使用
<plugin>
    <groupId>com.spotify</groupId>
    <artifactId>dockerfile-maven-plugin</artifactId>
    <version>1.4.13</version>
    <configuration>
        <repository>${project.artifactId}</repository>
        <tag>${project.version}</tag>
        <buildArgs>
            <jarFile>${project.build.finalName}.jar</jarFile>
        </buildArgs>
    </configuration>
</plugin>
执行 mvn package dockerfile:build 命令,在 docker 中查看镜像:

2.5、绑定 Docker 命令到 Maven 生命周期阶段
<plugin>
    <groupId>com.spotify</groupId>
    <artifactId>dockerfile-maven-plugin</artifactId>
    <version>1.4.13</version>
    <configuration>
        <repository>${project.artifactId}</repository>
        <tag>${project.version}</tag>
        <buildArgs>
            <jarFile>${project.build.finalName}.jar</jarFile>
        </buildArgs>
    </configuration>
    <executions>
        <execution>
            <id>build-image</id>
            <phase>package</phase>
            <goals>
                <goal>build</goal>
            </goals>
        </execution>
        <execution>
            <id>tag-image</id>
            <phase>package</phase>
            <goals>
                <goal>tag</goal>
            </goals>
            <configuration>
                <repository>10.49.196.34:18080/test/${project.artifactId}</repository>
                <tag>${project.version}</tag>
            </configuration>
        </execution>
        <execution>
            <id>push-image</id>
            <phase>verify</phase>
            <goals>
                <goal>push</goal>
            </goals>
            <configuration>
                <repository>10.49.196.34:18080/test/${project.artifactId}</repository>
                <tag>${project.version}</tag>
                <useMavenSettingsForAuth>true</useMavenSettingsForAuth>
            </configuration>
        </execution>
    </executions>
</plugin>
上面的配置在打包阶段绑定了生成镜像及给镜像打标签的目标,执行 mvn package 命令后,到 docker 中查看镜像信息:

在 verify 阶段绑定了 push 镜像的目标,在 Maven settings.xml 中配置远程仓库 Harbor 的用户名密码:
<servers>
  <server>
    <id>10.49.196.34:18080</id>
    <username>admin</username>
    <password>Harbor12345</password>
  </server>
</servers>
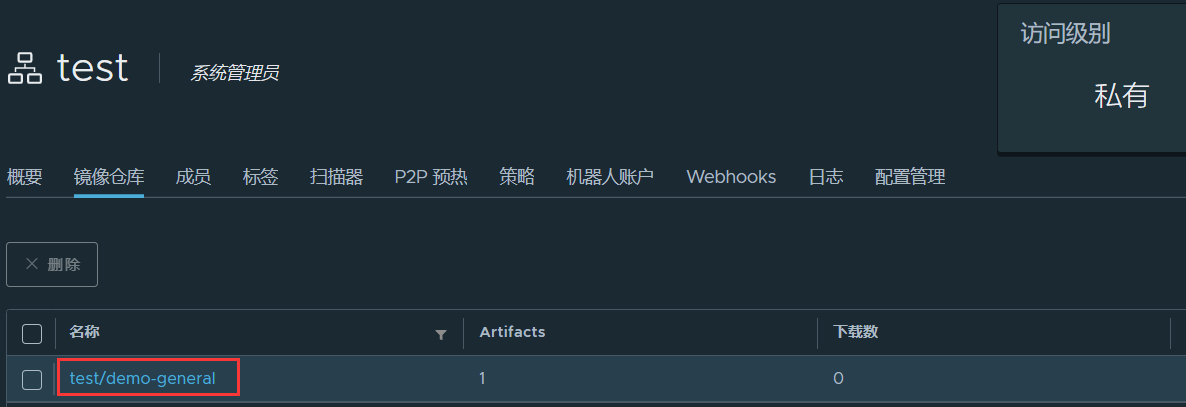
执行 mvn verify 命令后,到 Harbor 中查看镜像信息:
参考:https://github.com/spotify/dockerfile-maven。
标签:
maven


【推荐】国内首个AI IDE,深度理解中文开发场景,立即下载体验Trae
【推荐】编程新体验,更懂你的AI,立即体验豆包MarsCode编程助手
【推荐】抖音旗下AI助手豆包,你的智能百科全书,全免费不限次数
【推荐】轻量又高性能的 SSH 工具 IShell:AI 加持,快人一步
· TypeScript + Deepseek 打造卜卦网站:技术与玄学的结合
· 阿里巴巴 QwQ-32B真的超越了 DeepSeek R-1吗?
· 【译】Visual Studio 中新的强大生产力特性
· 张高兴的大模型开发实战:(一)使用 Selenium 进行网页爬虫
· 【设计模式】告别冗长if-else语句:使用策略模式优化代码结构
2022-07-16 Elasticsearch 入门实战(4)--Java Low Level REST Client 使用