
16.商城业务-首页+nginx配置
1.整合thymeleaf
在product项目中导入依赖
<!--  热部署依赖,使页面实时生效-->
        <dependency>
            <groupId>org.springframework.boot</groupId>
            <artifactId>spring-boot-devtools</artifactId>
        </dependency>
<!--  引入thymeleaf-->
        <dependency>
            <groupId>org.springframework.boot</groupId>
            <artifactId>spring-boot-starter-thymeleaf</artifactId>
        </dependency>
product中配置thymeleaf和mvc静态资源路径
#    thymeleaf配置
  thymeleaf:
    cache: false
    suffix: .html
    prefix: classpath:/templates/
在product项目中static目录下导入项目的index包
template目录下导入html文件
controller改名为app专门用来对接手机应用
新建web包,用来处理页面跳转
天坑-springboot无法显示css样式的问题
2.整合devtools渲染一级分类数据

@Controller
public class IndexController {
    @Autowired
    CategoryService categoryService;

    @GetMapping({"/","/index.html"})//路径可以是一个数组,/和/index都可以进入
    public String indexPage(Model model){
        //查询所有的一级分类
        List<CategoryEntity> categoryEntities=categoryService.getLevel1Categorys();
        model.addAttribute("categorys",categoryEntities);
        return "index";
    }
}

    @Override
    public List<CategoryEntity> getLevel1Categorys() {
        List<CategoryEntity> categoryEntities = this.list(new QueryWrapper<CategoryEntity>().eq("parent_cid", 0));
        return categoryEntities;
    }
3.渲染三级分类
在product中封装两个Vo
@AllArgsConstructor
@NoArgsConstructor
@Data
public class Catalog3Vo {

    private String id;

    private String name;

    private String catalog2Id;
}
@AllArgsConstructor
@NoArgsConstructor
@Data
public class Catelog2Vo implements Serializable {

    private String id;

    private String name;

    private String catalog1Id;

    private List<Catalog3Vo> catalog3List;
}
controller
 @ResponseBody//将返回的值用json的方式写出
    @GetMapping("/index/catelog.json")
    public Map<String, List<Catelog2Vo>> getCatalogJson(){
        Map<String, List<Catelog2Vo>> map=categoryService.getCatelogJson();
        return map;
    }
实现类

@Override
    public List<CategoryEntity> getLevel1Categorys() {
        List<CategoryEntity> categoryEntities = this.list(new QueryWrapper<CategoryEntity>().eq("parent_cid", 0));
        return categoryEntities;
    }
    //不建议这么写,嵌套太tm多了,后期优化
    @Override
    public Map<String, List<Catalog2Vo>> getCatelogJson() {
        List<CategoryEntity> entityList = baseMapper.selectList(null);
        // 查询所有一级分类
        List<CategoryEntity> level1 = getCategoryEntities(entityList, 0L);
        Map<String, List<Catalog2Vo>> parent_cid = level1.stream().collect(Collectors.toMap(k -> k.getCatId().toString(), v -> {
            // 拿到每一个一级分类 然后查询他们的二级分类
            List<CategoryEntity> entities = getCategoryEntities(entityList, v.getCatId());
            List<Catalog2Vo> catelog2Vos = null;
            if (entities != null) {
                catelog2Vos = entities.stream().map(l2 -> {
                    Catalog2Vo catelog2Vo = new Catalog2Vo(v.getCatId().toString(), l2.getName(), l2.getCatId().toString(), null);
                    // 找当前二级分类的三级分类
                    List<CategoryEntity> level3 = getCategoryEntities(entityList, l2.getCatId());
                    // 三级分类有数据的情况下
                    if (level3 != null) {
                        List<Catalog3Vo> catalog3Vos = level3.stream().map(l3 -> new Catalog3Vo(l3.getCatId().toString(), l3.getName(), l2.getCatId().toString())).collect(Collectors.toList());
                        catelog2Vo.setCatalog3List(catalog3Vos);
                    }
                    return catelog2Vo;
                }).collect(Collectors.toList());
            }
            return catelog2Vos;
        }));
        return parent_cid;
    }
Nginx域名访问环境搭建
正向代理:屏蔽客户端信息
反向代理:屏蔽服务器信息,负载均衡访问--Nginx
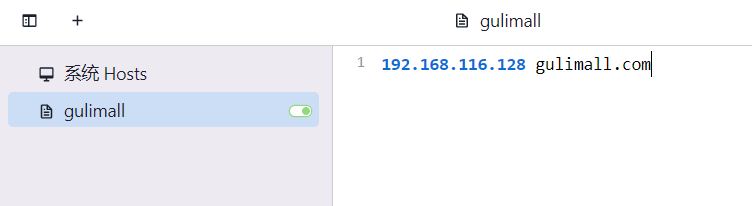
要实现的逻辑:本机浏览器请求gulimall.com,通过配置hosts文件之后,那么当你在浏览器中输入gulimall.com的时候,相当于域名解析DNS服务解析得到ip 192.168.116.128,也就是并不是访问java服务,而是先找nginx。什么意思呢?是说如果某一天项目上线了,gulimall.com应该是nginx的ip,用户访问的都是nginx
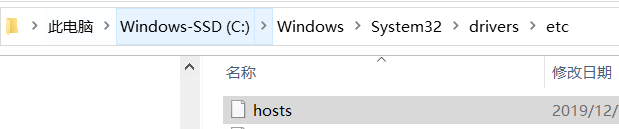
更改host文件
每次打开这个太麻烦了,安装一个SwitchHosts
同时还要修改hosts文件
写入虚拟机的地址
访问es测试一下

配置Nginx
修改nginx/conf/nginx.conf,将upstream映射到我们的网关服务,88是网关,注意这里输入的是本机ip,每次更换wifi都会发生变化
    upstream gulimall{
        server  192.168.10.100:88;
    }
配置gateway为服务器,将域名为**.gulimall.com转发至商品服务。配置的时候注意 网关优先匹配的原则,所以要把这个配置放到后面
    - id: gulimall_host_route
          uri: lb://gulimall-product
          predicates:
            - Host=**.gulimall.com
修改nginx/conf/conf.d/gulimall.conf,接收到gulimall.com的访问后,如果是/,转交给指定的upstream,由于nginx的转发会丢失host头,造成网关不知道原host,所以我们添加头信息
完整配置文件nginx/conf/conf.d/gulimall.conf
server {
    listen       80;
    server_name  gulimall.com;

    location / {
        proxy_pass http://gulimall;
        proxy_set_header Host $host;
    }

    error_page   500 502 503 504  /50x.html;
    location = /50x.html {
        root   /usr/share/nginx/html;
    }

}

