Spring Cloud Eureka集群部署到Linux环境
还是三板斧:先改配置文件,支持集群,然后出包,上传到linux环境(3个节点),最后启动jar包跑起来。
1、在原eureka服务端代码(参见Greenwich.SR2版本的Spring Cloud Eureka实例)基础上修改配置文件即可,这次我们废弃原来的application.properties文件,新增3个yml(用properties也可以,自己选用):
application-es1.yml(给192.1.6.19节点用,它需要指定另外两个节点作为注册中心,其他两个同理):
eureka:
  client:
    fetch-registry: true
    register-with-eureka: true
    service-url:
      defaultZone: http://192.1.6.20:8761/eureka,http://192.1.6.22:8761/eureka
  instance:
    prefer-ip-address: true
    instance-id: ${spring.cloud.client.ip-address}:${server.port}
    hostname: ${spring.cloud.client.ip-address}
    ip-address: 192.1.6.19

spring:
  profiles:
    active: es1
  application:
    name: eureka-server

server:
  port: 8761
application-es2.yml:
eureka:
  client:
    fetch-registry: true
    register-with-eureka: true
    service-url:
      defaultZone: http://192.1.6.19:8761/eureka,http://192.1.6.22:8761/eureka
  instance:
    prefer-ip-address: true
    instance-id: ${spring.cloud.client.ip-address}:${server.port}
    hostname: ${spring.cloud.client.ip-address}
    ip-address: 192.1.6.20

spring:
  profiles:
    active: es2
  application:
    name: eureka-server

server:
  port: 8761
application-es3.yml:
eureka:
  client:
    fetch-registry: true
    register-with-eureka: true
    service-url:
      defaultZone: http://192.1.6.19:8761/eureka,http://192.1.6.20:8761/eureka
  instance:
    prefer-ip-address: true
    instance-id: ${spring.cloud.client.ip-address}:${server.port}
    hostname: ${spring.cloud.client.ip-address}
    ip-address: 192.1.6.22

spring:
  profiles:
    active: es3
  application:
    name: eureka-server

server:
  port: 8761
2、maven出包后直接到linux对应的三个节点上rz -y上传生成的jar包
3、在三个节点上启动eureka-server,分别根据环境指定参数es1、es2、es3,比如我在192.1.1.0上启动,那么我需要指定环境为es1,其他两个同理:
java -jar eureka-0.0.1-SNAPSHOT.jar --spring.profiles.active=es1
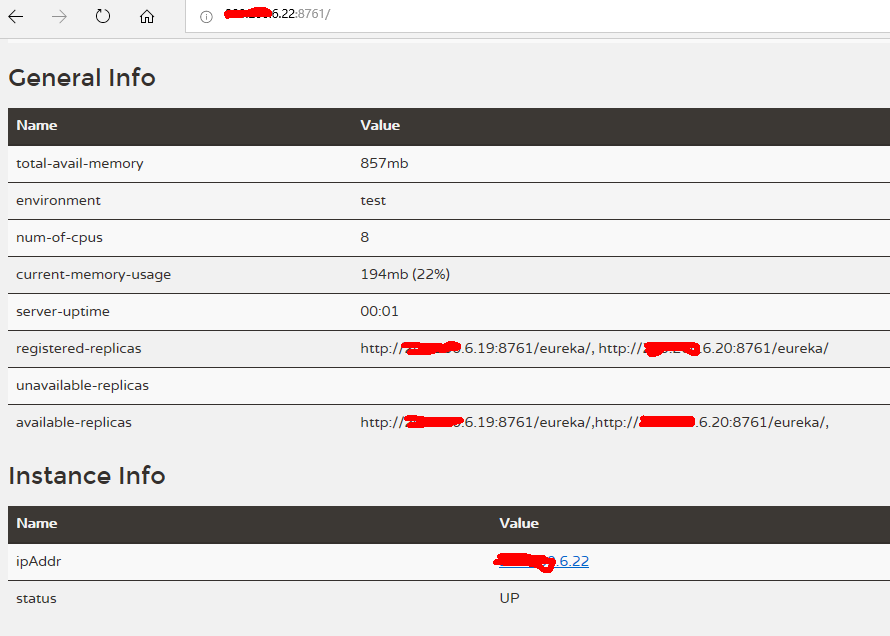
最后看下eureka界面http://192.1.1.2:8761/,可以看到已经支持集群,另外两个链接界面就不贴了:
如果要重启实例,需要先把原有进程找出来,比如我要重启es3环境的eureka:
$ netstat -nlp | grep 8761
(Not all processes could be identified, non-owned process info
 will not be shown, you would have to be root to see it all.)
tcp6       0      0 :::8761                 :::*                    LISTEN      14998/java
$ kill 14998
$ java -jar eureka-0.0.1-SNAPSHOT.jar --spring.profiles.active=es3


 浙公网安备 33010602011771号