Python接收解析用户输入参数(多种方法)
方式一:
import sys, getopt

if ( __name__ == '__main__' )  or  ( __name__ == 'main' ) :
        ## 参数0 是文件名+后缀
        ## 参数一
	Name = sys.argv[1];

        ## 参数二
	age = sys.argv[2];

        ## 检查参数个数
	argc = len( sys.argv );
	if ( argc < 1 ) :
		print (missingParms % locals());
		sys.exit()
用户输入:
python test.py lucy 23
名字年龄位置必须固定
方式二:
## 导入包
import getopt, sys

## 帮助
def Usage():
    print("\nUsage:")
    print(f'''
    方式一:向导模式
    python3 {sys.argv[0]}

    方式二:命令行直接输入参数
    python3 {sys.argv[0]} -d example{path_str}linux-cmd [-D description.json]

    Opthon:
        -d,--user_dir    指定 html 文件的存放目录
        -D,--Description 描述 html 的参考文件,[可选]。
         如:scp.html文件介绍,就可以在 -D 参数指定的 json 格式文件里查询
        -i,--detailed_information 显示详细执行过程,默认不显示

    示例:
        没有参考文件命令
        python3 {sys.argv[0]} -d example{path_str}linux-cmd

        有参考文件命令
        python3 {sys.argv[0]} -d example{path_str}linux-cmd -D data.json

    ''')

## 参数获取
try:
    opts, args = getopt.getopt(sys.argv[1:], "hid:D:",["help", "detailed_information","user_dir=", "Description="])
except getopt.GetoptError:
    print("\n[ Error] 未知参数,请检查。")
    ## 输入错误显示帮助
    Usage()
    sys.exit(-3)

## 参数解析
for opt, arg in opts:
    if opt in ("-h", "--help"):
        ## 显示帮助
        Usage()
        sys.exit(-4)
    elif opt in ("-i", "--detailed_information"):
        ## 是否显示详细执行过程; True = 显示 、 False = 不显示
        detailed_information = True
        print("630_detailed_information = ", detailed_information)
    elif opt in ("-d", "--user_dir"):
        ## html 目录
        user_object_Dir = arg
    elif opt in ("-D", "--Description"):
        ## 参考文件
        user_Description_file = arg
用户输入:
python test.py -i -d test/mdfile -D test/mdfile/data.json
参数 -i 后不需要参数,-d 和 -D 后要加入参数; 选项和选项参数
python  test.py   -D test/mdfile/data.json  -i  -d test/mdfile
或
python  test.py   -D test/mdfile/data.json  -d test/mdfile  -i
选项之间没有前后关系。但是选项后的参数不能乱,比如 -d test/mdfile/data.json -D test/mdfile 这样就是错误的。
方式三:推荐,据说是现在大佬都在用的方法 来源
文件名:md2h-ceshi.py
## 导入包
import optparse

if __name__ == '__main__':

    mdopt = optparse.OptionParser()
    mdopt.add_option('-t', '--template', dest='template', type='string', default='a', help='template file.')
    mdopt.add_option('-x', '--extensions', dest='extensions', type='string', default='', help='extensions.')
    mdopt.add_option('-o', '--output', dest='output', type='string', default='', help='output file.')
    mdopt.add_option('-d', '--deny', dest='deny', type='string', default='', help='deny file.')

    options, args = mdopt.parse_args()
    print('\nshow: {}  {}'.format(options, args))

    template=options.template,
    extensions=options.extensions.split(','),
    output=options.output,
    deny=options.deny.split(','),
    md=args

    print("\nshow_2: %s, %s, %s, %s, %s\n" % (template, extensions, output, deny, md))
    print("template 类型:", type(template))
    print("extensions 类型:", type(extensions))
用户输入:
python md2h-ceshi.py -t s -x f,d -o c -d a,b
-
方式四:
文件名:argparse-ceshi.py 来源
# 导入库
import argparse

# 1. 定义命令行解析器对象
parser = argparse.ArgumentParser(description='Demo of argparse')

# 2. 添加命令行参数
parser.add_argument('--epochs', type=int, default=30)
parser.add_argument('--batch', type=int, default=4)
parser.add_argument('-s', type=str, default='')

# 3. 从命令行中结构化解析参数
args = parser.parse_args()
print(args)
epochs = args.epochs
batch = args.batch
s = args.s
print('show {}  {} {}'.format(epochs, batch, s))
用户输入:
python argparse-ceshi.py --epochs 20 --batch 5 -s aa
-
方式五:
文件名:t_args.py
#!/usr/bin/env python
import sys

# 把参数用strip分割成列表
sys.argv = [i.strip() for i in sys.argv]

## 用下标访问列表内容,并赋值
region_id = sys.argv[1]
secret_id = sys.argv[2]
secret_key = sys.argv[3]

print(region_id, secret_id, secret_key)
用户输入:
python t_args.py 20 33 key

方式六: 字典键值匹配方式
bootimg.exe 来源:https://www.cnblogs.com/wutou/p/19126578
文件名: t1.py
import sys

def unpack_bootimg(updata=None, debug=False):
    print("fun unpack_bootimg")

def unpack_updata(updata=None, debug=False):
    print("fun unpack_updata")

if __name__ == '__main__':
    ## 字典,键值组合
    functions = {
                 '--unpack-bootimg': unpack_bootimg,
                 '--unpack-updata': unpack_updata,
                }

    ## 帮助
    def usage():
        sys.stderr.write('supported arguments:')
        sys.stderr.write('\n\t')
        sys.stderr.write('\n\t'.join(sorted(functions.keys())))
        sys.stderr.write('\n')
        raise SystemExit(1)

    if len(sys.argv) == 1:
        usage()

    sys.argv.pop(0)  ## 弹出(丢弃)第0个参数,即 t1.py
    cmd = sys.argv[0] ## 获取 --unpack-updata 等参数
    function = functions.get(cmd, None) ## 通过把参数当初键来去值,值是函数名
    sys.argv.pop(0)  ## 弹出获取过的参数
    if not function:  ## 如果没有函数名,说明参数不对
        usage()
    function(*sys.argv) ## 获取到值,就是函数名,执行函数
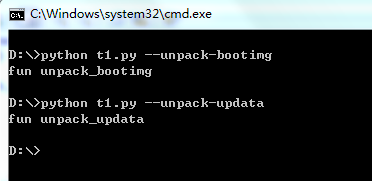
效果:
https://www.cnblogs.com/wutou/p/19126578

 浙公网安备 33010602011771号