elk搭建
FileBeat+Kafka+Elasticsearch + Logstash + Kibana 实现高吞吐量日志监控
(ELK)是一套开源的日志管理方案。在志邦项目部署了三台服务器到生产环境,生产环境用了nginx做负载均衡,通常,日志被分散的储存不同的服务器(tomcat)上。如果你管理数十上百台服务器,你还在使用依次登录每台机器的传统方法查阅日志。这样是不是感觉很繁琐和效率低下,对于要求更高的查询、排序和统计等要求和庞大的机器数量依然使用这样的方法难免有点力不从心,而且志邦接口较多,接口报文存储查询较慢,目前也是存在放在es非关系数据上。
开源实时日志分析 ELK 平台能够完美的解决我们上述的问题, ELK 由 ElasticSearch 、 Logstash 和 Kiabana 三个开源工具组成。
Logstash:负责日志的收集,处理
Elasticsearch:负责日志检索,分析和储存
Kibana:负责日志的可视化,图形化
2.1 安装Elasticsearch
以elk用户启动ES (以root用户启动会报错)
所以我们创建一个elk文件以及elk用户
创建 elk用户,elk文件夹,并把文件夹权限赋给elk用户
mkdir elk
useradd elk
chown -R elk elk
chgrp -R elk elk
解压 elasticsearch-7.1.0-linux-x86_64.tar.gz
切换用户
su elk
cd elasticsearch-7.1.0
cd config
配置文件
elasticsearch.yml :
node.name: node-1 #集群节点
bootstrap.memory_lock: false
bootstrap.system_call_filter: false
network.host: 10.10.0.16 #外网访问
cluster.initial_master_nodes: ["node-1"] #主节点
http.cors.enabled: true
http.cors.allow-origin: "*"
启动
./bin/elasticsearch &
ERROR: [3] bootstrap checks failed
[1]: max file descriptors [65535] for elasticsearch process is too low, increase to at least [65536]
[2]: max virtual memory areas vm.max_map_count [65530] is too low, increase to at least [262144]
[3] max number of threads [1024] for user [lish] likely too low, increase to at least [2048]
解决:[1]修改vim /etc/sysctl.conf添加下面配置:
vm.max_map_count=65536
然后执行命令:
sysctl -p
[2]修改vim /etc/security/limits.conf添加如下内容:
* soft nofile 65535
* hard nofile 65535
[3] vim /etc/security/limits.d/90-nproc.conf
修改如下内容:
* soft nproc 1024
#修改为
* soft nproc 2048
启动
./bin/elasticsearch &
浏览器输入:ip:port
例如10.10.0.16:9200
2.2 安装Logstash
1、解压安装包
tar -zxvf logstash-7.1.0.tar.gz
cd logstash-7.1.0/
2、编写配置文件
cd conf
vim conf/log4j_to_es.conf
输入以下内容:
|
# For detail structure of this file # Set: https://www.elastic.co/guide/en/logstash/current/configuration-file-structure.html input {
tcp { port => 4560 codec => json_lines #文本字符 mode => "server" host => "10.10.0.16" #logstash 应用服务器地址 } } filter { #Only matched data are send to output. } output { # For detail config for elasticsearch as output, # See: https://www.elastic.co/guide/en/logstash/current/plugins-outputs-elasticsearch.html elasticsearch { action => "index" #The operation on ES hosts => "10.10.0.16:9200" #ElasticSearch host, can be array. index => "oms%{+YYYY.MM}" #每个月创建一个索引 } #stdout { codec => rubydebug } } |
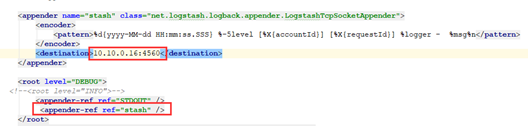
logsatsh输入源为tcp类型,监听端口4560 保证与项目保持一致
Kafka数据源
# For detail structure of this file
# Set: https://www.elastic.co/guide/en/logstash/current/configuration-file-structure.html
input {
  kafka {
    bootstrap_servers => ["10.10.183.152:9092,10.10.183.153:9092,10.10.183.154:9092"]
    topics =>["monitor-log"]
    group_id => "logstash"
    codec => json {
      charset => "UTF-8"
    }
   # codec => "plain"
  }
}
filter {
    mutate {
       remove_field => [ "@version","_id","_score","_type","log.offset" ]
    }
  #Only matched data are send to output.
}
output {
  # For detail config for elasticsearch as output,
  # See: https://www.elastic.co/guide/en/logstash/current/plugins-outputs-elasticsearch.html
  elasticsearch {
    action => "index"          #The operation on ES
    hosts  => "10.10.183.155:9200"   #ElasticSearch host, can be array.
    index  => "prod-%{+YY.MM}"         #The index to write data to.
  }
 # stdout { codec => rubydebug }
}
hap logback
启动logstash,读取配置文件(使用-f指定配置文件)
./bin/logstash -f config/log4j_to_es.conf &
2.3 安装Kibana
1、解压压缩包
tar -zxvf kibana-7.1.0-linux-x86_64.tar.gz
cd kibana-7.1.0/
2、配置Kibana(启动端口,elasticsearch url)
cd config
vim kibana.yml
server.port: 5601
elasticsearch.url: http://10.10.0.16:9200
3、启动kibana:
./bin/kibana &
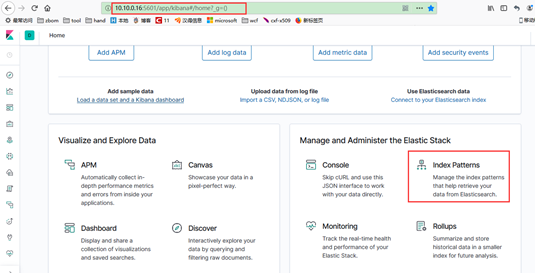
打开10.10.10.016:5601
选择创建索引
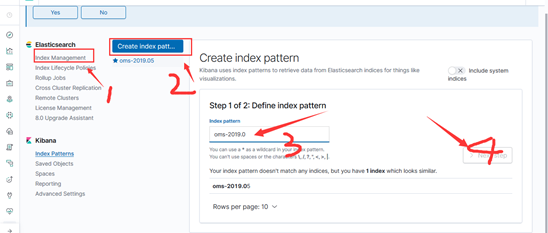
创建完成可以在这看到

所有索引在这边,可以进行删除等操作

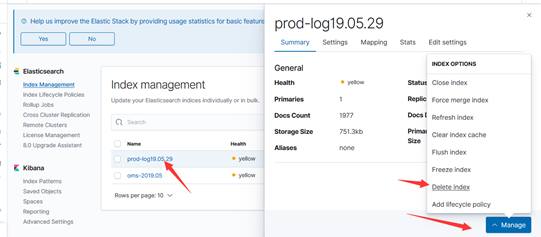
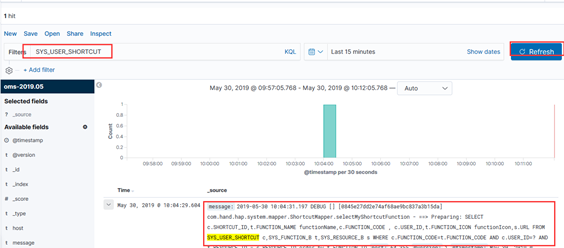
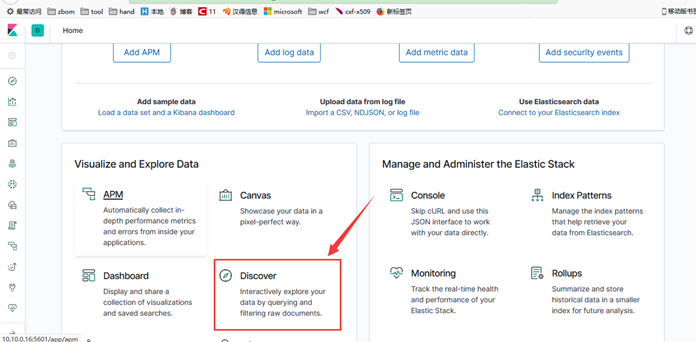
到这里进行查询
如果在你的logstash里面有错误 为json解析错误如下图,那么修改配置文件
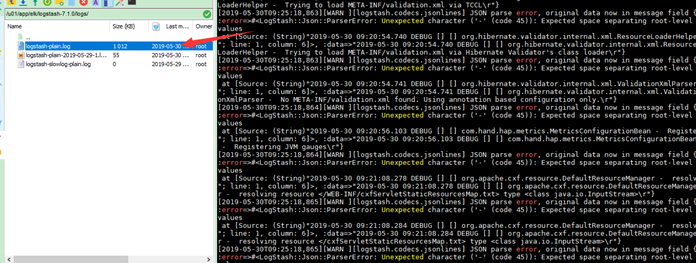
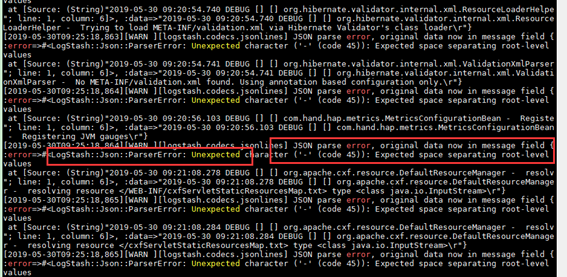
注释输入源格式

如果是json 它会解析字段,并按照字段存储
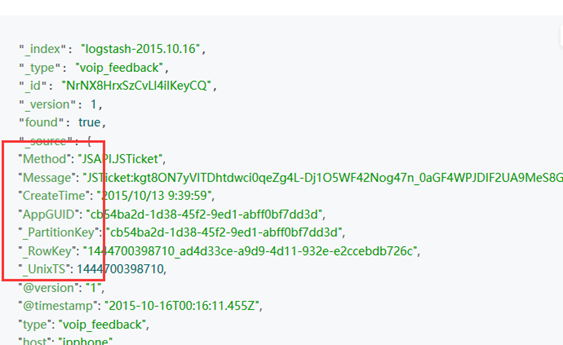
否则将全部存储在message