

SpringMVC(四)SpringMVC实现文件上传、异常拦截去、整合SSM
个人博客网:https://wushaopei.github.io/ (你想要这里多有)
一、文件上传
文件上传在SpringMVC中如何实现:
- 准备一个文件上传的表单
- 导入文件上传需要的jar包
           commons-fileupload-1.2.1.jar、
           commons-io-1.4.jar
3.配置文件上传解析器 CommonsMultipartResolver
4.配置Controller控制器的代码
1、创建Web工程

![]()
2、准备一个文件上传的表单
	<form action="${ pageContext.request.contextPath }/upload" method="post" enctype="multipart/form-data">
		用户名:<input type="text" name="username" /><br/>
		头像:  <input type="file" name="photo" /><br/>
		       <input type="submit">
</form>3、导入文件上传需要的jar包
commons-fileupload-1.2.1.jar
commons-io-1.4.jar
commons-logging-1.1.3.jar
spring-aop-4.3.18.RELEASE.jar
spring-beans-4.3.18.RELEASE.jar
spring-context-4.3.18.RELEASE.jar
spring-core-4.3.18.RELEASE.jar
spring-expression-4.3.18.RELEASE.jar
spring-web-4.3.18.RELEASE.jar
spring-webmvc-4.3.18.RELEASE.jar4、配置文件上传解析器
        <!-- 配置文件上传解析器
		CommonsMultipartResolver负责解决上传的数据,得到用户希望的结果<br/>
		id="multipartResolver" id值必须为:multipartResolver
	 -->
	<bean id="multipartResolver" class="org.springframework.web.multipart.commons.CommonsMultipartResolver">
		<!-- 配置上传解析用的字符集,防止出现乱码 -->
		<property name="defaultEncoding" value="UTF-8"/>
</bean>5、编写文件上传的Controller控制器中的代码:
@Controller
public class LastController {

	@RequestMapping("/upload")
	public String upload(@RequestParam(name = "username") String username,
			@RequestParam(name = "photo") MultipartFile photo) {

		System.out.println("用户名是:" + username);
		// 获取文件名
		System.out.println("上传的文件名是:" + photo.getOriginalFilename());

		try {
			photo.transferTo(new File("E:\\" + photo.getOriginalFilename()));
		} catch (Exception e) {
			e.printStackTrace();
		}

		return "/result.jsp";
	}

}
二、使用@ResponseBody将返回的数据转成json
1、使用的步骤如下:
- 导入json相关的包到web工程中
-
- jackson-annotations-2.7.0.jar
- jackson-core-2.7.4.jar
- jackson-databind-2.7.4.jar
-
- 编写一个请求的方式接收请求,并返回数据对象
- 在方法上添加注解@ResponseBody自动将返回值json化
2、Controller中的代码:
	/**
	 * @ResponseBody表示将返回值转换成为json对象
	 */
	@ResponseBody
	@RequestMapping("/getPerson")
	public Person getPerson() {
		return new Person(1, "wzg168", 18, new Date(), new BigDecimal(10000));
	}

	@ResponseBody
	@RequestMapping("/getPersonList")
	public List<Person> getPersonList() {
		List<Person> persons = new ArrayList<Person>();
		for (int i = 0; i < 10; i++) {
			persons.add(new Person(i, "name"+i, 18+i, new Date(), new BigDecimal(10000)));
		}
		return persons;
	}
3、打开浏览器测试如下:

![]()
4、使用@JsonFormat修改时间在json中的格式
        @JsonFormat(pattern = "yyyy-MM-dd HH:mm:ss", timezone = "GMT+8")
	private Date birthDate;
或
	@JsonFormat(pattern="yyyy-MM-dd HH:mm:ss",timezone = "GMT+8")
	public Date getBirthDate() {
		return birthDate;
	}
@JsonFormat表示设置json转换格式。
pattern="yyyy-MM-dd HH:mm:ss"	表示日期类型返回以 yyyy-MM-dd  HH:mm:ss 格式

    yyyy-MM-dd  表示年月日,HH:mm:ss表示时分秒

timezone = "GMT+8" 表示时间为格林时间+8小时三、使用@RequestBody接收请求体数据
在HTTP协议中,我们知道,请求体只存在于POST请求中才有。所以我们需要有一个表单。而且请求必须是post请求。
1、准备一个post请求的表单
        <h1>requestBody注解</h1>
	<form action="${ pageContext.request.contextPath }/requestBody" method="post">
		用户名:<input type="text" name="username" /><br/>
		密码:<input type="text" name="password" /><br/>
		<input type="submit" />
	</form>
2、在Controller中添加一个方法接收请求体
	/**
	 * @RequestBody 它可以把请求体中全部的数据,都注入到body参数中<br/>
	 */
	@RequestMapping("/requestBody")
	public String requestBody(@RequestBody String body) {
		System.out.println("请求体全部内容:" + body);
		return "/upload.jsp";
}四、使用HttpEntity参数获取请求头和请求体
表单:
        <h1>HttpEntity获取请求头和请求体</h1>
	<form action="${ pageContext.request.contextPath }/httpEntity" method="post">
		用户名:<input type="text" name="username" /><br/>
		密码:<input type="text" name="password" /><br/>
		<input type="submit" />
	</form>
Controller控制器的代码:
	@RequestMapping("/httpEntity")
	public String httpEntity(HttpEntity<String> entity) {
		System.out.println( "请求头:" + entity.getHeaders());
		System.out.println( "请求体:" + entity.getBody() );
		return "/upload.jsp";
}五、使用ResponseEntity返回值操作响应头和响应体
        /**
	 * 现在希望做下载的操作
	 * @throws IOException
	 */
	@RequestMapping("/download")
	public ResponseEntity<byte[]> download(HttpSession session) throws IOException{

		ServletContext context = session.getServletContext();

		// 读取需要下载的文件,以流的形式返回
		InputStream inputStream = context.getResourceAsStream("/imgs/d.jpg");

		byte[] buffer = new byte[1024*1000];
		inputStream.read(buffer);

		//响应头
		HttpHeaders httpHeaders = new HttpHeaders();

		// 下载的文件的数据类型。
//		getServletContext().getMimeType 获取下载的文件的数据类型
		httpHeaders.add("Content-Type", session.getServletContext().getMimeType("/imgs/d.jpg"));
		// 告诉客户端,我回传的数据。你要在附件的形式处理
		httpHeaders.add("Content-Disposition", "attachment; filename=d.jpg");

		// 第一个参数是响应体,返回的数据
		// 第二个参数是响应头
		// 第三个参数是响应状态码		200 OK

		ResponseEntity<byte[]> entity = new ResponseEntity<byte[]>(buffer, httpHeaders, HttpStatus.OK);

		return entity;
}六、HandlerInterceptor拦截器
1、HandlerInterceptor拦截器的介绍
HandlerInterceptor是一个接口,它的作用类似于javaWeb的Filter过滤器
2、单个HandlerInterceptor拦截器的示例
(1)、编写一个类去实现HandlerInterceptor接口
(2)、到Spring的容器配置文件中去配置拦截器,让SpringMVC知道都拦截哪些目标方法
public class MyHandlerIntercorptor implements HandlerInterceptor {
	/**
	 * afterCompletion在请求完成后<br/>
	 * 指的是页面渲染
	 */
	@Override
	public void afterCompletion(HttpServletRequest request, HttpServletResponse response,
			Object arg2, Exception arg3) throws Exception {

		System.out.println("这是afterCompletion方法");
	}

	/**
	 * postHandle在目标资源执行之后的代码
	 */
	@Override
	public void postHandle(HttpServletRequest request, HttpServletResponse response, Object arg2,
			ModelAndView arg3) throws Exception {
		// TODO Auto-generated method stub
		System.out.println("这是postHandle方法");
	}

	/**
	 * preHandle预处理方法<br/>
	 * 在提交的目标资源之前执行的代码
	 */
	@Override
	public boolean preHandle(HttpServletRequest request, HttpServletResponse response, Object arg2)
			throws Exception {
		System.out.println("这是preHandle方法");
		// 如果返回true则放行,如果返回false,就不放行
		return true;
	}

}
拦截器的配置:
        <!-- 配置所有拦截器 -->
	<mvc:interceptors>
		<!-- 配置单个拦截器 -->
		<mvc:interceptor>
			<!-- 拦截器,拦截地址 -->
			<mvc:mapping path="/hello" />
			<!-- 配置哪个类是拦截器实现类 -->
			<bean class="com.webcode.controller.MyHandlerIntercorptor" />
		</mvc:interceptor>
	</mvc:interceptors>
1、这是preHandle方法
2、这是目标方法执行啦……
3、这是postHandle方法
4、这是最终渲染的页面
5、这是afterCompletion方法3、单个拦截器异常时的执行顺序
一:目标方法前返回false的情况:

    1、目标方法前执行 		返回false
    2、这是目标方法		不执行
    3、目标方法之后		不执行
    4、这是渲染页面		不执行
    5、页面渲染完成!		不执行


二:目标方法前返回true的情况,目标方法异常

    1、目标方法前执行 		返回true
    2、这是目标方法		异常
    3、目标方法之后		不执行
    4、这是渲染页面		渲染异常页面
    5、页面渲染完成!		执行


三:目标方法前返回true的情况,目标方法后异常

    1、目标方法前执行 		返回true
    2、这是目标方法		执行
    3、目标方法之后		异常
    4、这是渲染页面		渲染异常页面
    5、页面渲染完成!		执行


四:目标方法前返回true的情况,渲染页面异常

    1、目标方法前执行 		返回true
    2、这是目标方法		执行
    3、目标方法之后		执行
    4、这是渲染页面		异常
    5、页面渲染完成!		执行
只要preHandler方法返回True, afterCompletion方法就会执行。
七、异常处理
1、使用@ExceptionHandler注解处理异常
@Controller
public class ExceptionController {

	/**
	 * @ExceptionHandler处理异常的方法<br/>
	 * 	参数就是抛出的异常对象<br/>
	 */
	@ExceptionHandler
	public String handlerException(Exception exception) {
		System.out.println("处理异常handlerException  Exception ===>>> " + exception);
		return "/error.jsp";
	}

	/**
	 * @ExceptionHandler处理异常的方法<br/>
	 * 	参数就是抛出的异常对象<br/>
	 */
	@ExceptionHandler
	public String handlerException(RuntimeException exception) {
		System.out.println("处理异常handlerException  RuntimeException ===>>> " + exception);
		return "/error.jsp";
	}

	/**
	 * @ExceptionHandler处理异常的方法<br/>
	 * 	参数就是抛出的异常对象<br/>
	 */
	@ExceptionHandler
	public String handlerException(ArithmeticException exception) {
		System.out.println("处理异常handlerException  ArithmeticException ===>>> " + exception);
		return "/error.jsp";
	}

	@RequestMapping("/sendException")
	public String sendException() {
		System.out.println("目标方法抛异常sendException");
		int i = 12 / 0;
		return "/result.jsp";
	}

}
@ExceptionHandler标注的方法,当Controller控制器出了异常之后。就会调用。
如果有多个异常。异常的对象。越精确越优先选择调用。
@ExceptionHandler只能处理它自己所在的控制器Controller所抛出的异常
2、使用@ControllerAdvice注解处理异常
@ControllerAdvice表示当前的Controller所有的@ExceptionHandler可以处理,所有Controller控制器抛出的异常
@ControllerAdvice
@Controller
public class ExceptionController {
3、异常处理优先顺序
在局部异常处理和全局异常处理同时存在的时候,优先顺序是:
- 局部优先 ---->>>> 2、精确优化
4、使用SimpleMappingExceptionResolver类映射异常跳转
         <!--
		简单的异常解析器<br/>
			把不同的异常。映射到不同的错误页面
	 -->
	<bean class="org.springframework.web.servlet.handler.SimpleMappingExceptionResolver">
		<property name="exceptionMappings">
			<props>
				<prop key="java.lang.Exception">/error2.jsp</prop>
				<prop key="java.lang.RuntimeException">/error1.jsp</prop>
				<prop key="java.lang.ArithmeticException">/error3.jsp</prop>
			</props>
		</property>
	</bean>
![]()
八、三大框架ssm(Spring+SpringMVC+Mybatis)的整合
1、测试数据库
drop database if exists ssm;

create database ssm;

use ssm;

##创建图书表
create table t_book(
	`id` int(11) primary key auto_increment, 	## 主键
	`name` varchar(50) not null,				## 书名
	`author` varchar(50) not null,				## 作者
	`price` decimal(11,2) not null,				## 价格
	`sales` int(11) not null,					## 销量
	`stock` int(11)								## 库存
);


## 插入初始化测试数据
insert into t_book(`id` , `name` , `author` , `price` , `sales` , `stock`)
values(null , 'java从入门到放弃' , '国哥' , 80 , 9999 , 9 );

insert into t_book(`id` , `name` , `author` , `price` , `sales` , `stock`)
values(null , '数据结构与算法' , '严敏君' , 78.5 , 6 , 13 );

insert into t_book(`id` , `name` , `author` , `price` , `sales` , `stock`)
values(null , '怎样拐跑别人的媳妇' , '龙伍' , 68, 99999 , 52 );

insert into t_book(`id` , `name` , `author` , `price` , `sales` , `stock`)
values(null , '木虚肉盖饭' , '小胖' , 16, 1000 , 50 );

insert into t_book(`id` , `name` , `author` , `price` , `sales` , `stock`)
values(null , 'C++编程思想' , '刚哥' , 45.5 , 14 , 95 );

insert into t_book(`id` , `name` , `author` , `price` , `sales` , `stock`)
values(null , '蛋炒饭' , '周星星' , 9.9, 12 , 53 );

insert into t_book(`id` , `name` , `author` , `price` , `sales` , `stock`)
values(null , '赌神' , '龙伍' , 66.5, 125 , 535 );

insert into t_book(`id` , `name` , `author` , `price` , `sales` , `stock`)
values(null , 'Java编程思想' , '阳哥' , 99.5 , 47 , 36 );

insert into t_book(`id` , `name` , `author` , `price` , `sales` , `stock`)
values(null , 'JavaScript从入门到精通' , '婷姐' , 9.9 , 85 , 95 );

insert into t_book(`id` , `name` , `author` , `price` , `sales` , `stock`)
values(null , 'cocos2d-x游戏编程入门' , '国哥' , 49, 52 , 62 );

insert into t_book(`id` , `name` , `author` , `price` , `sales` , `stock`)
values(null , 'C语言程序设计' , '谭浩强' , 28 , 52 , 74 );

insert into t_book(`id` , `name` , `author` , `price` , `sales` , `stock`)
values(null , 'Lua语言程序设计' , '雷丰阳' , 51.5 , 48 , 82 );

insert into t_book(`id` , `name` , `author` , `price` , `sales` , `stock`)
values(null , '西游记' , '罗贯中' , 12, 19 , 9999 );

insert into t_book(`id` , `name` , `author` , `price` , `sales` , `stock`)
values(null , '水浒传' , '华仔' , 33.05 , 22 , 88 );

insert into t_book(`id` , `name` , `author` , `price` , `sales` , `stock`)
values(null , '操作系统原理' , '刘优' , 133.05 , 122 , 188 );

insert into t_book(`id` , `name` , `author` , `price` , `sales` , `stock`)
values(null , '数据结构 java版' , '封大神' , 173.15 , 21 , 81 );

insert into t_book(`id` , `name` , `author` , `price` , `sales` , `stock`)
values(null , 'UNIX高级环境编程' , '乐天' , 99.15 , 210 , 810 );

insert into t_book(`id` , `name` , `author` , `price` , `sales` , `stock`)
values(null , 'javaScript高级编程' , '国哥' , 69.15 , 210 , 810 );

insert into t_book(`id` , `name` , `author` , `price` , `sales` , `stock`)
values(null , '大话设计模式' , '国哥' , 89.15 , 20 , 10 );

insert into t_book(`id` , `name` , `author` , `price` , `sales` , `stock`)
values(null , '人月神话' , '刚哥' , 88.15 , 20 , 80 );


## 查看表内容
select id,name,author,price,sales,stock from t_book;
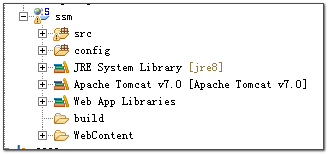
2、创建一个动态Web工程
![]()
3、然后导入整合Spring+SpringMVC+Mybatis的所有jar包
Spring的核心包
    spring-beans-4.0.0.RELEASE.jar
    spring-context-4.0.0.RELEASE.jar
    spring-core-4.0.0.RELEASE.jar
    spring-expression-4.0.0.RELEASE.jar
    commons-logging-1.1.3.jar

Spring的切面包
    com.springsource.org.aopalliance-1.0.0.jar
    com.springsource.org.aspectj.weaver-1.6.8.RELEASE.jar
    spring-aop-4.0.0.RELEASE.jar
    spring-aspects-4.0.0.RELEASE.jar

log4j日记包
    log4j-1.2.17.jar

mysql驱动和数据库连接池包
    c3p0-0.9.1.2.jar
    mysql-connector-java-5.1.37-bin.jar

Spring的数据库及事务包
    spring-jdbc-4.0.0.RELEASE.jar
    spring-orm-4.0.0.RELEASE.jar
    spring-tx-4.0.0.RELEASE.jar

SpringMVC的包
    spring-web-4.0.0.RELEASE.jar
    spring-webmvc-4.0.0.RELEASE.jar

Spring的Hiberante验证包
    hibernate-validator-annotation-processor-5.0.0.CR2.jar
    hibernate-validator-5.0.0.CR2.jar
    validation-api-1.1.0.CR1.jar
    jboss-logging-3.1.1.GA.jar
    classmate-0.8.0.jar

文件上传包
    commons-fileupload-1.2.1.jar
    commons-io-1.4.jar

Spring中的Json处理包
    jackson-annotations-2.1.5.jar
    jackson-core-2.1.5.jar
    jackson-databind-2.1.5.jar

MyBatis以及整合包
    mybatis-3.4.1.jar
    mybatis-spring-1.3.0.jar

JSTL标签库
    taglibs-standard-impl-1.2.1.jar
    taglibs-standard-spec-1.2.1.jar
4、各种配置文件
4.1、log4j.properties日记配置文件
# Global logging configuration
log4j.rootLogger=INFO, stdout
# Console output...
log4j.appender.stdout=org.apache.log4j.ConsoleAppender
log4j.appender.stdout.layout=org.apache.log4j.PatternLayout
log4j.appender.stdout.layout.ConversionPattern=%5p [%t] - %m%n
4.2、jdbc.properties属性配置文件
jdbc.user=root
jdbc.password=root
jdbc.url=jdbc:mysql://localhost:3306/ssm
jdbc.driver=com.mysql.jdbc.Driver
4.3、Mybatis核心配置文件
<?xml version="1.0" encoding="UTF-8" ?>
<!DOCTYPE configuration
  PUBLIC "-//mybatis.org//DTD Config 3.0//EN"
  "http://mybatis.org/dtd/mybatis-3-config.dtd">
<configuration>
	<!-- 配置 -->
	<settings>
		<!-- 开启二级缓存 -->
		<setting name="cacheEnabled" value="true" />
	</settings>

	<!-- 配置扫描加载Mapper.xml配置文件 -->
	<mappers>
		<package name="com.webcode.mapper" />
	</mappers>
</configuration>
4.4、SpringMVC需要的配置文件
springmvc.xml 配置文件
<?xml version="1.0" encoding="UTF-8"?>
<beans xmlns="http://www.springframework.org/schema/beans"
	xmlns:xsi="http://www.w3.org/2001/XMLSchema-instance"
	xmlns:context="http://www.springframework.org/schema/context"
	xmlns:mvc="http://www.springframework.org/schema/mvc"
	xmlns:mybatis-spring="http://mybatis.org/schema/mybatis-spring"
	xmlns:tx="http://www.springframework.org/schema/tx"
	xmlns:aop="http://www.springframework.org/schema/aop"
	xsi:schemaLocation="http://www.springframework.org/schema/mvc http://www.springframework.org/schema/mvc/spring-mvc-4.0.xsd
		http://mybatis.org/schema/mybatis-spring http://mybatis.org/schema/mybatis-spring-1.2.xsd
		http://www.springframework.org/schema/beans http://www.springframework.org/schema/beans/spring-beans.xsd
		http://www.springframework.org/schema/context http://www.springframework.org/schema/context/spring-context-4.0.xsd
		http://www.springframework.org/schema/aop http://www.springframework.org/schema/aop/spring-aop-4.0.xsd
		http://www.springframework.org/schema/tx http://www.springframework.org/schema/tx/spring-tx-4.0.xsd">

	<!-- 扫描springMVC的类和异常处理 -->
	<context:component-scan base-package="com.webcode" use-default-filters="false">
		<context:include-filter type="annotation" expression="org.springframework.stereotype.Controller"/>
		<context:include-filter type="annotation" expression="org.springframework.web.bind.annotation.ControllerAdvice"/>
	</context:component-scan>

	<!-- 视图解析器 -->
	<bean class="org.springframework.web.servlet.view.InternalResourceViewResolver">
		<property name="prefix" value="/book/" />
		<property name="suffix" value=".jsp"/>
	</bean>

	<!-- SpringMVC标签的两个mvc标签 -->
	<mvc:default-servlet-handler/>
	<mvc:annotation-driven/>
</beans>
web.xml中的配置:
<?xml version="1.0" encoding="UTF-8"?>
<web-app xmlns:xsi="http://www.w3.org/2001/XMLSchema-instance"
	xmlns="http://java.sun.com/xml/ns/javaee"
	xsi:schemaLocation="http://java.sun.com/xml/ns/javaee http://java.sun.com/xml/ns/javaee/web-app_2_5.xsd"
	id="WebApp_ID" version="2.5">
	<display-name>ssm</display-name>

	<!--	解决乱码的Filter过滤器	 -->
	<filter>
		<filter-name>CharacterEncodingFilter</filter-name>
		<filter-class>org.springframework.web.filter.CharacterEncodingFilter</filter-class>
		<init-param>
			<param-name>encoding</param-name>
			<param-value>UTF-8</param-value>
		</init-param>
		<init-param>
			<param-name>forceEncoding</param-name>
			<param-value>true</param-value>
		</init-param>
	</filter>
	<filter-mapping>
		<filter-name>CharacterEncodingFilter</filter-name>
		<url-pattern>/*</url-pattern>
	</filter-mapping>
	<!-- 支持restful风格的Filter -->
	<filter>
		<filter-name>HiddenHttpMethodFilter</filter-name>
		<filter-class>org.springframework.web.filter.HiddenHttpMethodFilter</filter-class>
	</filter>
	<filter-mapping>
		<filter-name>HiddenHttpMethodFilter</filter-name>
		<url-pattern>/*</url-pattern>
	</filter-mapping>

	<!-- 整合Spring到Web的监听器	-->
	<context-param>
		<param-name>contextConfigLocation</param-name>
		<param-value>classpath:applicationContext.xml</param-value>
	</context-param>
	<listener>
		<listener-class>org.springframework.web.context.ContextLoaderListener</listener-class>
	</listener>
	<!-- SpringMVC的前端控制器 -->
	<servlet>
		<servlet-name>springDispatcherServlet</servlet-name>
		<servlet-class>org.springframework.web.servlet.DispatcherServlet</servlet-class>
		<init-param>
			<param-name>contextConfigLocation</param-name>
			<param-value>classpath:springmvc.xml</param-value>
		</init-param>
		<load-on-startup>1</load-on-startup>
	</servlet>

	<servlet-mapping>
		<servlet-name>springDispatcherServlet</servlet-name>
		<url-pattern>/</url-pattern>
	</servlet-mapping>

</web-app>
4.5、Spring需要的配置文件 applicationContext.xml
<?xml version="1.0" encoding="UTF-8"?>
<beans xmlns="http://www.springframework.org/schema/beans"
	xmlns:xsi="http://www.w3.org/2001/XMLSchema-instance" xmlns:aop="http://www.springframework.org/schema/aop"
	xmlns:context="http://www.springframework.org/schema/context" xmlns:tx="http://www.springframework.org/schema/tx"
	xmlns:mybatis-spring="http://mybatis.org/schema/mybatis-spring"
	xsi:schemaLocation="http://mybatis.org/schema/mybatis-spring http://mybatis.org/schema/mybatis-spring-1.2.xsd
		http://www.springframework.org/schema/beans http://www.springframework.org/schema/beans/spring-beans.xsd
		http://www.springframework.org/schema/context http://www.springframework.org/schema/context/spring-context-4.0.xsd
		http://www.springframework.org/schema/aop http://www.springframework.org/schema/aop/spring-aop-4.0.xsd
		http://www.springframework.org/schema/tx http://www.springframework.org/schema/tx/spring-tx-4.0.xsd">
	<!-- 扫描除SpringMVC之外所有组件 -->
	<context:component-scan base-package="com.atguigu">
		<context:exclude-filter type="annotation" expression="org.springframework.stereotype.Controller" />
		<context:exclude-filter type="annotation" expression="org.springframework.web.bind.annotation.ControllerAdvice" />
	</context:component-scan>

	<!-- 加载jdbc.properties属性配置文件 -->
	<context:property-placeholder location="classpath:jdbc.properties" />

	<!-- 配置数据库连接池对象 -->
	<bean id="dataSource" class="com.mchange.v2.c3p0.ComboPooledDataSource">
		<property name="user" value="${jdbc.user}" />
		<property name="password" value="${jdbc.password}" />
		<property name="jdbcUrl" value="${jdbc.url}" />
		<property name="driverClass" value="${jdbc.driver}" />
	</bean>

	<!-- 配置事务管理器 -->
	<bean id="transactionManager"
		class="org.springframework.jdbc.datasource.DataSourceTransactionManager">
		<property name="dataSource" ref="dataSource" />
	</bean>

	<!-- Mybatis整合Spring的核心配置之一 -->
	<bean id="sqlSessionFactory" class="org.mybatis.spring.SqlSessionFactoryBean">
		<property name="dataSource" ref="dataSource" />
		<property name="configLocation" value="classpath:mybatis-config.xml" />
		<property name="mapperLocations" value="classpath:com/webcode/dao/*.xml" />
	</bean>
	<!-- Mybatis整合Spring的核心配置之二		老式的将Mapper接口注入到SpringIOC容器中
	<bean class="org.mybatis.spring.mapper.MapperScannerConfigurer">
		<property name="basePackage" value="com.webcode.dao"></property>
	</bean>
	 -->
	<!-- Mybatis整合Spring的核心配置之二	扫描并将Mapper接口注入到SpringIOC容器中 -->
	<mybatis-spring:scan base-package="com.webcode.dao" />

	<!-- 配置事务属性 -->
	<tx:advice id="tx_ssm" transaction-manager="transactionManager">
		<tx:attributes>
			<tx:method name="add*" propagation="REQUIRED" />
			<tx:method name="save*" propagation="REQUIRED" />
			<tx:method name="update*" propagation="REQUIRED" />
			<tx:method name="delete*" propagation="REQUIRED" />
			<tx:method name="*" read-only="true" />
		</tx:attributes>
	</tx:advice>

	<!-- 配置事务切面 -->
	<aop:config>
		<aop:advisor advice-ref="tx_ssm"
			pointcut="execution(* com..service..*.*(..))" />
	</aop:config>

</beans>
 浙公网安备 33010602011771号