yum方式部署MySQL
yum的方式部署MySQL
部署MySQL数据库有多种部署方式,常用的部署方式就有三种:yum安装、rpm安装以及编译安装。每一种安装方式都有自己的优势,那么企业当中通常情况下采用的是rpm和二进制安装的方式。
数据库官网下载地址:https://downloads.mysql.com/archives/community/
Linux
企业当中,常用的服务器都是Linux操作系统,少部分是使用Windows操作系统。本次部署采用Mysql 5.7作为实验版本。
Mysql 5.7的主要特性
-
更好的性能:对于多核CPU、固态硬盘、锁有着更好的优化,每秒100W QPS已不再是MySQL的追求,下个版本能否上200W QPS才是吾等用户更关心的
-
更好的InnoDB存储引擎
-
更为健壮的复制功能:复制带来了数据完全不丢失的方案,传统金融客户也可以选择使用MySQL数据库。此外,GTID在线平滑升级也变得可能
-
更好的优化器:优化器代码重构的意义将在这个版本及以后的版本中带来巨大的改进,Oracle官方正在解决MySQL之前最大的难题
-
原生JSON类型的支持
-
更好的地理信息服务支持:InnoDB原生支持地理位置类型,支持GeoJSON,GeoHash特性
-
新增sys库
yum部署方式
从CentOS 7.0发布以来,yum源中开始使用Mariadb来代替MySQL的安装(这里什么是mariadb,和mysql有什么区别,有兴趣的小伙伴可以自行查阅)。即使你输入的是yum install -y mysql , 显示的也是Mariadb的安装内容。如果想安装Mysql就必须使用Mysql官方的yum源。
1、编写yum源配置文件
#配置好yum源,包括epel源
[root@localhost ~]# curl -o /etc/yum.repos.d/CentOS-Base.repo https://mirrors.aliyun.com/repo/Centos-7.repo
[root@localhost ~]# wget -O /etc/yum.repos.d/epel.repo http://mirrors.aliyun.com/repo/epel-7.repo
[root@localhost ~]# yum -y install vim wget
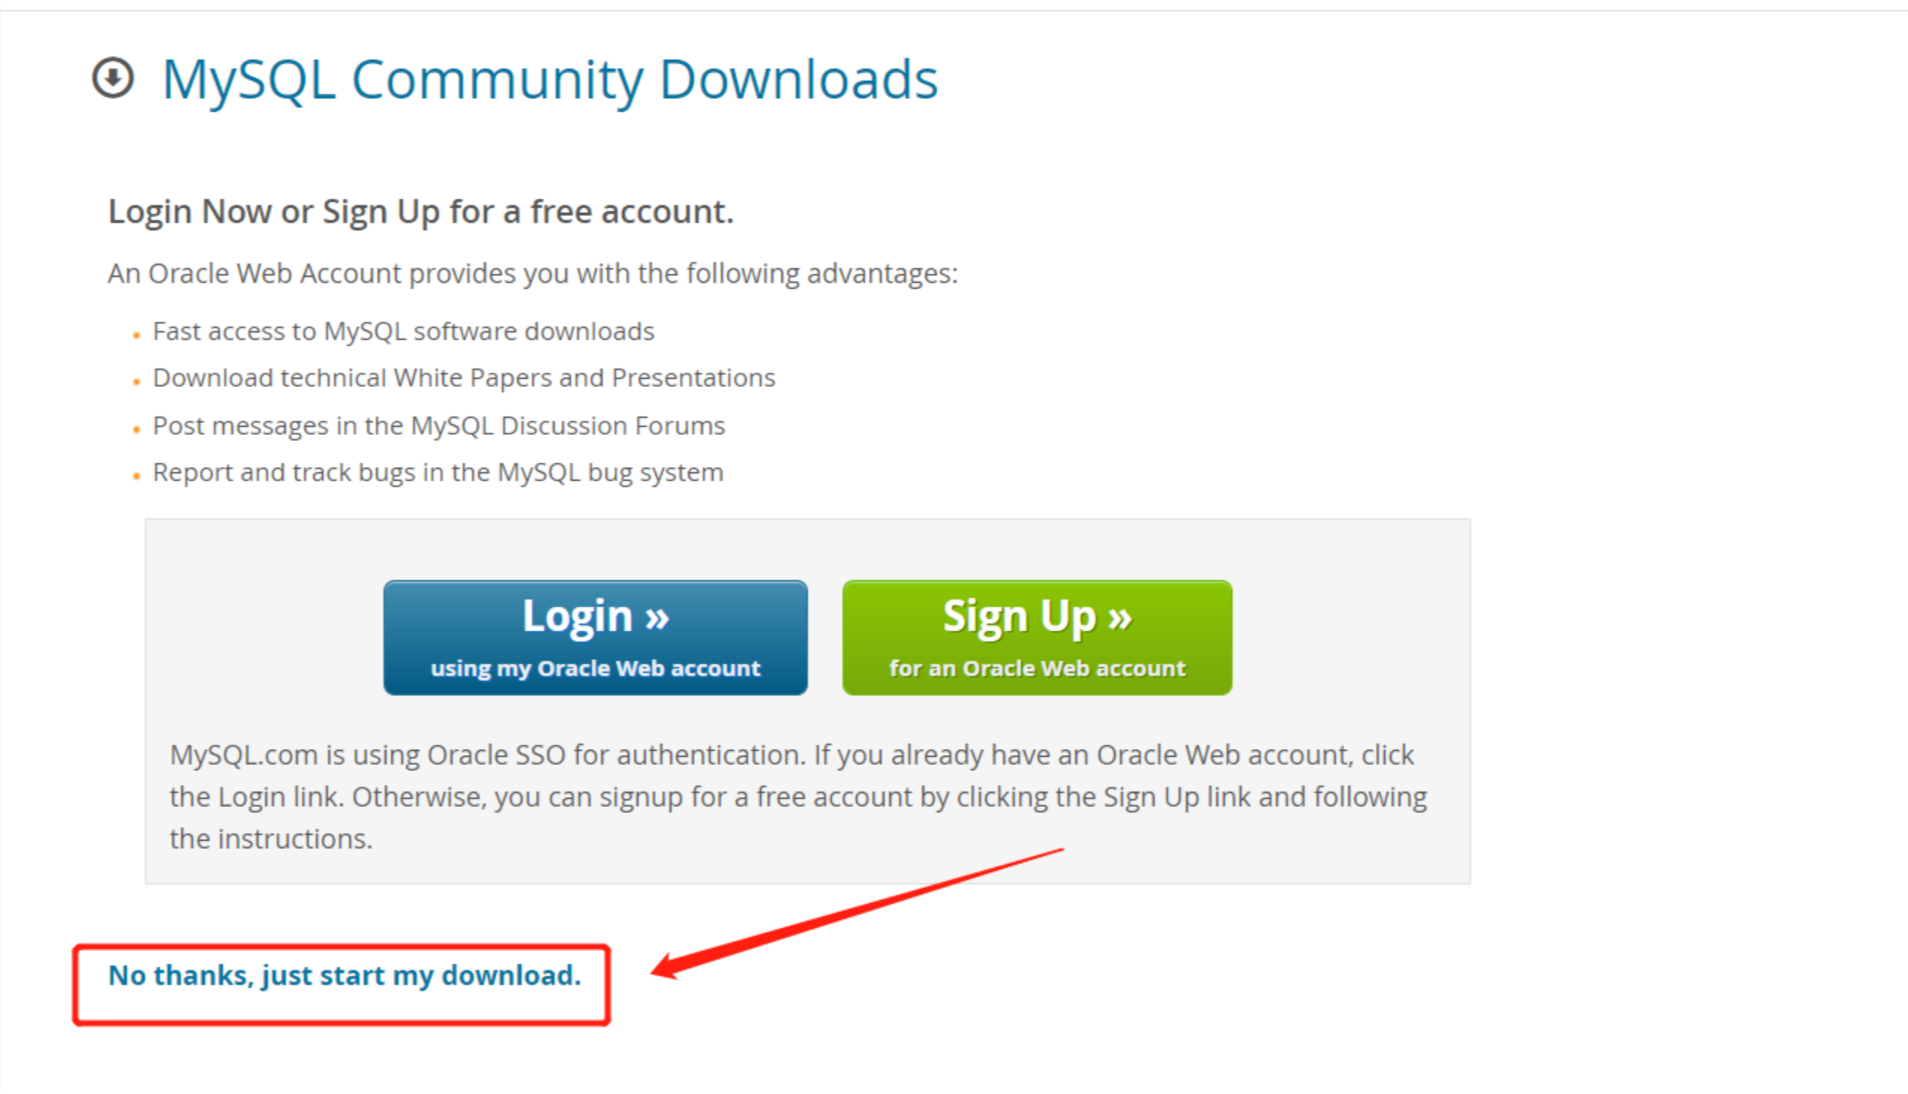
- 使用官方yum仓库
官网下载连接:https://dev.mysql.com/downloads/repo/yum/
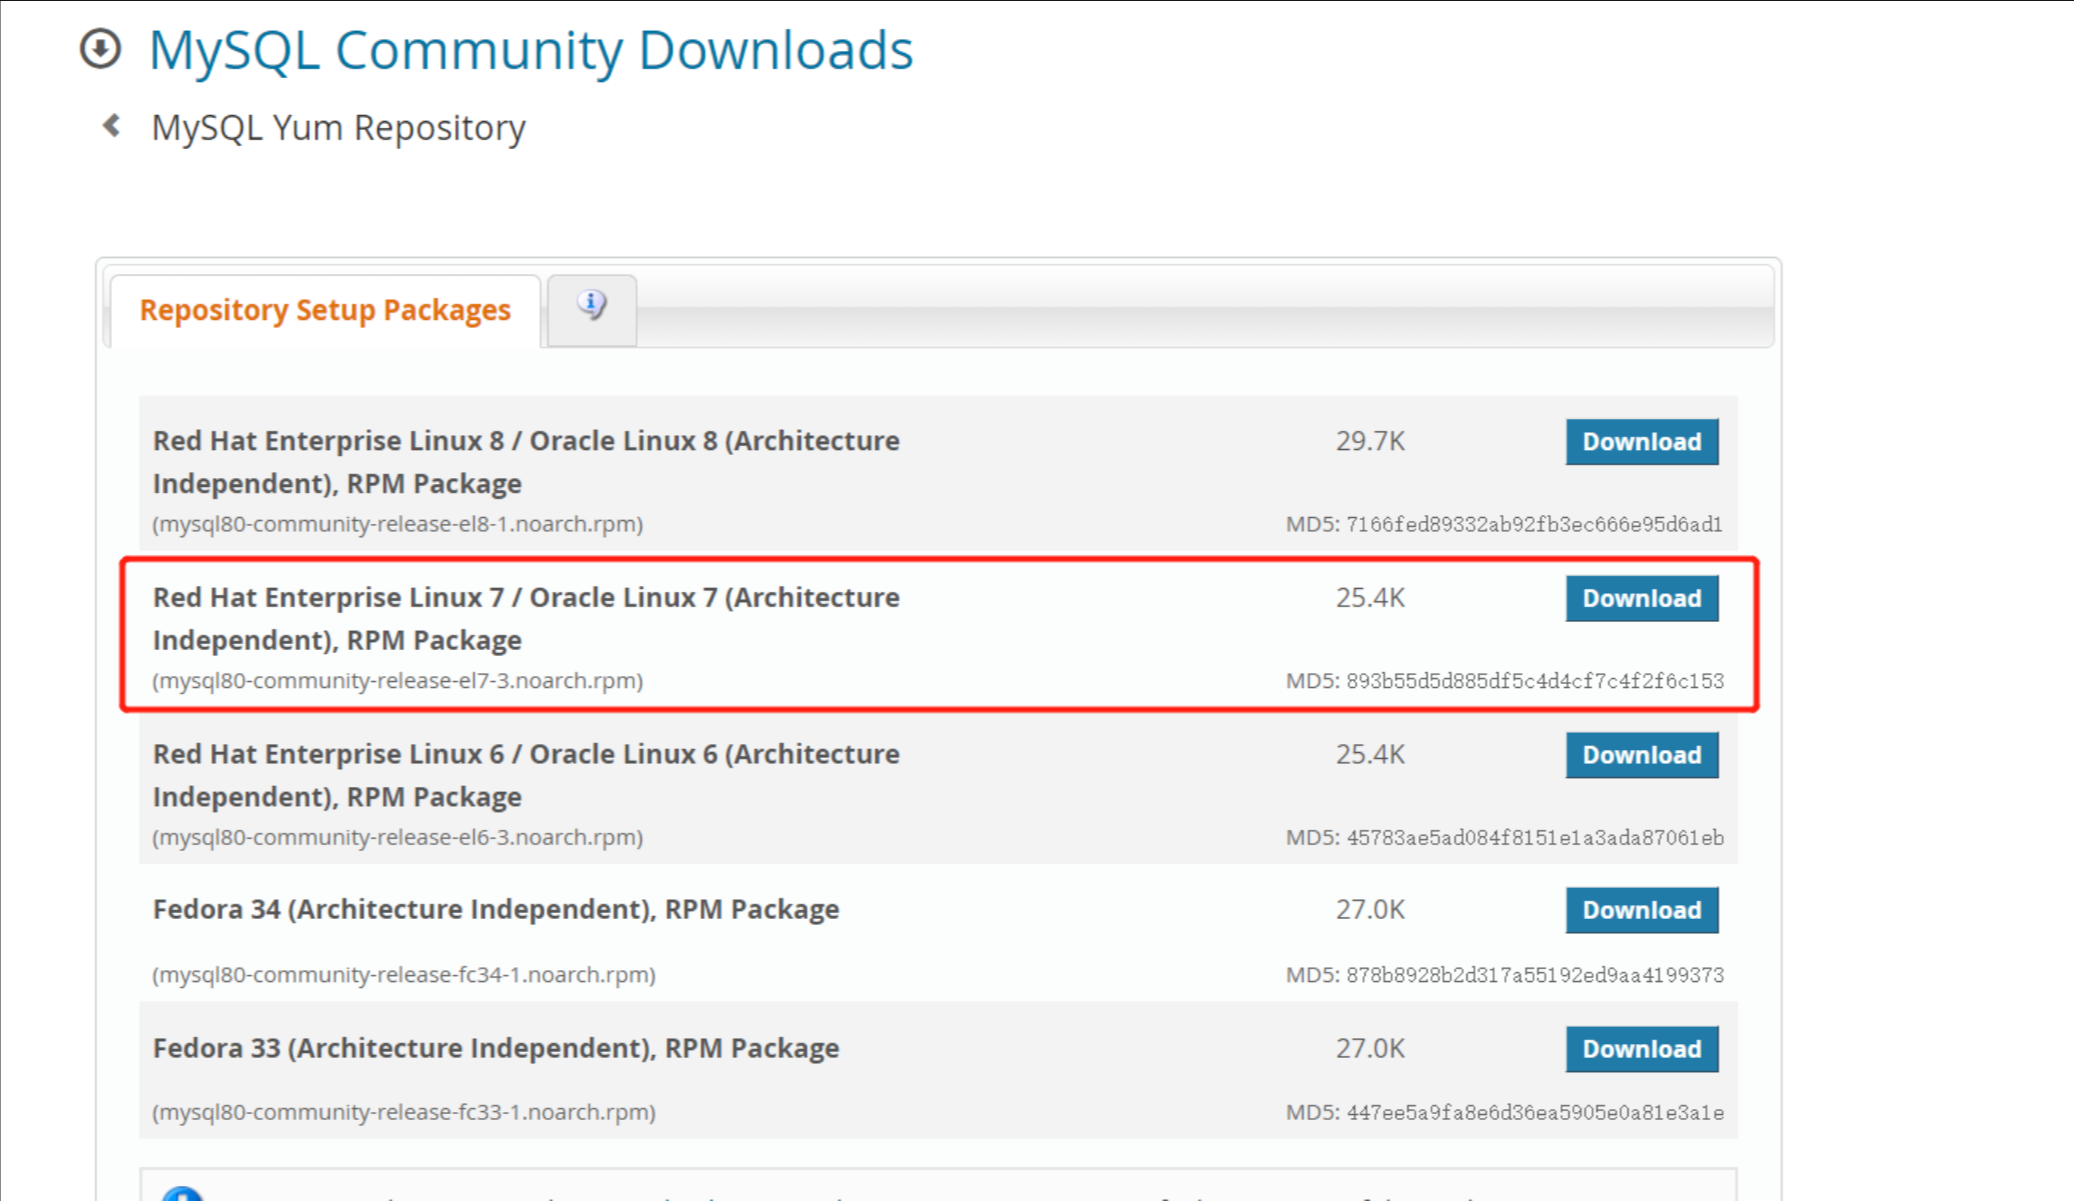
[root@localhost ~]# wget https://dev.mysql.com/get/mysql80-community-release-el7-3.noarch.rpm
--2021-09-14 06:45:09--  https://dev.mysql.com/get/mysql80-community-release-el7-3.noarch.rpm
Resolving dev.mysql.com (dev.mysql.com)... 137.254.60.11
Connecting to dev.mysql.com (dev.mysql.com)|137.254.60.11|:443... connected.
HTTP request sent, awaiting response... 302 Found
Location: https://repo.mysql.com//mysql80-community-release-el7-3.noarch.rpm [following]
--2021-09-14 06:45:10--  https://repo.mysql.com//mysql80-community-release-el7-3.noarch.rpm
Resolving repo.mysql.com (repo.mysql.com)... 23.50.239.110
Connecting to repo.mysql.com (repo.mysql.com)|23.50.239.110|:443... connected.
HTTP request sent, awaiting response... 200 OK
Length: 26024 (25K) [application/x-redhat-package-manager]
Saving to: ‘mysql80-community-release-el7-3.noarch.rpm’

100%[==============================================================>] 26,024      --.-K/s   in 0.04s

2021-09-14 06:45:11 (712 KB/s) - ‘mysql80-community-release-el7-3.noarch.rpm’ saved [26024/26024]

[root@localhost ~]# yum install mysql80-community-release-el7-3.noarch.rpm
Loaded plugins: fastestmirror
Examining mysql80-community-release-el7-3.noarch.rpm: mysql80-community-release-el7-3.noarch
Marking mysql80-community-release-el7-3.noarch.rpm to be installed
Resolving Dependencies
--> Running transaction check
---> Package mysql80-community-release.noarch 0:el7-3 will be installed
--> Finished Dependency Resolution

Dependencies Resolved

========================================================================================================
 Package                       Arch       Version     Repository                                   Size
========================================================================================================
Installing:
 mysql80-community-release     noarch     el7-3       /mysql80-community-release-el7-3.noarch      31 k

Transaction Summary
========================================================================================================
Install  1 Package

Total size: 31 k
Installed size: 31 k
Is this ok [y/d/N]: y
Downloading packages:
Running transaction check
Running transaction test
Transaction test succeeded
Running transaction
  Installing : mysql80-community-release-el7-3.noarch                                               1/1
  Verifying  : mysql80-community-release-el7-3.noarch                                               1/1

Installed:
  mysql80-community-release.noarch 0:el7-3

Complete!
- 使用清华大学开源镜像站的yum仓库(更快)
###使用官方的源很慢,建议使用国内的源,清华大学的源:
https://mirrors.tuna.tsinghua.edu.cn/mysql/yum/mysql80-community-el7/mysql80-community-release-el7-3.noarch.rpm
2、生成yum源缓存
每次当我们编写了,都需要生成yum缓存,以免安装错误。
[root@localhost ~]# yum makecache
Loaded plugins: fastestmirror
Determining fastest mirrors
 * base: mirrors.aliyun.com
 * extras: mirrors.aliyun.com
 * updates: mirrors.aliyun.com
base                                                                             | 3.6 kB  00:00:00
epel                                                                             | 4.7 kB  00:00:00
extras                                                                           | 2.9 kB  00:00:00
mysql56-community                                                                | 2.6 kB  00:00:00
php-webtatic                                                                     | 3.6 kB  00:00:00
updates                                                                          | 2.9 kB  00:00:00
(1/17): epel/x86_64/updateinfo                                                   | 1.0 MB  00:00:01
(2/17): epel/x86_64/prestodelta                                                  | 1.4 kB  00:00:00
(3/17): base/7/x86_64/other_db                                                   | 2.6 MB  00:00:02
(4/17): epel/x86_64/primary_db                                                   | 7.0 MB  00:00:03
(5/17): extras/7/x86_64/primary_db                                               | 243 kB  00:00:00
(6/17): extras/7/x86_64/other_db                                                 | 145 kB  00:00:00
(7/17): extras/7/x86_64/filelists_db                                             | 259 kB  00:00:01
(8/17): epel/x86_64/other_db                                                     | 3.3 MB  00:00:02
(9/17): mysql56-community/x86_64/primary_db                                      | 297 kB  00:00:01
(10/17): mysql56-community/x86_64/other_db                                       |  83 kB  00:00:00
(11/17): mysql56-community/x86_64/filelists_db                                   | 1.1 MB  00:00:02
(12/17): php-webtatic/other_db                                                   |  72 kB  00:00:01
(13/17): php-webtatic/filelists_db                                               |  97 kB  00:00:01
(14/17): epel/x86_64/filelists_db                                                |  12 MB  00:00:15
(15/17): updates/7/x86_64/primary_db                                             |  11 MB  00:00:07
(16/17): updates/7/x86_64/other_db                                               | 765 kB  00:00:00
(17/17): updates/7/x86_64/filelists_db                                           | 6.1 MB  00:00:21
Metadata Cache Created
3、检查安装的yum源是否存在
[root@localhost yum.repos.d]# yum repolist enabled | grep mysql
mysql-connectors-community/x86_64 MySQL Connectors Community                 212
mysql-tools-community/x86_64      MySQL Tools Community                      132
mysql80-community/x86_64          MySQL 8.0 Community Server                 283


# 选择默认安装的版本
# 安装 YUM 管理工具包,此包提供了 yum-config-manager 命令工具
[root@localhost ~]# yum -y install yum-utils

[root@localhost ~]# yum-config-manager --disable mysql80-community
[root@localhost ~]# yum-config-manager --enable mysql57-community
[root@localhost yum.repos.d]# yum repolist enabled | grep mysql
mysql-connectors-community/x86_64 MySQL Connectors Community                 212
mysql-tools-community/x86_64      MySQL Tools Community                      132
mysql57-community/x86_64          MySQL 5.7 Community Server                 524
4、安装MySQL服务
[root@localhost yum.repos.d]# yum install -y  mysql-community-server
Loaded plugins: fastestmirror
Loading mirror speeds from cached hostfile
 * base: mirrors.aliyun.com
 * extras: mirrors.aliyun.com
 * updates: mirrors.aliyun.com
Resolving Dependencies
--> Running transaction check
---> Package mysql-community-server.x86_64 0:5.7.35-1.el7 will be installed
--> Processing Dependency: mysql-community-common(x86-64) = 5.7.35-1.el7 for package: mysql-community-server-5.7.35-1.el7.x86_64
--> Processing Dependency: mysql-community-client(x86-64) >= 5.7.9 for package: mysql-community-server-5.7.35-1.el7.x86_64
--> Running transaction check
---> Package mysql-community-client.x86_64 0:5.6.51-2.el7 will be updated
---> Package mysql-community-client.x86_64 0:5.7.35-1.el7 will be an update
--> Processing Dependency: mysql-community-libs(x86-64) >= 5.7.9 for package: mysql-community-client-5.7.35-1.el7.x86_64
---> Package mysql-community-common.x86_64 0:5.6.51-2.el7 will be updated
---> Package mysql-community-common.x86_64 0:5.7.35-1.el7 will be an update
--> Running transaction check
---> Package mysql-community-libs.x86_64 0:5.6.51-2.el7 will be updated
--> Processing Dependency: libmysqlclient.so.18()(64bit) for package: perl-DBD-MySQL-4.023-6.el7.x86_64
--> Processing Dependency: libmysqlclient.so.18()(64bit) for package: 1:net-snmp-5.7.2-49.el7_9.1.x86_64
--> Processing Dependency: libmysqlclient.so.18()(64bit) for package: 1:net-snmp-agent-libs-5.7.2-49.el7_9.1.x86_64
--> Processing Dependency: libmysqlclient.so.18()(64bit) for package: 2:postfix-2.10.1-9.el7.x86_64
--> Processing Dependency: libmysqlclient.so.18(libmysqlclient_18)(64bit) for package: perl-DBD-MySQL-4.023-6.el7.x86_64
--> Processing Dependency: libmysqlclient.so.18(libmysqlclient_18)(64bit) for package: 2:postfix-2.10.1-9.el7.x86_64
--> Processing Dependency: libmysqlclient.so.18(libmysqlclient_18)(64bit) for package: 1:net-snmp-agent-libs-5.7.2-49.el7_9.1.x86_64
---> Package mysql-community-libs.x86_64 0:5.7.35-1.el7 will be an update
--> Running transaction check
---> Package mysql-community-libs-compat.x86_64 0:5.7.35-1.el7 will be installed
--> Finished Dependency Resolution

Dependencies Resolved

========================================================================================================
 Package                            Arch          Version                Repository                Size
========================================================================================================
Installing:
 mysql-community-server             x86_64        5.7.35-1.el7           mysql57-community        174 M
Installing for dependencies:
 mysql-community-libs-compat        x86_64        5.7.35-1.el7           mysql57-community        1.2 M
Updating for dependencies:
 mysql-community-client             x86_64        5.7.35-1.el7           mysql57-community         25 M
 mysql-community-common             x86_64        5.7.35-1.el7           mysql57-community        310 k
 mysql-community-libs               x86_64        5.7.35-1.el7           mysql57-community        2.4 M

Transaction Summary
========================================================================================================
Install  1 Package  (+1 Dependent package)
Upgrade             ( 3 Dependent packages)

Total download size: 203 M
Downloading packages:
Delta RPMs disabled because /usr/bin/applydeltarpm not installed.
warning: /var/cache/yum/x86_64/7/mysql57-community/packages/mysql-community-common-5.7.35-1.el7.x86_64.rpm: Header V3 DSA/SHA256 Signature, key ID 5072e1f5: NOKEY
Public key for mysql-community-common-5.7.35-1.el7.x86_64.rpm is not installed
(1/5): mysql-community-common-5.7.35-1.el7.x86_64.rpm                            | 310 kB  00:00:00
(2/5): mysql-community-libs-5.7.35-1.el7.x86_64.rpm                              | 2.4 MB  00:00:01
(3/5): mysql-community-libs-compat-5.7.35-1.el7.x86_64.rpm                       | 1.2 MB  00:00:04
(4/5): mysql-community-client-5.7.35-1.el7.x86_64.rpm                            |  25 MB  00:00:15
(5/5): mysql-community-server-5.7.35-1.el7.x86_64.rpm                            | 174 MB  00:03:34
--------------------------------------------------------------------------------------------------------
Total                                                                   940 kB/s | 203 MB  00:03:41
Retrieving key from file:///etc/pki/rpm-gpg/RPM-GPG-KEY-mysql
Importing GPG key 0x5072E1F5:
 Userid     : "MySQL Release Engineering <mysql-build@oss.oracle.com>"
 Fingerprint: a4a9 4068 76fc bd3c 4567 70c8 8c71 8d3b 5072 e1f5
 Package    : mysql80-community-release-el7-3.noarch (@/mysql80-community-release-el7-3.noarch)
 From       : /etc/pki/rpm-gpg/RPM-GPG-KEY-mysql
Running transaction check
Running transaction test
Transaction test succeeded
Running transaction
  Updating   : mysql-community-common-5.7.35-1.el7.x86_64                                           1/8
  Updating   : mysql-community-libs-5.7.35-1.el7.x86_64                                             2/8
  Updating   : mysql-community-client-5.7.35-1.el7.x86_64                                           3/8
  Installing : mysql-community-server-5.7.35-1.el7.x86_64                                           4/8
  Installing : mysql-community-libs-compat-5.7.35-1.el7.x86_64                                      5/8
  Cleanup    : mysql-community-client-5.6.51-2.el7.x86_64                                           6/8
  Cleanup    : mysql-community-libs-5.6.51-2.el7.x86_64                                             7/8
  Cleanup    : mysql-community-common-5.6.51-2.el7.x86_64                                           8/8
  Verifying  : mysql-community-server-5.7.35-1.el7.x86_64                                           1/8
  Verifying  : mysql-community-client-5.7.35-1.el7.x86_64                                           2/8
  Verifying  : mysql-community-libs-5.7.35-1.el7.x86_64                                             3/8
  Verifying  : mysql-community-common-5.7.35-1.el7.x86_64                                           4/8
  Verifying  : mysql-community-libs-compat-5.7.35-1.el7.x86_64                                      5/8
  Verifying  : mysql-community-libs-5.6.51-2.el7.x86_64                                             6/8
  Verifying  : mysql-community-common-5.6.51-2.el7.x86_64                                           7/8
  Verifying  : mysql-community-client-5.6.51-2.el7.x86_64                                           8/8

Installed:
  mysql-community-server.x86_64 0:5.7.35-1.el7

Dependency Installed:
  mysql-community-libs-compat.x86_64 0:5.7.35-1.el7

Dependency Updated:
  mysql-community-client.x86_64 0:5.7.35-1.el7       mysql-community-common.x86_64 0:5.7.35-1.el7
  mysql-community-libs.x86_64 0:5.7.35-1.el7

Complete!
5、启动MySQL服务
[root@localhost ~]# systemctl start mysqld
[root@localhost ~]# systemctl status mysqld
● mysqld.service - MySQL Server
   Loaded: loaded (/usr/lib/systemd/system/mysqld.service; enabled; vendor preset: disabled)
   Active: active (running) since Tue 2021-09-14 06:54:37 CST; 9s ago
     Docs: man:mysqld(8)
           http://dev.mysql.com/doc/refman/en/using-systemd.html
  Process: 2807 ExecStart=/usr/sbin/mysqld --daemonize --pid-file=/var/run/mysqld/mysqld.pid $MYSQLD_OPTS (code=exited, status=0/SUCCESS)
  Process: 2788 ExecStartPre=/usr/bin/mysqld_pre_systemd (code=exited, status=0/SUCCESS)
 Main PID: 2809 (mysqld)
   CGroup: /system.slice/mysqld.service
           └─2809 /usr/sbin/mysqld --daemonize --pid-file=/var/run/mysqld/mysqld.pid

Sep 14 06:54:35 localhost.localdomain systemd[1]: Starting MySQL Server...
Sep 14 06:54:37 localhost.localdomain systemd[1]: Started MySQL Server.
6、初始化
MySQL服务器初始化(从MySQL 5.7开始)
在 MySQL 服务器初始启动时,如果服务器的数据目录为空,则会发生以下情况:
-
MySQL 服务器已初始化。
-
在数据目录中生成SSL证书和密钥文件。
-
安装并启用该 validate_password 插件。
-
将创建一个超级用户 帐户'root'@'localhost'。并会设置超级用户的密码,将其存储在错误日志文件/var/log/mysqld.log中。
[root@localhost ~]# grep 'temporary password' /var/log/mysqld.log
2021-09-13T15:02:26.045452Z 1 [Note] A temporary password is generated for root@localhost: )Fg,sak*y4aS
7、尝试连接并修改默认密码
[root@localhost ~]# mysql -uroot -p")Fg,sak*y4aS"
mysql: [Warning] Using a password on the command line interface can be insecure.
Welcome to the MySQL monitor.  Commands end with ; or \g.
Your MySQL connection id is 2
Server version: 5.7.35

Copyright (c) 2000, 2021, Oracle and/or its affiliates.

Oracle is a registered trademark of Oracle Corporation and/or its
affiliates. Other names may be trademarks of their respective
owners.

Type 'help;' or '\h' for help. Type '\c' to clear the current input statement.

# 出现以下错误的原因是需要修改初始化密码
mysql> show databases;
ERROR 1820 (HY000): You must reset your password using ALTER USER statement before executing this statement.

mysql> alter user   root@localhost   identified  by  '123456';
ERROR 1819 (HY000): Your password does not satisfy the current policy requirements

#太过简单的密码会失败,因为不满足密码复杂度的要求

# 修改密码
mysql> alter user   root@localhost   identified  by  'Test123!';
Query OK, 0 rows affected (0.00 sec)
# 刷新权限
FLUSH PRIVILEGES;

# 要设置比较简单的密码就需要取消密码复杂度,编辑 /etc/my.cnf配置文件, 在 [mysqld]配置块儿中添加如下内容(企业生成环境不建议使用这种配置)
plugin-load=validate_password.so
validate-password=OFF
8、远程连接
远程登录还需要授权远程登录
Mysql默认不允许远程登录,我们需要设置关闭selinux或者防火墙,不关防火墙就开放3306端口;
 mysql> grant all privileges on *.* to root@localhost identified by 'Test123!';
 Query OK, 0 rows affected, 1 warning (0.00 sec)

#允许任意IP连接
 mysql> grant all privileges on *.* to root@'%' identified by 'Test123!';
 Query OK, 0 rows affected, 1 warning (0.00 sec)
# 刷新权限
FLUSH PRIVILEGES;
添加开放3306端口的iptables规则
iptables -t filter -I INPUT -p tcp --dport 3306 -j DROP
破解密码的两种方式
#方法一:删除授权库mysql,重新初始化
[root@egon ~]# rm -rf /var/lib/mysql/mysql #所有授权信息全部丢失!!!
[root@egon ~]# systemctl restart mariadb
[root@egon ~]# mysql

#方法二:启动时,跳过授权库
[root@egon ~]# vim /etc/my.cnf    #mysql主配置文件
[mysqld]
skip-grant-table   #添加
[root@egon ~]# systemctl restart mariadb
[root@egon ~]# mysql
MariaDB [(none)]> update mysql.user set password=password("123") where user="root" and host="localhost";
MariaDB [(none)]> flush privileges;
MariaDB [(none)]> \q
[root@egon ~]# #打开/etc/my.cnf去掉skip-grant-table,然后重启
[root@egon ~]# systemctl restart mariadb
[root@egon ~]# mysql -u root -p123 #以新密码登录
