Linux 常用配置
配置静态IP
- 查看本机动态IP,确认IP网段
终端输入ipconfig 或 netstat(基于 net_tools) 或者输入ip address 或ss
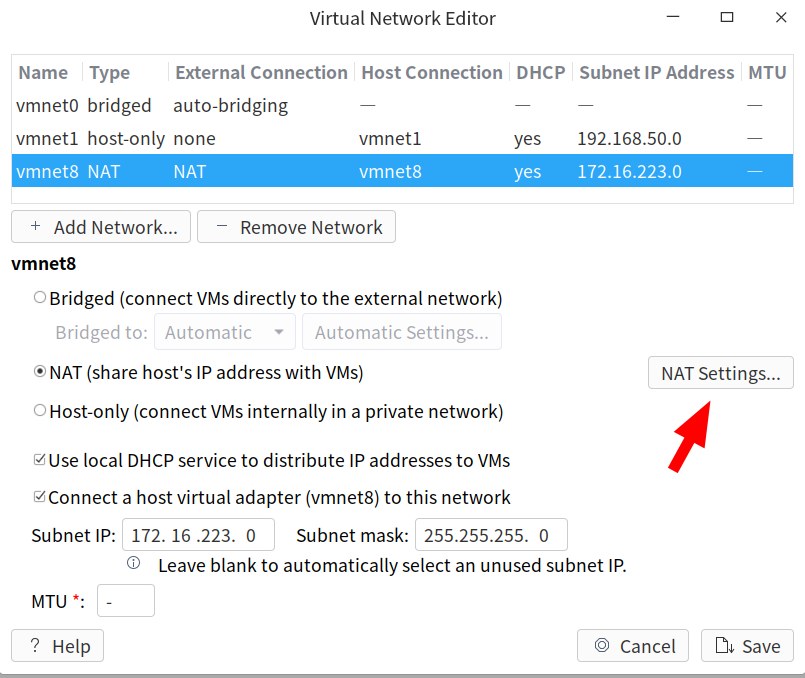
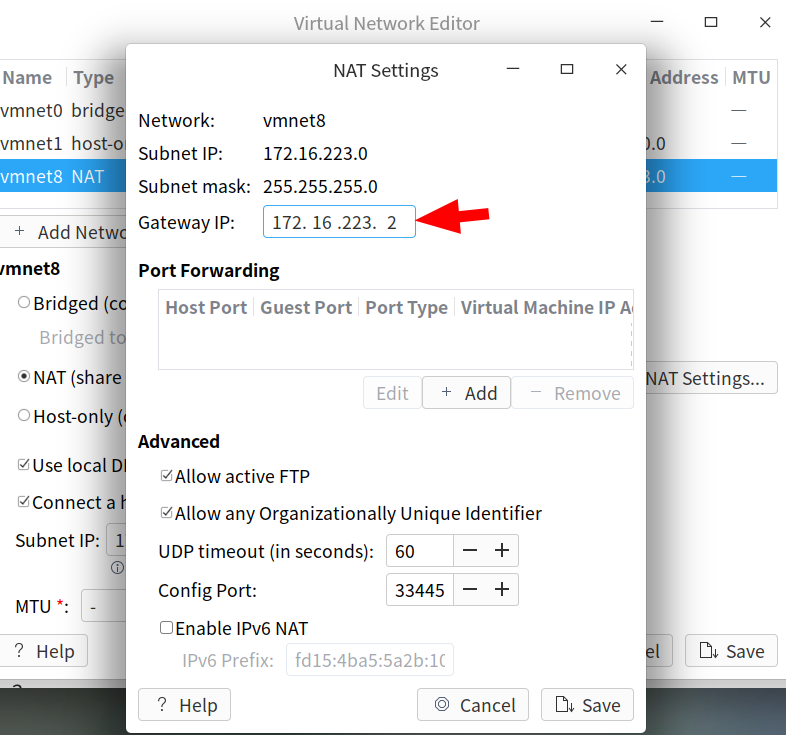
若使用VMware虚拟机,请打开 编辑→虚拟网络编辑器→对应虚拟机的网络模式选中→打开设置查看网关
-
su 切换 root 用户
-
备份网络配置文件 cp /etc/sysconfig/network-scripts/ifcfg-ens33 ens33.bak (备份文件名字随意)
注意:不一定是ens33,也可能是ens22或者其他
-
修改网络配置文件vim /etc/sysconfig/network-scripts/ifcfg-ens33
-
将 BOOTPROTO=dhcp 改为 BOOTPROTO=static
-
添加如下内容
注意: PADDR 和GATEWAY 字段根据自己之前查询到的网关IP来填
ONBOOT=yes
IPADDR=192.168.108.130
NETMASK=255.255.255,0
GATEWAY=192.168.108.2
DNS1=114.114.114.114
DNS2=8.8.8.8
- 重启网卡
//任选下面一条命令

/etc/init.d/network restart
systemctl restart network
service network restart
-
ifconfig 再次查看IP是否设置成功
-
ping -c 1 www.baidu.com 看是否可以ping通,若ping通,则说明设置成功
配置LAMP环境
LAMP环境概述
-
LAMP :Linux + Apache + Mysql + PHP
-
LAMP是一种常用来搭建动态网站 或者服务器 的开源软件,本身都是各自独立的程序,但是因为常被放在一起使用,拥有了越来越高的兼容度,共同组成了一个强大的Web应用程序平台

- LAMP的组件
1. Linux:Linux处在最底层,提供操作系统 。其它组件运行于 Linux之上,但不一定局限于 Linux,也可以在 Windows上运行
2. Apache:Apache位于第二层,它是一个Web服务平台,提供可让用户获得Web页面的机制
3. MySql:是最流行的开源关系数据库 管理系统,是LAMP的数据存储端
4. PHP:PHP是一种被广泛应用的开放源代码的多用途脚本语言 ,它可嵌入到HTML中,尤其适合Web开发
安装Apache环境
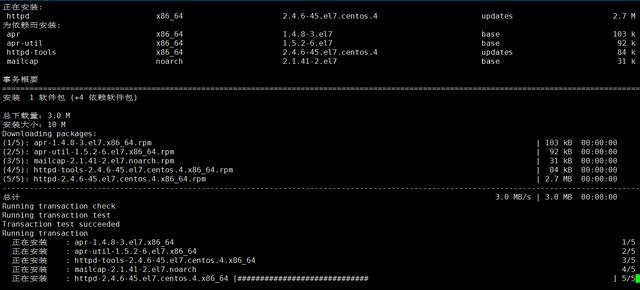
- root 用户下,使用yum 命令安装Apache和扩展
[root@localhost ~]# yum -y install **httpd httpd-devel httpd-manual mod_ssl**
- 启动 Apache服务并添加到 开机自启 中
[root@localhost ~]# systemctl start httpd
[root@localhost ~]# systemctl enable httpd

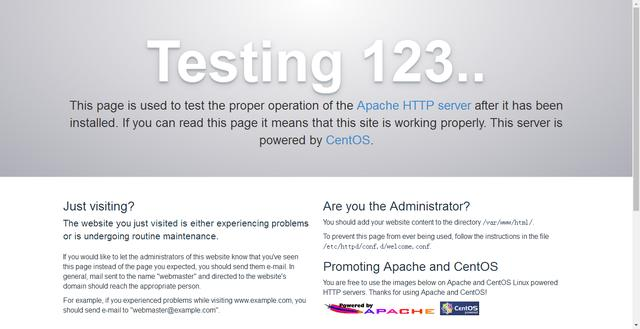
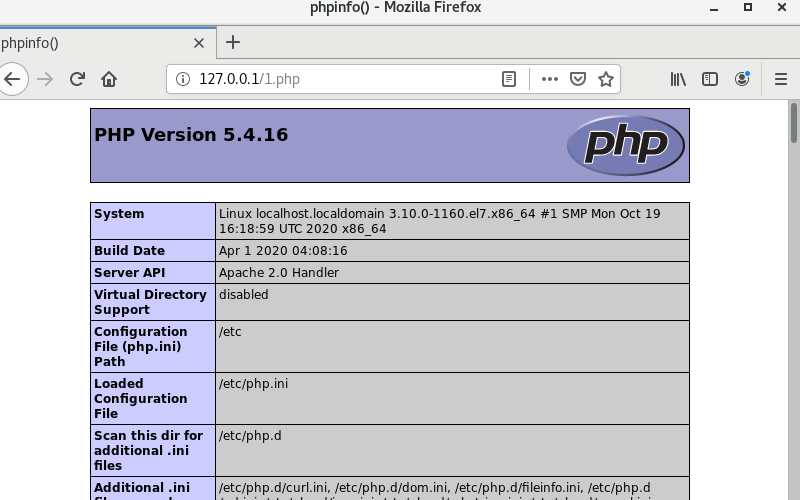
- 打开firefox浏览器 测试 127.0.0.1,显示如图则配置成功
- 配置用户权限
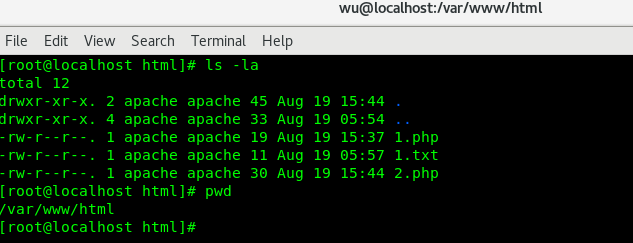
[root@localhost ~]# **chown -R apache:apache /var/www**
- apache常用默配置目录
| 服务目录 | /etc/httpd |
|---|---|
| 主配置文件 | /etc/httpd/conf/httpd.conf |
| 网站数据目录 | /var/www/html |
| 访问日志 | /var/log/httpd/access_log |
| 错误日志 | /var/log/httpd/error_log |
| 默认的网站主目录 | /var/www/html |
安装Mysql环境
1.安装Mysql和扩展包
[root@localhost ~]# yum -y install **mariadb-server mariadb**
- 安装完成后启动mysq
[root@localhost ~]# systemctl start mariadb
- 登陆mysq数据库
[root@localhost ~]# mysql -u root
- 设置为开机自启动
[root@localhost ~]# systemctl enable mariadb.service
- 配置mysql_secure_installation,初始化root密码
[root@localhost Desktop]# **mysql_secure_installation**

NOTE: RUNNING ALL PARTS OF THIS SCRIPT IS RECOMMENDED FOR ALL MariaDB
      SERVERS IN PRODUCTION USE!  PLEASE READ EACH STEP CAREFULLY!

In order to log into MariaDB to secure it, we'll need the current
password for the root user.  If you've just installed MariaDB, and
you haven't set the root password yet, the password will be blank,
so you should just press enter here.

Enter current password for root (enter for none):
OK, successfully used password, moving on...

Setting the root password ensures that nobody can log into the MariaDB
root user without the proper authorisation.

**Set root password? [Y/n] y**
New password:
Re-enter new password:
Password updated successfully!
Reloading privilege tables..
 ... Success!


By default, a MariaDB installation has an anonymous user, allowing anyone
to log into MariaDB without having to have a user account created for
them.  This is intended only for testing, and to make the installation
go a bit smoother.  You should remove them before moving into a
production environment.

**Remove anonymous users? [Y/n] y**
 ... Success!

Normally, root should only be allowed to connect from 'localhost'.  This
ensures that someone cannot guess at the root password from the network.

**Disallow root login remotely? [Y/n] n**
 ... skipping.

By default, MariaDB comes with a database named 'test' that anyone can
access.  This is also intended only for testing, and should be removed
before moving into a production environment.

**Remove test database and access to it? [Y/n] n**
 ... skipping.

Reloading the privilege tables will ensure that all changes made so far
will take effect immediately.

**Reload privilege tables now? [Y/n] y**
 ... Success!

Cleaning up...

All done!  If you've completed all of the above steps, your MariaDB
installation should now be secure.

Thanks for using MariaDB!
安装PHP环境
- 安装PHP5和扩展包
[root@localhost ~]# yum -y install php php-mysql php-common php-gd php-mbstring php-mcrypt
php-devel php-xml
- 安装完成后重启httpd服务
[root@localhost ~]# systemctl restart httpd
- 安装完成后在 /var/www/html 下新建一个1.php文件
<?php
  phpinfo();
?>
错误修复方案
若遇到PHP项目程序运行后,某些功能无法正常使用,可以尝试以下命令
[root@localhost ~]# systemctl stop firewalld.service
[root@localhost ~]# setenforce 0
LNMP环境介绍
-
对于LAMP环境中的 Apache服务器,可以使用 nginx来替代 nginx+php-fpm+mysql安装PHP和扩展包
-
Nginx服务器:
- Nginx是一款轻量级的高性能web服务器/反向代理服务器及电子邮件(MAP/POP3)代理服务器,并在一个BSD-like协议下发行。
- 特点是占有内存少,并发能力强 ,事实上 ngInx的并发能力确实在同类型的网页服务器中表现较好
- 使用 Nginx服务器的代表网站用户有:百度、京东、新浪、网易、腾讯、淘宝等
配置Python3 环境
这里演示CentOS 7 中配置Python3.7.5
- 安装依赖环境
yum install zlib-devel bzip2-devel openssl-devel ncurses-devel sqlite-devel readline-devel tk-devel libffi-devel gcc make
- 下载Python3
https://www.python.org/downloads/
- 解压下载的Python安装包
[root@localhost ~]# tar -zxvf Python-3.7.5.tgz
- 进入解压后的文件目录中,执行 ./configure
[root@localhost Python-3.7.5]# ./configure --prefix=/opt/python/python3.7.5
[root@localhost Python-3.7.5]# ./configure --enable-optimizations  #优化
- 执行编译和安装
[root@localhost Python-3.7.5]# make && make install
- 建立软连接
[root@localhost Python-3.7.5]# ln -s /opt/python/python-3.7.5 /usr/bin/python3

 浙公网安备 33010602011771号