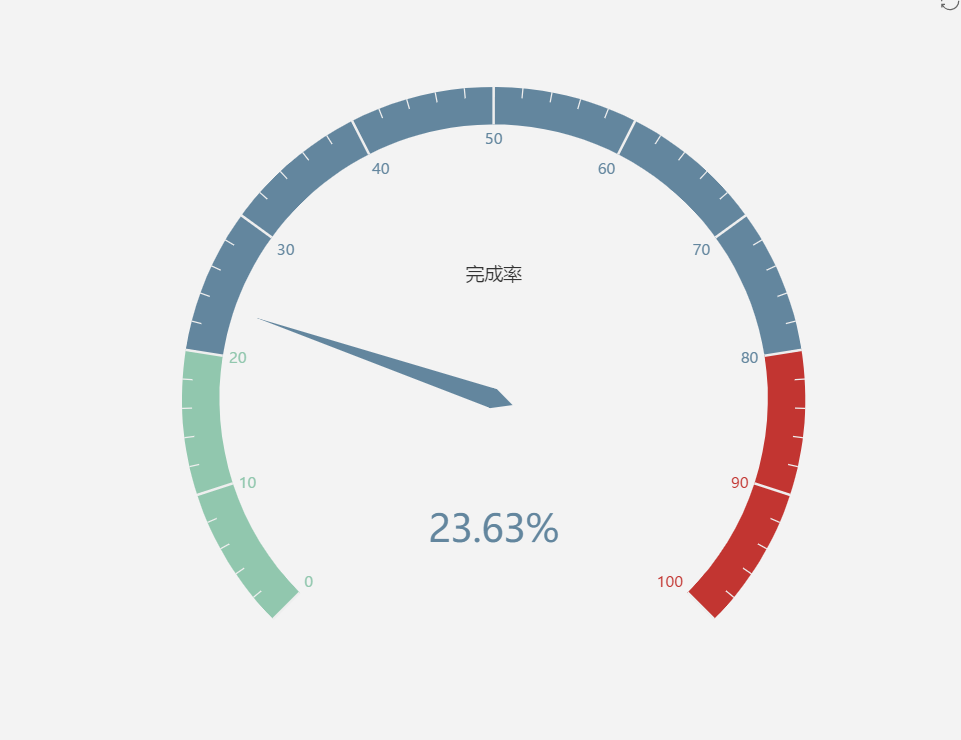
echarts仪表盘如何设置图例(legend)
echarts 图表中经常需要对不同的颜色设置图例标识不同的意义,而仪表盘的指针只存在一个值,如何表示不同颜色的意义,官网配置项并未给出该功能;
不同段的颜色是通过axisLine->lineStyle->color来设置的;
搜索了很多的资料都没有找到用来标识各颜色段的图例;
反复琢磨,可不可以使用有图例的图来强制加上这个图例呢?
这里熟悉echarts的童鞋可能想到解决方法了;
那我们就来使用一招“移花接木”大法;

主要思想:使用柱状图的legend图例,然后设置柱状图和仪表图的层级,然后再隐藏柱状图,禁用legend的点击事件;
注意点:
1.series中既有type为‘gauge’的配置项,也有type为‘bar’的配置项,而'bar'类型的配置项只要关注其legend的颜色即可;
2.对于柱状图要隐藏的项较多,必须全部设置成不显示,其中包括轴线和分割线等;
3.防止奇怪的体验最好将legend的点击事件禁用掉;
var option = { legend: { //配置legend,这里的data,要对应type为‘bar’的series数据项的‘name’名称,作为图例的说明 data:['预热期','导入期','成长期','成熟期','衰退期'], selectedMode:false, //图例禁止点击 top:20, itemWidth:23, itemHeight:6, textStyle: { color: '#707070', fontStyle: 'normal', fontWeight: 'normal', fontFamily: 'sans-serif', fontSize: 11, }, }, grid: { z:1, //grid作为柱状图的坐标系,其层级要和仪表图层级不同,同时隐藏 show:false, left: '-30%', right: '4%', bottom: '3%', containLabel: true, splitLine:{ show: false //隐藏分割线 }, }, xAxis : [ //这里有很多的show,必须都设置成不显示 { type : 'category', data : [], axisLine: { show: false }, splitLine:{ show: false }, splitArea: { interval: 'auto', show: false } } ], yAxis : [ //这里有很多的show,必须都设置成不显示 { type : 'value', axisLine: { show: false }, splitLine:{ show: false }, } ], toolbox: { show: false, }, series : [ { name:'刻度盘', type: 'gauge', startAngle: 180, endAngle: 0, "center": ["50%", "80%"], //整体的位置设置 z: 3, min: min, max: max+min, splitNumber: max, radius: '110%', axisLine: { // 坐标轴线 lineStyle: { // 属性lineStyle控制线条样式 width: 10, color:optionUsedColors } }, axisTick: { // 坐标轴小标记 length: 19, // 属性length控制线长 splitNumber: 2, lineStyle: { // 属性lineStyle控制线条样式 color: '#cdcdcd' } }, splitLine: { // 分隔线 length: 20, // 属性length控制线长 lineStyle: { // 属性lineStyle(详见lineStyle)控制线条样式 color: 'auto' } }, axisLabel: { textStyle: { color:'#454A57' } }, pointer: { show: true, length: '70%', width: 5, }, itemStyle:{ normal:{ color:'#454A57', borderWidth:0 } }, title: { //仪表盘标题 show: true, offsetCenter: ['0', '20'], textStyle: { color: '#444A56', fontSize: 12, fontFamily: 'Microsoft YaHei' } }, detail: { textStyle: { fontSize: 12, color: '#707070' }, offsetCenter: offsetConfig, formatter: function(){ return '上市时间\n'+time; } }, data:[{value: (status/100*max || 0), name: '当前阶段'}] }, { name: '灰色内圈', type: 'gauge', z:2, radius: '110%', startAngle: 180, endAngle: 0, "center": ["50%", "80%"], //整体的位置设置 splitNumber: 4, axisLine: { // 坐标轴线 lineStyle: { // 属性lineStyle控制线条样式 color: [ [1, '#F2F4F8'] ], width: 24, opacity: 1, } }, splitLine: { //分隔线样式 show: false, }, axisLabel: { //刻度标签 show: false, }, axisTick: { //刻度样式 show: false, }, detail : { show:false, textStyle: { // 其余属性默认使用全局文本样式,详见TEXTSTYLE fontWeight: 'bolder', fontSize:12 } }, }, { name:'预热期', type:'bar', barWidth: '60%', //不显示,可以随便设置 data:[0], itemStyle: { normal: { color: '#41C468', //这里的图例要注意,颜色设置和仪表盘的颜色对应起来 } } }, { name:'导入期', type:'bar', barWidth: '60%', data:[0], itemStyle: { normal: { color: '#70C1B3', } } }, { name:'成长期', type:'bar', barWidth: '60%', data:[0], itemStyle: { normal: { color: '#00A1E9', } } }, { name:'成熟期', type:'bar', barWidth: '60%', data:[0], itemStyle: { normal: { color: '#EE4444', } } }, { name:'衰退期', type:'bar', barWidth: '60%', data:[0], itemStyle: { normal: { color: '#DCF2C4', } } } ] }
最终的效果图如下,是不是很简单呢。


