部署zabbix
部署zxbbix
1、准备机器,环境初始化 --没什么用
[root@iZ2ze261ew0wzy5zenjh2xZ ~]# ifconfig eth0 | awk 'NR==2{print $2}'
172.21.100.230
2、虚拟机需要关闭防火墙 --没什么用
sed -i 's/SELINUX=enforcing/SELINUX=disabled/' /etc/selinux/config -- -i是不显示过程的意思
3、获取zabbix的下载源 --这里开始
# rpm -Uvh https://repo.zabbix.com/zabbix/5.0/rhel/7/x86_64/zabbix-release-5.0-1.el7.noarch.rpm

# ls /etc/yum.repos.d    --可以查看下载的zabbix包
--4、更换zabbix.repo源为清华的
# sed -i 's#http://repo.zabbix.com#https://mirrors.tuna.tsinghua.edu.cn/zabbix#' /etc/yum.repos.d/zabbix.repo
5、清空缓存,下载zabbix服务端
# yum clean all

# yum install zabbix-server-mysql zabbix-agent -y
安装Software Collections,便于后续安装高版本的PHP,默认yum安装的PHP版本为5.4过低。
SCL可以让你再同一个操作系统上安装和使用多个版本的软件,而不会影响整个系统的安装包。
软件包会安装在/opt/rh目录下
为了避免系统广泛冲突, /opt/rh包安装目录中。例如。这允许你再centos7机器上安装Python3.5,而不会删除或干扰Python2.7.
/etc/opt/rh/软件包的所有配置文件都存储在目录中相应的目录中
6、安装工具,可以在机器上。使用多个版本的软件,并且不会影响到整个系统的依赖环境
# yum install centos-release-scl -y
7、修改zabbix-frontend前端源,修改enabled=1
[root@iZ2ze261ew0wzy5zenjh2xZ ~]vim /etc/yum.repos.d/zabbix.repo

[zabbix]
name=Zabbix Official Repository - $basearch
baseurl=https://mirrors.tuna.tsinghua.edu.cn/zabbix/zabbix/5.0/rhel/7/$basearch/
enabled=1
gpgcheck=1
gpgkey=file:///etc/pki/rpm-gpg/RPM-GPG-KEY-ZABBIX-A14FE591

[zabbix-frontend]
name=Zabbix Official Repository frontend - $basearch
baseurl=https://mirrors.tuna.tsinghua.edu.cn/zabbix/zabbix/5.0/rhel/7/$basearch/frontend
enabled=0													-----此处应该修改为1
gpgcheck=1
gpgkey=file:///etc/pki/rpm-gpg/RPM-GPG-KEY-ZABBIX-A14FE591

[zabbix-debuginfo]
name=Zabbix Official Repository debuginfo - $basearch
baseurl=https://mirrors.tuna.tsinghua.edu.cn/zabbix/zabbix/5.0/rhel/7/$basearch/debuginfo/
enabled=0
gpgkey=file:///etc/pki/rpm-gpg/RPM-GPG-KEY-ZABBIX-A14FE591
gpgcheck=1

[zabbix-non-supported]
name=Zabbix Official Repository non-supported - $basearch
baseurl=https://mirrors.tuna.tsinghua.edu.cn/zabbix/non-supported/rhel/7/$basearch/
enabled=1
gpgkey=file:///etc/pki/rpm-gpg/RPM-GPG-KEY-ZABBIX
gpgcheck=1
8、安装zabbix前端环境,且是安装到scl环境下
# yum install zabbix-web-mysql-scl zabbix-apache-conf-scl -y --scl版本的就会安装到/opt/rh目录下,跟别的软件版本不冲突
9、安装zabbix所需的数据库
# yum install mariadb-server -y
10、配置数据库,开机启动
# systemctl enable --now mariadb     开机启动并且立即启动
没有显示证明成功
--报错:
[root@iZ2ze261ew0wzy5zenjh2xZ rh]# systemctl enable --now mariadb
Created symlink from /etc/systemd/system/multi-user.target.wants/mariadb.service to /usr/lib/systemd/system/mariadb.service.
Job for mariadb.service failed because the control process exited with error code. See "systemctl status mariadb.service" and "journalctl -xe" for details.
--执行以下步骤:
[root@iZ2ze261ew0wzy5zenjh2xZ etc]# cp /usr/share/mysql/my-huge.cnf /etc/my.cnf
cp: overwrite ‘/etc/my.cnf’? y
再重新
# systemctl enable --now mariadb		开机启动并且立即启动
--检查是否已经启动		--已经running
[root@iZ2ze261ew0wzy5zenjh2xZ etc]# systemctl status mariadb
● mariadb.service - MariaDB database server
   Loaded: loaded (/usr/lib/systemd/system/mariadb.service; enabled; vendor preset: disabled)
   Active: active (running) since Sat 2021-04-17 15:18:58 CST; 3min 49s ago
  Process: 371499 ExecStartPost=/usr/libexec/mariadb-wait-ready $MAINPID (code=exited, status=0/SUCCESS)
  Process: 371464 ExecStartPre=/usr/libexec/mariadb-prepare-db-dir %n (code=exited, status=0/SUCCESS)
--查看端口是否已经启动
[root@iZ2ze261ew0wzy5zenjh2xZ etc]# netstat -tuln		--3306已经启动
Active Internet connections (only servers)
Proto Recv-Q Send-Q Local Address           Foreign Address         State
tcp        0      0 0.0.0.0:1010            0.0.0.0:*               LISTEN
tcp        0      0 0.0.0.0:22              0.0.0.0:*               LISTEN
tcp        0      0 127.0.0.1:25            0.0.0.0:*               LISTEN
tcp        0      0 0.0.0.0:3306            0.0.0.0:*               LISTEN
11、初始化数据库,设置密码
[root@iZ2ze261ew0wzy5zenjh2xZ etc]# mysql_secure_installation

NOTE: RUNNING ALL PARTS OF THIS SCRIPT IS RECOMMENDED FOR ALL MariaDB
      SERVERS IN PRODUCTION USE!  PLEASE READ EACH STEP CAREFULLY!

In order to log into MariaDB to secure it, we'll need the current
password for the root user.  If you've just installed MariaDB, and
you haven't set the root password yet, the password will be blank,
so you should just press enter here.

Enter current password for root (enter for none): 			--默认为空,直接回车
Set root password? [Y/n] 									--是否设置密码,输入y
New password:												--数据库的新密码:******
Re-enter new password:										--重新输入密码
Password updated successfully!
Reloading privilege tables..
 ... Success!												--密码设置成功
Remove anonymous users? [Y/n]								--是否要移除匿名用户,输入y
Disallow root login remotely? [Y/n]							--是否禁止远程root进行登录,输入n
Remove test database and access to it? [Y/n] 				--是否移除测试数据库,没什么用,输入y
Reload privilege tables now? [Y/n] 							--是否刷新授权表,输入y
Cleaning up...

All done!  If you've completed all of the above steps, your MariaDB
installation should now be secure.

Thanks for using MariaDB!									--完成

[root@iZ2ze261ew0wzy5zenjh2xZ etc]# mysql -uroot -p			--进入数据库
Enter password:
Welcome to the MariaDB monitor.  Commands end with ; or \g.
Your MariaDB connection id is 9
Server version: 5.5.68-MariaDB MariaDB Server

Copyright (c) 2000, 2018, Oracle, MariaDB Corporation Ab and others.

Type 'help;' or '\h' for help. Type '\c' to clear the current input statement.


MariaDB [(none)]> show databases;
+--------------------+
| Database           |
+--------------------+
| information_schema |
| mysql              |
| performance_schema |
+--------------------+
3 rows in set (0.01 sec)
12、添加数据库用户,以及zabbix所需的数据库信息
MariaDB [(none)]> show databases;
+--------------------+
| Database           |
+--------------------+
| information_schema |
| mysql              |
| performance_schema |
+--------------------+
3 rows in set (0.01 sec)

MariaDB [(none)]> create database zabbix character set utf8 collate utf8_bin;
Query OK, 1 row affected (0.00 sec)
MariaDB [(none)]> create user zabbix@localhost identified by '******';		--创建zabbix用户和密码
Query OK, 0 rows affected (0.00 sec)
MariaDB [(none)]> grant all privileges on zabbix.* to zabbix@localhost;		--授权给zabbix
Query OK, 0 rows affected (0.00 sec)
MariaDB [(none)]> flush privileges;											--刷新一下授权表
Query OK, 0 rows affected (0.00 sec)
MariaDB [(none)]> quit;														--退出mysql数据库
Bye
13、使用zabbix-mysql命令,导入数据库信息
[root@iZ2ze261ew0wzy5zenjh2xZ ~]# zcat /usr/share/doc/zabbix-server-mysql*/create.sql.gz | mysql -uzabbix -p zabbix
Enter password:
[root@iZ2ze261ew0wzy5zenjh2xZ ~]#						--已经将数据写入了mysql,进入查看
[root@iZ2ze261ew0wzy5zenjh2xZ ~]# mysql -uzabbix -p
Enter password:
Welcome to the MariaDB monitor.  Commands end with ; or \g.
Your MariaDB connection id is 13
Server version: 5.5.68-MariaDB MariaDB Server

Copyright (c) 2000, 2018, Oracle, MariaDB Corporation Ab and others.

Type 'help;' or '\h' for help. Type '\c' to clear the current input statement.

MariaDB [(none)]> show databases;
+--------------------+
| Database           |
+--------------------+
| information_schema |
| zabbix             |
+--------------------+
2 rows in set (0.00 sec)

MariaDB [(none)]>
MariaDB [(none)]> use zabbix						--切换数据库为zabbix
Database changed
MariaDB [zabbix]> show tables;						--如果里面有表说明导入正确
+----------------------------+
| Tables_in_zabbix           |
+----------------------------+
| acknowledges               |
| actions                    |
| alerts                     |
| application_discovery      |
| application_prototype      |
| application_template       |
| applications               |
			...
MariaDB [zabbix]> quit;
Bye
[root@iZ2ze261ew0wzy5zenjh2xZ ~]#
14、修改zabbix server配置文件,修改数据库的密码
[root@iZ2ze261ew0wzy5zenjh2xZ zabbix]# vim /etc/zabbix/zabbix_server.conf
/password						--搜索关于password的行
修改DBPassword=******				--此处为密码
[root@iZ2ze261ew0wzy5zenjh2xZ zabbix]# grep '^DBPa' /etc/zabbix/zabbix_server.conf 		--查看一下是否成功
DBPassword=******
15、修改zabbix的PHP配置文件
[root@iZ2ze261ew0wzy5zenjh2xZ /]# vim /etc/opt/rh/rh-php72/php-fpm.d/zabbix.conf
--修改timezone
; php_value[date.timezone] = Asia/Shanghai
php_value[date.timezone] = Asia/Shanghai   --并去掉前面的注释
[zabbix]
user = apache
group = apache

listen = /var/opt/rh/rh-php72/run/php-fpm/zabbix.sock
listen.acl_users = apache
listen.allowed_clients = 127.0.0.1

pm = dynamic
pm.max_children = 50
pm.start_servers = 5
pm.min_spare_servers = 5
pm.max_spare_servers = 35

php_value[session.save_handler] = files
php_value[session.save_path]    = /var/opt/rh/rh-php72/lib/php/session/

php_value[max_execution_time] = 300
php_value[memory_limit] = 128M
php_value[post_max_size] = 16M
php_value[upload_max_filesize] = 2M
php_value[max_input_time] = 300
php_value[max_input_vars] = 10000
; php_value[date.timezone] = Europe/Riga
[root@iZ2ze261ew0wzy5zenjh2xZ /]# grep 'timezone' /etc/opt/rh/rh-php72/php-fpm.d/zabbix.conf
php_value[date.timezone] = Asia/Shanghai
16、启动Zabbix server和agent进程,并为它们设置开机自启:
# systemctl restart zabbix-server zabbix-agent httpd rh-php72-php-fpm
# systemctl enable zabbix-server zabbix-agent httpd rh-php72-php-fpm
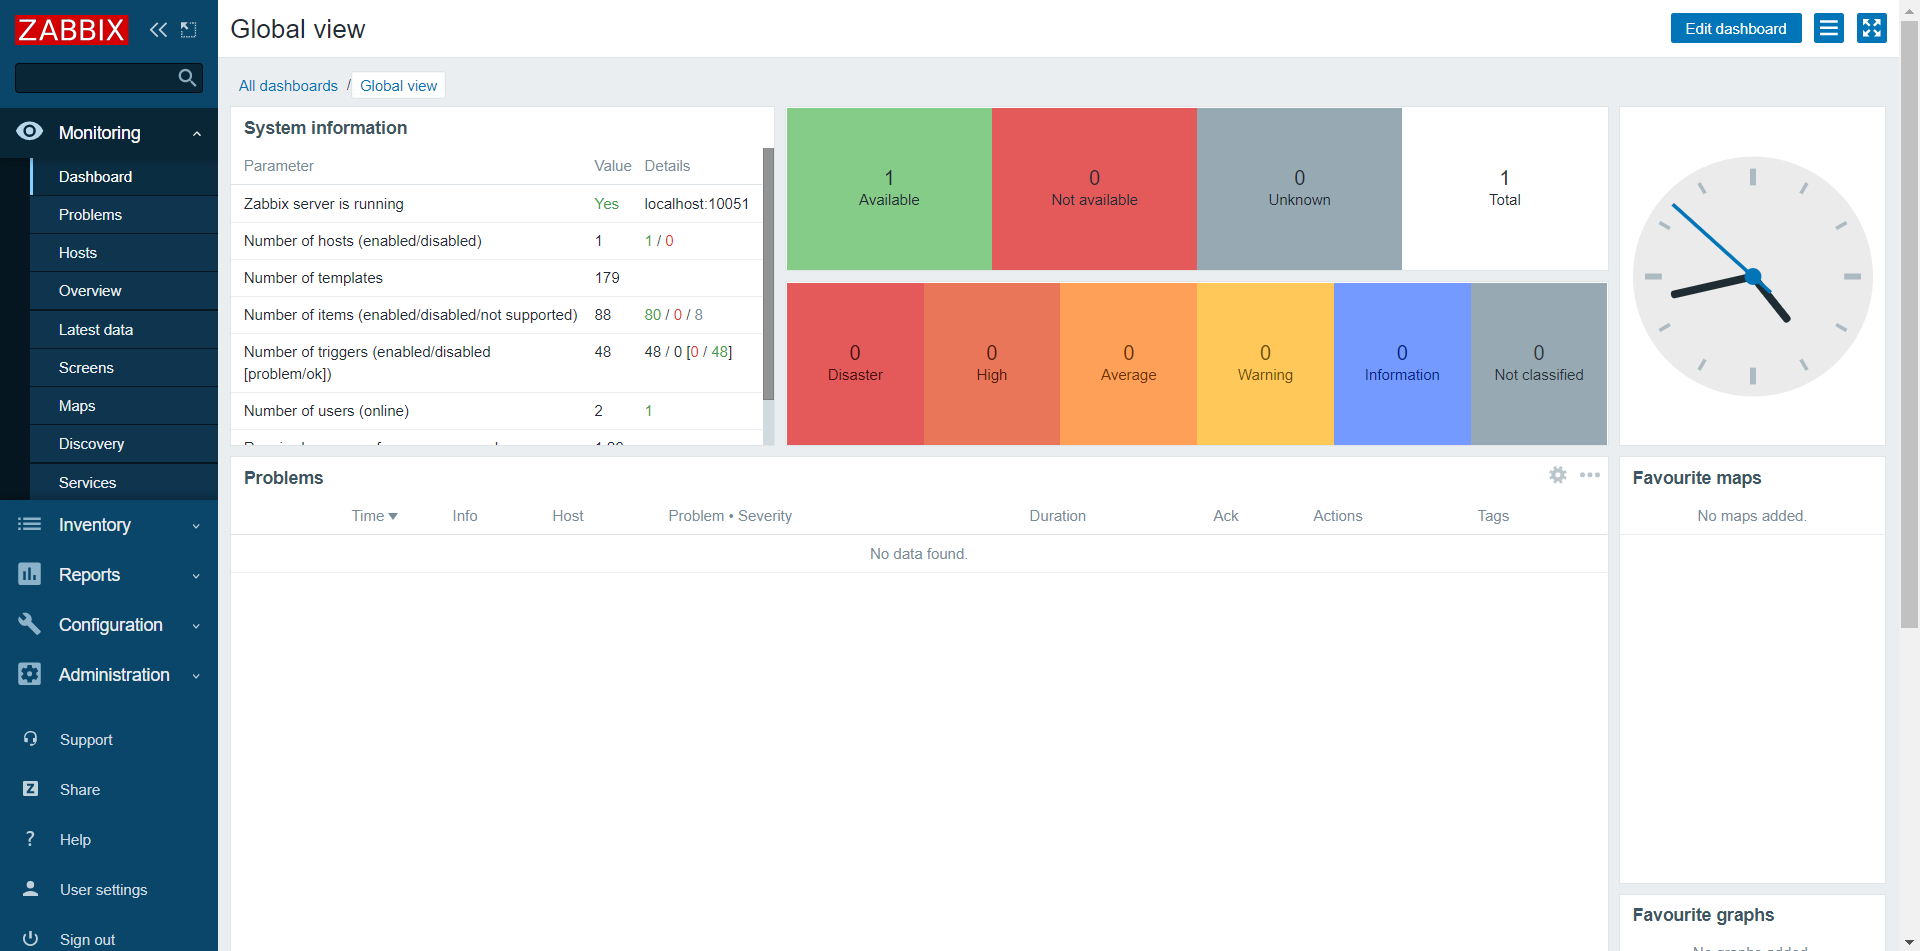
17、通过浏览器访问:本机ip/zabbix
登录用户、密码
Admin、zabbix
=======分割线=
要监控的其他服务器,安装客户端
zabbix5.0版本
agent2新版本采用golang语言开发的客户端
由于是go语言开发。部署起来就很方便了。和之前的程序部署形式不一样了
agent2默认用10050端口。也就是zabbix客户端的端口
-
旧版本的客户端。zabbix-agent
-
go语言新版本客户端。zabbix-agent2
1、机器环境准备。2台zabbix客户端
ip			zabbix-agent2
ip			zabbix-agent2

2、注意时间要跟服务端相同		--为了保持时间一致。所有机器都要装ntpdate
# yum install ntpdate -y
# ntpdate -u ntp.aliyun.com
3、时区的统一配置
# mv /etc/localtime{,.bak}		--做个备份
# ln -s /usr/share/zoneinfo/Asia/Shanghai /etc/localtime				--做个软连接。这样时区就统一了
具体的zabbix-agent2部署流程
1、获取zabbix的下载源 --这里开始
# rpm -Uvh https://mirrors.tuna.tsinghua.edu.cn/zabbix/zabbix/5.0/rhel/7/x86_64/zabbix-agent-5.0.1-1.el7.x86_64.rpm

# ls /etc/yum.repos.d    --可以查看下载的zabbix包
2、更换zabbix.repo源为清华的
# sed -i 's#http://repo.zabbix.com#https://mirrors.tuna.tsinghua.edu.cn/zabbix#' /etc/yum.repos.d/zabbix.repo
3、安装zabbix-agent2
# yum install zabbix-agent2 -y
4、查看配置文件
/etc/zabbix/zabbix_agent2.conf
5、查看启动命令
ls -l /usr/sbin/zabbix_agent2
6、启动zabbix。并且开机自启动。并立即启动
# systemctl enable --now zabbix-agent2

查看10050端口是否已经开启
# netstat -tlun | grep zabbix
7、修改agent2配置文件。查看配置信息
查看 # grep -Ev '^#|^$' /etc/zabbix/zabbix_agent2.conf			--Ev 排除的意思	--^# #号开头的行	--^$ 空行
 --可以查看pid
修改 # vim /etc/zabbix/zabbix_agent2.conf							--根据自己的环境修改
 改Server地址:改成服务端的地址
 改ServerActive:改成服务端地址
 改Hostname:改成当前的主机名				--主机名更改方法:hostnamectl set-hostname 要修改的名字
8、重启zabbix-agent2
# systemctl restart zabbix-agent2
验证zabbix-agent2的连通性
1、在服务端上安装zabbix-get命令,可以获取客户端数据
# yum install zabbix-get -y
2、命令检测服务端是否连接上客户端
# zabbix_get -s '客户端地址' -p 10050 -k 'system.hostname'
解决zabbix-server查看的乱码问题
# yum install wqy-microhei-fonts -y		--安装一个字体

# \cp /usr/share/fonts/wqy-microhei/wqy-microhei.ttc /usr/share/fonts/dejavu/DejaVuSans.ttf			--反斜杠是用原生cp的意思。系统默认cp -i
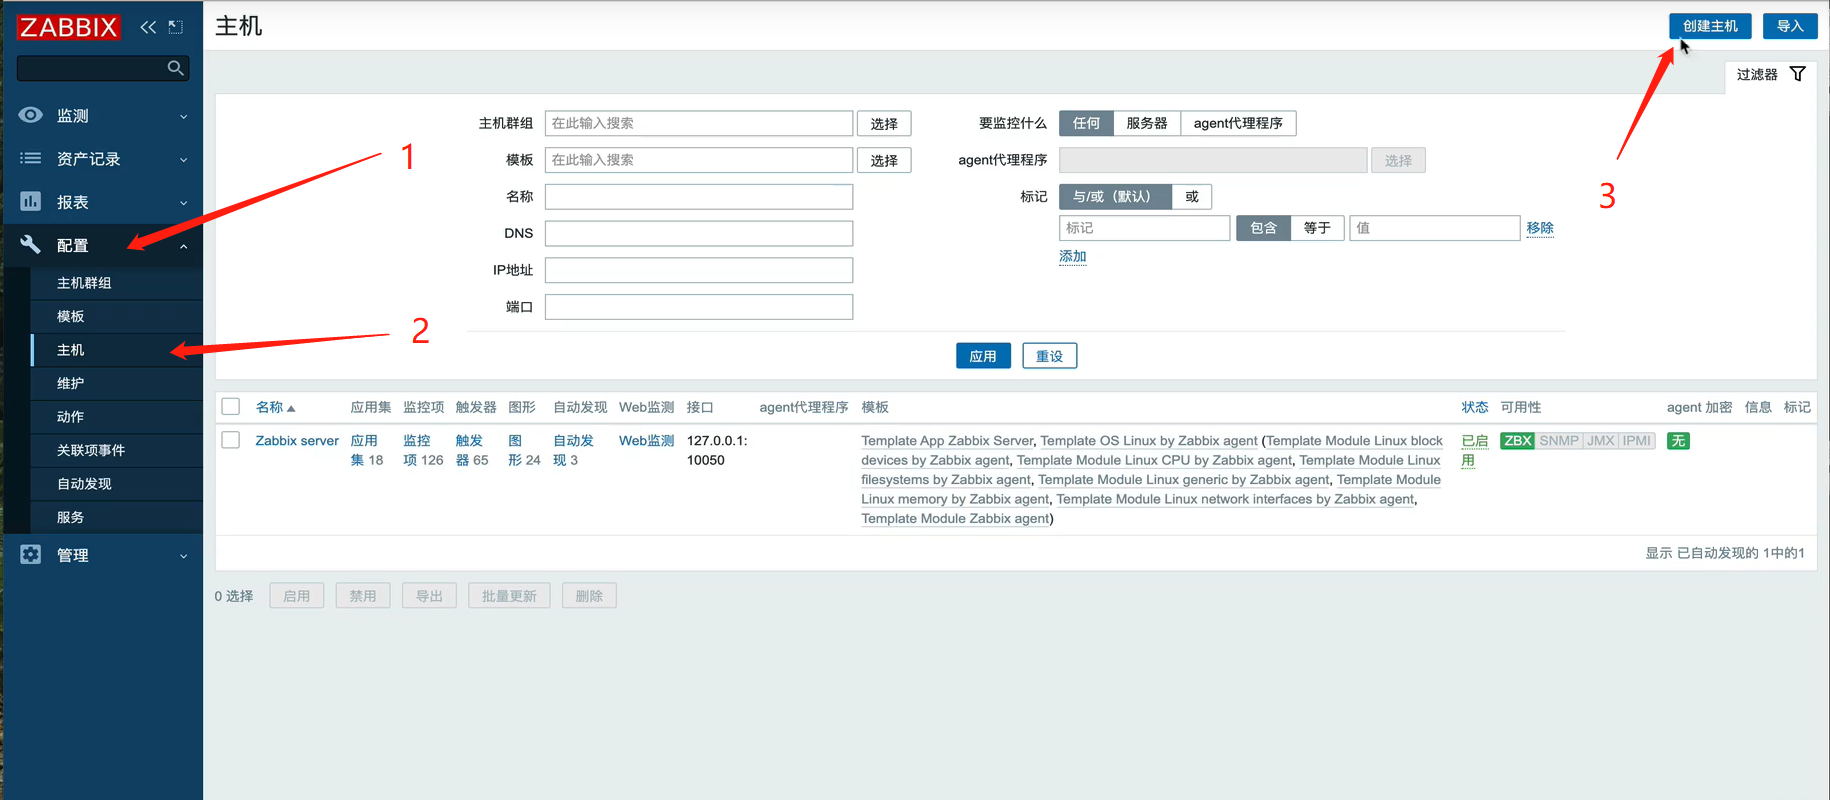
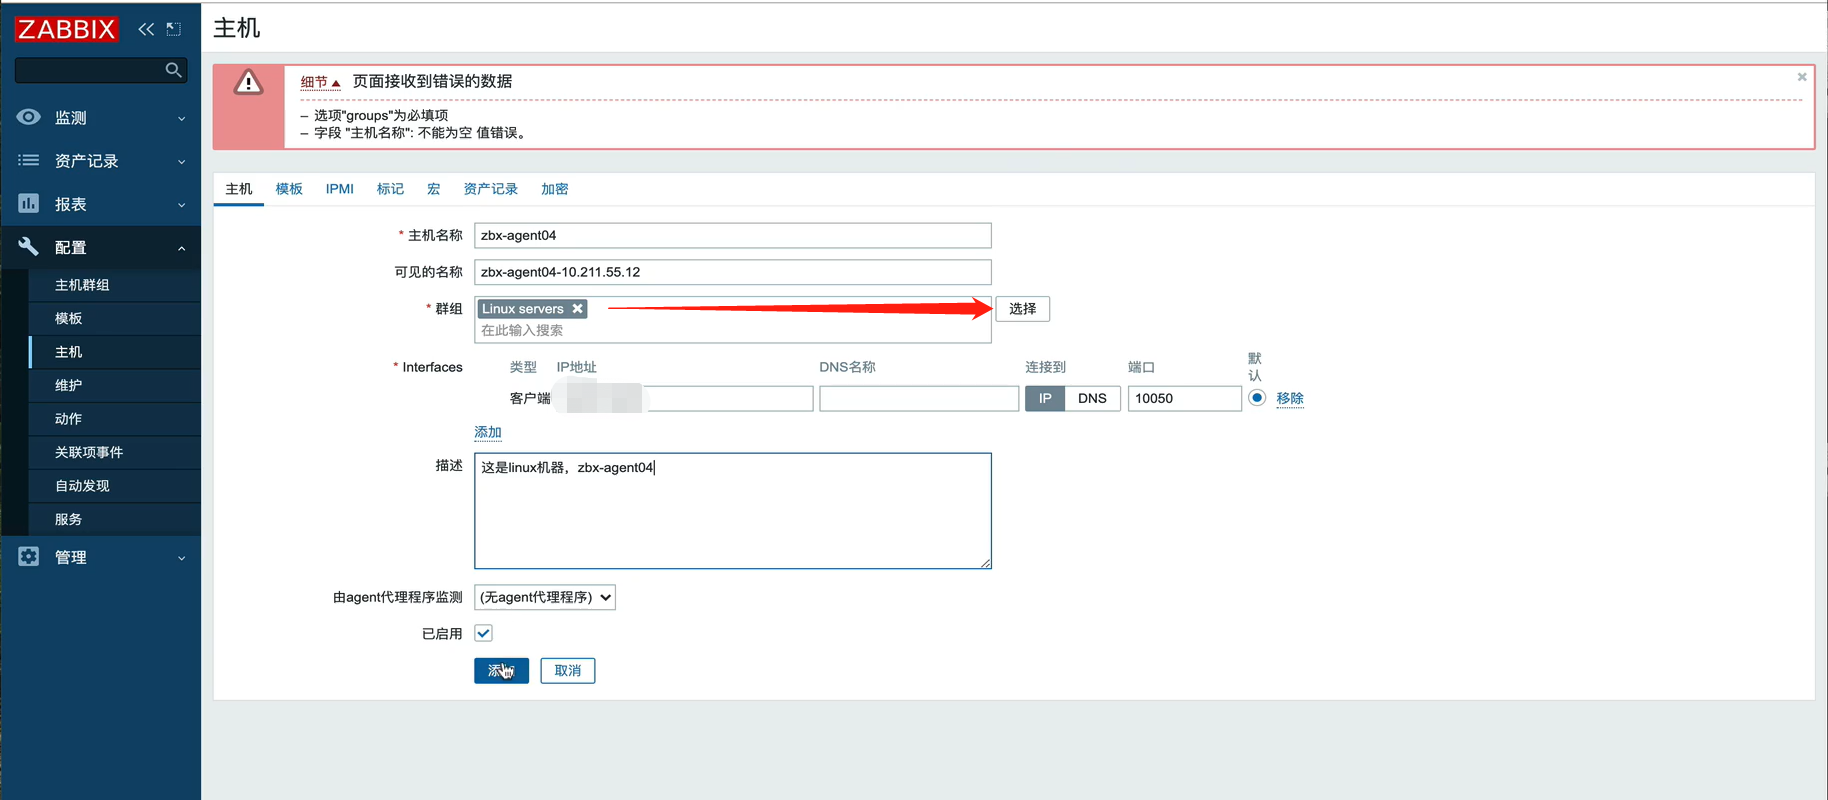
页面添加客户端机器
创建主机

自定义监控内容
自定义监控服务器登录的人数
需求:限制登录人数不超过三个,超过三个就发出报警信息
服务端验证连通性方式验证
命令行角度监控
1、明确需要执行的Linux命令
# who | wc -l		---可以查看有多少个连接用户

2、手动创建zabbix的配置文件。用于自定义key
2.1 配置文件的路径 /etc/zabbix/zabbix_agent2.conf
2.2 配置文件里有一个Userparameter,介绍了用法

3、创建配置文件。以及内容如下
[root@iZ2ze261ew0wzy5zenjh2xZ zabbix_agent2.d]# pwd
/etc/zabbix/zabbix_agent2.d
[root@iZ2ze261ew0wzy5zenjh2xZ zabbix_agent2.d]# vim userparameter_login.conf
[root@iZ2ze261ew0wzy5zenjh2xZ zabbix_agent2.d]# cat userparameter_login.conf
UserParameter=login.user,who|wc -l
4、重启一下
[root@iZ2ze261ew0wzy5zenjh2xZ zabbix_agent2.d]#systemctl restart zabbix-agent2
服务端验证
服务端验证连通性方式验证
# zabbix_get -s '客户端地址' -p 10050 -k 'login.user'
在页面添加zabbix-server的自定义监控项模板
添加流程:
- 创建模板
- 创建应用集(好比是一个文件夹,里面放入一堆监控项)
- 创建监控项,自定义item,具体监控的内容
- 创建触发器,当监控项获取到值的时候,进行和触发器比较,判断,决定是否报警
- 创建图形
- 将具体的主机和该模板链接,关联
---------是故无冥冥之志者----------
---------无昭昭之明----------
---------无惛惛之事者----------
---------无赫赫之功----------
本文来自博客园,作者:|是吴啊|,转载请注明原文链接:https://www.cnblogs.com/wuguofeng/p/14671130.html
