Elemnet-ui实现自定义上传图片
1.该组件是基于Element-ui与Vue实现的,主要运用到了Element-ui的Upload组件的几个钩子函数,其中按照element ui官网的说法,http-request 覆盖原默认的上传行为,可以自定义上传的实现。可进行删除,可预览
个人代码实现如下:html代码部分
 <div>
    <el-upload
      list-type="picture-card"
      :limit="1"
      action="#"
      :on-preview="handlePictureCardPreview"
      :file-list="fileList"
      :on-remove="handleRemove"
      :on-change="handleChange"
      :before-upload="beforeUpload"
      :http-request="upload"
      :class="{ isShowAddPicture : fileListCom }" //定义上传一个图片后,后面的+号不显示
    >
      <i class="el-icon-plus" />
    </el-upload>
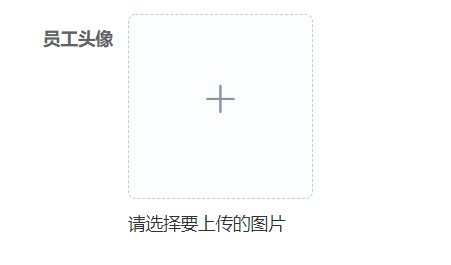
    <span>请选择要上传的图片</span>
    <el-progress v-if="showPercent" :percentage="percent" style="width:195px" />
    <el-dialog :visible.sync="showVisible" title="图片预览">
      <img :src="imageUrl" alt="" style="width:100%">
    </el-dialog>
  </div>
Js代码部分:其中用到了一个腾讯云服务的对象存储功能,
<script>
import Cos from 'cos-js-sdk-v5'
// 创建cos实例
const cos = new Cos({
  SecretId: 'AKIDsOhkW2JJ2VieJn34pKbcNs78uQghSxCC', // 身份ID
  SecretKey: 'lGVVFiuoSothFWWFjxwf8ML3VifMnytX' // 身份密钥
})

export default {
  data() {
    return {
      fileList: [],
      imageUrl: '',
      showVisible: false,
      currentFileUid: null, // 记录当前上传的图片
      percent: 0, // 图片上传的进度,
      showPercent: false
    }
  },
  computed: {
    fileListCom() {
      return this.fileList.length === 1
    }
  },
  created() {
  },
  methods: {
    // 文件预览
    handlePictureCardPreview(file) {
      console.log(file)
      this.imageUrl = file.url
      this.showVisible = true
    },
    // 文件删除
    // fileList是删除后返回的数组
    handleRemove(file, fileList) {
      // console.log(file)
      // console.log(fileList)
      // this.fileList = this.fileList.filter(item => item.uid !== file.uid) // 将删除后的文件排除在外
      this.fileList = fileList
    },
    // 文件上传
    handleChange(file, fileList) {
      // if (this.fileList.filter(item => item.uid === file.uid)) {`
      // }
      console.log(fileList.length)
      // ************把添加的图片显示
      this.fileList = fileList.map(item => item)
      // this.fileList = [...fileList]
    },
    // 文件上传前检查文件类型
    beforeUpload(file) {
      // console.log(file)
      // 先检查文件类型
      const imgType = ['image/webp', 'image/png', 'image/jpeg', 'image/jpg']
      if (!imgType.some(item => item === file.type)) {
      // if (!imgType.includes(file.type)) {
        // 如果不存在
        this.$message.error('请检查上传的图片格式是否为webp/png/jpeg/jpg格式')
        return false// 上传停止
      }
      // 其次检查文件大小,不能超过5M
      const maxSize = 5 * 1024 * 1024
      if (file.size > maxSize) {
        this.$message.error('上传的文件大小不能大于5M!')
        return false
      }
      this.currentFileUid = file.uid
      this.showPercent = true
      // console.log(this.currentFileUid)
      return true
    },
    // 上传图片动作
    upload(params) {
      // console.log(params)
      if (params.file) {
        cos.putObject({
          Bucket: 'wuniwei66-1306658544', // 配置自己腾讯云的存储桶
          Region: 'ap-guangzhou', // 地域
          Key: params.file.name, // 文件名
          Body: params.file, // 要上传的文件对象
          StorageClass: 'STANDARD', // 上传的模式类型 直接默认 标准模式即可
          // 上传到腾讯云 =》 哪个存储桶 哪个地域的存储桶 文件  格式  名称 回调
          onProgress: (params) => {
            console.log(params)
            this.percent = params.percent * 100
          }
        }, (error, data) => {
          console.log(error || data)
          if (!error && data.statusCode === 200) {
            // 如果为true,说明文件上传成功 fileList的数据的url变成现在上传成功的地址
            // 目前是一种图片,但是请注意 fileList是一个数组,需要知道当前上传的哪一张图片
            this.fileList = this.fileList.map(item => {
              console.log(item)
              if (item.uid === this.currentFileUid) {
                // 将成功的地址赋值给原来的url属性
                console.log(data.Location)
                return { url: 'http://' + data.Location, upload: true }
              }
              return item
            })
            // 将上传成功的地址 回写到fileList中 fileList的变化 =》upload组件就会根据fileList变化去渲染获取图片地址
            setTimeout(() => {
              // 1.关闭进度条
              // 2.进度条重置为0
              this.showPercent = false
              this.percent = 0
            }, 1000)
          }
        })
      }
    }
  }
}
</script>
<style lang="scss">
.isShowAddPicture {
.el-upload--picture-card {
display: none;
}
}
</style>>
具体实现效果如下:


总结:Vue中为了减少自己服务器的内存,可以通过第三方云服务器来存储地址,把图片的地址存到自己的服务器上,这个案例是用element-ui组件库中的upload组件上传到了我自己的腾讯云里面,
第一步先下载包cos-js-sdk-v5
第二步的话要创建Cos实例
const COS = require('cos-js-sdk-v5')
// 填写自己腾讯云cos中的key和id (密钥)
const cos = new COS({
  SecretId: 'AKIDWLuDHAsKxQecJlvmQIJsAB0a9RrwqbeR', // 身份识别ID
  SecretKey: 'xxx' // 身份秘钥
})
具体实现步骤:可查阅文档 :https://cloud.tencent.com/document/product/436/38484
只是针对于elment-ui组件库有效,如果使用其他的组件库,需要做更改


