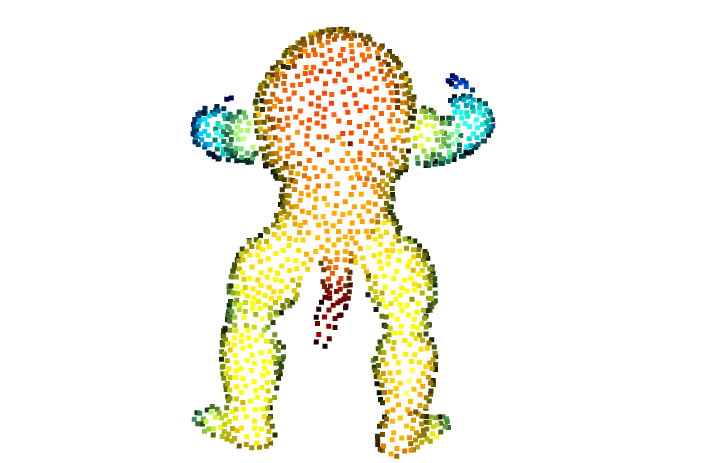
Geometry模块之Point Cloud
1 点云可视化
关于点云·可视化,Open3D 专门设置了一个 Visualization 大的模块来进行细致讲解(以后再研究)
这里只是进行最简单的点云数据展示,不进行别的任何操作
- 点云文件可视化就要调用
draw_geometries()函数,函数源码如下:
def draw_geometries(*args, **kwargs): # real signature unknown; restored from __doc__
    """
    draw_geometries(*args, **kwargs)
    Overloaded function.


    1. draw_geometries(geometry_list, window_name='Open3D', width=1920, height=1080, left=50, top=50, point_show_normal=False, mesh_show_wireframe=False, mesh_show_back_face=False)
        Function to draw a list of geometry.Geometry objects

    Args:
        geometry_list (List[open3d.geometry.Geometry]): List of geometries to be visualized.
        window_name (str, optional, default='Open3D'): The displayed title of the visualization window.
        width (int, optional, default=1920): The width of the visualization window.
        height (int, optional, default=1080): The height of the visualization window.
        left (int, optional, default=50): The left margin of the visualization window.
        top (int, optional, default=50): The top margin of the visualization window.
        point_show_normal (bool, optional, default=False): Visualize point normals if set to true.
        mesh_show_wireframe (bool, optional, default=False): Visualize mesh wireframe if set to true.
        mesh_show_back_face (bool, optional, default=False): Visualize also the back face of the mesh triangles.
        lookat (numpy.ndarray[numpy.float64[3, 1]]): The lookat vector of the camera.
        up (numpy.ndarray[numpy.float64[3, 1]]): The up vector of the camera.
        front (numpy.ndarray[numpy.float64[3, 1]]): The front vector of the camera.
        zoom (float): The zoom of the camera.

    Returns:
        None
参数解释:
geometry_list:要进行显示的点云数据列表,必须为Geometry格式的对象(即正确读取后的那个对象)window_name:顾名思义,点云显示之后窗体的标题名称width、heigth:显示点云的窗体的宽度、高度left、top:点云显示区域距离窗体左边、上边的边距point_show_normal:默认为False,设置为True,则会显示每一个点的法线mesh_show_wireframe:默认为False,设置为True,则会显示网格数据的线框mesh_show_back_face:默认为False,设置为True,则会显示网格数据的背景lookat:相机的方向矢量,数据格式为numpy类型的 三个float数据,可以不指定up:相机的上矢量,数据格式为numpy类型的 三个float数据,可以不指定front:相机的前矢量,数据格式为numpy类型的 三个float数据,可以不指定zoom:相机镜头的缩放比例,数据格式为一个float类型的数据,可以不指定
返回值:None
- 点云可视化代码示例
import open3d as o3d
import numpy as np

file = "../data/ArmadilloMesh.ply"
pcd_file = o3d.io.read_triangle_mesh(file)

# 点云可视化
o3d.visualization.draw_geometries(
    [pcd_file],
    window_name='我的PCD文件',
    width=1280,
    height=720,
    left=50,
    top=50,
    point_show_normal=False,
    mesh_show_wireframe=False,
    mesh_show_back_face=False,
    zoom=0.3412,
    front=[0.4257, -0.2125, -0.8795],
    lookat=[2.6172, 2.0475, 1.532],
    up=[-0.0694, -0.9768, 0.2024]
)
不设置相机参数的情况下,默认显示如下: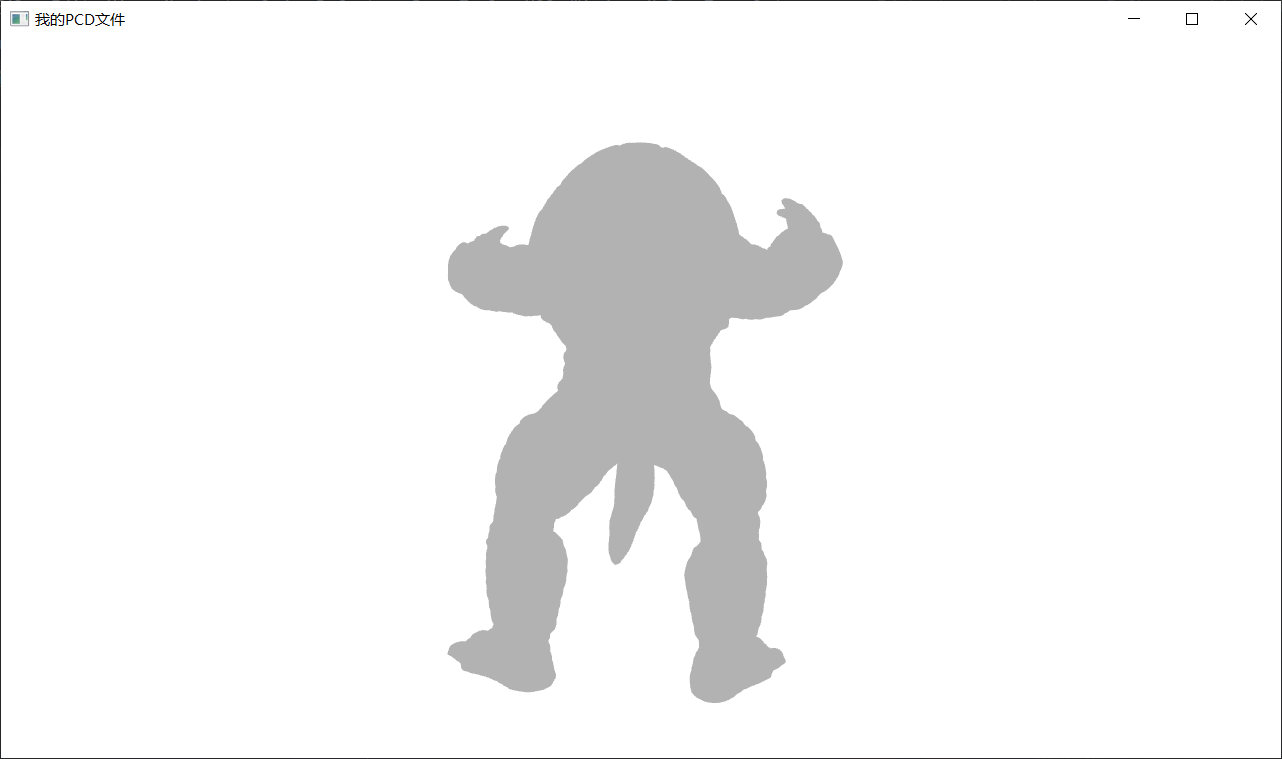
设置了相机参数的情况下: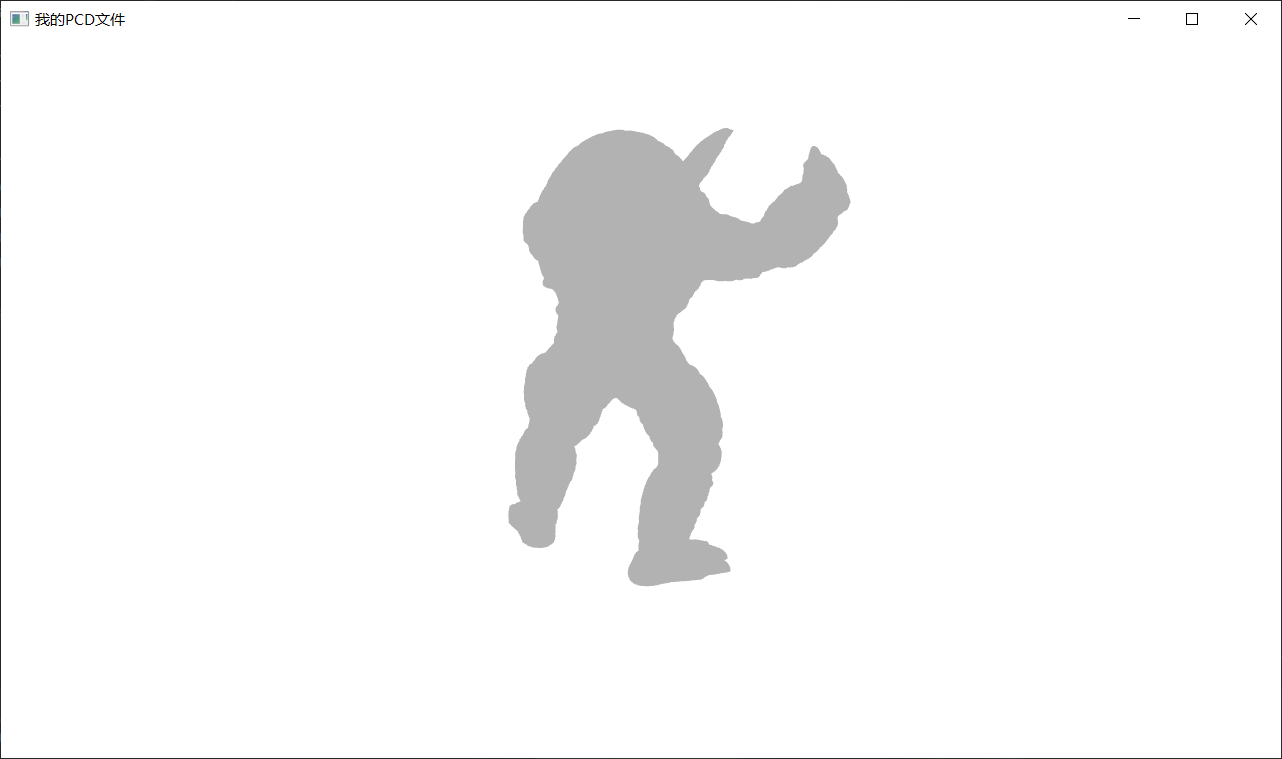
如果读取的是点云文件,那么可以设置显示法向量 point_show_normal=True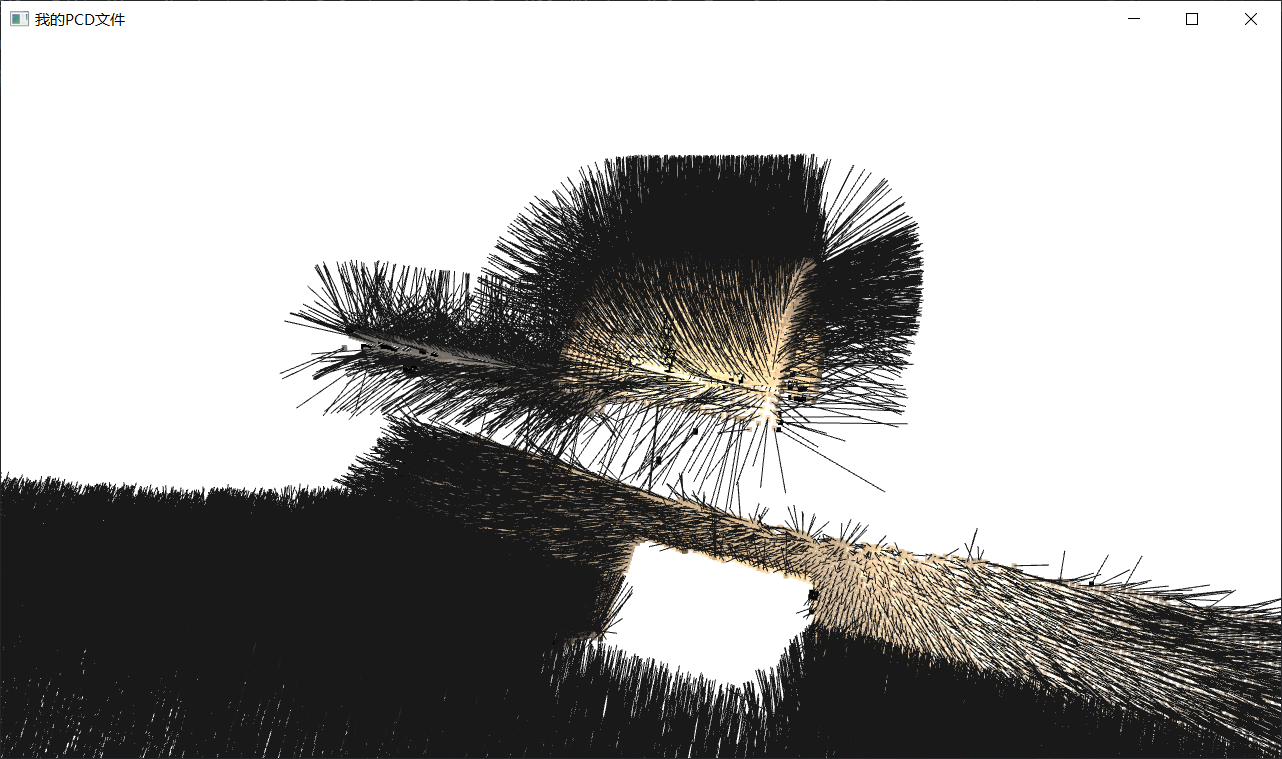
如果是网格文件,那么可以设置显示网格边框 mesh_show_wireframe=True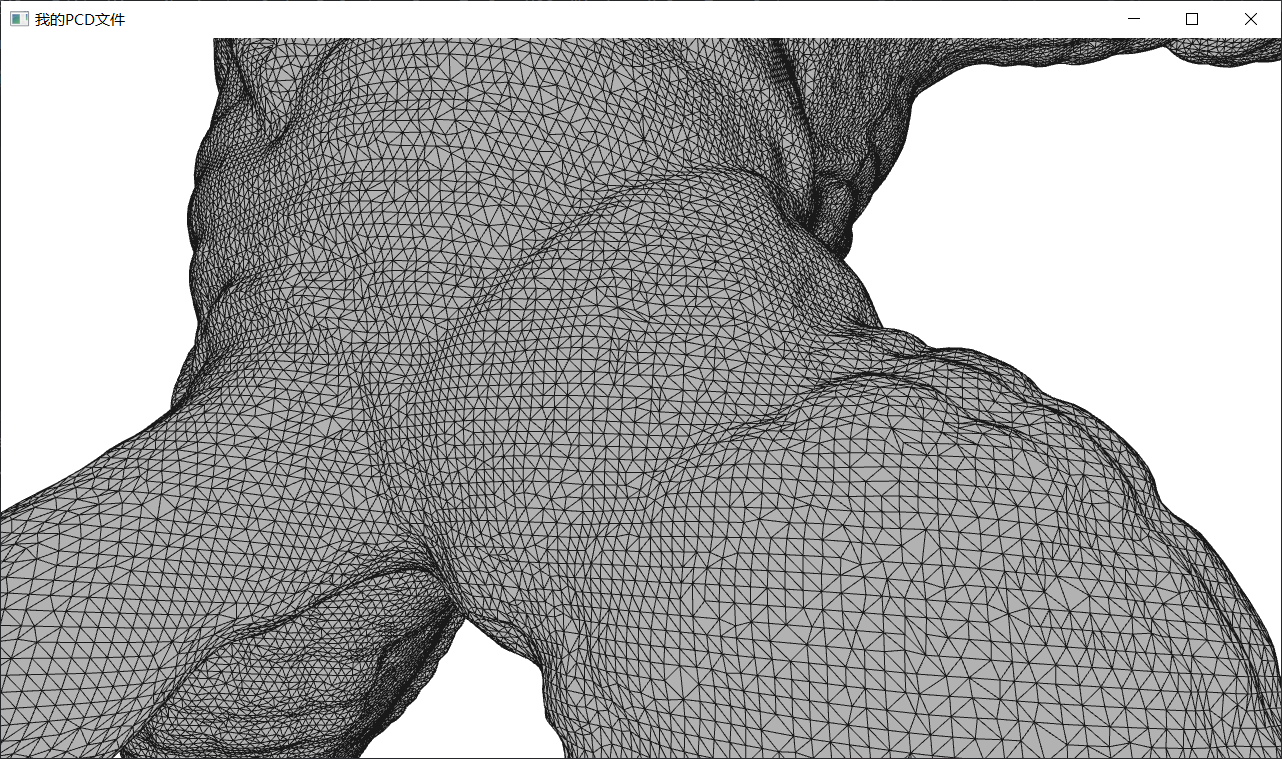
2 体素降采样
- 体素降采样是使用常规的体素网格从输入点云创建而出的统一下采样点云,它通常是许多点云处理任务的预处理步骤,该过程分为两步:
- 点被打包成体素
- 每个被占用的体素通过平均内部的所有点,进而生成为一个点
- 该功能通过调用
voxel_down_sample()函数实现,函数源码如下:
def voxel_down_sample(self, voxel_size):
    """
    voxel_down_sample(self, voxel_size)
    Function to downsample input pointcloud into output pointcloud with a voxel. Normals and colors are averaged if they exist.

    Args:
        voxel_size (float): Voxel size to downsample into.

    Returns:
        open3d.geometry.PointCloud
    """
    pass
参数只有一个:voxel_size:缩减采样的尺寸缩减比例,数据为 float类型。数值越小,保留的原始信息越多
返回值:返回一个 PointCloud对象
- 提速采样代码示例
file = "../data/fragment.pcd"
pcd_file = o3d.io.read_point_cloud(file)

# 体素降采样
downpcd = pcd_file.voxel_down_sample(voxel_size=0.0364)

# 点云可视化
o3d.visualization.draw_geometries(
    [downpcd],
    zoom=0.8541,
    front=[0.4257, 0.2125, 0.8795],
    lookat=[2.6172, 2.0475, 1.532],
    up=[0.0694, 0.9768, 0.2024]
)
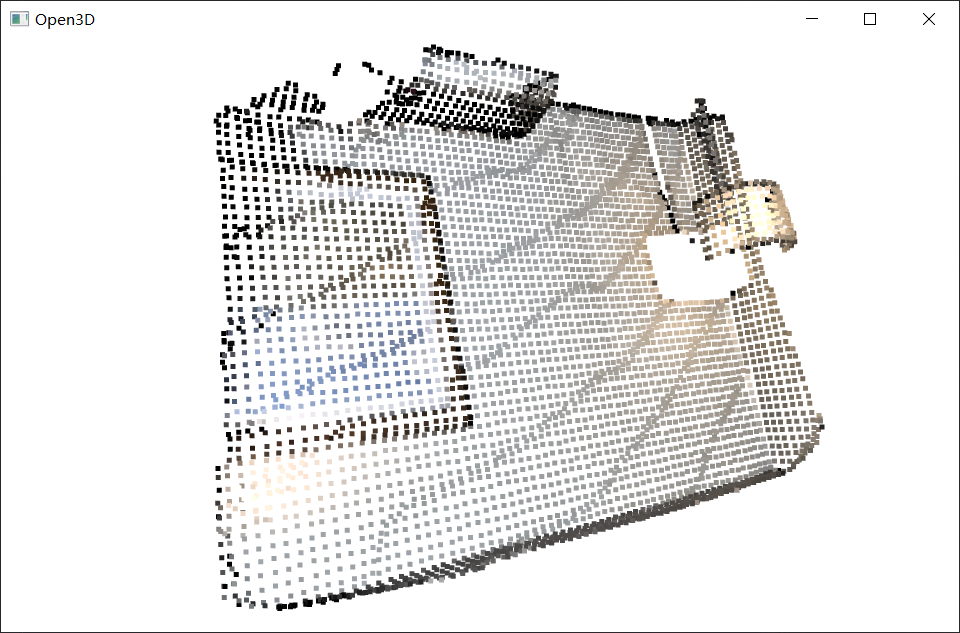
3 顶点法线估计
- 对点云数据进行降采样之后,可以进行顶点处的法线估计
- 调用
estimate_normals()来实现,该函数查找相邻点并使用协方差分析计算相邻点的主轴。函数源码如下:
    def estimate_normals(self, max_nn=30, radius=None):
        """
        estimate_normals(self, max_nn=30, radius=None)
        Function to estimate point normals. If the pointcloud normals exists, the estimated normals are oriented with respect to the same. It uses KNN search if only max_nn parameter is provided, and HybridSearch if radius parameter is also provided.

        Args:
            max_nn (int, optional, default=30): NeighbourSearch max neighbours parameter [default = 30].
            radius (Optional[float], optional, default=None): [optional] NeighbourSearch radius parameter to use HybridSearch. [Recommended ~1.4x voxel size].

        Returns:
            None
        """
        pass
函数参数解释:
max_nn:邻近搜索时的最大邻近参数,默认为30radius:使用混合型搜索时的邻近搜索半径,默认为None
返回值:None
- 顶点法线估计代码示例
file = "data/fragment.pcd"
pcd_file = o3d.io.read_point_cloud(file)

# 体素降采样
downpcd = pcd_file.voxel_down_sample(voxel_size=0.0564)

# 顶点法线估计
downpcd.estimate_normals (
    search_param = o3d.geometry.KDTreeSearchParamHybrid(radius=0.1, max_nn=30)
)

# 点云可视化
o3d.visualization.draw_geometries(
    [downpcd],
    zoom=0.8541,
    front=[0.4257, 0.2125, 0.8795],
    lookat=[2.6172, 2.0475, 1.532],
    up=[0.0694, 0.9768, 0.2024],
    point_show_normal=True
)
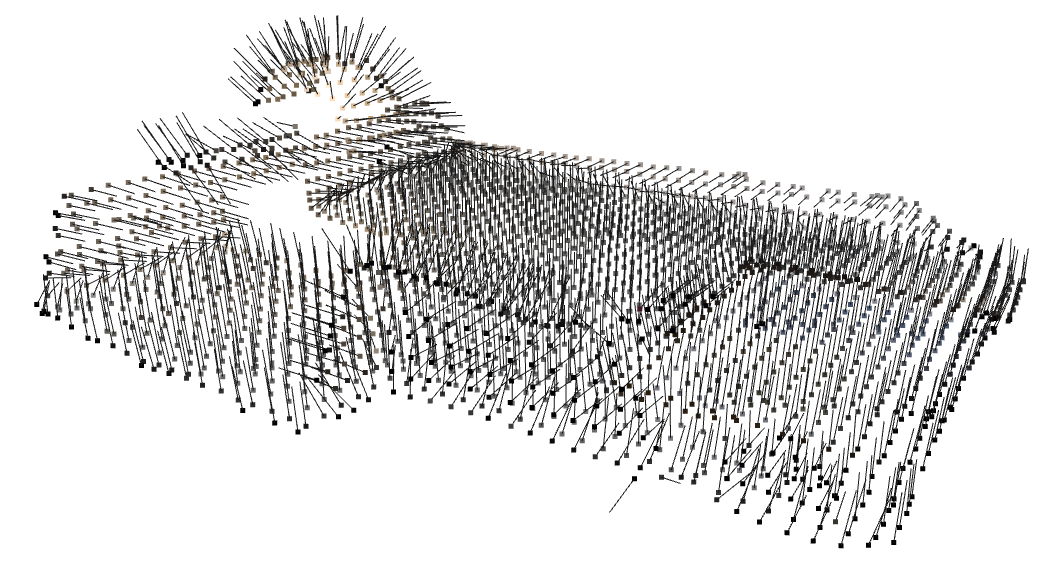
4 访问估计的顶点法线
- 上一标题中,我们将顶点的法线估计了出来,现在可以通过列表索引的方式进行每个顶点法线的访问
file = "data/fragment.pcd"
pcd_file = o3d.io.read_point_cloud(file)

# 体素降采样
downpcd = pcd_file.voxel_down_sample(voxel_size=0.0564)

# 顶点法线估计
downpcd.estimate_normals (
    search_param = o3d.geometry.KDTreeSearchParamHybrid(radius=0.1, max_nn=30)
)

# 访问估计的顶点法线
print(downpcd.normals[0])    # [-0.04518796  0.9974618  -0.0550273 ]
file = "data/fragment.pcd"
pcd_file = o3d.io.read_point_cloud(file)

# 体素降采样
downpcd = pcd_file.voxel_down_sample(voxel_size=0.0564)

# 顶点法线估计
downpcd.estimate_normals (
    search_param = o3d.geometry.KDTreeSearchParamHybrid(radius=0.1, max_nn=30)
)

# 访问估计的顶点法线,转为 numpy 数组
print(np.asarray(downpcd.normals)[4:10])

# [[ 0.04829902  0.25583394 -0.96551344]
#  [ 0.01789116  0.08861941 -0.99590487]
#  [ 0.03432426 -0.9952495  -0.09110588]
#  [ 0.99950422 -0.01411585  0.02814342]
#  [ 0.02683828  0.99765903  0.06289813]
#  [-0.19932052  0.00900625 -0.97989296]]
5 裁剪点云
- 裁剪点云可以调用
read_selection_polygon_volume()和crop_point_cloud()来完成 read_selection_polygon_volume()函数解释
def read_selection_polygon_volume(filename):
    """
    read_selection_polygon_volume(filename)
    Function to read SelectionPolygonVolume from file

    Args:
        filename (str): The file path.

    Returns:
        open3d.visualization.SelectionPolygonVolume
    """
    pass
函数参数:它的参数只有一个,是一个 json格式的裁剪盒文件(crop.json),文件具体内容如下所示(这也是点云裁剪的核心文件)
返回值: open3d.visualization.SelectionPolygonVolume,一个点云的裁剪对象 SelectionPolygonVolume
crop.json内容解释
{
	"axis_max" : 57.71400452,
	"axis_min" : -57.71451569,
	"bounding_polygon" :
	[
      [-4.305984, 5.784946, 0.0],
      [-53.28232, -52.039658, 0.0],
      [34.625401, -52.534321, 0.0]
	],
	"class_name" : "SelectionPolygonVolume",
	"orthogonal_axis" : "Z",
	"version_major" : 1,
	"version_minor" : 0
}
crop.josn文件具体参数解释:
axis_max、axis_min:这两个参数是指定的裁剪轴的最大值、最小值bounding_polygon:这就是裁剪盒子的范围指定数组- 以哪个坐标轴为指定裁剪轴,就将哪个轴上的坐标归零(这里以 Z 轴为裁剪轴,那么点的 Z 轴数值全部为 0)
- 当指定轴数值变为 0 时,此时的点就变成了一条直线
- 多条直线相交之下就会形成一个平面
- 这个平面到指定轴最大、最小边界之间的范围,就是裁剪区域
- 至于裁剪区域的具体点云数据坐标,可以通过
CloudCompare软件来获取
class_name:这个就是 Open3D 中指定的裁剪对象,是一个名为SelectionPolygonVolume的裁剪类,名称不能改变,否则json文件读取会出错orthogonal_axis:指定的裁剪轴,字母为大写version_major、version_mirror:应该与版本有关,这个必须固定为 1、0,否则json文件读取会出错
- 明白了裁剪范围的
json文件,接下来就简单了,直接调用crop_point_cloud()函数进行裁剪就行了 crop_point_cloud()函数源码解释
def crop_point_cloud(self, input):
    """
    crop_point_cloud(self, input)
    Function to crop point cloud.

    Args:
        input (open3d.geometry.PointCloud): The input point cloud.

    Returns:
        open3d.geometry.PointCloud
    """
    pass
参数只有一个,就是要裁剪的点云对象本身
返回值是一个裁剪之后的点云对象 open3d.geometry.PointCloud
- 裁剪点云代码示例
# 获取指定轴的最大最小值
def get_max_and_min(file_path: str, axios: str) -> None:
    ply_file = o3d.io.read_point_cloud(file_path, format='ply')
    points = np.asarray(ply_file.points)
    res = []
    if axios == "X":
        temp = [np.round(point[0], 8) for point in points]
        res.append(max(temp))
        res.append(min(temp))
    elif axios == "Y":
        temp = [np.round(point[1], 8) for point in points]
        res.append(max(temp))
        res.append(min(temp))
    else:
        temp = [np.round(point[2], 8) for point in points]
        res.append(max(temp))
        res.append(min(temp))
    print("{0}轴的最大值为:{1}\t最小值为:{2}".format(axios, res[0], res[1]))


# 读取、裁剪、可视化
def read_crop_visual(file_path: str, json_path: str) -> None:
    # 读取点云文件
    ply = o3d.io.read_point_cloud(file_path, 'ply')
    # 配置 crop.json 文件
    vol = o3d.visualization.read_selection_polygon_volume(json_path)
    # 进行裁剪
    cut = vol.crop_point_cloud(ply)
    # 裁剪后可视化
    o3d.visualization.draw_geometries(
        [cut],
        width=1280,
        height=720,
        zoom=0.7,
        front=[0.5439, -0.2333, -0.8060],
        lookat=[2.4615, 2.1331, 1.338],
        up=[-0.1781, -0.9708, 0.1608]
    )


if __name__ == '__main__':
    file_path = "data/ArmadilloMesh.ply"
    json_path = "help/crop.json"
    axios = "Z"
    # get_max_and_min(file_path, axios)
    read_crop_visual(file_path, json_path)
在该例子中,我们只取了三个点坐标,以 Z 轴为指定裁剪轴,裁剪区域就是如下图所示的,三角形平面与外包围盒构成的空间范围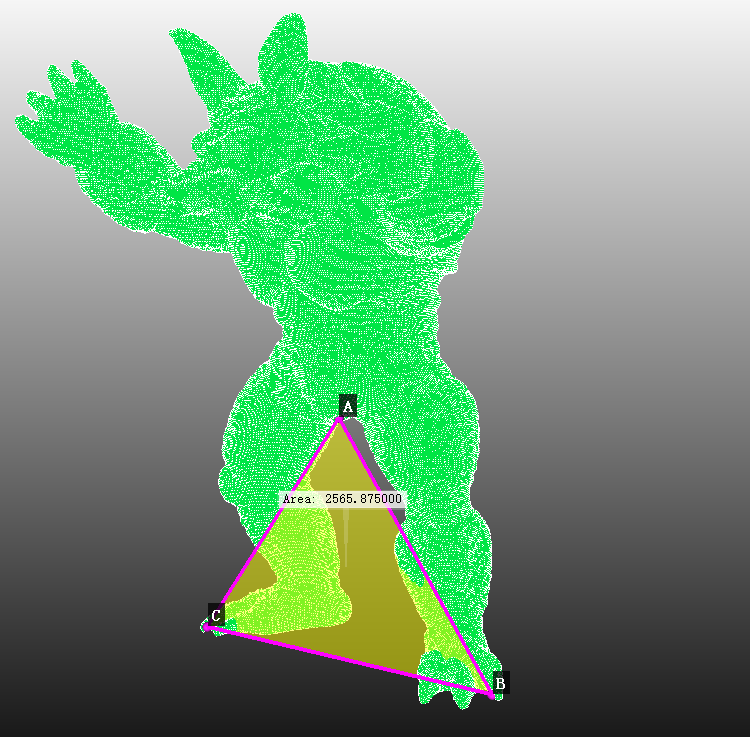
裁剪之后的点云样子如下: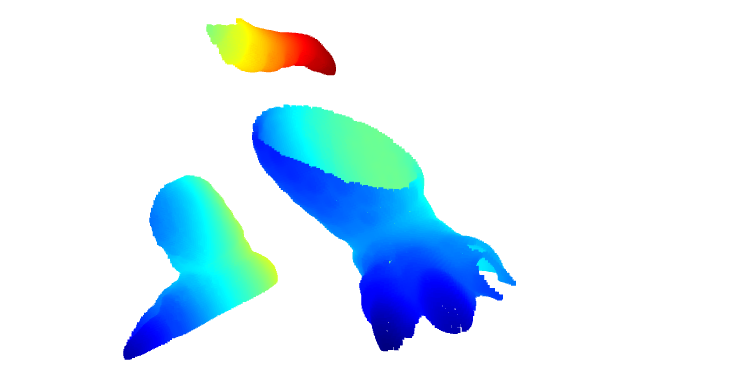
6 点云均匀染色
- 点云染色调用
paint_uniform_color()即可实现
def paint_uniform_color(self, color):
    """
    paint_uniform_color(self, color)
    Assigns each point in the PointCloud the same color.

    Args:
        color (numpy.ndarray[numpy.float64[3, 1]]): RGB color for the PointCloud.

    Returns:
        open3d.geometry.PointCloud
    """
    pass
参数只有一个,就是颜色的 RGB 组成,颜色的数据类型为 numpy.ndarray格式的 float64,取值范围 [0,1]
返回值是点云对象 open3d.geometry.PointCloud
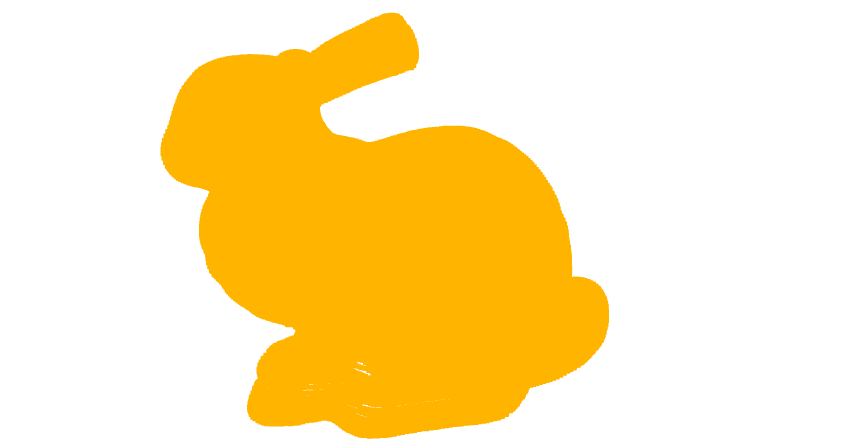
- 点云均匀染色,代码示例
file = "data/BunnyMesh.ply"
ply = o3d.io.read_point_cloud(file, 'ply')

# 点云染色
ply.paint_uniform_color([1,0.706,0])

o3d.visualization.draw_geometries([ply],width=1280,height=720)
7 计算点云距离
- Open3D 提供了
compute_point_cloud_distance方法来计算 从源点云到目标点云的距离 - 它是源点云中的每个点到目标点云中最近点的距离
- 该函数的源码如下
def compute_point_cloud_distance(self, target): # real signature unknown; restored from __doc__
    """
    compute_point_cloud_distance(self, target)
    For each point in the source point cloud, compute the distance to the target point cloud.

    Args:
        target (open3d.geometry.PointCloud): The target point cloud.

    Returns:
        open3d.utility.DoubleVector
    """
    pass
参数只有一个:要进行距离计算的目标点云对象 Pointloud
返回值:一个双精度向量 DoubleVector对象
- 计算点云距离,代码示例
file = "data/ArmadilloMesh.ply"
json_path = "help/crop.json"

# 读取点云文件
ply = o3d.io.read_point_cloud(file, 'ply')
# 配置 crop.json 文件
vol = o3d.visualization.read_selection_polygon_volume(json_path)
# 进行裁剪
foot = vol.crop_point_cloud(ply)

# 计算原始点云中每个点到目标点云最近邻点的距离
dist_list = ply.compute_point_cloud_distance(foot)
dists = np.asarray(dist_list)
print("前五个近邻点的距离为:", dist_list[:5])

# 从计算出的所有距离中,选择出距离大于固定距离的点,并保留
ind = np.where(dists > 12)[0]
# 根据上面的距离条件从源点云中保留符合条件的点云
ply_without_foot = ply.select_by_index(ind)

# 可视化
o3d.visualization.draw_geometries([ply_without_foot], width=1280, height=720)
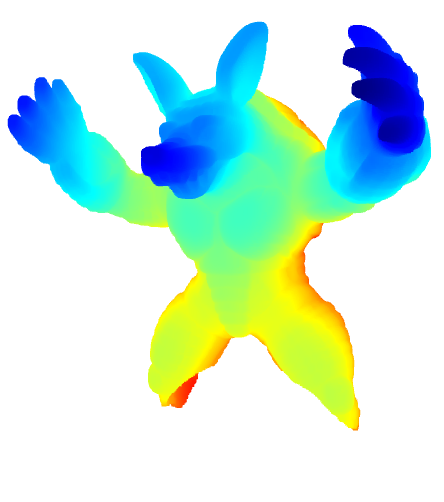
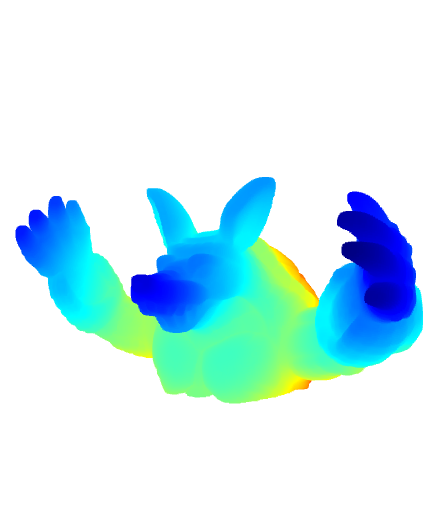
- 根据研究,计算出所有点离目标点云的最近邻点距离后,根据
np.where中保留距离的不同,可以很清楚的观察到不同距离下点云保留的形状特征
当保留的距离为 0.01、12、45时,保留的点云形态如下(从左到右依次为 0.01、12、45):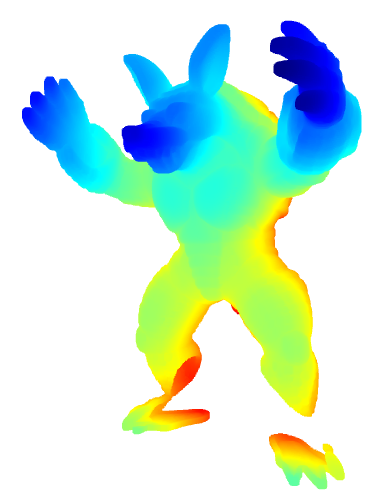
8 点云包围盒
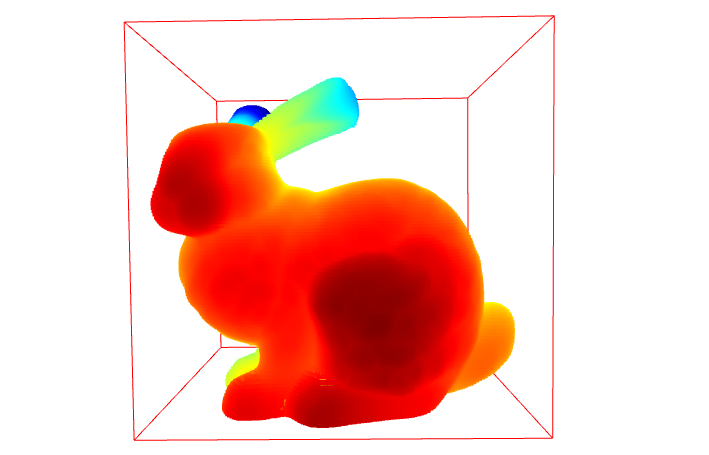
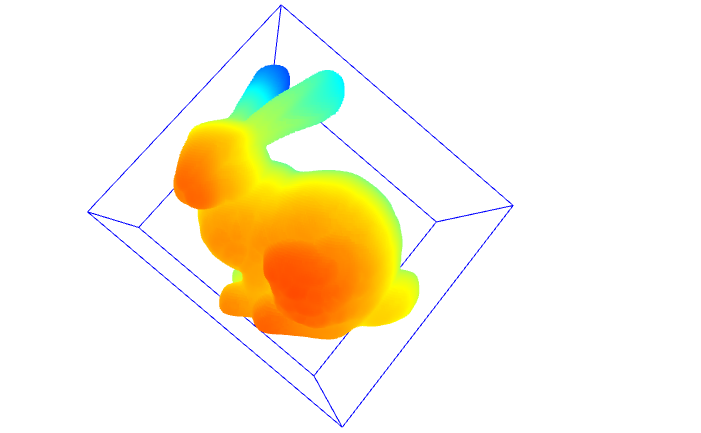
- 点云的包围盒一般分为两种:轴对齐包围盒、定向包围盒
- 两种包围盒均有与之对应的计算函数,分别为
- 轴对齐包围盒:
get_axis_aligned_bounding_box() - 定向包围盒:
get_oriented_bounding_box()
- 轴对齐包围盒的函数源码如下
def get_axis_aligned_bounding_box(self):
    """
    get_axis_aligned_bounding_box(self)
    Returns an axis-aligned bounding box of the geometry.

    Returns:
        open3d.geometry.AxisAlignedBoundingBox
    """
    pass
不需要参数,调用之后会返回一个轴对齐包围盒的对象 AxisAlignedBoundingBox
- 轴对齐包围盒,代码示例
rabbit = "data/BunnyMesh.ply"

# 读取点云文件
ply = o3d.io.read_point_cloud(rabbit, 'ply')

# 计算轴对齐包围盒
box_axis = ply.get_axis_aligned_bounding_box()
box_axis.color = (1,0,0)

# 可视化
o3d.visualization.draw_geometries([ply, box_axis], width=960, height=540)
- 定向包围盒的函数源码如下
def get_oriented_bounding_box(self, robust=False):
    """
    get_oriented_bounding_box(self: open3d.cpu.pybind.geometry.Geometry3D, robust: bool = False) -> open3d::geometry::OrientedBoundingBox


    Returns the oriented bounding box for the geometry.

    Computes the oriented bounding box based on the PCA of the convex hull.
    The returned bounding box is an approximation to the minimal bounding box.

    Args:
         robust (bool): If set to true uses a more robust method which works in
              degenerate cases but introduces noise to the points coordinates.

    Returns:
         open3d.geometry.OrientedBoundingBox: The oriented bounding box. The
         bounding box is oriented such that the axes are ordered with respect to
         the principal components.
    """
    pass
参数解释:robust:默认为 False,若设置为 True,会使用更稳定的包围盒算法,但是可能会引入噪声点
返回值:一个定向包围盒对象 OrientedBoundingBox
- 定向包围盒,代码示例
rabbit = "data/BunnyMesh.ply"

# 读取点云文件
ply = o3d.io.read_point_cloud(rabbit, 'ply')

# 计算定向包围盒
box_oriented = ply.get_oriented_bounding_box()
box_oriented.color = (0,0,1)

# 可视化
o3d.visualization.draw_geometries([ply, box_axis], width=960, height=540)
9 计算点云凸包
- 点云的凸包是包含所有点的最小凸集
- Open3D 包含了计算凸包的方法,基于Qhull 实现
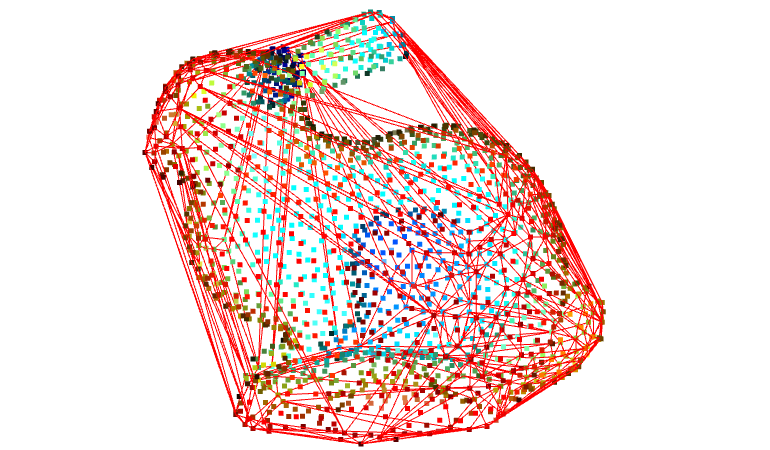
- 在下面的示例代码中,我们首先从网格中采样一个点云,然后计算作为三角形网格返回的凸包
- 然后,我们将凸包形象化为一个红色的线集
- 要实现计算凸包的功能,要依次调用四个函数
- 首先要调用函数
compute_vertex_normals(),计算出点云对象的顶点法线
def compute_vertex_normals(self, normalized=True):
    """
    compute_vertex_normals(self, normalized=True)
    Function to compute vertex normals, usually called before rendering

    Args:
        normalized (bool, optional, default=True)

    Returns:
        open3d.geometry.TriangleMesh
    """
    pass
一般情况下直接调用该函数,不用传参
参数只有一个 normalized,默认为 True,起到规范化的作用?
返回值是三角网格对象 TriangleMesh
- 然后调用函数
sample_points_poisson_disk()进行泊松盘采样,得到均匀分布的采样点集
def sample_points_poisson_disk(self, number_of_points, init_factor=5, pcl=None, use_triangle_normal=False, seed=-1):
    """
    sample_points_poisson_disk(self, number_of_points, init_factor=5, pcl=None, use_triangle_normal=False, seed=-1)
    Function to sample points from the mesh, where each point has approximately the same distance to the neighbouring points (blue noise). Method is based on Yuksel, "Sample Elimination for Generating Poisson Disk Sample Sets", EUROGRAPHICS, 2015.

    Args:
        number_of_points (int): Number of points that should be sampled.
        init_factor (float, optional, default=5): Factor for the initial uniformly sampled PointCloud. This init PointCloud is used for sample elimination.
        pcl (open3d.geometry.PointCloud, optional, default=None): Initial PointCloud that is used for sample elimination. If this parameter is provided the init_factor is ignored.
        use_triangle_normal (bool, optional, default=False): If True assigns the triangle normals instead of the interpolated vertex normals to the returned points. The triangle normals will be computed and added to the mesh if necessary.
        seed (int, optional, default=-1): Seed value used in the random generator, set to -1 to use a random seed value with each function call.

    Returns:
        open3d.geometry.PointCloud
    """
    pass
参数解释:
number_of_points:需要进行泊松盘采样的点数量init_factor:默认为5,初始均匀采样点云的因子,这些初始化的PointCloud对象用于样本消除pcl:默认为None,用于样本消除的初始PointCloud对象,如果提供了此参数,则会忽略init_factor参数use_triangle_normal:默认为False,如果为True,则会为返回的点分配三角形法线,而非插值顶点法线seed:默认为-1,用于在随机生成器中使用的种子值,设置为-1,将会在每次函数调用中使用随机种子值
返回值为点云对象 PointCloud
- 再调用
compute_convex_hull()计算三角网格的凸包
def compute_convex_hull(self):
    """
    compute_convex_hull(self)
    Computes the convex hull of the triangle mesh.

    Returns:
        Tuple[open3d.geometry.TriangleMesh, List[int]]
    """
    pass
该函数无参数
返回值为一个元祖对象,包含三角网格对象 TriangleMesh和点集列表
- 最后使用
create_from_triangle_mesh()从三角网格中创建对应的凸包边集
def create_from_triangle_mesh(self, mesh):
    """
    create_from_triangle_mesh(mesh)
    Factory function to create a LineSet from edges of a triangle mesh.

    Args:
        mesh (open3d.geometry.TriangleMesh): The input triangle mesh.

    Returns:
        open3d.geometry.LineSet
    """
    pass
参数只有一个,要进行凸包边集计算的三角网格对象 TriangleMesh
返回值为凸包边集对象 LineSet
- 计算点云凸包,代码示例
rabbit = "data/BunnyMesh.ply"

# 读取点云文件
mesh = o3d.io.read_triangle_mesh(rabbit)

# 计算法向量
mesh.compute_vertex_normals()

# 使用泊松盘采样进行点云采样,该采样方式可以使点均匀分布
pcl = mesh.sample_points_poisson_disk(number_of_points=1800)

# 计算凸包的三角网格
hull, _ = pcl.compute_convex_hull()

# 从三角网格中创建对应的凸包边集
hull_ls = o3d.geometry.LineSet.create_from_triangle_mesh(hull)

# 线集上色
hull_ls.paint_uniform_color((1,0,0))

# 可视化
o3d.visualization.draw_geometries([pcl, hull_ls], width=960, height=540)
10 分割几何图元支持面
- 要在点云中找到具有最大支持的平面,可以调用
segement_plane()函数来实现
def segment_plane(self, distance_threshold, ransac_n, num_iterations, seed=None):
    """
    segment_plane(self, distance_threshold, ransac_n, num_iterations, seed=None)
    Segments a plane in the point cloud using the RANSAC algorithm.

    Args:
        distance_threshold (float): Max distance a point can be from the plane model, and still be considered an inlier.
        ransac_n (int): Number of initial points to be considered inliers in each iteration.
        num_iterations (int): Number of iterations.
        seed (Optional[int], optional, default=None): Seed value used in the random generator, set to None to use a random seed value with each function call.

    Returns:
        Tuple[numpy.ndarray[numpy.float64[4, 1]], List[int]]
    """
    pass
参数解释:
distance_threshold: 定义一个点到一个估计平面的最大距离,该点可被视为一个不规则点ransac_n:定义随机采样的点数以估计一个平面num_iterations:定义对随机平面进行采样和验证的频率seed:默认为None,用于在随机生成器中使用的种子值,设置为None,将会在每次函数调用中使用随机种子值
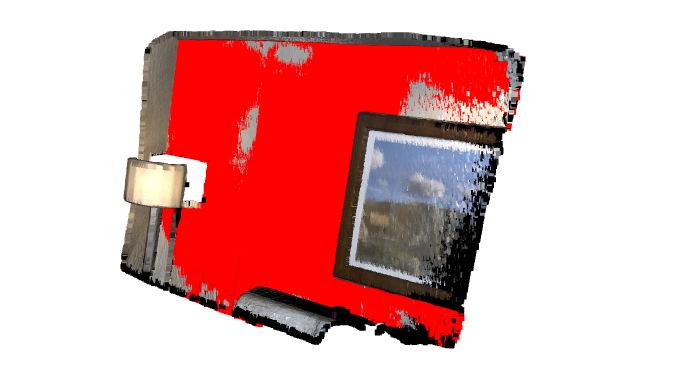
函数返回值为一个元祖,其包含了四个 float类型的平面方程参数 (a,b,c,d),对于该平面上每个点 [x,y,z]都有 ax + by + cz + d = 0成立
- 分割几何图元支持面,代码示例
room_pcd = "data/fragment.pcd"
pcd = o3d.io.read_point_cloud(room_pcd)

# 分割几何图元支持面
plane_model, inliers = pcd.segment_plane(
    distance_threshold=0.01,
    ransac_n=3,
    num_iterations=1000
)

[a, b, c, d] = plane_model
print(f"平面方程为: {a:.2f}x + {b:.2f}y + {c:.2f}z + {d:.2f} = 0")

inlier_cloud = pcd.select_by_index(inliers)
inlier_cloud.paint_uniform_color([1, 0, 0])
outlier_cloud = pcd.select_by_index(inliers, invert=True)

# 可视化
o3d.visualization.draw_geometries([inlier_cloud, outlier_cloud], width=960, height=540)
11 隐蔽点消除
- 点云可视化的时候,前景点经常会妨碍后景点的显示,这个时候就需要使用
hidden_point_removal()来进行隐蔽点消除 - 该函数的源码如下
def hidden_point_removal(self, camera_location, radius):
    """
    hidden_point_removal(self, camera_location, radius)
    Removes hidden points from a point cloud and returns a mesh of the remaining points. Based on Katz et al. 'Direct Visibility of Point Sets', 2007. Additional information about the choice of radius for noisy point clouds can be found in Mehra et. al. 'Visibility of Noisy Point Cloud Data', 2010.

    Args:
        camera_location (numpy.ndarray[numpy.float64[3, 1]]): All points not visible from that location will be reomved
        radius (float): The radius of the sperical projection

    Returns:
        Tuple[open3d.geometry.TriangleMesh, List[int]]
    """
    pass
参数解释:
camera_location:设置相机位置的参数,为float类型的三维坐标点radius:对象遮蔽的半径?
返回值为一个元祖,其中包含着三角网格对象 TriangleMesh
master = "data/ArmadilloMesh.ply"
mesh = o3d.io.read_triangle_mesh(master)

# 计算点的法线
mesh.compute_vertex_normals()
# 利用泊松盘采样得到均匀采样点
pcd = mesh.sample_points_poisson_disk(4000)

# 获取点云数据的最大最小边界
diameter = np.linalg.norm(np.asarray(pcd.get_max_bound()) - np.asarray(pcd.get_min_bound()))

# 设置相机和半径参数
camera = [0, 0, diameter]
radius = diameter * 100

# 去除隐蔽点
_, pt_map = pcd.hidden_point_removal(camera, radius)

# 可视化
pcd = pcd.select_by_index(pt_map)
o3d.visualization.draw_geometries([pcd])
可以看到消除的结果中,只能看到后景点而看不到前景点