Spring Cloud Config配置中心的使用
一、概述
1. 为什么使用?
1> 配置文件太多,不方便维护
2> 配置文件一般都保存这各种明文显示的密码,无法保证配置内容的安全性,也无法做到按权限分配给个人
3> 更新配置项目需重启,试想想,在生产环境,那么多台机器。。。
2. config介绍
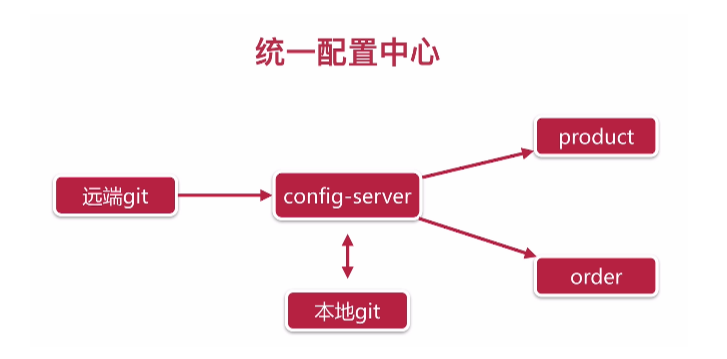
config分为Server端和Client端,实现原理如下图所示:

- Server端负责从远端git(码云、GitHub等)拉取配置,并缓存在本地;
- Client端(上图的product和order服务)在启动时,从Server端本地缓存中获取配置
二、Server端配置
1. 新建config Server模块,加载依赖
<dependency>
    <groupId>org.springframework.cloud</groupId>
    <artifactId>spring-cloud-config-server</artifactId>
</dependency>
2. 在启动类上@EnableConfigServer注解,开启configServer
@EnableConfigServer //开启configServer
@SpringBootApplication
@EnableDiscoveryClient //开启Eureka Client
public class TestConfigApplication {

    public static void main(String[] args) {
        SpringApplication.run(TestConfigApplication.class, args);
    }
}
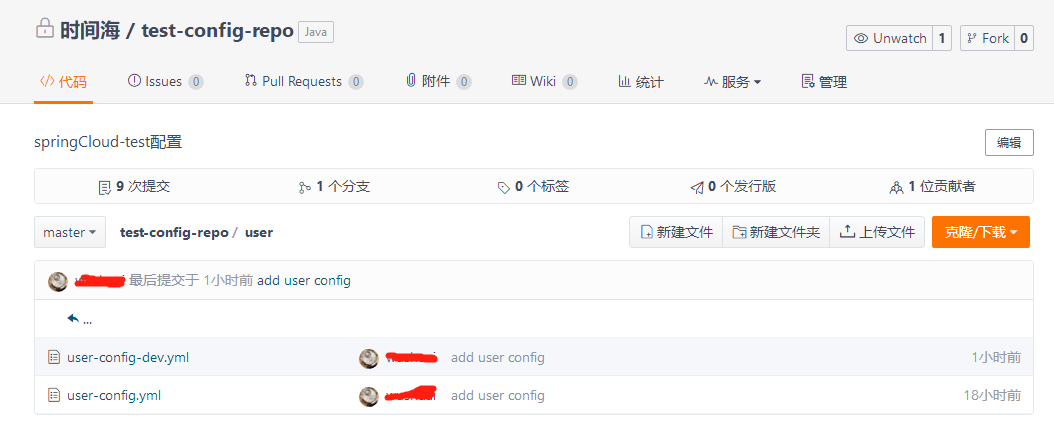
3. 在远端git上新建项目(这里使用码云),并把配置上传上去,具体操作略

说明:config语法规定,xxx.yml为公共配置,在拉取配置时会和xxx.{}profiles}.yml合并
4. 修改配置文件
spring:
  application:
    name: test-config
  profiles:
    active: dev
#配置中心
  cloud:
    config:
      server:
        git:
          uri: https://gitee.com/wslook/test-config-repo.git
          search-paths: user  //配置文件目录,多个用逗号隔开
          username: xxx
          password: xxx
          default-label: master
          basedir: ./configRepo/  //本地缓存地址
          force-pull: true  //强制拉取配置,解决手动修改本地缓存配置后,无法拉取最新配置的问题
# 注册中心
eureka:
  instance:
    prefer-ip-address: true
  client:
    service-url:
      defaultZone: http://localhost:2181/eureka/
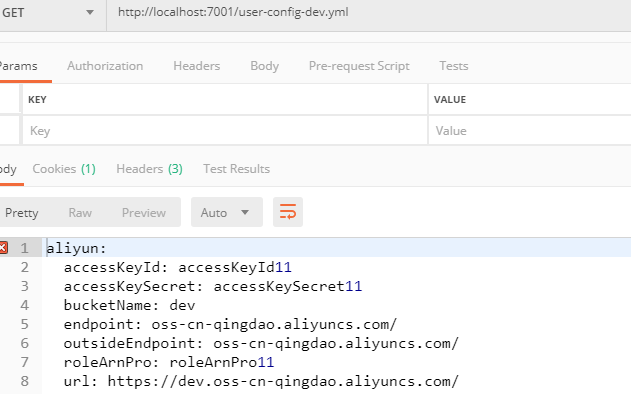
5. 测试

三、Client端配置
1. 加载依赖
<dependency>
    <groupId>org.springframework.cloud</groupId>
    <artifactId>spring-cloud-starter-config</artifactId>
</dependency>
2. 修改配置文件(把配置文件名改为bootstrap.yml)
spring:
# 配置中心
  cloud:
    config:
     name: user-config
     profile: dev
     label: master
     discovery:
        enabled: true
        serviceId: test-config
     fail-fast: true


# 注册中心
eureka:
  instance:
    prefer-ip-address: true
  client:
    service-url:
      defaultZone: http://localhost:2181/eureka/
3. 测试
编写测试代码:
@RequestMapping("/test")
@RestController
public class TestController {

    @Resource
    private OSSProperties ossProperties;

    @RequestMapping("/config")
    public String test(){
        return ossProperties.getUrl();
    }
}
启动user服务,可以看到,已经把配置拉取下来了

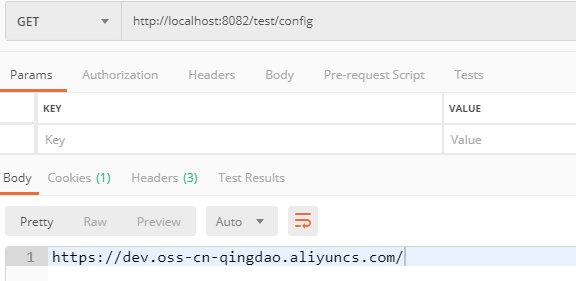
使用postman验证

四、高可用
对于config集群,很简单,因为由注册中心(这里使用的eureka)统一管理服务,所以不需要额外的配置,只需多启动几台config Server服务即可

