

C# WCF实现聊天室功能
1、WCF是什么
Windows Communication Foundation(WCF)是由微软开发的一系列支持数据通信的应用程序框架
看这篇文章之前,可以先看我的另一篇文章,初步了解一下WCF:https://www.cnblogs.com/wskxy/p/9435300.html
2、如何通过WCF做聊天室
首先,我们画个示意图:

按照图示,我们来建立Service和Client
客户端选择WinForm,这是不用争议的
服务端为啥要选用Web呢,这是为了方便IIS配置
3、首先是ServiceWeb
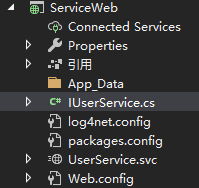
IUserService.cs 定义好接口(IUserService)和关联回调(IUserCallback)

using System.ServiceModel;

namespace ServiceWeb
{
    //信息类,懒得新建,放一起了
    [ServiceContract]
    public class UserInfo
    {
        public string acc;
        public string sayContext;
    }
    [ServiceContract]
    public class UserInfoSubscriber : UserInfo
    {
        public IUserCallback subscriber;
    }

    //回调Client函数接口
    public interface IUserCallback
    {
        [OperationContract(IsOneWay = true)]
        void OnLogin(UserInfo user);
        [OperationContract(IsOneWay = true)]
        void OnQuit(UserInfo user);
        [OperationContract(IsOneWay = true)]
        void OnSay(UserInfo user);
    }
    //Service服务函数接口
    [ServiceContract(SessionMode = SessionMode.Required, CallbackContract = typeof(IUserCallback))]
    public interface IUserService
    {
        [OperationContract(IsOneWay = true)]
        void Login(string acc, string pwd);
        [OperationContract(IsOneWay = true)]
        void Quit(string acc);
        [OperationContract(IsOneWay = true)]
        void Say(UserInfo user);
    }
}
UserService.svc 实现接口函数
using System.Collections.Generic;
using System.Linq;
using System.ServiceModel;

namespace ServiceWeb
{
    // 注意: 使用“重构”菜单上的“重命名”命令,可以同时更改代码和配置文件中的类名“User”。
    [ServiceBehavior(InstanceContextMode = InstanceContextMode.PerSession, ConcurrencyMode = ConcurrencyMode.Multiple)]
    public class UserService : IUserService
    {
        /*存储登录信息*/
        /*必须加static,不然每次都被重新实例化*/
        public static List<UserInfoSubscriber> userList = new List<UserInfoSubscriber>();
        public void Login(string acc, string pwd)
        {
            /*1、检测登录,在数据库判断登录信息,不涉及本章重点,为方便代码省略,默认成功*/

            /*2、成功登录后广播*/
            //为当前用户创建订阅者(回调接口)
            IUserCallback subscriber = OperationContext.Current.GetCallbackChannel<IUserCallback>();

            if (userList.FindIndex(x => x.acc == acc) == -1)//避免重复登录
            {
                var user = new UserInfoSubscriber()
                {
                    acc = acc,
                    subscriber = subscriber
                };
                userList.Add(user);
                //user.subscriber.OnLogin(user);//用子类作为参数无效,所以需要重新new返回信息(可能和WCF协议有关)
                //user.subscriber.OnLogin((UserInfo)user);//这样也不行
                user.subscriber.OnLogin(new UserInfo() { acc = acc });//成功执行回调
                foreach (UserInfoSubscriber item in userList.Where(x => x.acc != acc))  //告知其他客户端当前用户已上线
                {
                    item.subscriber.OnLogin(new UserInfo() { acc = acc });
                }
            }
        }

        public void Quit(string acc)
        {
            var user = userList.Find(x => x.acc == acc);
            if (user != null)
            {
                user.subscriber.OnQuit(new UserInfo() { acc = acc });
                userList.Remove(user);
            }
        }

        public void Say(UserInfo _user)
        {
            var user = userList.Find(x => x.acc == _user.acc);
            foreach (UserInfoSubscriber item in userList)
            {
                item.subscriber.OnSay(_user);
            }
        }

    }
}
注意 Web.config 的<services>,需要有User服务(有的不会自动建立,然后产生错误,缺了就补上)
      <services>
          <service name="ServiceWeb.UserService">
              <!--问题:协定需要会话,但是绑定“BasicHttpBinding”不支持它或者因配置不正确而无法支持它-->
              <!--解决:将BasicHttpBinding换成wsDualHttpBinding-->
              <endpoint address="" binding="wsDualHttpBinding" contract="ServiceWeb.IUserService">
                  <identity>
                      <dns value="localhost"/>
                  </identity>
              </endpoint>
              <endpoint address="mex" binding="mexHttpBinding" contract="IMetadataExchange"/>
              <host>
                  <baseAddresses>
                      <add baseAddress="http://localhost:8733/Design_Time_Addresses/Service/UserService/"/>
                  </baseAddresses>
              </host>
          </service>
      </services>
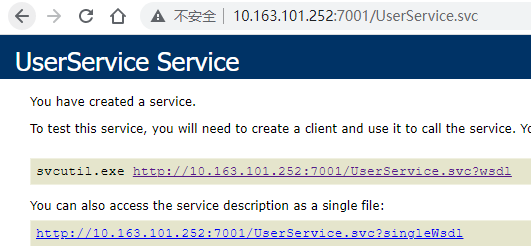
这样,Service就算定义好了,可以直接配置到IIS,打开svc可以看到:
4、Client
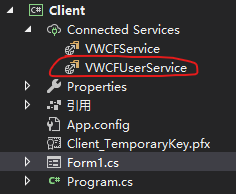
先把服务引用进来,引用后配置文件有如下信息:
    <system.serviceModel>
        <bindings>
            <wsDualHttpBinding>
                <binding name="WSDualHttpBinding_IUserService" />
            </wsDualHttpBinding>
        </bindings>
        <client>
            <endpoint
                address="http://10.163.101.252:7001/UserService.svc"
                binding="wsDualHttpBinding" bindingConfiguration="WSDualHttpBinding_IUserService"
                contract="VWCFUserService.IUserService" name="WSDualHttpBinding_IUserService">
                <identity>
                    <dns value="localhost" />
                </identity>
            </endpoint>
        </client>
    </system.serviceModel>
然后,让我们开心写界面
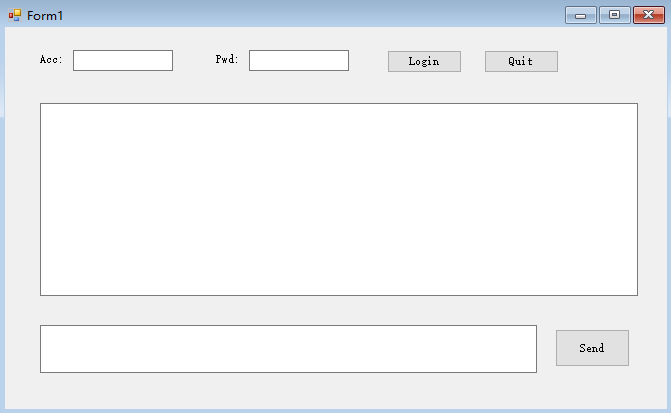
代码如下:
using Client.VWCFUserService;
using System;
using System.Collections.Generic;
using System.ComponentModel;
using System.Data;
using System.Drawing;
using System.Linq;
using System.ServiceModel;
using System.Text;
using System.Threading.Tasks;
using System.Windows.Forms;

namespace Client
{
    public partial class Form1 : Form, IUserServiceCallback
    {
        InstanceContext context;
        UserServiceClient sc;

        public Form1()
        {
            InitializeComponent();
        }

        private void Form1_Load(object sender, EventArgs e)
        {
            this.tb_Acc.Text = "kxy";
            this.tb_Pwd.Text = "123";
            this.tb_Message_Box.ReadOnly = true ;
            this.btn_Quit.Enabled = false;
            this.btn_Send.Enabled = false;
            //this.tb_Send_Box.Focus();  //这个不知道为啥无效
            this.ActiveControl = this.tb_Send_Box;
        }
        private void Login_Click(object sender, EventArgs e)
        {
            context = new InstanceContext(this);
            sc = new UserServiceClient(context);
            //sc.Login(sc.InnerChannel.SessionId, this.tbAcc.Text);
            sc.Login(this.tb_Acc.Text, this.tb_Pwd.Text);
        }

        private void Quit_click(object sender, EventArgs e)
        {
            if (sc != null)
                sc.Quit(this.tb_Acc.Text);
        }

        private void send_Click(object sender, EventArgs e)
        {
            if (!string.IsNullOrEmpty(tb_Send_Box.Text))
            {
                sc.Say(new UserInfo() { acc = this.tb_Acc.Text, sayContext = this.tb_Send_Box.Text });
            }
        }
        private void Form1_FormClosing(object sender, FormClosingEventArgs e)
        {
            if (sc != null)
                sc.Quit(this.tb_Acc.Text);
        }

        public void OnLogin(VWCFUserService.UserInfo user)
        {
            tb_Message_Box.Text += $"\r\n已登录:{user.acc}";
            this.tb_Acc.ReadOnly = true;
            this.tb_Pwd.ReadOnly = true;
            this.btn_Login.Enabled = false;
            this.btn_Quit.Enabled = true;
            this.btn_Send.Enabled = true;
        }
        public void OnQuit(VWCFUserService.UserInfo user)
        {
            tb_Message_Box.Text += $"\r\n已退出:{user.acc}";
            this.tb_Acc.ReadOnly = false;
            this.tb_Pwd.ReadOnly = false;
            this.btn_Login.Enabled = true;
            this.btn_Quit.Enabled = false;
            this.btn_Send.Enabled = false;
        }
        public void OnSay(VWCFUserService.UserInfo user)
        {
            tb_Message_Box.Text += $"\r\n{user.acc}-{DateTime.Now.ToString("f")}";
            tb_Message_Box.Text += $"\r\n{user.sayContext}";
            this.tb_Send_Box.Text = "";
            this.tb_Send_Box.Focus();

        }
    }
}
到这里,我们的通讯就可以正常进行了。
请大家自己尝试,可以打开多个进程,体验多人在线!!!
5、Client的发布和版本更新
WinForm怎么进行发布和检测更新呢?
也是利用IIS!!!
具体操作如下:
首先将WinForm发布打包(一步一步截图太麻烦,直接看最后信息呈现)
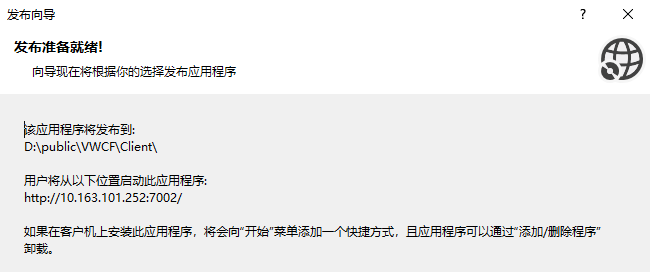
1 2 3 | 参数解释:1、该应用程序将发布到(发布生产程序存放的位置,本地随便都行)2、用户将从以下位置启动此应用程序(这个地址是后面程序将要在IIS上的host地址) |
生成文件如下:
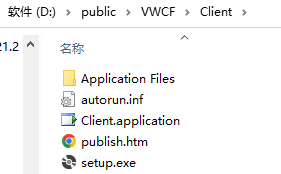
将文件发布到服务器(服务器文件位置随便),定义站点10.163.101.252:7002
访问http://10.163.101.252:7002/publish.htm,可以进行Client下载安装
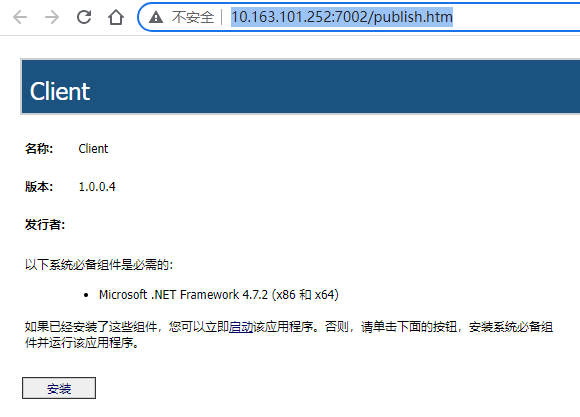
并且每次启动Client的时候,会自动检查是否有版本更新
(当然需要发布新版本,并将新程序Copy到站点,才会进行更新)


【推荐】国内首个AI IDE,深度理解中文开发场景,立即下载体验Trae
【推荐】编程新体验,更懂你的AI,立即体验豆包MarsCode编程助手
【推荐】抖音旗下AI助手豆包,你的智能百科全书,全免费不限次数
【推荐】轻量又高性能的 SSH 工具 IShell:AI 加持,快人一步
· TypeScript + Deepseek 打造卜卦网站:技术与玄学的结合
· Manus的开源复刻OpenManus初探
· AI 智能体引爆开源社区「GitHub 热点速览」
· C#/.NET/.NET Core技术前沿周刊 | 第 29 期(2025年3.1-3.9)
· 从HTTP原因短语缺失研究HTTP/2和HTTP/3的设计差异