SpringCloud学习笔记(二)——Eureka(注册中心)
一、Eureka简介
二、Eureka快速入门
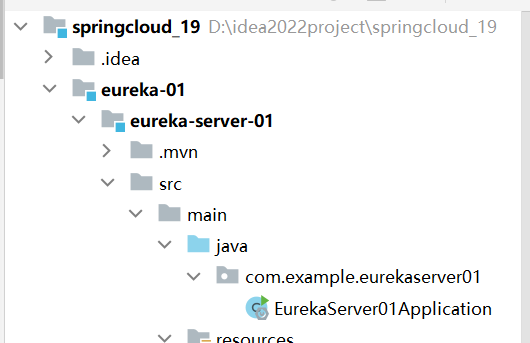
2.1 搭建Eureka-Server
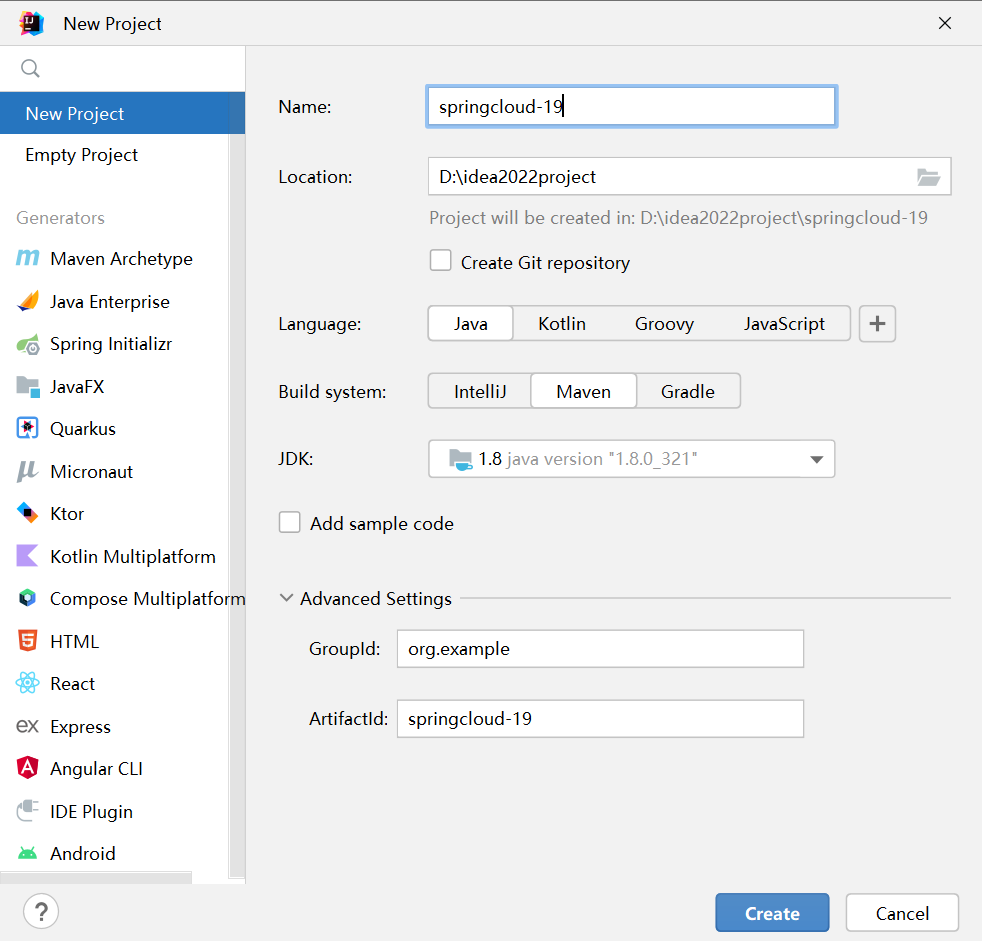
首先新建一个maven项目:
这里src删除掉就可以了。
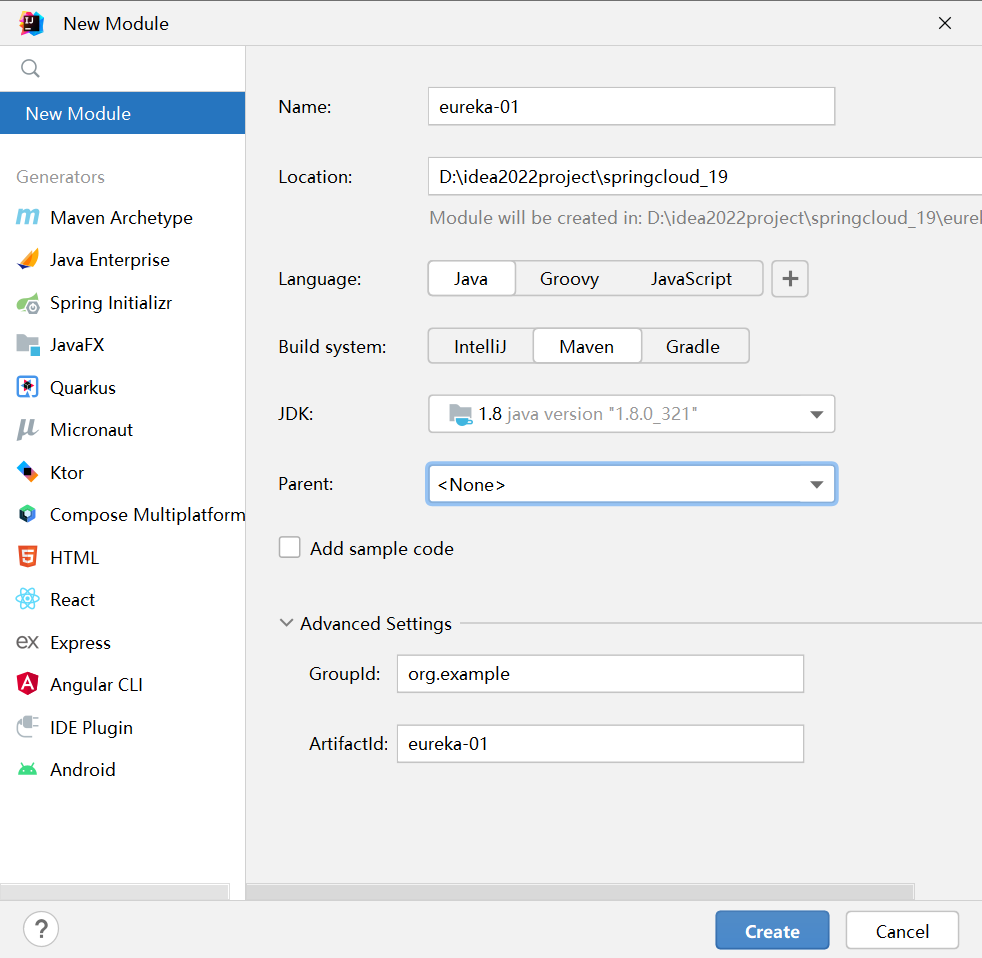
在项目下新建一个module(maven类型的):

同样删除掉这个module下的src包。
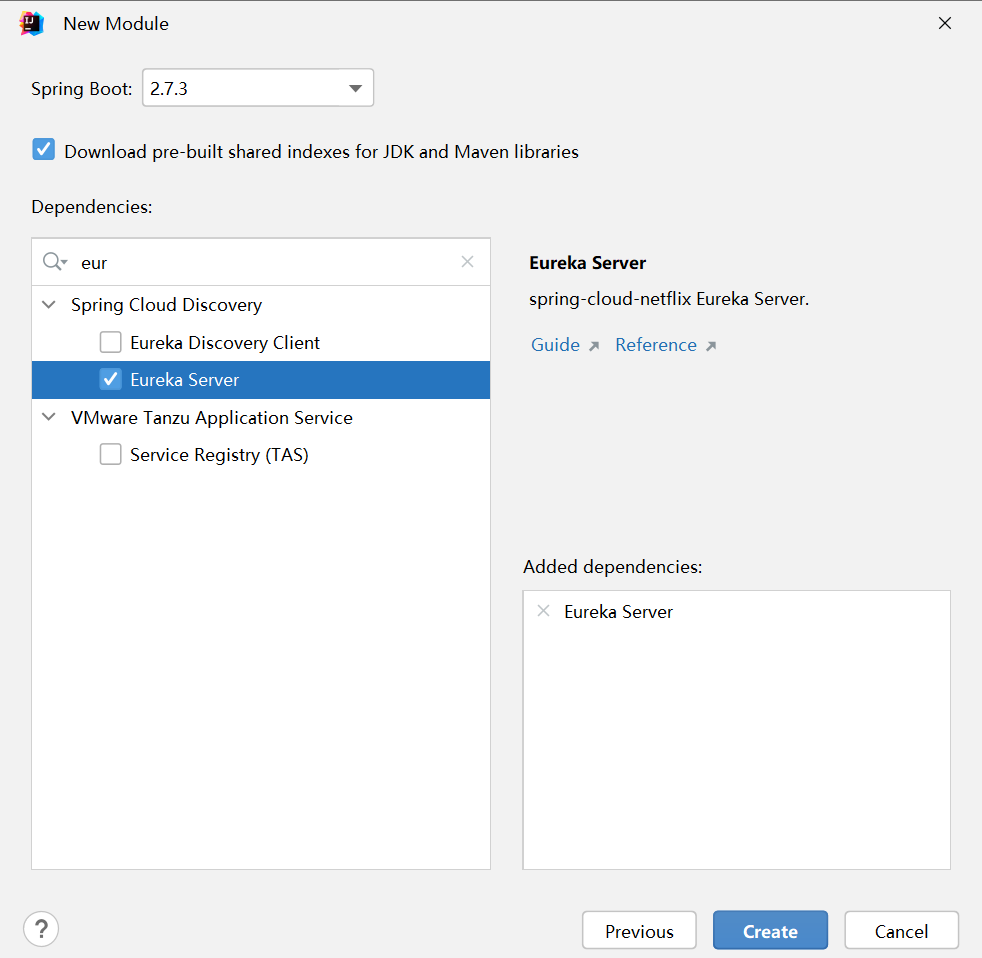
然后再在当前module下新建一个module(springboot类型的):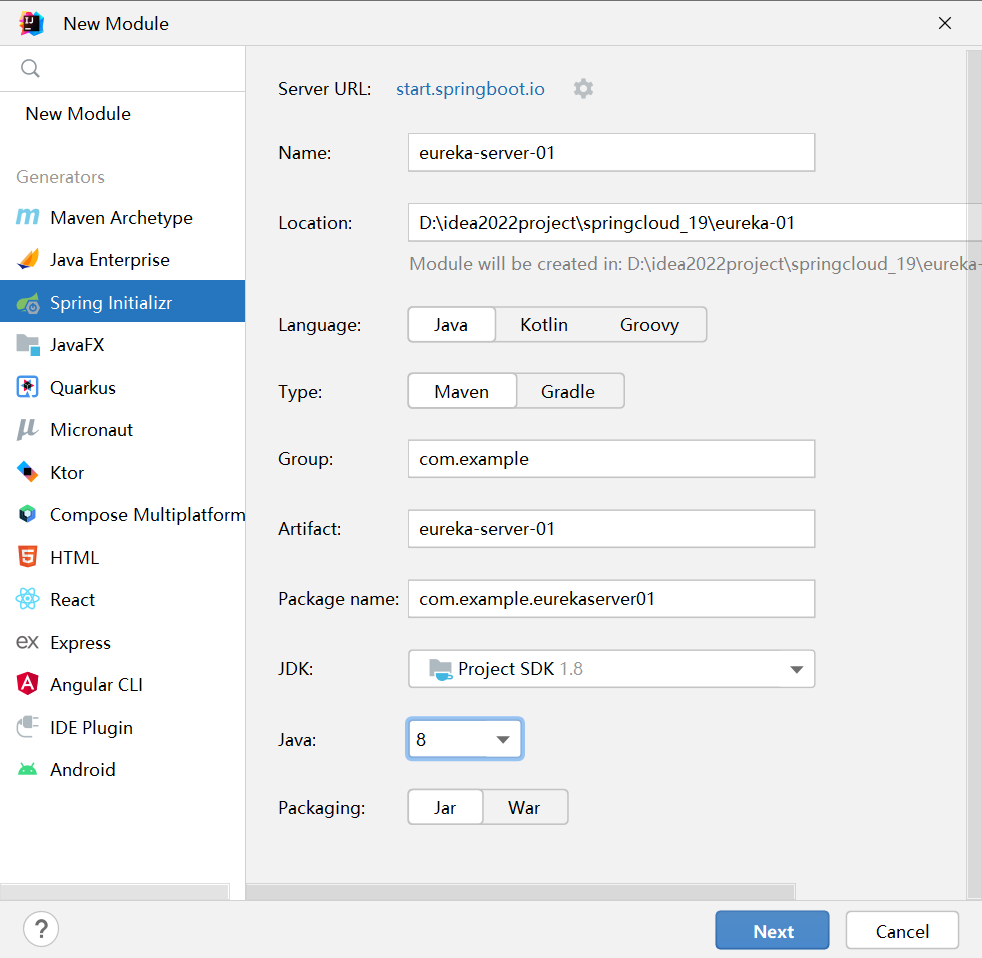
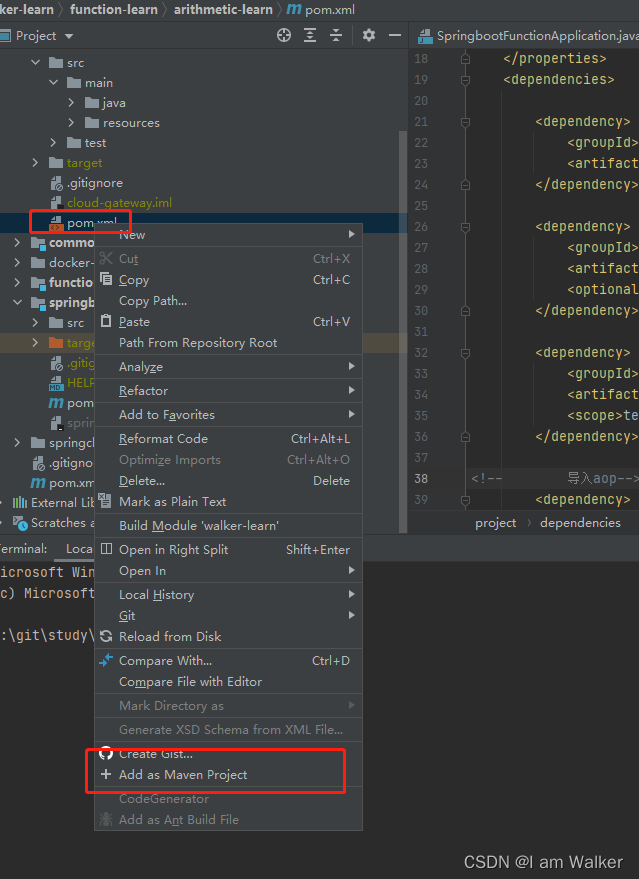
创建完成后,如果你因为Idea版本原因导致创建出来的不是一个maven项目(判断依据是pom.xml这个文件是否是蓝色的),只需要右键pom文件将其关联成maven文件。
这里我们按照以前的版本进行学习,所以需要修改子pom.xml文件中的两个地方(springboot和springcloud)的版本信息:
<?xml version="1.0" encoding="UTF-8"?>
<project xmlns="http://maven.apache.org/POM/4.0.0" xmlns:xsi="http://www.w3.org/2001/XMLSchema-instance"
    xsi:schemaLocation="http://maven.apache.org/POM/4.0.0 https://maven.apache.org/xsd/maven-4.0.0.xsd">
    <modelVersion>4.0.0</modelVersion>
    <!-- 实质还是 springboot 项目-->
    <parent>
        <groupId>org.springframework.boot</groupId>
        <artifactId>spring-boot-starter-parent</artifactId>
        <version>2.3.12.RELEASE</version>
        <relativePath/> <!-- lookup parent from repository -->
    </parent>
    <groupId>com.example</groupId>
    <artifactId>eureka-01</artifactId>
    <version>0.0.1-SNAPSHOT</version>
    <name>eureka-01</name>
    <description>eureka-01</description>
    <!-- 这里控制了 springcloud 的版本-->
    <properties>
        <java.version>1.8</java.version>
        <spring-cloud.version>Hoxton.SR12</spring-cloud.version>
    </properties>
    <dependencies>
        <!-- eureka 注册中心的服务端-->
        <dependency>
            <groupId>org.springframework.cloud</groupId>
            <artifactId>spring-cloud-starter-netflix-eureka-server</artifactId>
        </dependency>

        <dependency>
            <groupId>org.springframework.boot</groupId>
            <artifactId>spring-boot-starter-test</artifactId>
            <scope>test</scope>
        </dependency>
    </dependencies>

    <!-- 依赖管理,cloud 的依赖-->
    <dependencyManagement>
        <dependencies>
            <dependency>
                <groupId>org.springframework.cloud</groupId>
                <artifactId>spring-cloud-dependencies</artifactId>
                <version>${spring-cloud.version}</version>
                <type>pom</type>
                <scope>import</scope>
            </dependency>
        </dependencies>
    </dependencyManagement>

    <build>
        <plugins>
            <plugin>
                <groupId>org.springframework.boot</groupId>
                <artifactId>spring-boot-maven-plugin</artifactId>
            </plugin>
        </plugins>
    </build>

</project>
修改启动类:
@SpringBootApplication
@EnableEurekaServer  //注解用于开启注册中心服务端
public class Eureka01Application {

    public static void main(String[] args) {
        SpringApplication.run(Eureka01Application.class, args);
    }

}
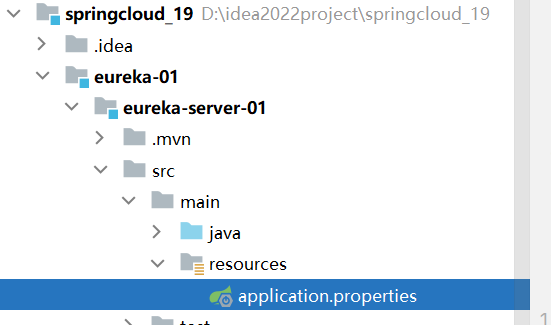
修改配置文件:
server:
  port: 8761 #为什么是 8761,其他端口就报错
spring:
  application:
    name: eureka-server #服务名称
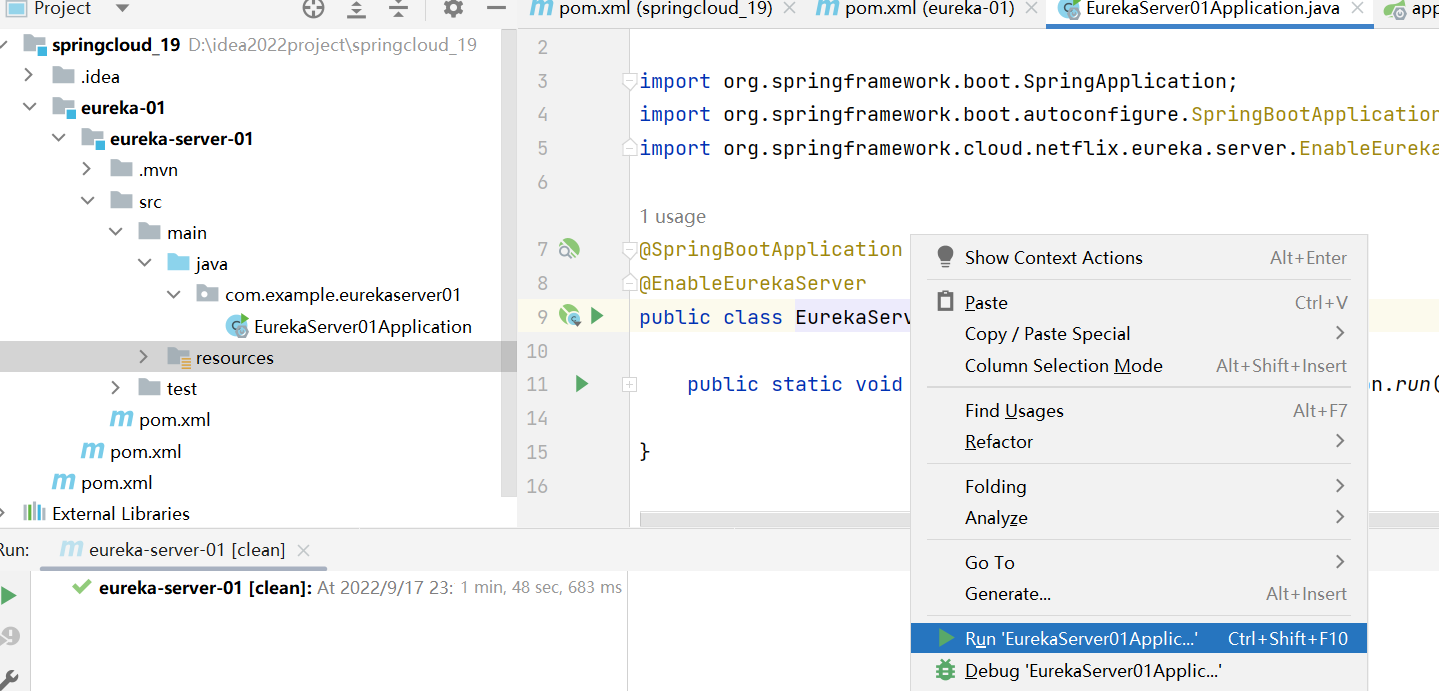
然后我们运行这个子项目
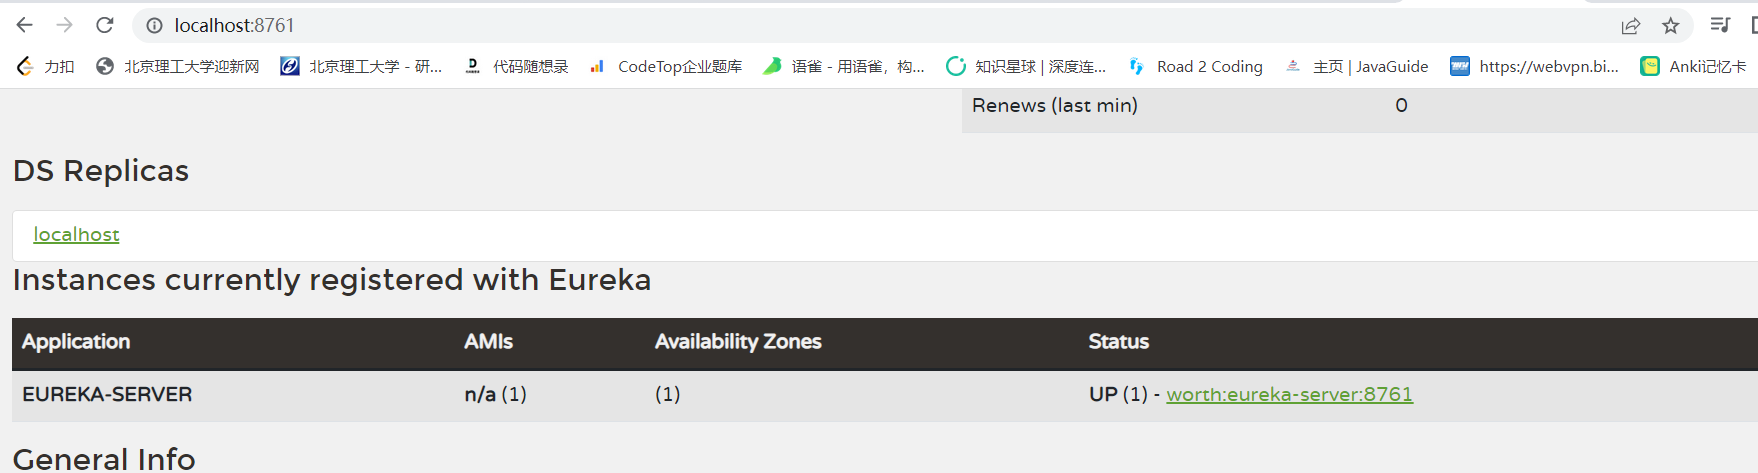
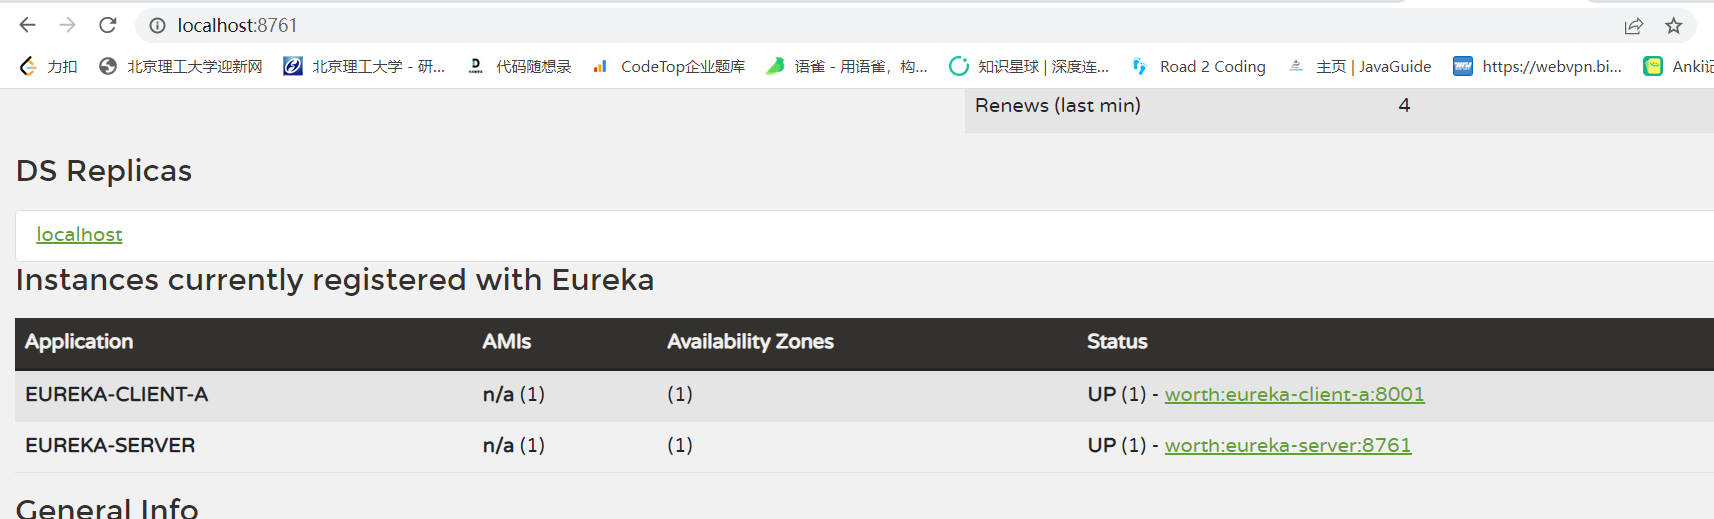
在浏览器中输入http://localhost:8761访问测试;
2.2 搭建Eureka-Client-A
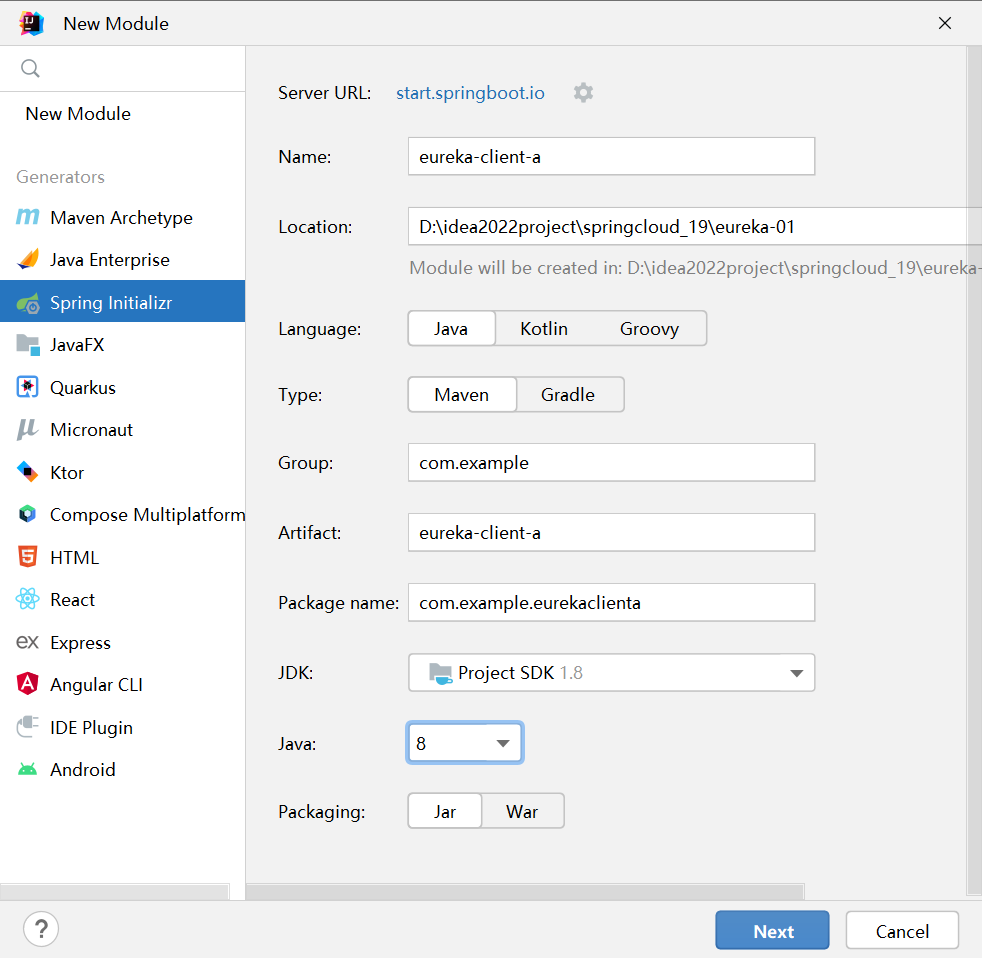
创建一个与eureka-server同级的client module。
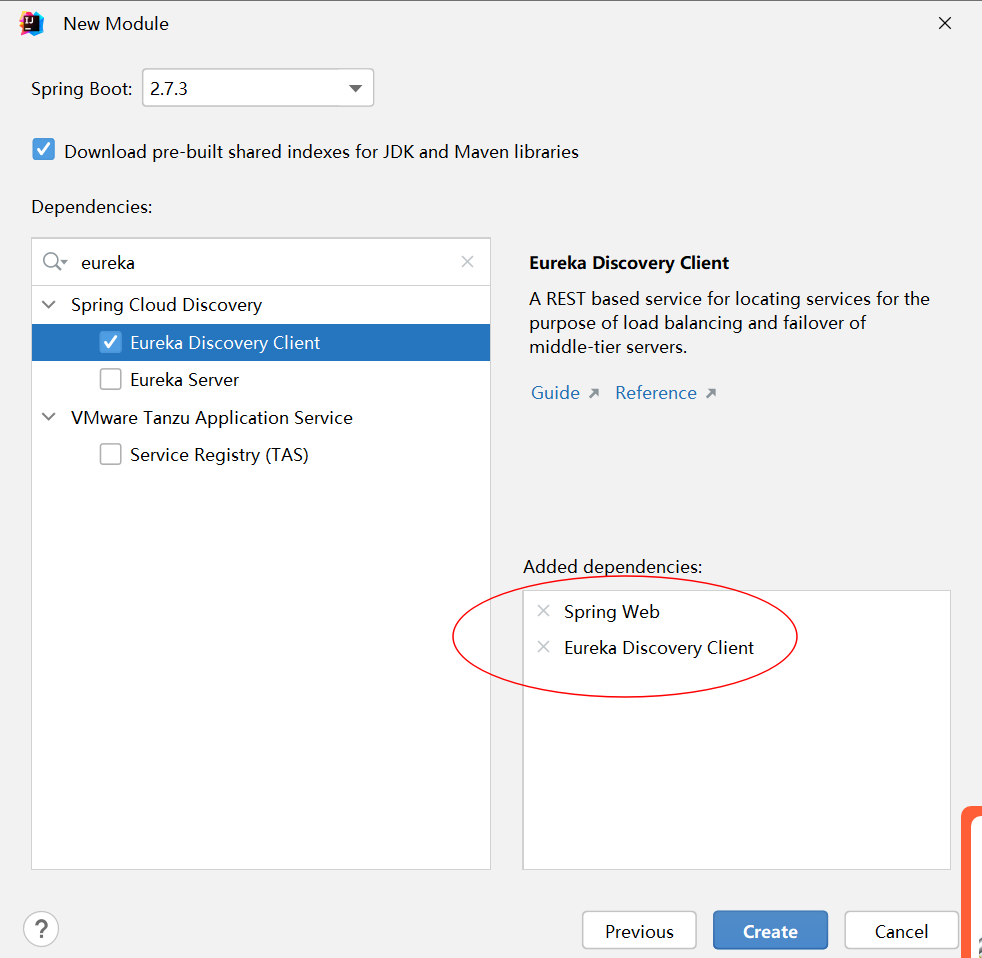
选中如下两个依赖:
同样修改pom.xml文件中的版本号:
<?xml version="1.0" encoding="UTF-8"?>
<project xmlns="http://maven.apache.org/POM/4.0.0" xmlns:xsi="http://www.w3.org/2001/XMLSchema-instance"
         xsi:schemaLocation="http://maven.apache.org/POM/4.0.0 https://maven.apache.org/xsd/maven-4.0.0.xsd">
    <modelVersion>4.0.0</modelVersion>
    <parent>
        <groupId>org.springframework.boot</groupId>
        <artifactId>spring-boot-starter-parent</artifactId>
        <version>2.3.12.RELEASE</version>
        <relativePath/> <!-- lookup parent from repository -->
    </parent>
    <groupId>com.example</groupId>
    <artifactId>eureka-client-a</artifactId>
    <version>0.0.1-SNAPSHOT</version>
    <name>eureka-client-a</name>
    <description>eureka-client-a</description>
    <properties>
        <java.version>1.8</java.version>
        <spring-cloud.version>Hoxton.SR12</spring-cloud.version>
    </properties>
    <dependencies>
        <dependency>
            <groupId>org.springframework.boot</groupId>
            <artifactId>spring-boot-starter-web</artifactId>
        </dependency>
        <!-- eureka的客户端的依赖 -->
        <dependency>
            <groupId>org.springframework.cloud</groupId>
            <artifactId>spring-cloud-starter-netflix-eureka-client</artifactId>
        </dependency>

        <dependency>
            <groupId>org.springframework.boot</groupId>
            <artifactId>spring-boot-starter-test</artifactId>
            <scope>test</scope>
        </dependency>
    </dependencies>
    <dependencyManagement>
        <dependencies>
            <dependency>
                <groupId>org.springframework.cloud</groupId>
                <artifactId>spring-cloud-dependencies</artifactId>
                <version>${spring-cloud.version}</version>
                <type>pom</type>
                <scope>import</scope>
            </dependency>
        </dependencies>
    </dependencyManagement>

    <build>
        <plugins>
            <plugin>
                <groupId>org.springframework.boot</groupId>
                <artifactId>spring-boot-maven-plugin</artifactId>
            </plugin>
        </plugins>
    </build>

</project>
修改启动类:
@SpringBootApplication
@EnableEurekaClient  //标记此服务为eureka的客户端
public class EurekaClientAApplication {

    public static void main(String[] args) {
        SpringApplication.run(EurekaClientAApplication.class, args);
    }

}
修改配置文件:
服务器端端口必须得是8761,客户端的端口号没限制。
server:
  port: 8001
spring:
  application:
    name: eureka-client-a
eureka:
  client:
    service-url: #eureka 服务端和客户端的交互地址
      defaultZone: http://localhost:8761/eureka/
先启动服务器端,再启动这个客户端:
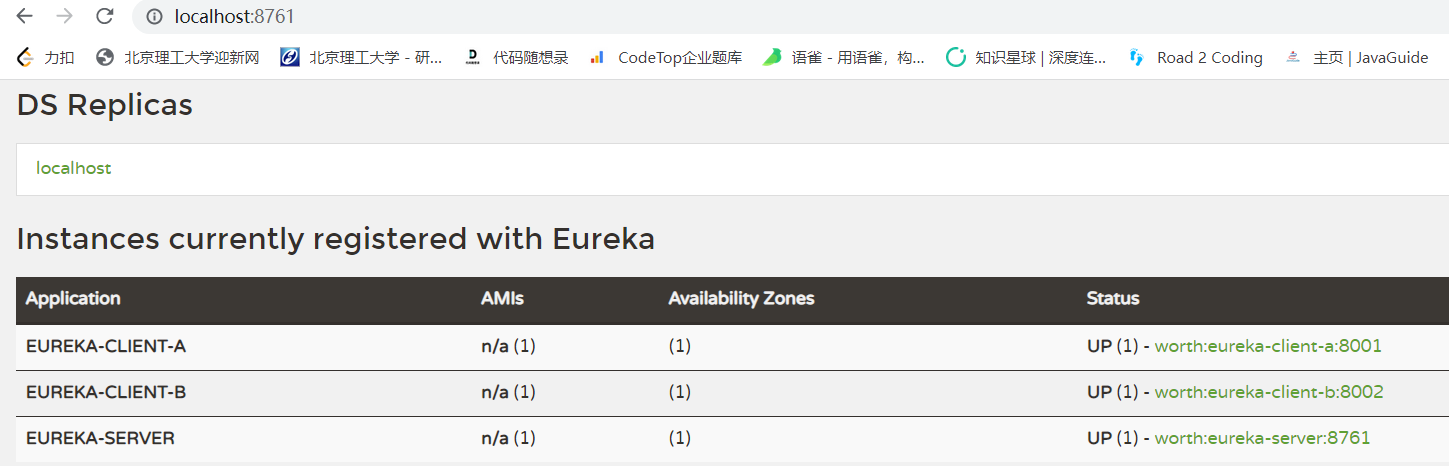
2.3 再搭建一台客户端
过程同上,浏览器显示如下:
2.4 为eureka-client-a创建集群
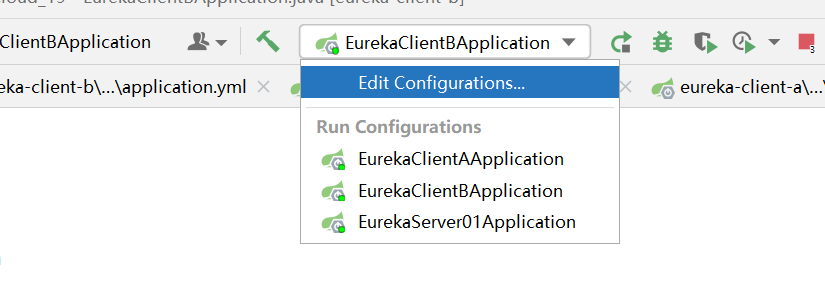
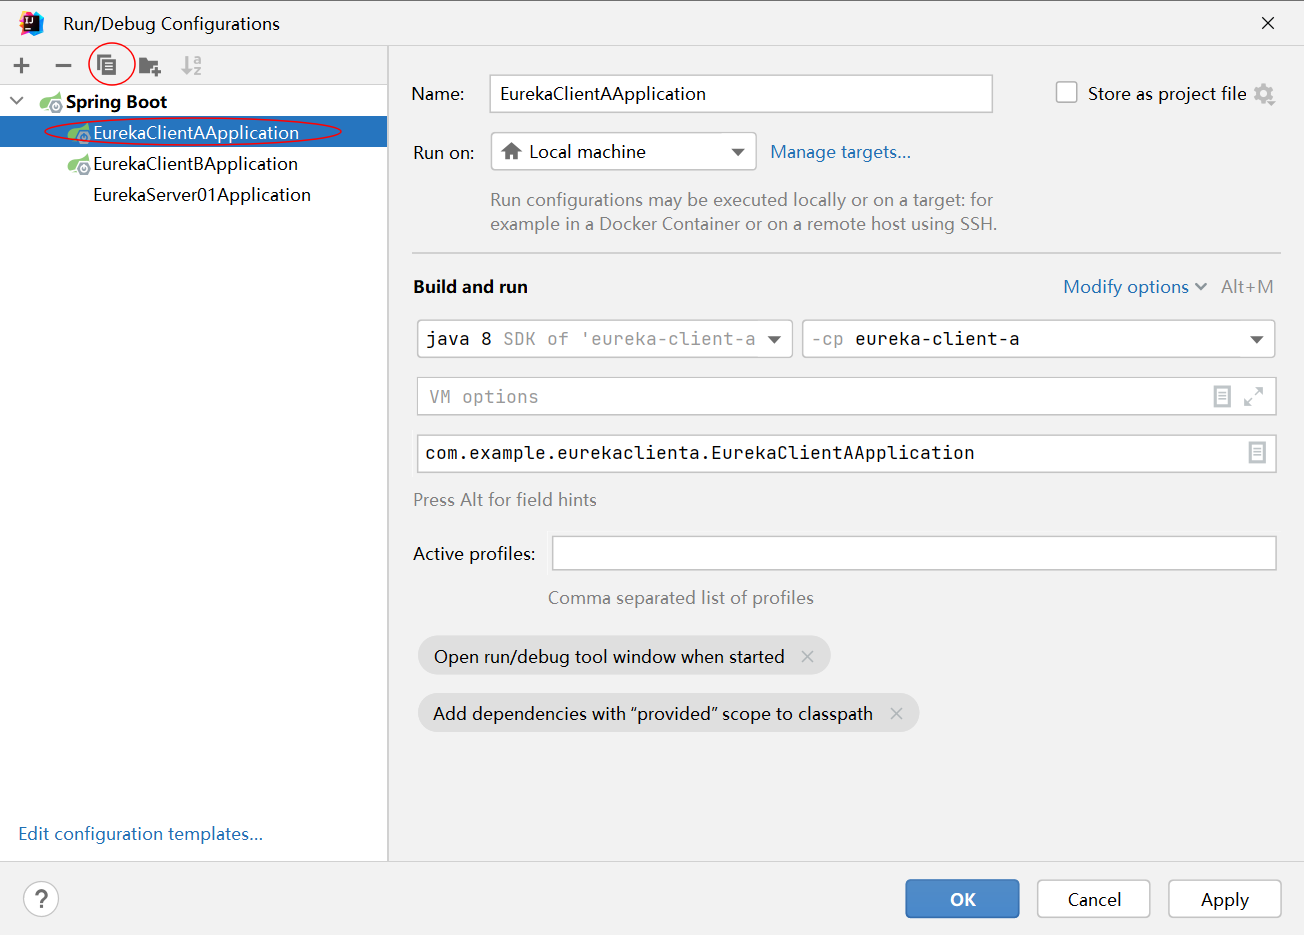
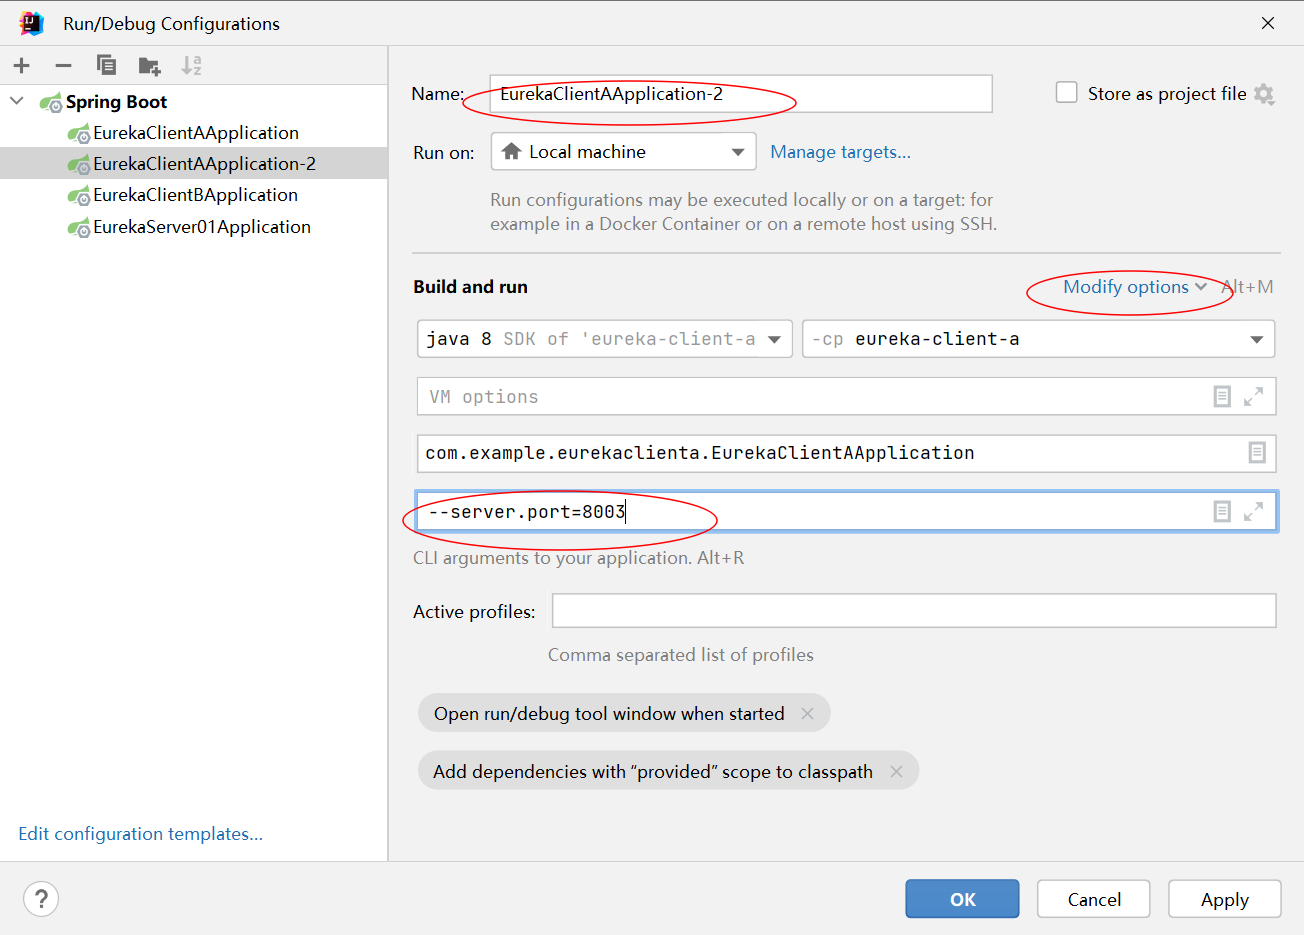
然后直接run
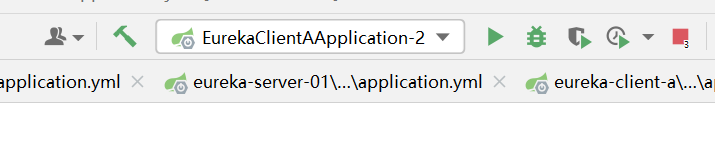
然后运行成功:

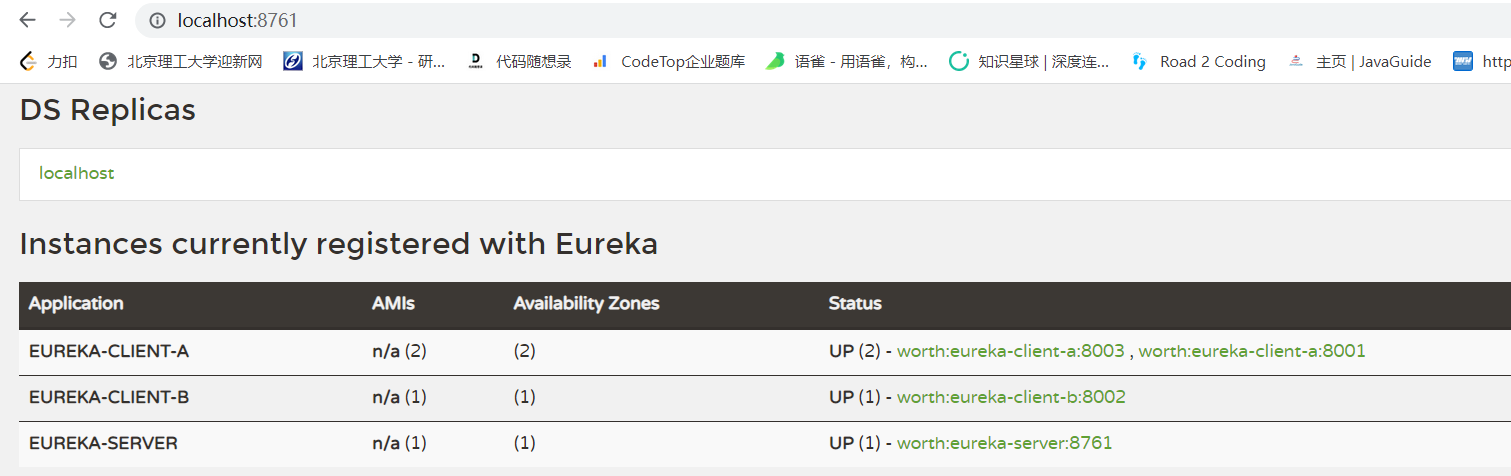
我们可以在浏览器中看到:
三、eureka-server配置文件详解
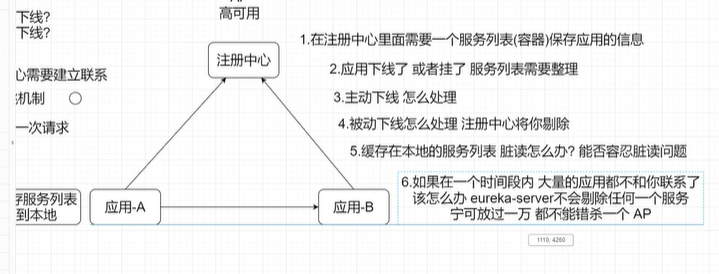
先来说明一下工作机制,进而好理解配置文件的含义。
3.1 server中的配置分为三大类:server、client(因为server可以注册本身,所以也是客户端)、instance
server:
  port: 8761
spring:
  application:
    name: eureka-server
eureka:
  client:
    service-url: #eureka 服务端和客户端的交互地址,集群用,隔开
      defaultZone: http://localhost:8761/eureka
    fetch-registry: true #是否拉取服务列表
    register-with-eureka: true #是否注册自己(单机 eureka 一般关闭注册自己,集群注意打开)

  server:
    eviction-interval-timer-in-ms: 30000 #清除无效节点的频率(毫秒)--定期删除
    enable-self-preservation: true #server 的自我保护机制,避免因为网络原因造成误剔除,生产环境建议打开
    renewal-percent-threshold: 0.85 #85%,如果在一个机房的 client 端,15 分钟内有 85%的 client 没有续约,那么则可能是
3.2 client中的配置分为两大类:client和server
server:
  port: 8080
spring:
  application:
    name: eureka-client
eureka:
  client:
    service-url: #eureka 服务端和客户端的交互地址,集群用,隔开
      defaultZone: http://localhost:8761/eureka
    register-with-eureka: true #注册自己
    fetch-registry: true #拉取服务列表,即将server中的服务列表缓存到本地
    registry-fetch-interval-seconds: 5 # 表示 eureka-client 间隔多久去拉取服务注册信息
  instance:
    hostname: localhost # 服务主机名称
    instance-id: ${eureka.instance.hostname}:${spring.application.name}:${server.port} # 实例 id
    prefer-ip-address: true # 服务列表以 ip 的形式展示
    lease-renewal-interval-in-seconds: 10 # 表示 eureka client 发送心跳给 server 端的频率
    lease-expiration-duration-in-seconds: 20 #表示 eureka server 至上一次收到 client 的心跳之后,等待 下一次心跳的超时时间,在这个时间内若没收到下一次心跳,则将移除该实例
四、构建eureka集群
4.1 集群结构图
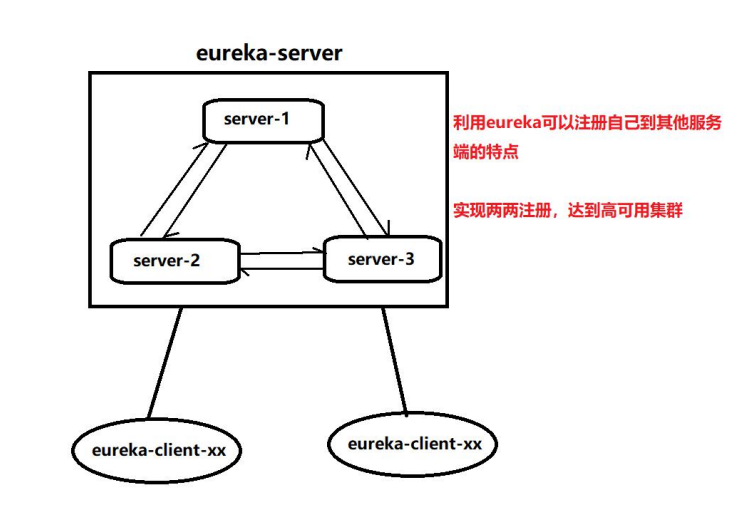
集群有两种模式:去中心化集群和主从集群模式
4.2 集群的配置
进行集群的配置,再创建另外两个项目,作为server的集群,各个server的配置文件如下:
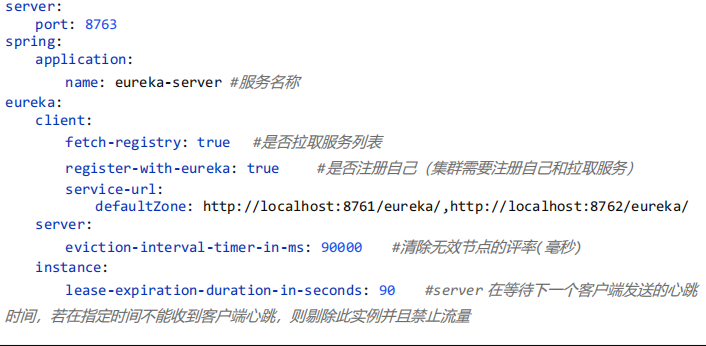
server-1(即最开始创建的那个server):
server:
    port: 8761 #为什么是 8761,其他端口就报错
spring:
    application:
        name: eureka-server #服务名称
eureka:
    client:
        fetch-registry: true #是否拉取服务列表
        register-with-eureka: true #是否注册自己(集群需要注册自己和拉取服务)
        service-url:
          defaultZone: http://localhost:8762/eureka/,http://localhost:8763/eureka/
  server:
    eviction-interval-timer-in-ms: 90000 #清除无效节点的评率(毫秒)
  instance:
    lease-expiration-duration-in-seconds: 90 #server 在等待下一个客户端发送的心跳 时间,若在指定时间不能收到客户端心跳,则剔除此实例并且禁止流量
注意这里defaultZone应该写另外两台server的地址和端口。
server-2:
server:
  port: 8762
spring:
  application:
    name: eureka-server #服务名称
eureka:
  client:
    fetch-registry: true #是否拉取服务列表
    register-with-eureka: true #是否注册自己(集群需要注册自己和拉取服务)
    service-url:
      defaultZone: http://localhost:8761/eureka/,http://localhost:8763/eureka/
  server:
    eviction-interval-timer-in-ms: 90000 #清除无效节点的评率(毫秒)
  instance:
    lease-expiration-duration-in-seconds: 90 #server 在等待下一个客户端发送的心跳 时间,若在指定时间不能收到客户端心跳,则剔除此实例并且禁止流量
注意这里应用名称要保持一致,否则就不是集群了
server-3:
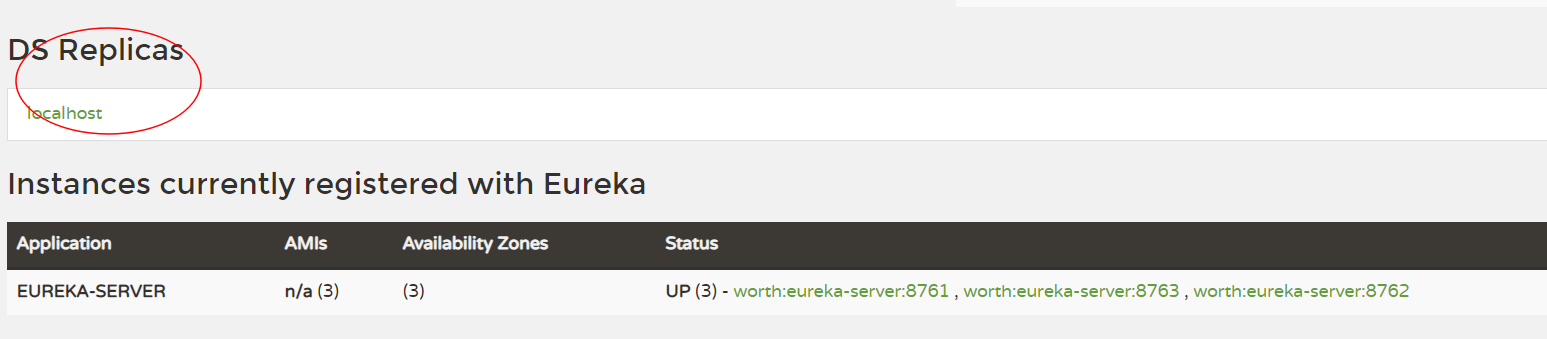
4.3 测试发现并没有出现集群
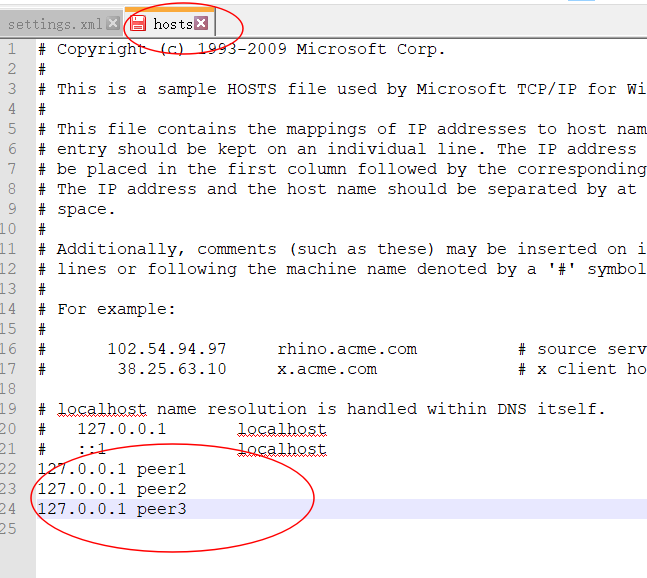
win+R键,然后输入drivers就自动进入这个文件夹了,修改etc/hosts文件如下:
然后重新修改配置文件如下(三个文件都做类似的修改):
然后再次访问,可以看到出现集群:
4.4 集群的终极配置方案
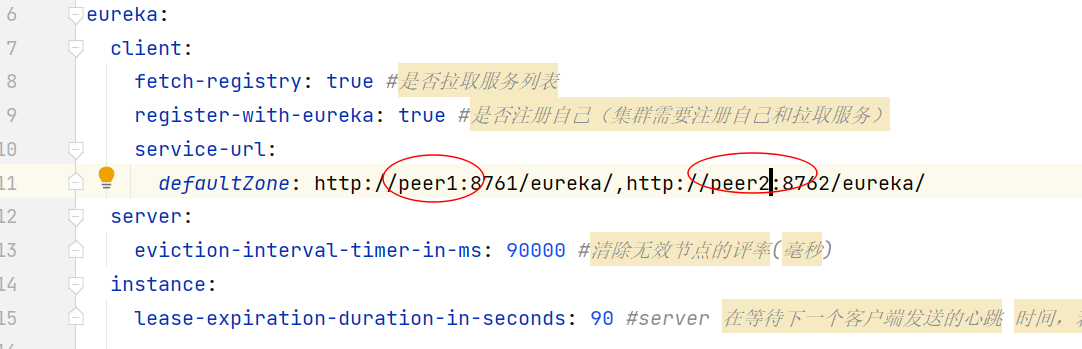
将其中一台server的配置文件修改如下,主要是将defaultZone中增加三个地址。
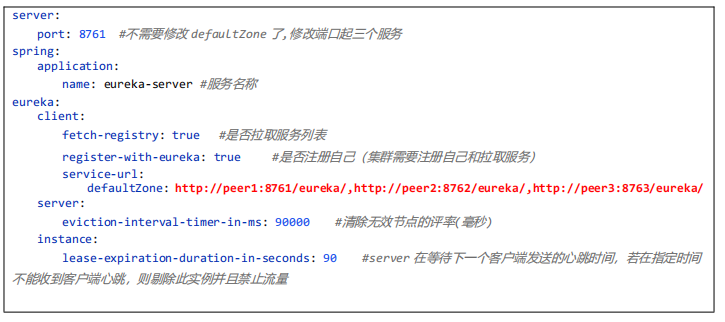
server:
  port: 8761
spring:
  application:
    name: eureka-server
eureka:
  client:
    register-with-eureka: true
    service-url:
      defaultZone: http://peer1:8761/eureka/,http://peer2:8762/eureka/,http://peer3:8763/eureka/

  instance:
    lease-expiration-duration-in-seconds: 5 #server 在等待下一个客户端发送的心跳 时间,若在指定时间不能收到客户端心跳,则剔除此实例并且禁止流量
    #hostname: peer1
    instance-id: ${spring.application.name}:${server.port}
注意:这里不能配置eureka.instance.hostname这个属性,如果配置了这个属性为peer1,则最终的三台集群都不会显示peer1这台服务器。
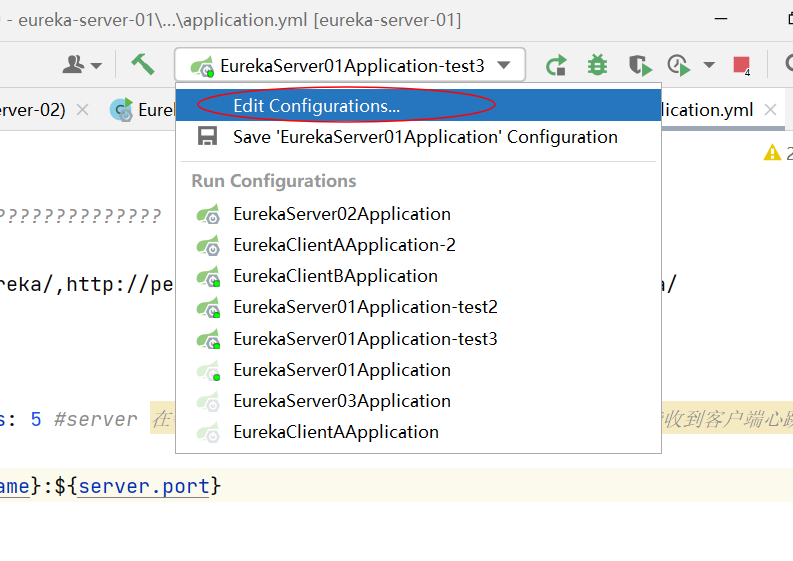
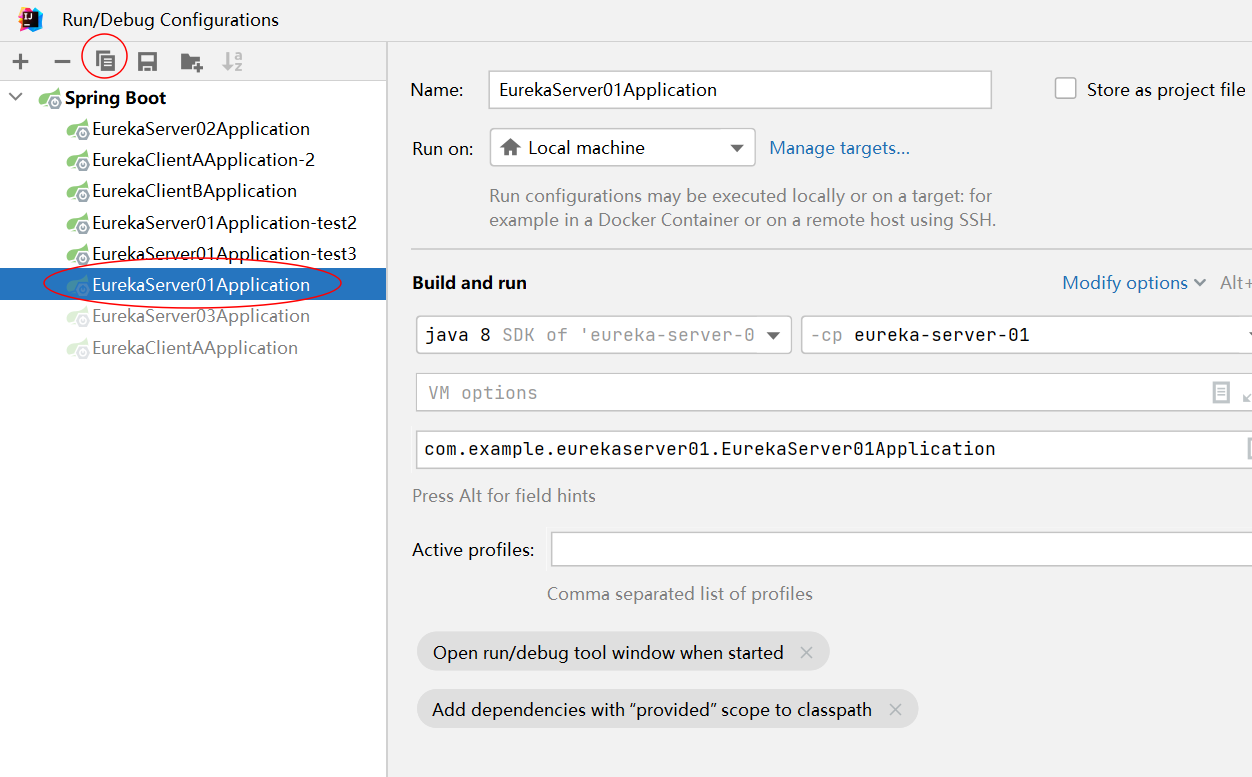
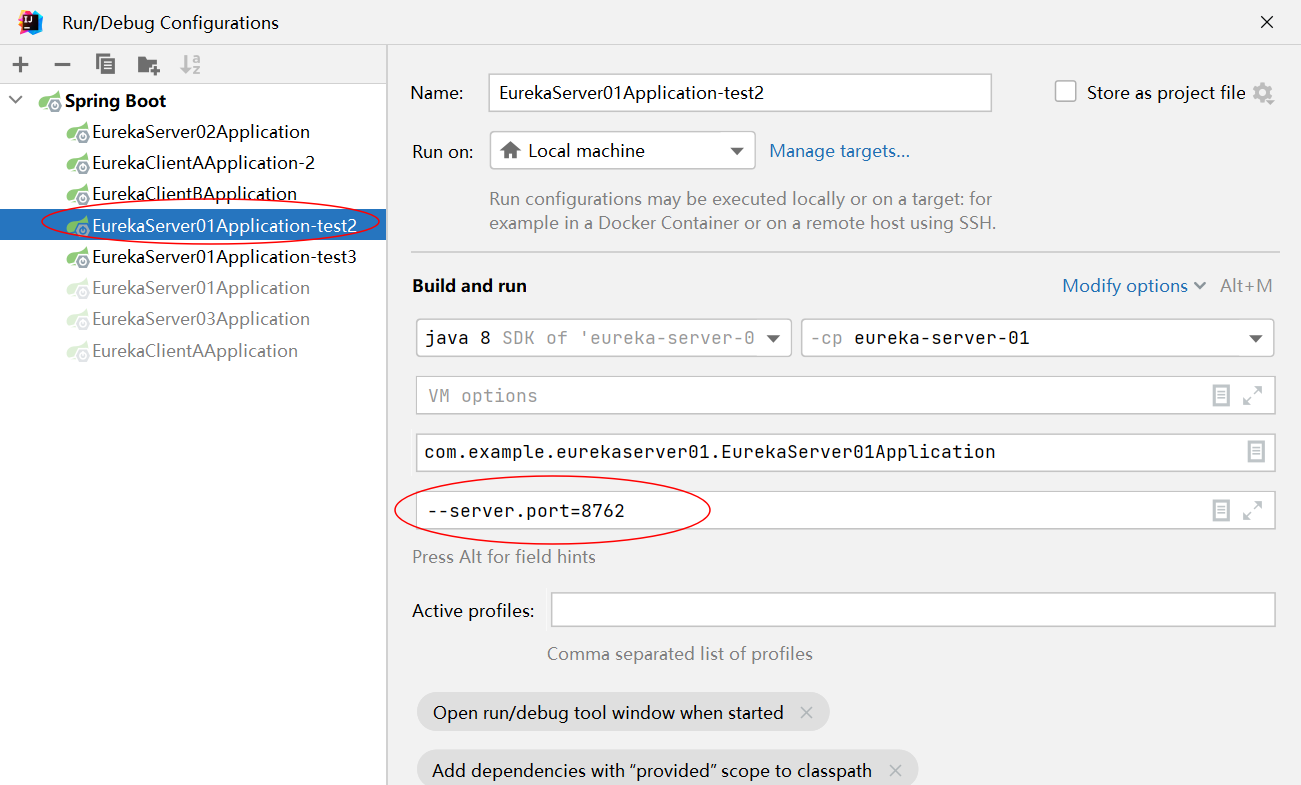
然后复制两份这台服务器,具体步骤如下:
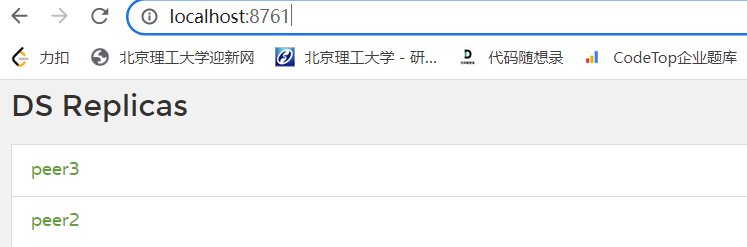
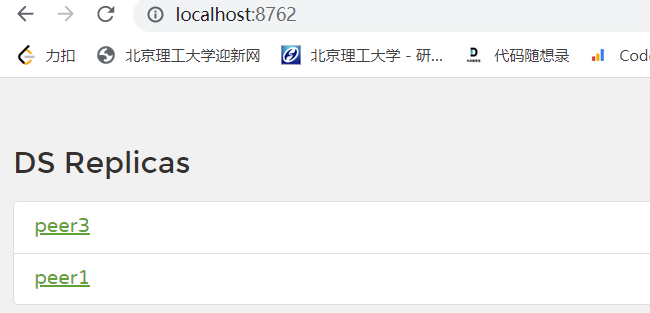
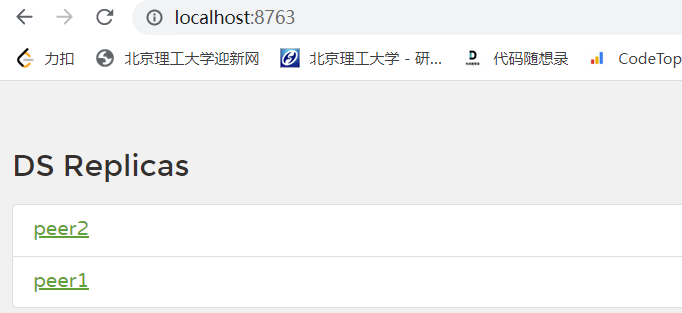
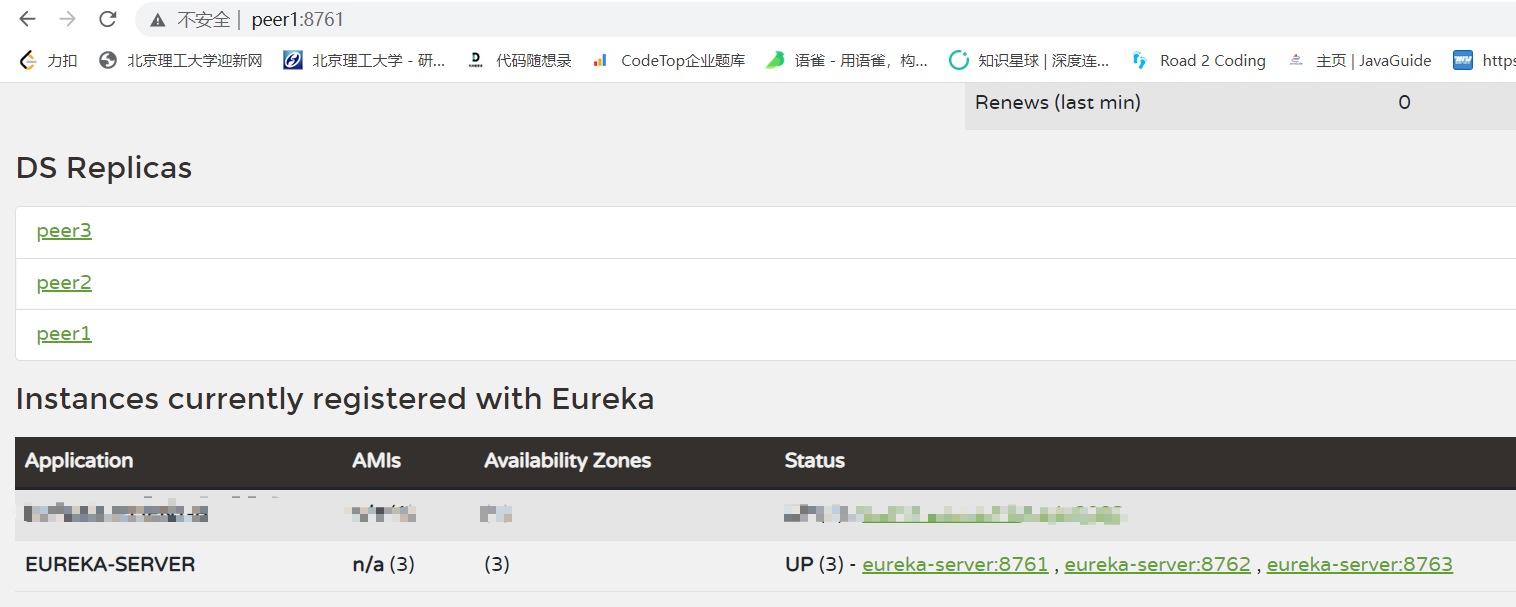
最终的集群信息显示如下:
五、集群的使用
打开一个客户端,注册到其中一台服务器上,配置文件代码如下:
注意:这里最好在三台服务器上都注册,以防止注册的那台挂掉无法注册。
server:
  port: 8002
spring:
  application:
    name: eureka-client-b
eureka:
  client:
    service-url: #eureka ????????????
      defaultZone: http://peer1:8761/eureka/
    register-with-eureka: true
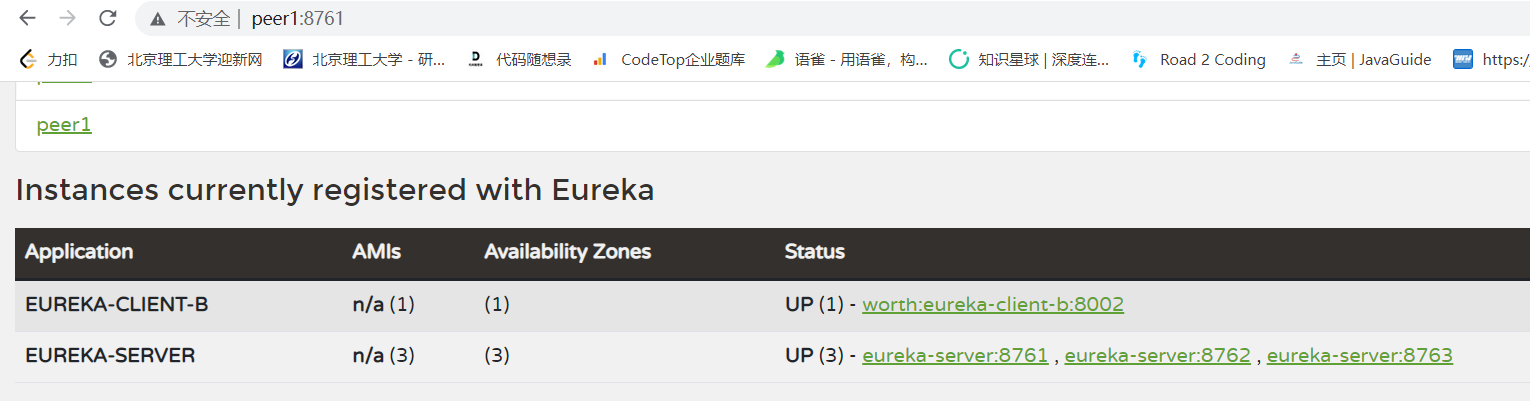
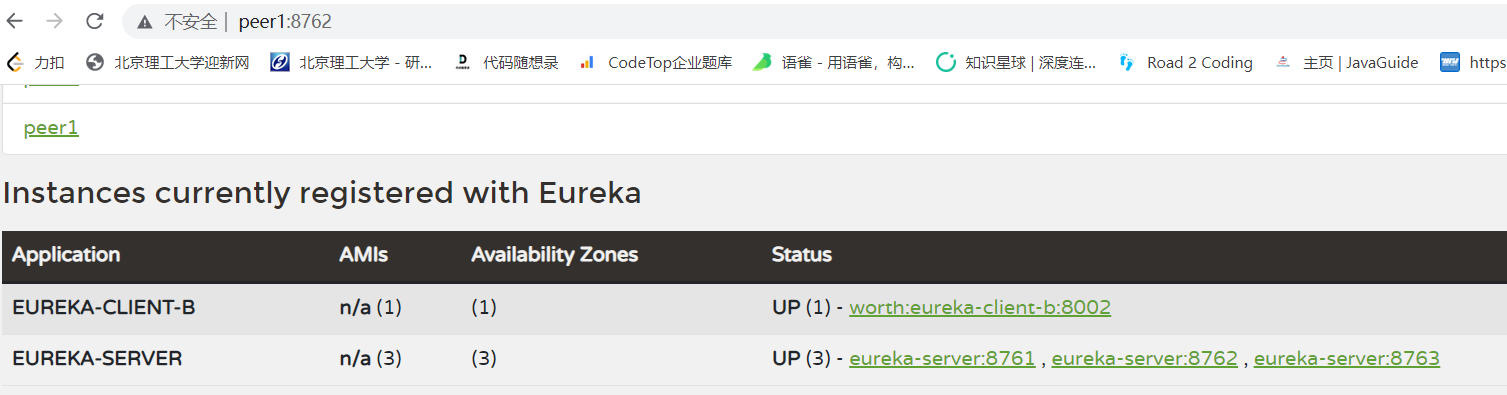
然后运行起来,然后会发现往其中一台服务器注册,另外两台也会自动有这个客户端的信息。
六、集群的深入理解
七、服务发现
7.1 服务发现简介
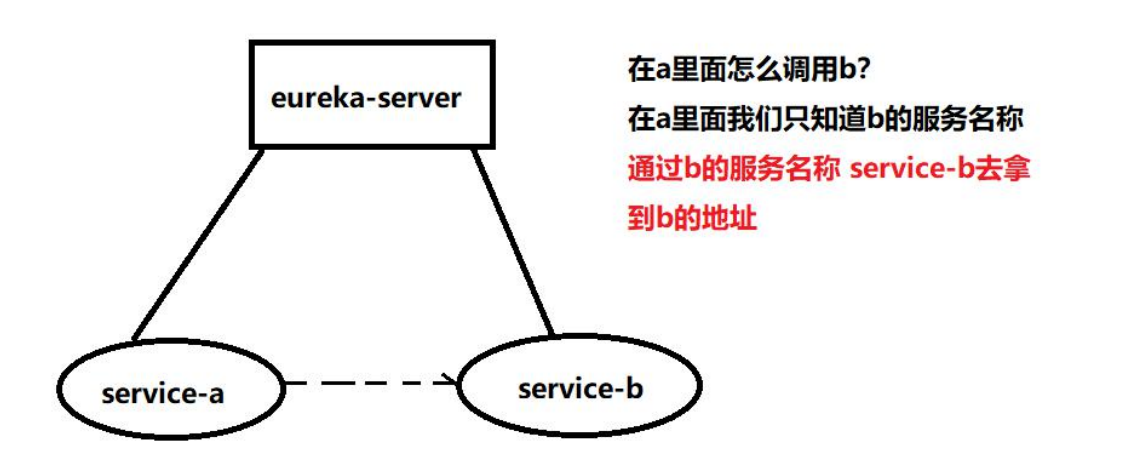
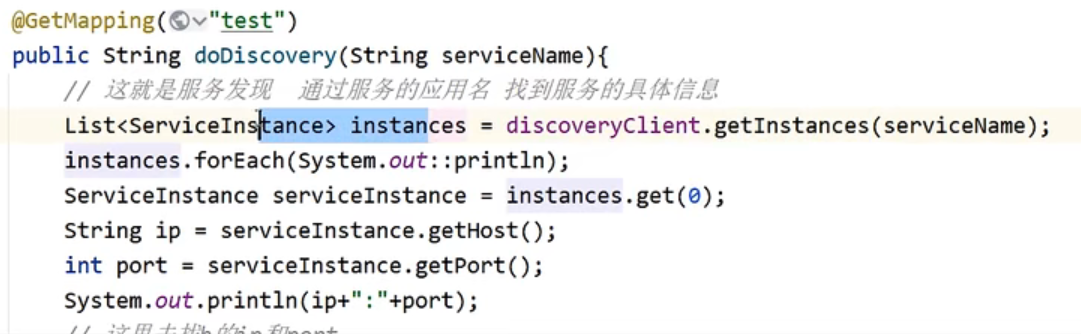
7.2 服务发现的测试(目的是通过服务名称来获得IP和端口,进而再通过HTTP请求去获取另一个服务的信息)

然后我们在A服务里做服务发现,目的是在A服务里通过名称发现服务B。
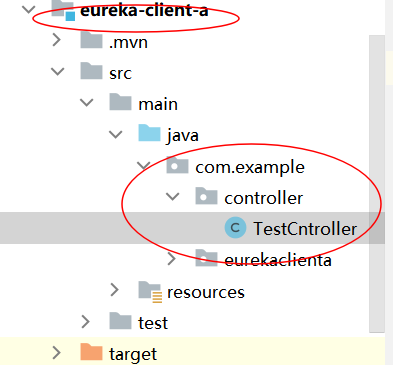
在A服务里创建一个Controller,文件位置如下:
这里有一个值得注意的点,controller文件夹必须放在与启动类同级的目录下,否则会访问不到,我这个截图是有问题的。
cntroller中的代码如下:
package com.example.controller;

import org.springframework.beans.factory.annotation.Autowired;
import org.springframework.cloud.client.ServiceInstance;
import org.springframework.cloud.client.discovery.DiscoveryClient;
import org.springframework.web.bind.annotation.GetMapping;
import org.springframework.web.bind.annotation.RestController;

import java.util.List;

@RestController
public class TestCntroller {

    /*** 注入服务发现组件,我们的 eureka 已经实现了这个接口,所以 IOC 里面有这个对象 */
    @Autowired
    private DiscoveryClient discoveryClient;

    @GetMapping("find")
    public String find(String serviceId) {
        //调用服务发现
        List<ServiceInstance> instances = discoveryClient.getInstances(serviceId);
        instances.forEach(System.out::print);
        return instances.toString();
    }

}
然后我们在浏览器中访问 http://localhost:8003/find?serviceId=eureka-client-b。

获得IP和端口号的具体代码如下:

 浙公网安备 33010602011771号