1 安装
网上很多, 第一次安装直接去官网下载
es+logstash+kibana
eshead
2 结果展示+说明
一 精准搜索想要的数据
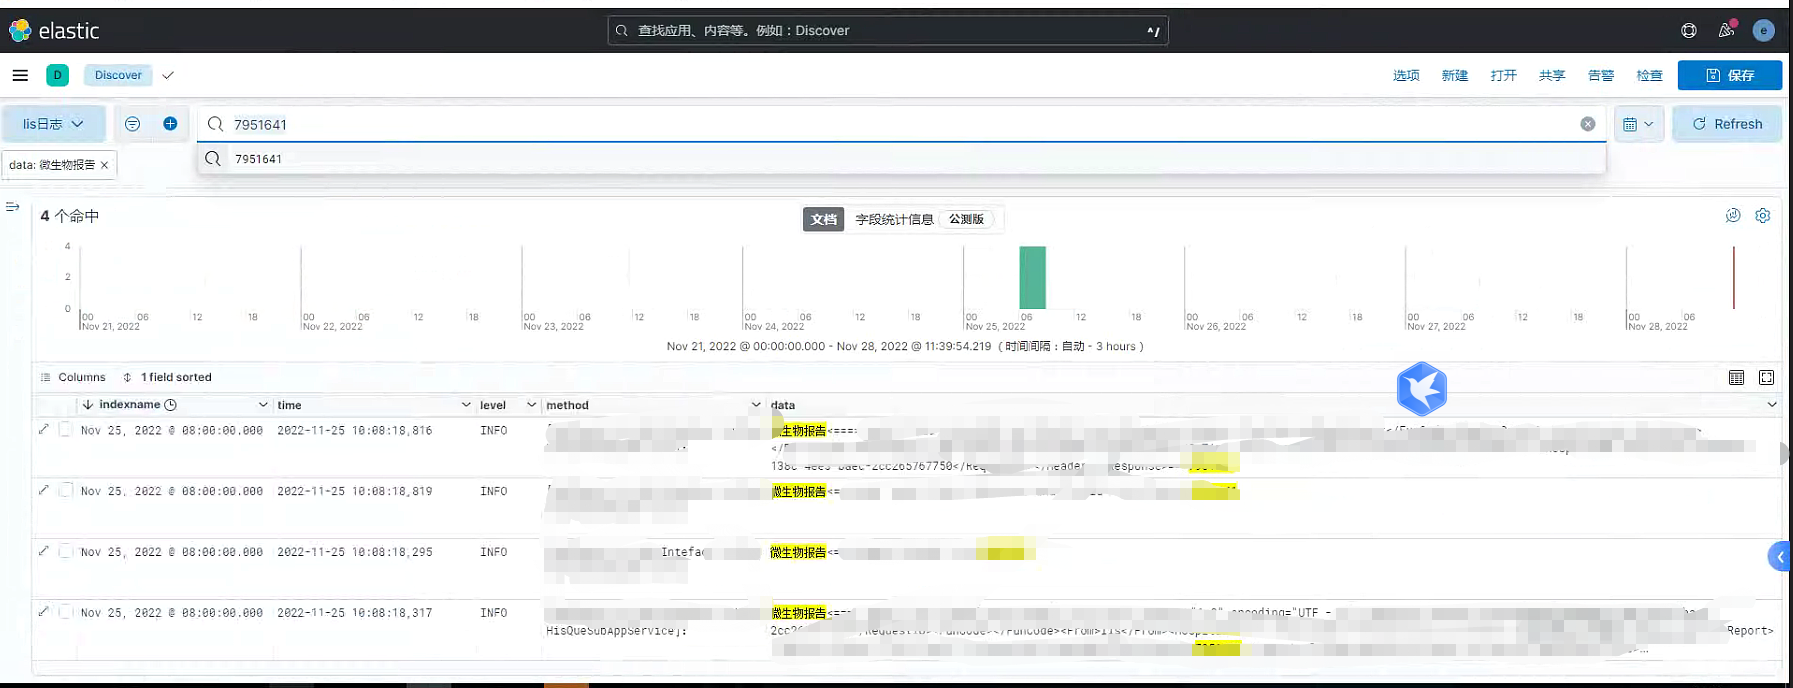
二 指定搜索时间范围内的所有数据
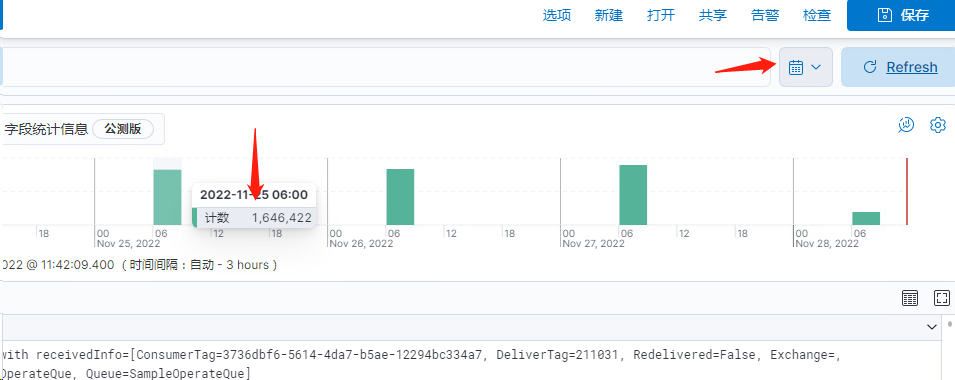
三 生命周期过期设置(验证中)
3天内的数据,过了三天的数据会直接delete,只用了hot和delete

3 需关注的几个点
一 logstash配置文件
运行命令
在D:\logstash\logstash-8.4.0\bin>
运行 logstash.bat -f D:\logstash\logstash-8.4.0\my_stash4.conf
conf文件我放在bin同级别目录下
input {
  file {
    path => "D:/Lis_DataBase/Lis_PDF_Service1/App_Data/log/*.log"
    type => "log"
    start_position => "beginning"
    sincedb_path => "D:/logstash/sincedb_acess/null"
    codec => plain{ charset => "GBK"}
  }
}

filter {
  grok  {
    match => {
      "message" => "%{TIMESTAMP_ISO8601:time}\s*%{DATA:thread}\s*%{LOGLEVEL:level}\s*(?<method>([\S+]*))\s*%{GREEDYDATA:data}"
    }
    remove_field => "message"
  }
我的日志里面有空换行,回失败排除掉
  if "_grokparsefailure" in [tags] { drop {} }
  mutate {
    add_field => {
        "time2" => "%{time}"
    }
  }
  mutate {
    split => ["time2", " "]
    add_field => {
        "indexname" => "%{[time2][0]}"
    }
  }
  mutate {
    remove_field => ["@timestamp","event","time2","log"]
  }
}
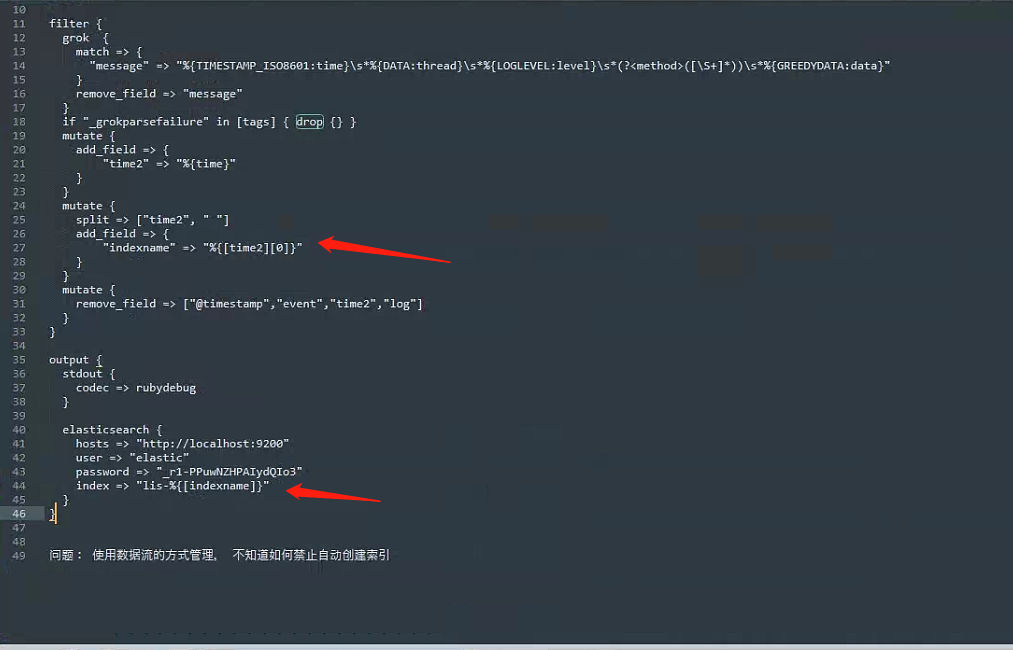
我弄time2的原因是打算每天建一个索引,或来发现没必要.
用time2的话如下图

output {
  stdout {
    codec => rubydebug
  }

  elasticsearch {
    hosts => "http://localhost:9200"
    user => "elastic"
    password => "不告诉你"
    index => "lis-log-rollover"
  }
}
每天建索引
input {
  file {
    path => "D:/logstash/log_test/lifecycle/*.log"
    type => "log"
    start_position => "beginning"
    sincedb_path => "D:/logstash/sincedb_acess/null"
    codec => plain{ charset => "GBK"}
  }
}

filter {
  grok  {
    match => {
      "message" => "%{TIMESTAMP_ISO8601:time}\s*%{DATA:thread}\s*%{LOGLEVEL:level}\s*(?<method>([\S+]*))\s*%{GREEDYDATA:data}"
    }
    remove_field => "message"
  }
  if "_grokparsefailure" in [tags] { drop {} }
  mutate {
    add_field => {
        "time2" => "%{time}"
    }
  }
  mutate {
    split => ["time2", " "]
    add_field => {
        "indexname" => "%{[time2][0]}"
    }
  }
  mutate {
    remove_field => ["@timestamp","event","time2","log"]
  }
}

output {
  stdout {
    codec => rubydebug
  }

  elasticsearch {
    hosts => "http://localhost:9200"
    user => "elastic"
    password => "_r1-PPuwNZHPAIydQIo3"
    index => "lis-%{[indexname]}"
  }
}


问题: 使用数据流的方式管理, 不知道如何禁止自动创建索引
二 es账户设置
https://blog.csdn.net/qq_41985662/article/details/123647941
三 生命周期策略选择
这里研究网上文章是发现了两种, 一是通过 索引模板+别名+新建一个物理索引管理,
因为我一开始的想法是每天建一个索引,然后通过生命周期淘汰, 第一中当时不符合我心里的想法就迟迟没采纳
二是后来发的, 通过datastream,给我的实际感觉是,它是一个能代理多个真实索引的方法,满足我前面的想法,实验之后也确实可以。 但是有个问题,我想要es策略淘汰之后,不再自动新建索引,简单的通过网上教程还未找到好的办法。
最终选择了方式一。
贴一下方式一二的验证方法:
方式一 别名:
生命周期策略
PUT _ilm/policy/ehr_prod_log_policy
{
  "policy": {
    "phases": {
      "hot": {
        "actions": {
          "rollover": {
            "max_docs": "1"
          }
        }
      },
      "delete": {
        "min_age": "30s",
        "actions": {
          "delete": {}
        }
      }
    }
  }
}
索引模板+第一个物理索引
这里索引生命周期名字指向的是你前面设置的索引生命周期名字,
索引生命周期rollover别名,这里一定更要和索引格式一样, 后面自动创建新索引的时候,会根据这里的直接创建002等
PUT _template/ehr_prod_log_template
{
  "index_patterns": ["ehr-prod-log-rollover-*"],
  "settings": {
    "number_of_shards": 1,
    "number_of_replicas": 1,
    "index.lifecycle.name": "ehr_prod_log_policy",
    "index.lifecycle.rollover_alias": "ehr-prod-log-rollover"
  }
}

PUT ehr-prod-log-rollover-00000001
{
  "aliases": {
    "ehr-prod-log-rollover": {
      "is_write_index": true
    }
  }
}
写入数据
POST /ehr-prod-log-rollover/_doc
{
"message":"hello12"
}
查看模板下索引生命周期的状态
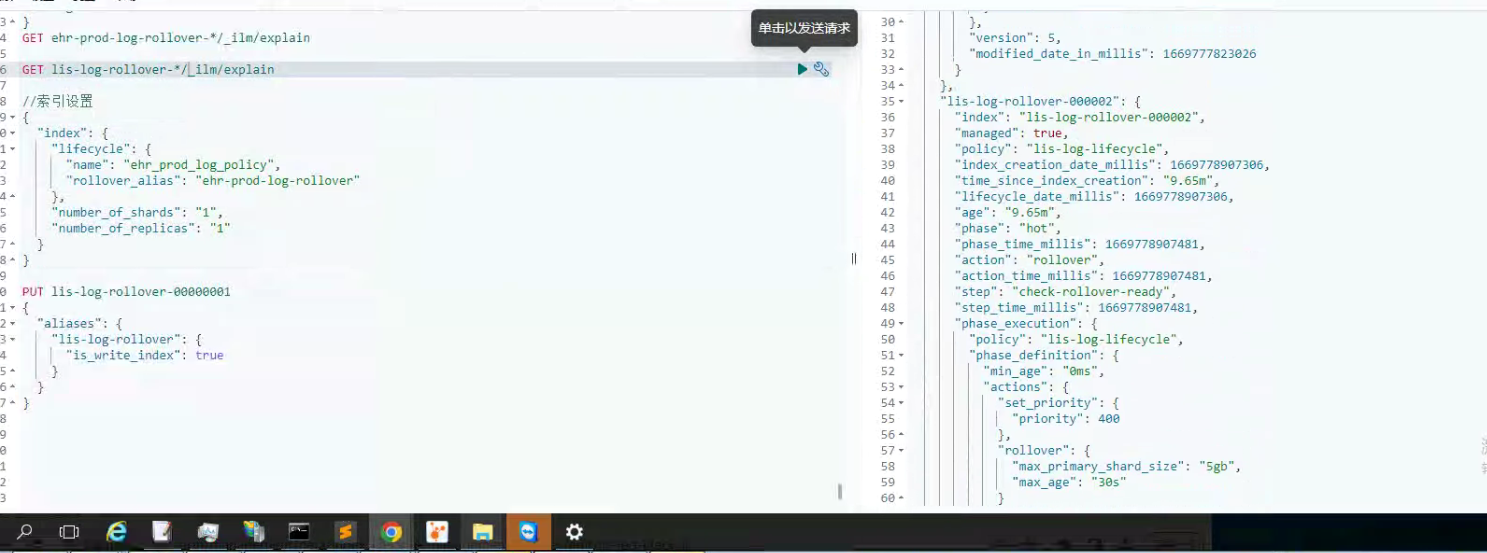
GET ehr-prod-log-rollover-*/_ilm/explain
新索引模板
PUT _ilm/policy/ehr_prod_log_policy
{
  "policy": {
    "phases": {
      "hot": {
        "actions": {
          "rollover": {
            "max_docs": "1"
          }
        }
      },
      "delete": {
        "min_age": "30s",
        "actions": {
          "delete": {}
        }
      }
    }
  }
}

PUT /_index_template/ehr_prod_log_template
{
  "index_patterns": ["ehr-prod-log-rollover-*"],
  "template":{
    "settings":{
       "number_of_shards": 1,
    "number_of_replicas": 1,
    "index.lifecycle.name": "ehr_prod_log_policy",
    "index.lifecycle.rollover_alias": "ehr-prod-log-rollover"
    }
  }
}

PUT ehr-prod-log-rollover-00000001
{
  "aliases": {
    "ehr-prod-log-rollover": {
      "is_write_index": true
    }
  }
}

POST /ehr-prod-log-rollover/_doc
{
"message":"hello12"
}
GET ehr-prod-log-rollover-*/_ilm/explain
基本2分钟就可以验证
方式二 datastream
策略
PUT _ilm/policy/test_log_policy
{
  "policy": {
    "phases": {
      "hot": {
        "actions": {
          "rollover": {
            "max_docs": "1"
          }
        }
      },
      "delete": {
        "min_age": "30s",
        "actions": {
          "delete": {}
        }
      }
    }
  }
}
模板 ,这里不需要设置别名
PUT /_index_template/test_log_te
{
  "index_patterns": ["test_log*"],
  "data_stream":{},
  "template":{
    "settings":{
      "index.lifecycle.name":"test_log_policy"
    }
  }
}
快速验证
POST /test_log_te-2022-01-01/_doc
{
  "@timestamp":"2022-12-06",
    "demo":"hello12"
}
POST /test_log_te-2022-02-01/_doc
{
  "@timestamp":"2022-12-06",
    "demo":"hello12"
}
POST /test_log_te-2022-04-01/_doc
{
  "@timestamp":"2022-11-26",
    "demo":"hello42"
}

在kibana中可以观察到, 他们自动删除后, 会自动创建一个.ds的索引

其实也可以直接用方式二,设置上更简单。
kibana-es索引生命周期 设置方式一,

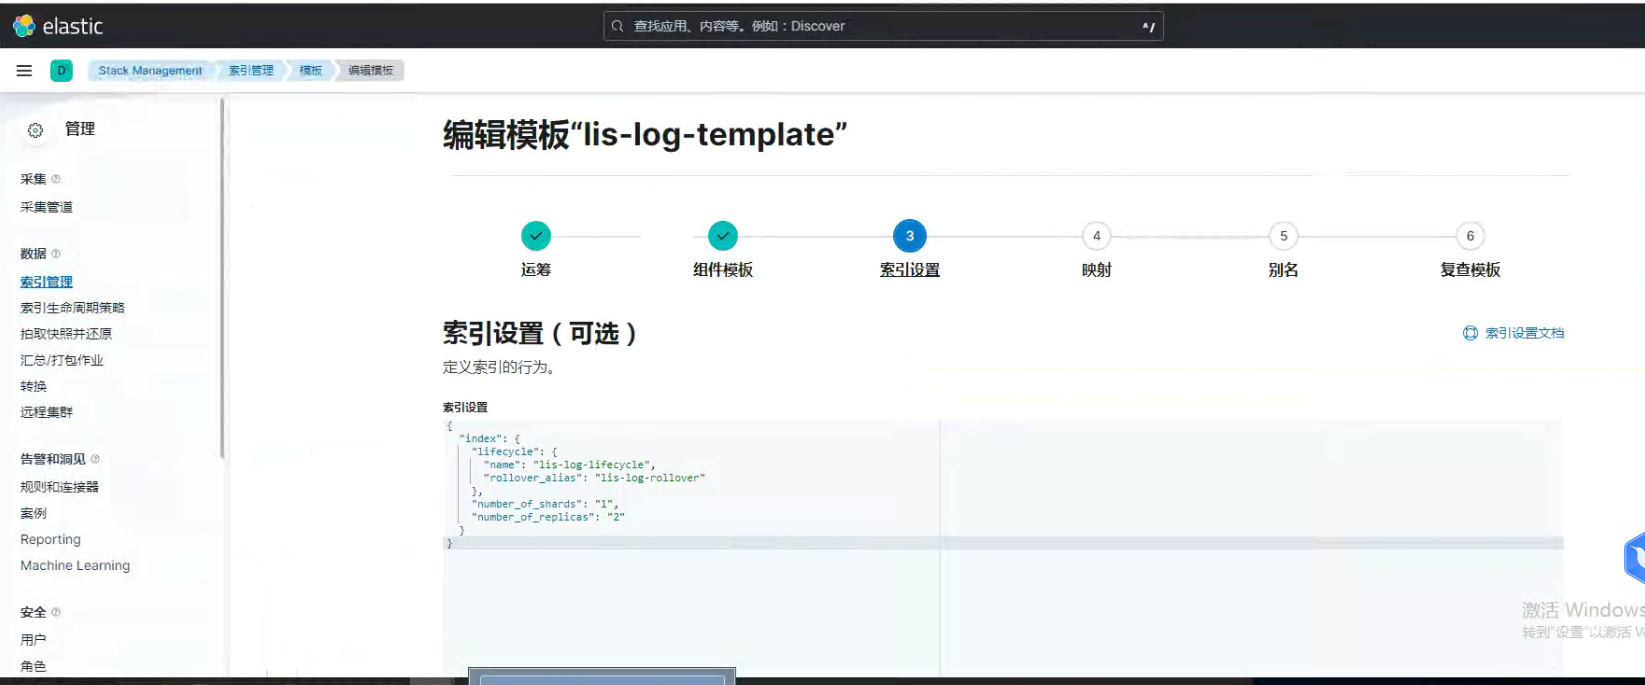
{
  "index": {
    "lifecycle": {
      "name": "lis-log-lifecycle",
      "rollover_alias": "lis-log-rollover"
    },
    "number_of_shards": "1",
    "number_of_replicas": "2"
  }
}
其他暂时不需要管
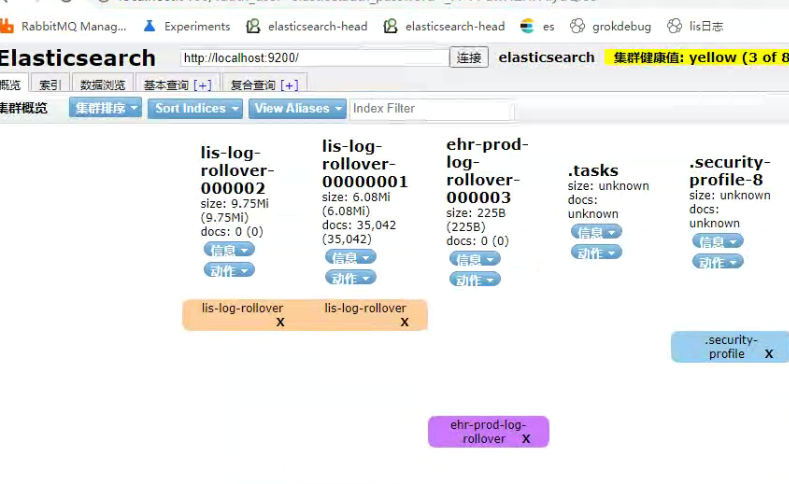
测试30s生命周期得效果:
四 不足的问题点
es的健康还是黄色
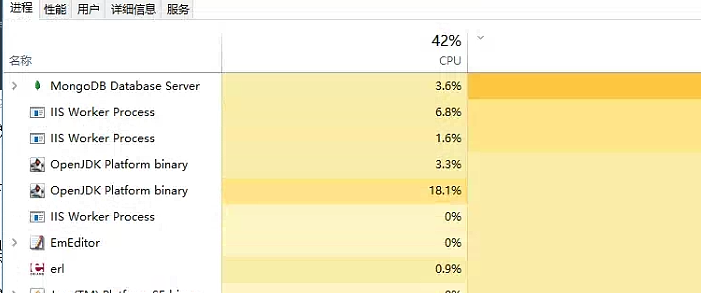
logstash main 默认的cpu打的贼高
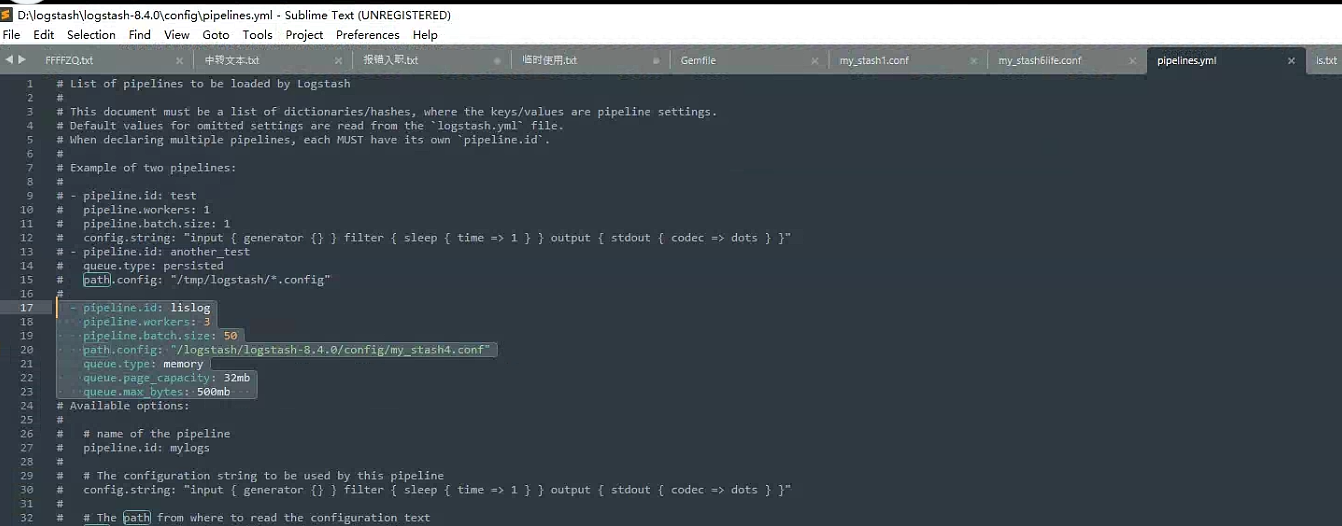
使用pipeline, 注意 win不要盘符,不然报错
https://discuss.elastic.co/t/logstash-ignoring-a-particular-pipeline-defined-in-pipelines-yml-no-configuration-found-in-the-configured-sources/125272
  - pipeline.id: lislog
    pipeline.workers: 3
    pipeline.batch.size: 50
    path.config: "/logstash/logstash-8.4.0/config/my_stash4.conf"
    queue.type: memory
    queue.page_capacity: 32mb
    queue.max_bytes: 500mb
格式参照
目前看控制住了. 之前打导百分百
五 内存观测
visualgc,可以给es的jvm的伊甸园去设置大一些,观测上目前看养老区一周多都没有gc过。
还有实际使用的jvm用的g1回收算法。
补充
kibana 操作清空索引
POST lis-log-rollover/_delete_by_query
{
"query":{
"match_all": {}
}
}
补充
排除不需要的日志
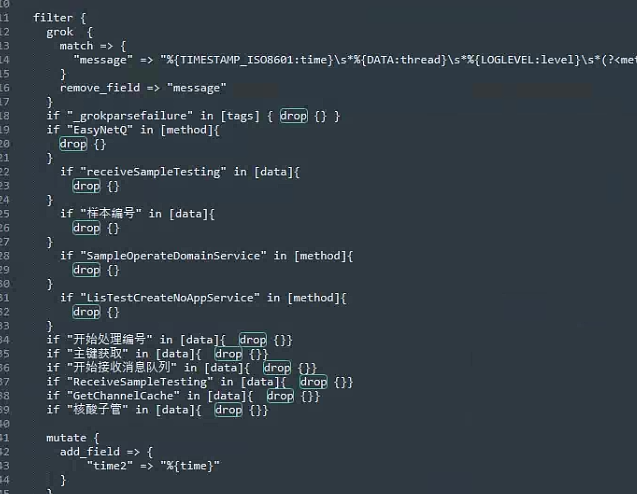
logstash临时终版配置
input {
  file {
    path => ["D:/Lis_DataBase/Lis_PDF_Service1/App_Data/log/*.log","D:/Lis_DataBase/Lis_Service/App_Data/log/*.log"]
    type => "log"
    start_position => "end"
    sincedb_path => "D:/logstash/sincedb_acess/null"
    codec => plain{ charset => "GBK"}
  }
}

filter {
  grok  {
    match => {
      "message" => "%{TIMESTAMP_ISO8601:time}\s*%{DATA:thread}\s*%{LOGLEVEL:level}\s*(?<method>([\S+]*))\s*%{GREEDYDATA:data}"
    }
    remove_field => "message"
  }
  if "_grokparsefailure" in [tags] { drop {} }
  if "EasyNetQ" in [method]{
    drop {}
  }
    if "receiveSampleTesting" in [data]{
      drop {}
  }
    if "样本编号" in [data]{
      drop {}
  }
    if "SampleOperateDomainService" in [method]{
      drop {}
  }
    if "LisTestCreateNoAppService" in [method]{
      drop {}
  }
  if "开始处理编号" in [data]{  drop {}}
  if "主键获取" in [data]{  drop {}}
  if "开始接收消息队列" in [data]{  drop {}}
  if "ReceiveSampleTesting" in [data]{  drop {}}
  if "GetChannelCache" in [data]{  drop {}}
  if "核酸子管" in [data]{  drop {}}
  if "要打包的" in [data]{  drop {}}
  if "QuartzSchedulerThread" in [method] { drop {}}
  if  "ReportHandlerAppService" in [method] { drop {}}
  mutate {
    add_field => {
        "time2" => "%{time}"
    }
  }
  mutate {
    split => ["time2", ","]
    add_field => {
        "logtime" => "%{[time2][0]}"
    }
  }
  # 这里虽然时间算出来会少8 ,答案是kibana搜索时候自动补了
  date {
    match => ["logtime","yyyy-MM-dd HH:mm:ss"]
    timezone => "Asia/Shanghai"
    target => "logtime2"
  }
  # 这里不需要了
  #ruby {
   # code => "
    #  event.set('logtime3', event.get('logtime2').time.localtime + 8*60*60)
     # #event.set('@timestamp',event.get('timestamp'))
      #"
  #}
  mutate {
    remove_field => ["@timestamp","event","time","log","time2","thread","logtime"]
  }
}

output {
  stdout {
    codec => rubydebug
  }
  elasticsearch {
    hosts => "http://localhost:9200"
    user => "elastic"
    password => "_r1-PPuwNZHPAIydQIo3"
    index => "lis-log-rollover"
  }
}
效果:所以log2虽然在记录里面是少8小时,试剂在搜索使用的时候自动加了,哎. 我用的是8.4版本的
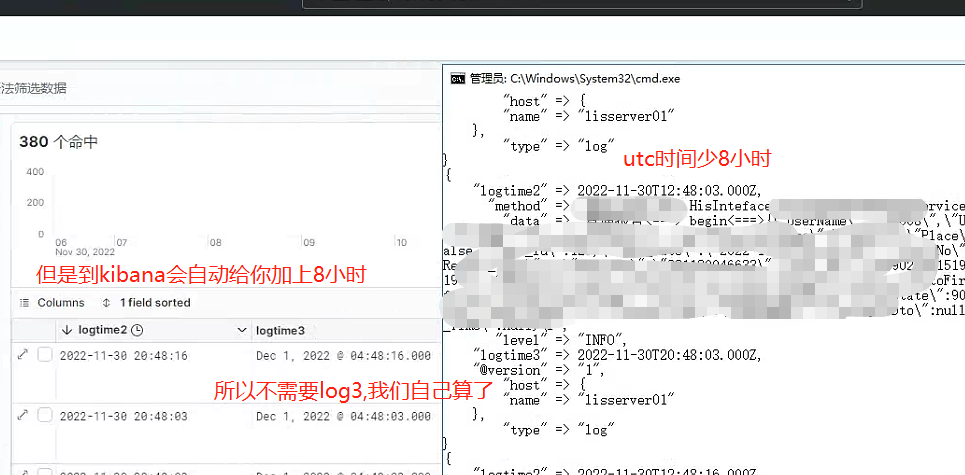
设置
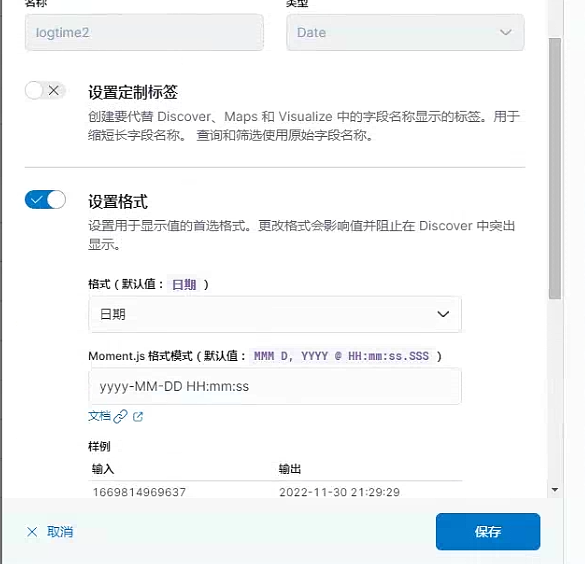
终版展示

小记录 使用kibana的 控制台功能
建索引
PUT lis-log-rollover-00000001
{
  "aliases": {
    "lis-log-rollover": {
      "is_write_index": true
    }
  }
}
  删除索引
DELETE lis-log-rollover-00000001

清空索引
POST lis-log-rollover/_delete_by_query
{
  "query":{
    "match_all": {}
  }

}
4 下一步,搭建两台机器,最终能做到三台机器的日志在一台服务器上查看


