1.什么是Phoenix
Phoenix是构建在HBase上的一个SQL层,能让我们用标椎的JDBC APIs而不是HBase客户端APIs来创建表,插入数据和对HBase数据进程查询;
Phoenix完全使用java编写,作为HBase内嵌的JDBC驱动,Phoenix查询引擎会将SQL查询转换为一个或多个HBase扫描(Scan),并编排执行以生成标椎的JDBC结果集;直接使用HBase API协同处理器自定义过滤器,对于简单查询来说,其性能量级是毫秒,对于百万级的行数来说,其性能量级是秒;
2.Phoenix安装
2.1 下载Phoenix
http://phoenix.apache.org/download.html

2.2 上传并解压文件

2.3 将Phoenix安装目录下的两个jar包copy到hbase的lib目录下(三台机器都需要)

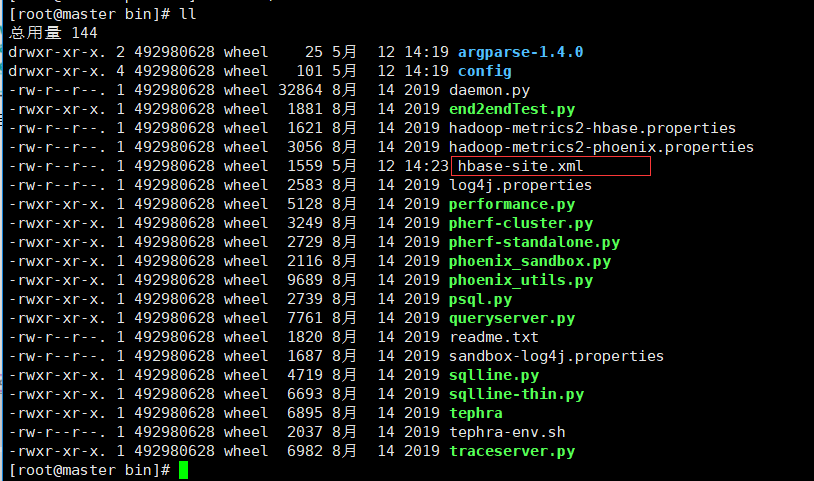
2.4 将hbase-site.xml文件copy到Phoenix的bin目录下,完成覆盖
cd /opt/module/hbase/conf
cp hbase-site.xml /opt/module/phoenix/bin/

2.5 重启hbase服务,开启Phoenix服务
bin/sqlline.py hadoop102:2181
3.Phoenix测试
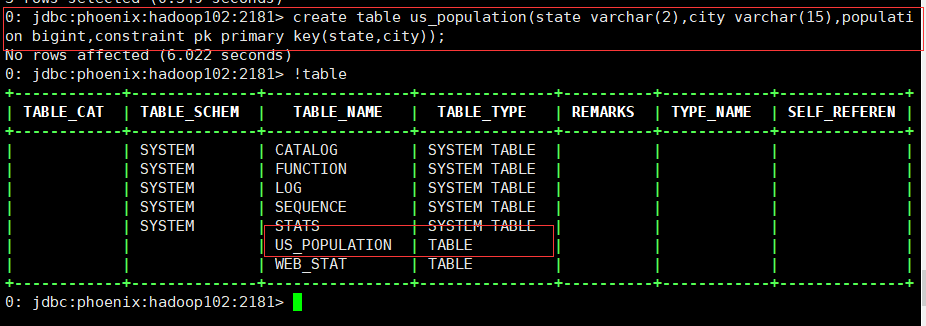
使用!table查看生成的元数据表:

使用!help查看Phoenix的用法
使用!exit退出Phoenix
3.1 创建数据表并导入数据
3.1.1 在Phoenix的bin目录下,执行该语句:
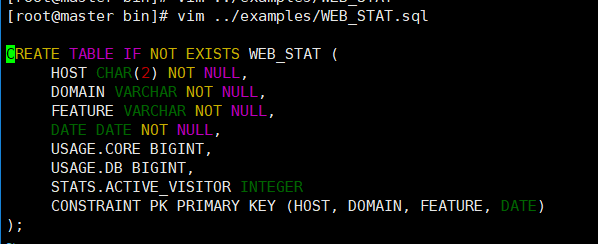
使用Phoenix自带的sql脚本文件
./psql.py localhost:2181 ../examples/WEB_STAT.sql
3.1.2 再导入指定的数据:
-t 后携带的是表名,CSV是数据文件
./psql.py -t WEB_STAT localhost:2181 ../examples/WEB_STAT.csv
3.2 查询数据
3.2.1 进入Phoenix命令行,执行!table查看已经创建的表:

3.2.2 检索该表记录条数:
select count(1) from web_stat;

3.2.3 按照domain域名进行分组查询:
select domain,count(1) as number from web_stat group by domain order by number;

3.3 插入表数据
3.3.1 创建新的数据表
create table us_population(state varchar(2),city varchar(15),population bigint,constraint pk primary key(state,city));
3.3.2 插入/更新数据
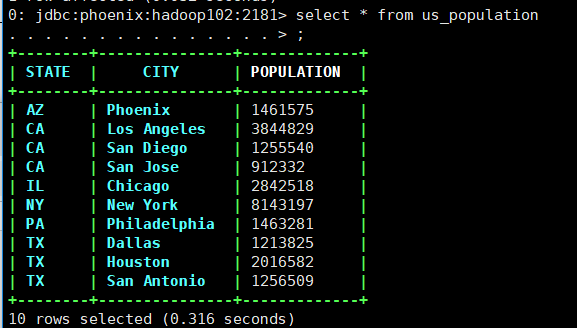
upsert into us_population(state,city,population) values('NY','New York',8143197);
upsert into us_population(state,city,population) values('NY','New York',8143197);
upsert into us_population(state,city,population) values('CA','Los Angeles',3844829);
upsert into us_population(state,city,population) values('IL','Chicago',2842518);
upsert into us_population(state,city,population) values('TX','Houston',2016582);
upsert into us_population(state,city,population) values('PA','Philadelphia',1463281);
upsert into us_population(state,city,population) values('AZ','Phoenix',1461575);
upsert into us_population(state,city,population) values('TX','San Antonio',1256509);
upsert into us_population(state,city,population) values('CA','San Diego',1255540);
upsert into us_population(state,city,population) values('TX','Dallas',1213825);
upsert into us_population(state,city,population) values('CA','San Jose',912332);
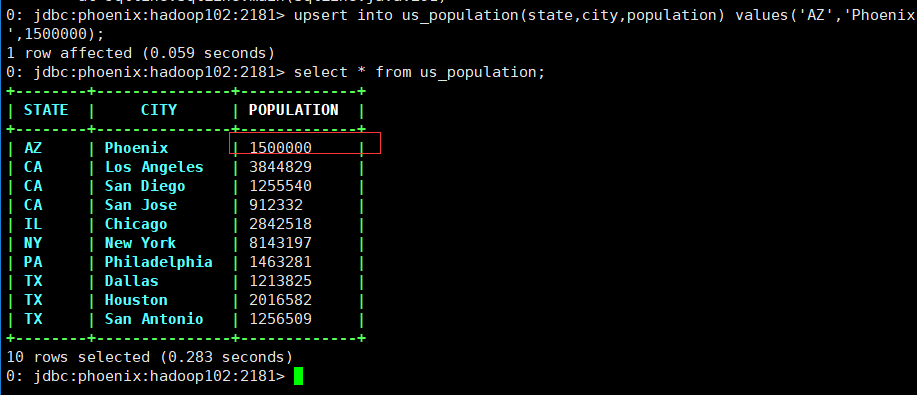
3.4 修改表数据
upsert into us_population(state,city,population) values('AZ','Phoenix',1500000);
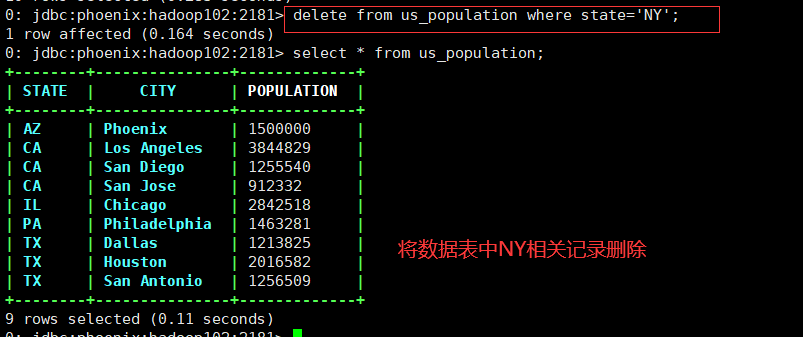
3.5 删除表数据
delete from us_population where state='NY';
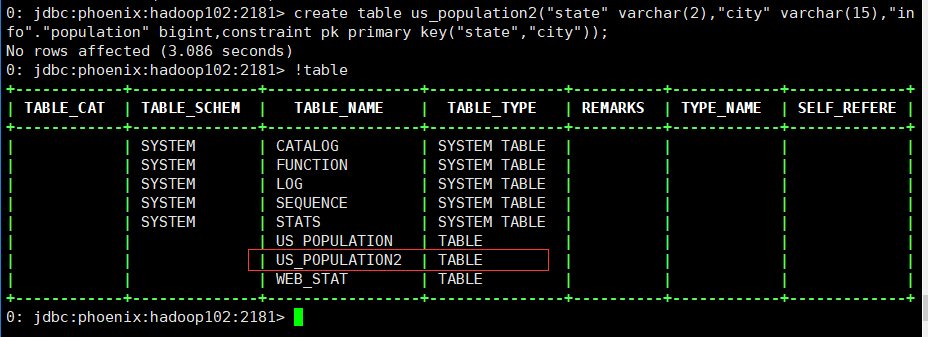
3.6 创建带列族的数据表
3.6.1 创建新数据表
create table us_population2("state" varchar(2),"city" varchar(15),"info"."population" bigint,constraint pk primary key("state","city"));
3.6.2 新增数据
upsert into us_population2("state","city","info"."population") values('BY','shanghai',8143197);

利用Phoenix查询hbase时,返回结果中无法区分字段的列族,当不同列族下存在相同名称的字段时,会产生异常(在hbase的不同列族中,不要出现相同的列名字段);
3.7 Phoenix的表映射
默认情况下,在hbase中创建的表在Phoenix中是看不到的;
在hbase的shell命令行中新建表
create 'HBASE_PHONEIX','grade'
插入数据
put 'HBASE_PHONEIX','001','grade:name','BigData'
put 'HBASE_PHONEIX','001','grade:classname','B01'
如果在Phoenix中操作由hbase创建的数据表,则需要在Phoenix中进行表的映射;
映射的方式有两种:视图映射和表映射;
3.7.1 视图映射
在Phoenix的4.10版本之后,推荐使用基于视图的方式映射到hbase上的数据;仅提供高速检索与查询功能;删除视图也不会影响hbase上的数据;
删除视图上的数据会出现Error:ERROR 505 (4200):Table is read only这样的异常;
创建视图:
create view "HBASE_PHONEIX"("row" varchar primary key,"grade"."classname" varchar,"grade"."name" varchar);
select * from HBASE_PHONEIX;

3.7.2 表映射
使用Apache Phoenix创建时对hbase的表映射,有两种方法:
1.当hbase中表已存在,创建用名表和结构即可;
2.当hbase中不存在,可以直接使用create table指令创建需要的表,并且在创建指令中可以根据需要对hbase表结构进行显示的说明;
3.Phoenix的主键名称不需要和hbase中相同,两边通过表格内置结构可以自动关联起来,因为表格自动识别主键;
4.Phoenix中的column必须以hbase的columnFamily开头;
在Phoenix中创建映射表:必须需要禁用表的映射规则,这样做会降低检索性能;
create table "HBASE_PHONEIX"("row" varchar primary key,"grade"."classname" varchar,"grade"."name" varchar)column_encodeed_bytes=0;
3.8 使用JDBC
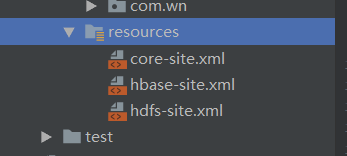
3.8.1 开发准备,从集群中copy以下文件:
core-site.xml,hbase-site.xml,hdfs-site.xml文件放置在项目的resource目录下;
3.8.2 导入依赖
<dependency>
  <groupId>org.apache.phoenix</groupId>
  <artifactId>phoenix-core</artifactId>
  <version>4.14.3-HBase-1.4</version>
</dependency>
3.8.3 打开连接
    private  static Connection conn=null;
    private static Statement statement=null;

    /*打开连接*/
    static {
        try {
            Class.forName("org.apache.phoenix.jdbc.PhoenixDriver");
            //这里配置zookeeper地址,可单个,也可多个,可以是域名或者ip
            String url="jdbc:phoenix:hadoop102:2181/hbase";
            conn= DriverManager.getConnection(url);
            statement=conn.createStatement();
        } catch (Exception e) {
            e.printStackTrace();
        }
    }
3.8.4 创建数据表
    /*创建数据表*/
    public static void testCreateTable(String tableName) throws SQLException {
        String sql="create table "+tableName+" (mykey integer not null primary key,mycolumn varchar)";
        statement.executeUpdate(sql);
        conn.commit();
        System.out.println("创建数据表成功!");
        conn.close();
        statement.close();
    }
    public static void main(String[] args) throws SQLException {
        testCreateTable("wn");    //创建数据表
    }

3.8.5 单条插入数据
    /*单条插入数据*/
    public static void testUpsert() throws SQLException {
        String sql1="upsert into wn values(1,'test1')";
        String sql2="upsert into wn values(2,'test2')";
        String sql3="upsert into wn values(3,'test3')";
        statement.executeUpdate(sql1);
        statement.executeUpdate(sql2);
        statement.executeUpdate(sql3);
        conn.commit();
        System.out.println("数据已插入!");
        conn.close();
        statement.close();
    }
    public static void main(String[] args) throws SQLException {
        testUpsert();   //单条插入数据
    }

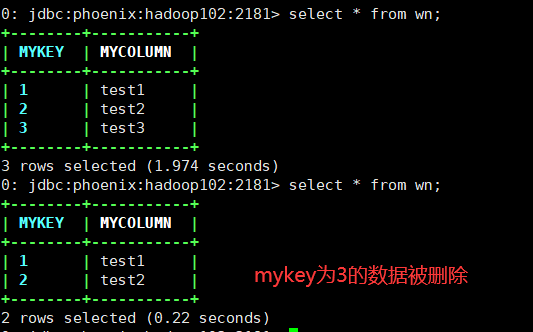
3.8.6 删除数据
    /*删除数据*/
    public static void testDelete(String tableName) throws SQLException {
        String sql="delete from "+tableName+" where mykey=3";
        statement.executeUpdate(sql);
        conn.commit();
        System.out.println("删除数据成功!");
        conn.close();
        statement.close();
    }
    public static void main(String[] args) throws SQLException {
        testDelete("wn");   //删除数据
    }
3.8.7 检索数据表中的记录
    /*检索数据表中的记录*/
    public static void testReadAll() throws SQLException {
        String sql="select * from wn";
        long time=System.currentTimeMillis();
        ResultSet rs = statement.executeQuery(sql);
        conn.commit();
        while (rs.next()){
            //获取字段值
            int mykey = rs.getInt("mykey");
            //获取字段值
            String mycolumn = rs.getString("mycolumn");
            System.out.println("mykey:"+mykey+"\t"+"mycolumn:"+mycolumn);
        }
        rs.close();
        conn.close();
        statement.close();
    }
    public static void main(String[] args) throws SQLException {
        testReadAll();  //检索数据表中记录
    }


 posted on
