什么是跨域
使用JS获取数据时,涉及到的两个URL只要协议,域名,端口有任何一个不同,都当做是不同的域,相互访问就会有跨域问题;
怎样使用nginx解决跨域问题
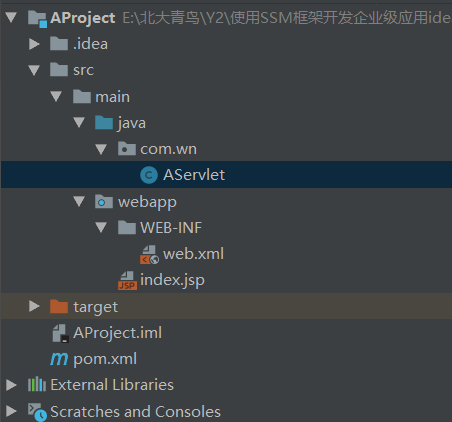
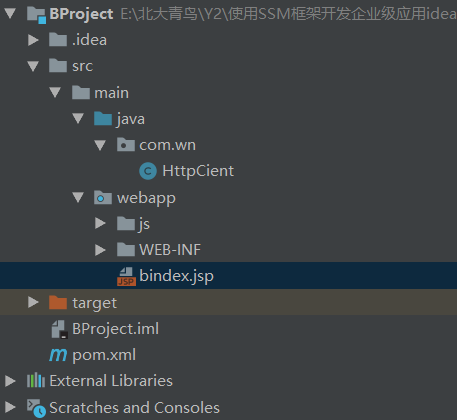
步骤一:创建两个工程AProject,BProject


步骤二:在A工程中创建servlet
package com.wn;

import com.alibaba.fastjson.JSON;

import javax.servlet.ServletException;
import javax.servlet.annotation.WebServlet;
import javax.servlet.http.HttpServlet;
import javax.servlet.http.HttpServletRequest;
import javax.servlet.http.HttpServletResponse;
import java.io.IOException;

@WebServlet("/aServlet")
public class AServlet extends HttpServlet {
    //resp.setContentType("text/html;charset=utf-8");
    @Override
    protected void doPost(HttpServletRequest req, HttpServletResponse resp) throws ServletException, IOException {
        doGet(req,resp);
    }

    //方法四:使用nginx解決跨域問題
    @Override
    protected void doGet(HttpServletRequest req, HttpServletResponse resp) throws ServletException, IOException {
        String username = req.getParameter("username");
        System.out.println("数据:"+username);

        //响应
        resp.getWriter().write("success");
    }
}
步骤三:在B工程中创建jsp页面
<%--
  Created by IntelliJ IDEA.
  User: wn
  Date: 2020/2/6
  Time: 10:04
  To change this template use File | Settings | File Templates.
--%>
<%@ page contentType="text/html;charset=UTF-8" language="java" %>
<html>
<head>
    <title>跨域</title>
    <script type="text/javascript" src="js/jquery-1.8.3.min.js"></script>
    <script>
        //使用nginx解决跨域问题
        $(function () {
            $("#button").click(function () {
                var username=$("#username").val();
                $.ajax({
                    url:"http://www.123.com:81/a/aServlet?username="+username,
                    type:"GET",
                    success:function (result) {
                        alert(result)
                    },
                    error:function () {
                        alert("error!!!")
                    }
                })
            })
        })

    </script>
</head>
<body>
  <input type="text" name="username" id="username"/><button id="button" type="button">提交</button>
</body>
</html>
步骤四:配置nginx.conf文件
server {
        listen       81;
        server_name  www.123.com;

        #charset koi8-r;

        #access_log  logs/host.access.log  main;

        location / {
            root   html;
            index  index.html index.htm;
        }

        #nginx解决跨域问题
        location /a {
            proxy_pass http://www.aproject.com:8080/;
            index index.html index.htm;

        }
        location /b {
            proxy_pass http://www.bproject.com:8081/;
            index index.html index.htm;
        }
}
步骤五:启动,实现效果
使用www.123.com:81/b/bindex.jsp访问B项目中的页面

输入123文本,点击提交按钮,页面将会淡出弹出success提示框,这样就代表数据成功请求和响应;

完成之后,A项目控制台中会接收到公共页面提交的数据,并且servlet也将数据成功响应给页面;


 posted on

