springboot入门_helloworld
springboot是什么,能做什么
官方的说明如下:
Spring Boot makes it easy to create stand-alone, production-grade Spring-based Applications that you can run. We take an opinionated view of the Spring platform and third-party libraries, so that you can get started with minimum fuss. Most Spring Boot applications need very little Spring configuration.
Our primary goals are:
- Provide a radically faster and widely accessible getting-started experience for all Spring development.
- Be opinionated out of the box but get out of the way quickly as requirements start to diverge from the defaults.
- Provide a range of non-functional features that are common to large classes of projects (such as embedded servers, security, metrics, health checks, and externalized configuration).
- Absolutely no code generation and no requirement for XML configuration.
Spring Boot使创建可运行的独立的、基于Spring的产品级应用程序变得很容易。我们对Spring平台和第三方库有自己的看法,这样您就可以以最少的麻烦开始工作。大多数Spring引导应用程序只需要很少的Spring配置。
我们的主要目标是:
·为所有Spring开发提供一个非常快的、广泛可访问的开始体验。
·要跳出固有的思维模式,但是当需求开始偏离默认设置时,要迅速避开。
·提供大型项目(如嵌入式服务器、安全性、度量、健康检查和外部化配置)所共有的一系列非功能特性。
·绝对不需要生成代码,也不需要XML配置。
springboot使用
目前springboot已经到了2.1版本了,构建一个基于springboot2的项目需要环境如下:
java 8+; maven 3.2+; springframework 5.0.8RELEASE+; Tomcat 8;
话不多说,我们直接上车,动手写一个springboot项目,输出helloworld。
首先,创建一个maven工程,修改pom文件,引入所需要的依赖,pom.xml如下
 1 <?xml version="1.0" encoding="UTF-8"?>
 2 <project xmlns="http://maven.apache.org/POM/4.0.0" xmlns:xsi="http://www.w3.org/2001/XMLSchema-instance"
 3     xsi:schemaLocation="http://maven.apache.org/POM/4.0.0 http://maven.apache.org/xsd/maven-4.0.0.xsd">
 4     <modelVersion>4.0.0</modelVersion>
 5
 6     <groupId>org.allen.learn</groupId>
 7     <artifactId>springboot_helloworld</artifactId>
 8     <version>0.0.1-SNAPSHOT</version>
 9
10     <packaging>war</packaging>
11
12     <!-- Inherit defaults from Spring Boot -->
13     <parent>
14         <groupId>org.springframework.boot</groupId>
15         <artifactId>spring-boot-starter-parent</artifactId>
16         <version>2.0.4.RELEASE</version>
17     </parent>
18
19     <!-- Add typical dependencies for a web application -->
20     <dependencies>
21         <dependency>
22             <groupId>org.springframework.boot</groupId>
23             <artifactId>spring-boot-starter-web</artifactId>
24         </dependency>
25     </dependencies>
26
27 </project>
其次,创建一个java对象,并写main方法,此main为项目的启动类 方法,代码如下:
 1 package org.allen.learn.boot.app;
 2
 3 import org.springframework.boot.SpringApplication;
 4 import org.springframework.boot.autoconfigure.SpringBootApplication;
 5
 6 @SpringBootApplication
 7 public class Application {
 8
 9     public static void main(String[] args) {
10         SpringApplication.run(Application.class, args);
11     }
12
13 }
最后我们写一个控制器,输出hello world,代码如下:
 1 package org.allen.learn.boot.controller;
 2
 3 import org.springframework.web.bind.annotation.RequestMapping;
 4 import org.springframework.web.bind.annotation.RestController;
 5
 6 @RestController
 7 public class HelloWorldController {
 8
 9     @RequestMapping("/hello")
10     public String hello() {
11         return "hello world!!!";
12     }
13
14 }
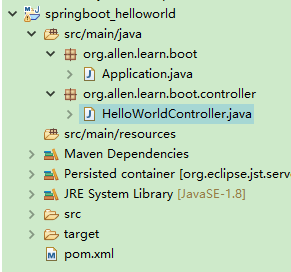
整个工程结构如下图:
接下来,我们执行启动类的main方法,启动项目,控制台输出信息如下:
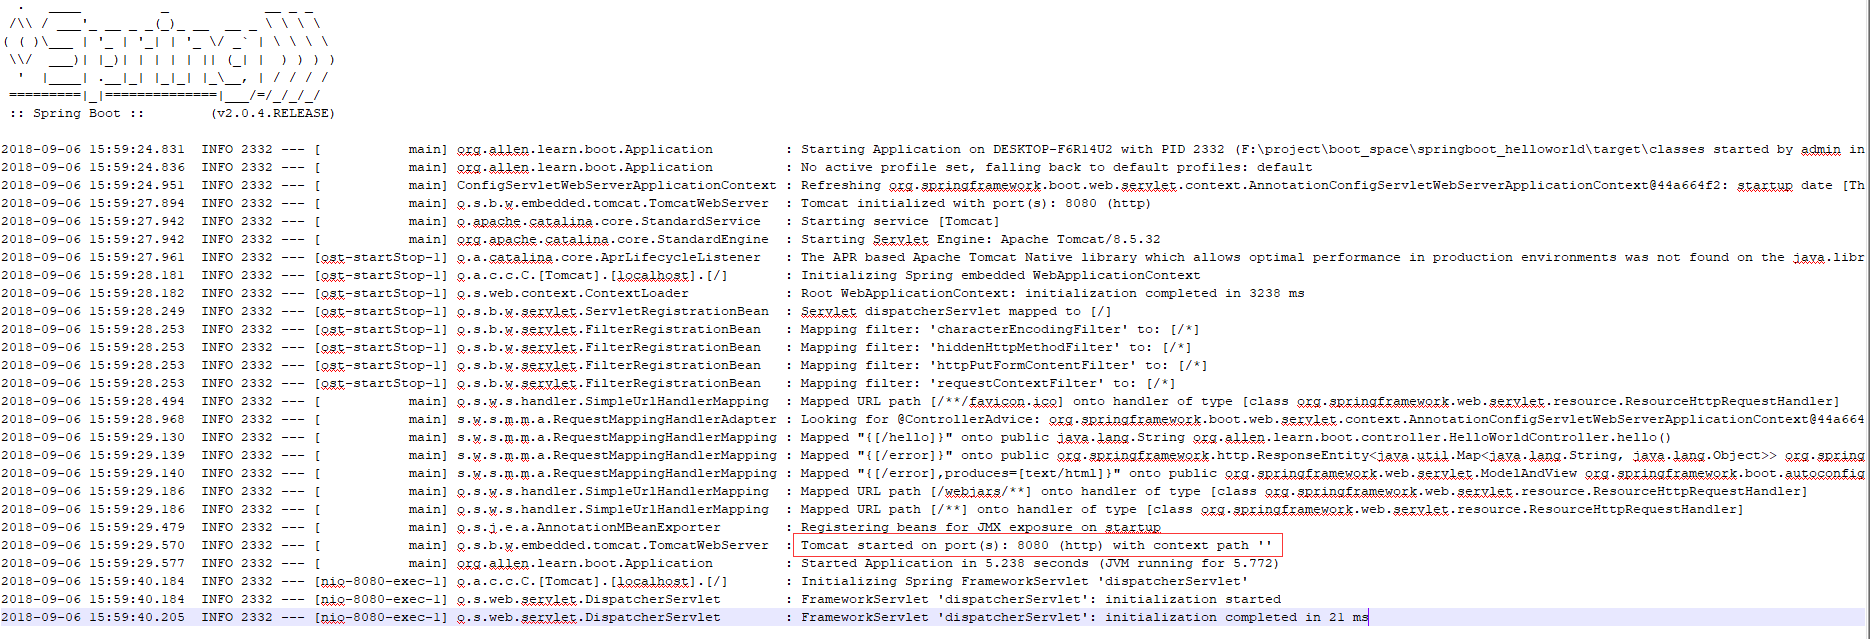
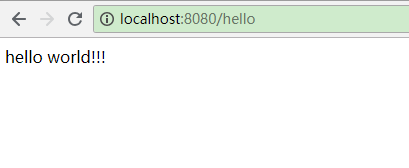
在上图中可以看出,tomcat的端口为8080,根路径为空,所以我们访问 http://localhost:8080/hello 可以在浏览器中看到输出的信息,如下图:
至此,我们用springboot简单的实现了输出hello world。
相较以前我们使用springmvc框架,要修改web.xml 添加各种xml文件,springboot使用起来确实很方便,不用任何xml文件。
修改默认端口和根路径
在上边的启动日志中,我们可以看到默认端口是8080,默认的根路径是空,我们只需要在resources路径下创建application.properties文件,在此文件中指定端口和添加访问根路径即可,如下:
#修改默认端口
server.port=8090

#修改根路径
server.servlet.context-path=/helloWorld
重启项目,输出启动信息如下:

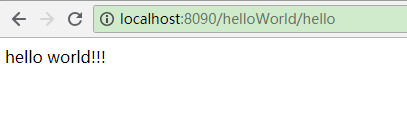
这时我们可以看到tomcat的端口变成了8090,根路径变成了 /helloWorld 我们访问 http://localhost:8090/helloWorld/hello 浏览器输出如下:
开发环境
热启动在我们平时的开发中很常见,但是在我们修改了文件重启时,总是会报错,无法正常启动。springboot对热启动支持的很好,我们只需要引入相应的插件依赖就可以了,修改文件之后会及时生效。pom文件添加依赖:
1 <dependency>
2             <groupId>org.springframework.boot</groupId>
3             <artifactId>spring-boot-devtools</artifactId>
4             <optional>true</optional>
5         </dependency>
当然如果你想禁止使用此特性,也可以在属性文件中设置
1 #禁用 重启 2 spring.devtools.restart.enabled=false 或者在启动类方法的run方法之前设置 1 System.setProperty("spring.devtools.restart.enabled", "false");
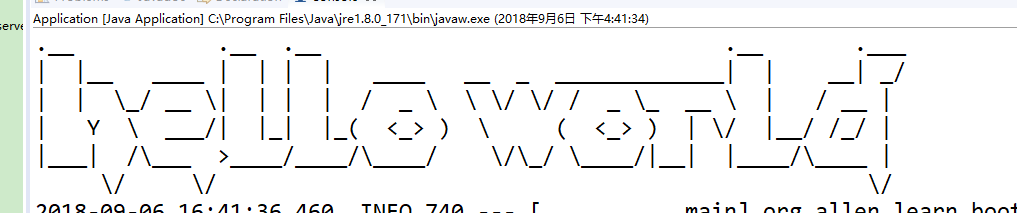
修改banner
在启动日志信息中,我们可以看到最开始输出的是一个spring的字样,这个是可以修改的。我们需要在resources路径下创建一个banner.txt文件,并在里边写如需要打印出来的字符串即可。
我们可以在第三方网站帮我们转换内容,字符串转换:http://www.network-science.de/ascii/ 图片转换:http://www.degraeve.com/img2txt.php
此处我们以字符串'hello world'为例说明(先去上边的网站转换内容,在复制到banner.txt中),重启服务,看启动日志如下:
如果我们不想显示banner,可以在启动方法中指定,修改启动类代码如下:
1 public static void main(String[] args) {
2         //SpringApplication.run(Application.class, args);
3
4         //禁止输出banner
5         SpringApplication app = new SpringApplication(Application.class);
6         app.setBannerMode(Banner.Mode.OFF);
7         app.run(args);
8     }
此文为本人初学springboot做的笔记,如有不正确的地方,希望读者朋友可以指正。

 浙公网安备 33010602011771号