
WPF学习记录 一、布局
主要有5种:
1、StackPanel
这种布局是按照子控件的顺序逐个按顺序排队显示,可以设置排队的方式
下面的代码是水平排队展示:
        <StackPanel Orientation="Horizontal">
            <Button Width="100" Height="20" Content="test"></Button>
            <Button Width="100" Height="20" Content="test"></Button>
            <Button Width="100" Height="20" Content="test"></Button>
            <Button Width="100" Height="20" Content="test"></Button>
        </StackPanel>
显示效果如下:

下面的代码是垂直排队展示:
        <StackPanel Orientation="Vertical">
            <Button Width="100" Height="20" Content="test"></Button>
            <Button Width="100" Height="20" Content="test"></Button>
            <Button Width="100" Height="20" Content="test"></Button>
            <Button Width="100" Height="20" Content="test"></Button>
        </StackPanel>
效果如下:

2、WrapPanel
跟StackPanel的用法基本一致,只不过多一个功能,就是换行,在StackPanel里是不会换行的,如果超过了界面的范围,就不显示了,但是WrapPanel是会自动换行的,如下图:

代码如下:
        <WrapPanel Orientation="Horizontal">
            <Button Width="300" Height="20" Content="test"></Button>
            <Button Width="300" Height="20" Content="test"></Button>
            <Button Width="300" Height="20" Content="test"></Button>
            <Button Width="300" Height="20" Content="test"></Button>
        </WrapPanel>
3、WrapPanel
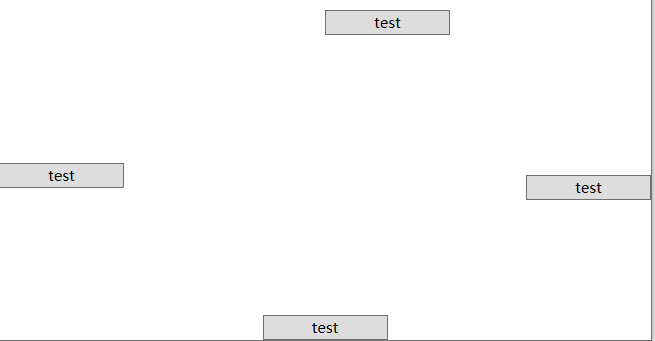
可以像winform那像控制控件在左、右、上、下的顶端排列,如下:
        <DockPanel  LastChildFill="False">
            <Button Width="100" DockPanel.Dock="Left" Height="20" Content="test"></Button>
            <Button Width="100" DockPanel.Dock="Top" Height="20" Content="test"></Button>
            <Button Width="100" DockPanel.Dock="Right" Height="20" Content="test"></Button>
            <Button Width="100" DockPanel.Dock="Bottom" Height="20" Content="test"></Button>
        </DockPanel>
效果图如下:
4、Grid
这个我用得比较多,详细的就不记了,只记关键的吧
可以使用 width="2*",这样的方式来按比例设置宽度
5、Canvas
这个是用来把控件放到绝对位置上,这个我也用过,就不记录了


【推荐】国内首个AI IDE,深度理解中文开发场景,立即下载体验Trae
【推荐】编程新体验,更懂你的AI,立即体验豆包MarsCode编程助手
【推荐】抖音旗下AI助手豆包,你的智能百科全书,全免费不限次数
【推荐】轻量又高性能的 SSH 工具 IShell:AI 加持,快人一步
· .NET Core 中如何实现缓存的预热?
· 从 HTTP 原因短语缺失研究 HTTP/2 和 HTTP/3 的设计差异
· AI与.NET技术实操系列:向量存储与相似性搜索在 .NET 中的实现
· 基于Microsoft.Extensions.AI核心库实现RAG应用
· Linux系列:如何用heaptrack跟踪.NET程序的非托管内存泄露
· TypeScript + Deepseek 打造卜卦网站:技术与玄学的结合
· Manus的开源复刻OpenManus初探
· AI 智能体引爆开源社区「GitHub 热点速览」
· 三行代码完成国际化适配,妙~啊~
· .NET Core 中如何实现缓存的预热?