Graylog安装配置
ES集群健康检测:curl -sXGET http://localhost:9200/_cluster/health?pretty=true | grep "status" | awk -F '[ "]+' '{print $4}' | grep -c "green"
ES节点健康检测:curl -sXGET localhost:9200/_cat/health |awk -F ' ' '{print $4}'
-s --silent 静默模式,就是不显示错误和进度
--------------------------------------------------------------------------------------
https://github.com/mobz/elasticsearch-head
https://github.com/lmenezes/elasticsearch-kopf
--------------------------------------------------------------------------------------
注:新版graylog需要 jdk 1.8以上版本支持
ES集群索引数据重置方法:
--------------------------------------------------------------------------------------------
ELASTICSEARCH 服务监控
Elasticsearch 服务本身通过 API 提供了丰富的监控信息,您可以直接调用接口获取监控数据:
- 集群健康状态: http://<任意节点私网IP>:9200/_cluster/health?pretty=true
- 各节点统计信息: http://<任意节点私网IP>:9200/_nodes/stats?pretty=true
- 索引统计信息: http://<任意节点私网IP>:9200/_stats?pretty=true
此外,Elasticsearch 服务内置了 kopf 插件(一个 Elasticsearch 的 web 管理界面),可以通过 http://<任意节点私网IP>:9200/_plugin/kopf 在浏览器上查看更详细的统计信息。
--------------------------------------------------------------------------
graylog以及es内存大小调整:
graylog: vim /etc/sysconfig/graylog-server GRAYLOG_SERVER_JAVA_OPTS=""
es: vim /etc/sysconfig/elasticsearch ES_HEAP_SIZE=3g
---------------------------------------------------------------------------
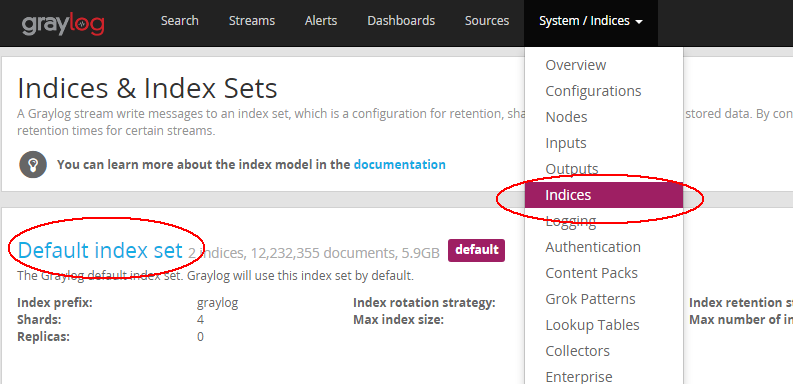
shards 代表索引分片,es可以把一个完整的索引分成多个分片,这样的好处是可以把一个大的索引拆分成多个,分布到不同的节点上。构成分布式搜索。分片的数量只能在索引创建前指定,并且索引创建后不能更改。
replicas 代表索引副本,es可以设置多个索引的副本,副本的作用一是提高系统的容错性,当个某个节点某个分片损坏或丢失时可以从副本中恢复。二是提高es的查询效率,es会自动对搜索请求进行负载均衡。
当配置ES集群时,只需要更改graylog配置文件的:
elasticsearch_discovery_zen_ping_unicast_hosts = 192.168.0.200:9300, 192.168.0.201:9300
-----------------------------------------------------------------------------------------------------
Elasticsearch存储的索引数据比较多占用空间比较大,清理方法: (默认存放在/var/lib/elasticsearch/graylog2/nodes/0/indices)
# curl -XDELETE 'http://localhost:9200/index_name/'
例如:# curl -XDELETE 'http://192.168.0.200:9200/graylog_0/'
新版的graylog已经将graylog-server与graylog-web二部分合二为一了,统称graylog-server
# Email transport
transport_email_enabled = true
transport_email_hostname = smtp.tech.com
transport_email_port = 465
transport_email_use_auth = true
transport_email_use_tls = true
transport_email_use_ssl = true
transport_email_auth_username = wjoyxt@tech.com 也可能是 wjoyxt
transport_email_auth_password = wjoyxt666
transport_email_subject_prefix = [graylog2]
transport_email_from_email = wjoyxt@tech.com 注意与alert中的sender邮箱保持一致
transport_email_web_interface_url = http://外网IP或域名:9000
改成外网IP或域名的目的是为了在收到的报警邮件中可以不通过VPN的情况下直接访问相应的只包含警报关键字的日志信息的汇总链接,当然了也可以连接VPN使用内网IP地址访问


-------------------------------------------------------------------------------------------
当使用HTTP Alarm Callback时,可以直接调用短信接口进行告警处理

--------------------------------------------------------------------------------------------
Graylog是一个开源的 log 收容器,主要有两个部分集合而成 server 与 web interface,两个都是由 Java 写的,Server 的部份可以收容 syslog over TCP/UDP, 同时他也有自己的格式 GELF (Graylog Extended Log Format),背后的储存是搭配 mongodb,而搜寻引擎则由 elasticsearch 提供。另外的 web interface 也是 Java 写成的(早期好像是 Ruby on Rails),主要的功能就是提供一个漂亮的搜寻与分析的界面
ElasticSearch是一个基于Lucene的搜索服务器。它提供了一个分布式多用户能力的全文搜索引擎,基于RESTful web接口。Elasticsearch是用Java开发的,并作为Apache许可条款下的开放源码发布,是第二流行的企业搜索引擎。设计用于云计算中,能够达到实时搜索,稳定,可靠,快速,安装使用方便
具体安装文档可查看官网手册: http://docs.graylog.org 可使用有道网页翻译书签: http://fanyi.youdao.com/web2/
端口说明:
Elasticsearch默认tcp通信端口是9300,HTTP API接口是9200
Graylog-server:9000/api Graylog-web:9000
一、graylog体系结构
测试环境最小化单一安装结构图示:

生产环境集群扩展模式结构如下:
最前端要加一层负载均衡系统,graylog-server的主从角色是在配置文件里面进行设置,然后mongodb数据库集群里面进行指定区分的

二、首先安装配置Elasticsearch (Mongodb安装部分此处略,需要注意的是mongodb的bind_ip处的设置,而且graylog会自动创建相应的数据库和用户)
1、前往官网进行下载安装elasticsearch
# wget https://download.elasticsearch.org/elasticsearch/release/org/elasticsearch/distribution/rpm/elasticsearch/2.0.0/elasticsearch-2.0.0.rpm
# yum install elasticsearch-2.0.0.rpm -y
2、或者使用官方yum源进行安装
rpm --import https://packages.elastic.co/GPG-KEY-elasticsearch
Add the following in your /etc/yum.repos.d/ directory in a file with a .repo suffix, for exampleelasticsearch.repo,(注意2.x或者1.x 只有两位)
[elasticsearch-2.x]
name=Elasticsearch repository for 2.x packages
baseurl=http://packages.elastic.co/elasticsearch/2.x/centos
gpgcheck=1
gpgkey=http://packages.elastic.co/GPG-KEY-elasticsearch
enabled=1
yum install elasticsearch
2、vim /etc/elasticsearch/elasticsearch.yml
network.bind_host: 10.1.1.33  #绑定实际的服务器IP地址
cluster.name: graylog2        #与/etc/graylog/server/server.conf 中的elasticsearch_cluster_name 集群名称相同
node.name: "node-xx"
discovery.zen.ping.multicast.enabled: false
discovery.zen.ping.unicast.hosts: ["es-node-1.example.org:9300" , "es-node-2.example.org:9300"]
script.disable_dynamic: true  #出于安全考虑,禁用动态脚本功能防止可能的远程代码执行
3、使用curl命令操作elasticsearch
curl -i -XGET 'localhost:9200/' #安装完成后的验证
curl -XGET localhost:9200/_cat/nodes #查看当前存活的各elasticsearch节点
curl -XGET localhost:9200/_cat/master
curl -XGET localhost:9200/_cat/health
健康度检查分为绿色、黄色或红色。绿色代表一切正常,集群功能齐全,黄色意味着所有的数据都是可用的,但是某些复制没有被分配,红色则代表因为某些原因,某些数据不可用
需要注意的是如果单机上安装多个elasticsearch实例的话,elasticsearch的服务端口号会依次自动累加,例如第二套elasticsearch的为9201和9301。
curl更多操作方法参考资料 http://blog.csdn.net/iloveyin/article/details/48312767
三、安装graylog-server和graylog-web (jdk rpm包安装时注意采用默认的安装方式,/usr/bin/java)
$ sudo rpm -Uvh https://packages.graylog2.org/repo/packages/graylog-1.2-repository-el6_latest.rpm
$ sudo yum install graylog-server graylog-web
$vim /etc/graylog/server/server.conf


[root@syslog ~]# cat /etc/graylog/server/server.conf |grep -v grep|grep -v ^#|grep -v ^$
is_master = true
node_id_file = /etc/graylog/server/node-id
password_secret = qdp0CjlUtrQUlqtgvjSiG0tI3aA4jX7wYGlR10FD8mmkm8WLQ1j0UnaTL3nCocYu7lFB7zRa6GdEe8x5ZVHBemzwXLJufOMO
root_password_sha2 = 4bbdd5a829dba09d7a7ff4c1367be7d36a017b4267d728d31bd264f63debeaa6
root_email = "wjoyxt@126.com"
root_timezone = +08:00
plugin_dir = /usr/share/graylog-server/plugin
rest_listen_uri = http://10.1.1.43:12900/
rotation_strategy = count
elasticsearch_max_docs_per_index = 20000000
elasticsearch_max_number_of_indices = 20
retention_strategy = delete
elasticsearch_shards = 2
elasticsearch_replicas = 1
elasticsearch_index_prefix = graylog2
allow_leading_wildcard_searches = false
allow_highlighting = false
elasticsearch_discovery_zen_ping_multicast_enabled = false
elasticsearch_discovery_zen_ping_unicast_hosts = 10.1.1.43:9300,10.1.1.33:9300
elasticsearch_analyzer = standard
output_batch_size = 500
output_flush_interval = 1
output_fault_count_threshold = 5
output_fault_penalty_seconds = 30
processbuffer_processors = 5
outputbuffer_processors = 3
processor_wait_strategy = blocking
ring_size = 65536
inputbuffer_ring_size = 65536
inputbuffer_processors = 2
inputbuffer_wait_strategy = blocking
message_journal_enabled = true
message_journal_dir = /var/lib/graylog-server/journal
dead_letters_enabled = false
lb_recognition_period_seconds = 3
mongodb_useauth = false
mongodb_uri = mongodb://localhost/graylog2
mongodb_max_connections = 100
mongodb_threads_allowed_to_block_multiplier = 5
transport_email_enabled = true
transport_email_hostname = 127.0.0.1
transport_email_port = 25
transport_email_use_auth = false
transport_email_use_tls = false
transport_email_use_ssl = false
transport_email_auth_username =
transport_email_auth_password =
transport_email_subject_prefix =
transport_email_from_email =
transport_email_web_interface_url = http://10.1.1.43:9000
password_secret = qdp0CjlUtrQUlqtgvjSiG0tI3aA4jX7wYGlR10FD8mmkm8WLQ1j0UnaTL3nCocYu7lFB7zRa6GdEe8x5ZVHBemzwXLJufOMO
#以上项必须与/etc/graylog/web/web.conf中的application.secret相同
root_password_sha2 = 0f3bb51e4955b2872351934b82c293db8cc1770b96bf9047b184a26ae25bcb5c #此处即登陆graylog-web:9000界面的密码,现在设置的是wjoyxt
#如果没有shasum命令的话,使用yum install perl-Digest-SHA进行安装
elasticsearch_cluster_name = graylog2  #定义一个集群名称
elasticsearch_discovery_zen_ping_multicast_enabled = false  # Disable multicast
elasticsearch_discovery_zen_ping_unicast_hosts = es-node-1.example.org:9300,es-node-2.example.org:9300 # List of Elasticsearch nodes to connect to
mongodb_useauth = false       #默认为false,可不必添加。当为false时,则不必配置mongodb相关的 mongodb_user、mongodb_password


# Email transport 邮件报警相关设置
transport_email_use_auth = false
transport_email_use_tls = false
transport_email_use_ssl = false
transport_email_auth_username =
transport_email_auth_password =
transport_email_subject_prefix =
transport_email_from_email =
transport_email_web_interface_url = http://外网IP:9000  #此处指向可通过外网访问到graylog-web的域名或IP
$vim /etc/graylog/web/web.conf
graylog2-server.uris="http://0.0.0.0:12900"
application.secret="qdp0CjlUtrQUlqtgvjSiG0tI3aA4jX7wYGlR10FD8mmkm8WLQ1j0UnaTL3nCocYu7lFB7zRa6GdEe8x5ZVHBemzwXLJufOMO"
timezone="Asia/Shanghai"
四、客户端配置:日志收集graylog-collector (帮助文档链接 http://docs.graylog.org/en/1.2/pages/collector.html)
Graylog收集器是一个轻量级的Java应用程序,允许您将数据从日志文件转发给一个Graylog集群.
前提:You need to have Java >= 7 installed to run the collector
目前官方只提供了RHEL7的repo,对于centos 6版本的话从以下链接下载zip包
https://github.com/Graylog2/collector#binary-download (另外此链接包含一个graylog-collector配置例子,可以进行参考)
这是一个最小的配置收集日志的例子/var/log/syslog文件并将它们发送给Graylog服务器:
server-url = "http://10.0.0.1:9000/api"  (新版)

inputs {
  syslog {
    type = "file"
    path = "/var/log/syslog"
  }
}

outputs {
  graylog-server {
    type = "gelf"
    host = "10.0.0.1"
    port = 12201   #此端口是graylog-server服务器上建立Inputs时对应的日志数据采集端口
  }
}
附加另一个使用正则表达式和分流输出的例子:
server-url = "http://10.1.1.43:12900"
collector-id = "file:/usr/local/graylog-collector/config/collector-id"
inputs {
  ylygw-servlet {
    type = "file"
    path-glob-root = "/home/admin/logs"
    path-glob-pattern = "*/*.log"
    outputs = "ylygw-tcp"
  }
  ylygw-out {
    type = "file"
    path = "/yly/tomcat7.yly9090/logs/catalina.out"
    outputs = "ylygw-tcp"
  }

  nginx-access {
    type = "file"
    path = "/usr/local/nginx/logs/shop_acc.log"
    outputs = "nginx-access"
  }

  nginx-error {
    type = "file"
    path = "/usr/local/nginx/logs/shop_error.log"
    outputs = "nginx-error"
  }
}
outputs {
  ylygw-tcp {
    type = "gelf"
    host = "10.1.1.43"
    port = 12205
    client-queue-size = 512
    client-connect-timeout = 5000
    client-reconnect-delay = 1000
    client-tcp-no-delay = true
    client-send-buffer-size = 32768
  }
  nginx-access {
    type = "gelf"
    host = "10.1.1.43"
    port = 12201
    client-queue-size = 512
    client-connect-timeout = 5000
    client-reconnect-delay = 1000
    client-tcp-no-delay = true
    client-send-buffer-size = 32768
  }

  nginx-error {
    type = "gelf"
    host = "10.1.1.43"
    port = 12202
    client-queue-size = 512
    client-connect-timeout = 5000
    client-reconnect-delay = 1000
    client-tcp-no-delay = true
    client-send-buffer-size = 32768
  }

}
graylog-collector启动方法:
  $ cd graylog-collector-0.4.1/
  $ bin/graylog-collector run -f collector.conf
五、流和报警设置
Graylog Streem (graylog 流) 是一个路由消息分类并且实时处理的机制。 你可以自定义规则指导Graylog哪个消息路由到哪个streem
首先需要自定义一个字段即为某一类消息打上标签,打开graylog web管理页面,System->Input ,在已建好的 Input 右边的 More actions->Add static fields , 然后输入字段名称和标签名称标识。完成后则可以在Search时通过左下角的 Fields 查看到新建的字段值,勾选该字段后,则新建字段后的所有流消息都会被打上相应的标签。
之后可以开始创建streem和相应的匹配规则,一般情况下 alert condition 采用 Message count condition

Editing Alarm Callback
Sender
graylog@wjoyxt.org
E-Mail Subject
${stream.title}: 日志警报 来自 Graylog 日志系统
E-Mail Body(optional)
##########
警报描述: ${check_result.resultDescription}
日期: ${check_result.triggeredAt}
Stream ID: ${stream.id}
Stream title: ${stream.title}
Stream 描述: ${stream.description}

${if stream_url}Stream URL: ${stream_url}${end}

##########
${if backlog}Last messages accounting for this alert:
${foreach backlog message}${message}

${end}${else}以上地址仅允许北京办公地点访问
以上数据由某某机房Graylog日志系统提供
${end}
或
##########

警报标题描述:       ${stream.description}

警报触发信息描述:${check_result.resultDescription}

${if stream_url}报警日志信息查询链接:${stream_url}${end}

##########
${if backlog}Last messages accounting for this alert:
${foreach backlog message}${message}

${end}${else}
${end}
配置rsyslog远程发送日志:
vim /etc/rsyslog.conf
*.* @10.1.1.33:5140
@@为tcp协议传输 @为udp协议
FAQ:
关于登陆web界面后图形上显示的时间不对的问题,graylog-server默认使用UTC时区时间,目前解决方法只能在新建用户时,选择TimeZone: Shanghai。然后用新用户代替admin用户。
graylog.conf
is_master = true
node_id_file = /etc/graylog/server/node-id
password_secret = iLxgl1vsC6iA4MJXJbMQ5mAKAPh5qIoCEdHeQdEVQFJ8wZz8XRznS7CVgSTGgS2nc0qwPr65gxop3GcfvajprKa3zqs44Hc8
root_password_sha2 = 72d7c50d4e1e267df628ec2ee9eabee0f31cb17a29f3eb41e0a04ede5134c37f
root_email = "wjoyxt@wjoyxt.com"
root_timezone = +08:00
plugin_dir = /usr/share/graylog-server/plugin
rest_listen_uri = http://0.0.0.0:9000/api/
web_listen_uri = http://0.0.0.0:9000/
rotation_strategy = count
elasticsearch_max_docs_per_index = 20000000
elasticsearch_max_number_of_indices = 20
retention_strategy = delete
elasticsearch_shards = 3
elasticsearch_replicas = 0
elasticsearch_index_prefix = graylog
allow_leading_wildcard_searches = false
allow_highlighting = false
elasticsearch_cluster_name = es-0nqimfw0
elasticsearch_hosts = http://192.168.0.250:9200, http://192.168.0.251:9200, http://192.168.0.252:9200
elasticsearch_network_host = 192.168.0.200
elasticsearch_network_bind_host = 192.168.0.200
elasticsearch_analyzer = standard
output_batch_size = 500
output_flush_interval = 1
output_fault_count_threshold = 5
output_fault_penalty_seconds = 30
processbuffer_processors = 5
outputbuffer_processors = 3
processor_wait_strategy = blocking
ring_size = 65536
inputbuffer_ring_size = 65536
inputbuffer_processors = 2
inputbuffer_wait_strategy = blocking
message_journal_enabled = true
message_journal_dir = /var/lib/graylog-server/journal
lb_recognition_period_seconds = 3
mongodb_uri = mongodb://localhost/graylog
mongodb_max_connections = 1000
mongodb_threads_allowed_to_block_multiplier = 5
transport_email_enabled = true
transport_email_hostname = smtp.126.com
transport_email_port = 465
transport_email_use_auth = true
transport_email_use_tls = true
transport_email_use_ssl = true
transport_email_auth_username = wjoyxt
transport_email_auth_password = wjoyxt888
transport_email_subject_prefix = [graylog2]
transport_email_from_email = wjoyxt@wjoyxt.com
transport_email_web_interface_url = http://graylog.wjoyxt.com:9000
content_packs_dir = /usr/share/graylog-server/contentpacks
content_packs_auto_load = grok-patterns.json
proxied_requests_thread_pool_size = 32

 浙公网安备 33010602011771号