

第一个微信小项目
一、所需要的七个第三方库及其安装
1、Pillow
PIL:Python Imaging Library,已经是 Python 平台事实上的图像处理标准库。PIL功能非常强大,但API却非常简单易用。
如果安装了Anaconda,Pillow就已经可用了。否则,需要在命令行下通过pip安装:
pip install pillow
2、Pyecharts
是一个用于生成 Echarts 图表的类库。Echarts 是百度开源的一个数据可视化 JS 库。用 Echarts 生成的图可视化效果非常棒,pyecharts 是为了与 Python 进行对接,方便在 Python 中直接使用数据生成图。使用pyecharts可以生成独立的网页,也可以在flask、django中集成使用。
可在命令行通过pip安装:
pip install pyecharts
3、Itchat
itchat 是一个开源的微信个人号接口,使用 python 调用微信从未如此简单。
可在在命令行通过pip安装:
pip install itchat
4、Jieba
Jieba库是一款优秀的 Python 第三方中文分词库,jieba 支持三种分词模式:精确模式、全模式和搜索引擎模式,下面是三种模式的特点。
精确模式:试图将语句最精确的切分,不存在冗余数据,适合做文本分析
全模式:将语句中所有可能是词的词语都切分出来,速度很快,但是存在冗余数据
搜索引擎模式:在精确模式的基础上,对长词再次进行切分
可在在命令行通过pip安装:
pip install jieba
5、Numpy
NumPy 是一个 Python 的第三方库,代表 “Numeric Python”,主要用于数学/科学计算。 它是一个由多维数组对象和用于处理数组的例程集合组成的库。
使用 Numpy 我们可以轻松进行如下等计算:
- 数组的算数和逻辑运算。
- 傅立叶变换和用于图形操作的例程。
- 与线性代数有关的操作。 NumPy 拥有线性代数和随机数生成的内置函数。
可在在命令行通过pip安装:
pip install Numpy
6、Pandas
Pandas 是基于 NumPy 的一种工具,该工具是为了解决数据分析任务而创建的。Pandas纳入了大量库和一些标准的数据模型,提供了高效地操作大型数据集所需的工具。pandas 提
供了大量能使我们快速便捷地处理数据的函数和方法。你很快就会发现,它是使 Python 成为强大而高效的数据分析环境的重要因素之一。
可在在命令行通过pip安装:
pip install Pandas
7、wxpy
wxpy 在 itchat 的基础上,通过大量接口优化提升了模块的易用性,并进行丰富的功能扩展。
可在在命令行通过pip安装:
pip install wxpy
8、安装地图数据包:
pip install echarts-china-provinces-pypkg
pip install echarts-countries-pypkg
二:
from wxpy import Bot
bot = Bot(cache_path=True)
#获取我的所有微信好友信息
friend_all = bot.friends()
print(friend_all)
print(friends)获得好友的所有信息
print(len(friend_all)获得微信好友人数
从上面的获取信息全字段来看,我们获取的每位好友的信息都是一个字典,字典里只有'City'、'Province'、'Signature'、
'NickName'、'HeadImgUrl'、'Sex'是我们需要的。下面我们就对这几个 key 进行提取。
lis=[] #创建一个空列表
for a_friend in friends[1:]:
    NickName = a_friend.raw.get('NickName',None)
    #Sex = a_friend.raw.get('Sex',None)
    Sex ={1:"男",2:"女",0:"其它"}.get(a_friend.raw.get('Sex',None),None)
    City = a_friend.raw.get('City',None)
    Province = a_friend.raw.get('Province',None)
    Signature = a_friend.raw.get('Signature',None)
    HeadImgUrl = a_friend.raw.get('HeadImgUrl',None)
    HeadImgFlag = a_friend.raw.get('HeadImgFlag',None)
    list_0=[NickName,Sex,City,Province,Signature,HeadImgUrl,HeadImgFlag]
lis.append(list_0)
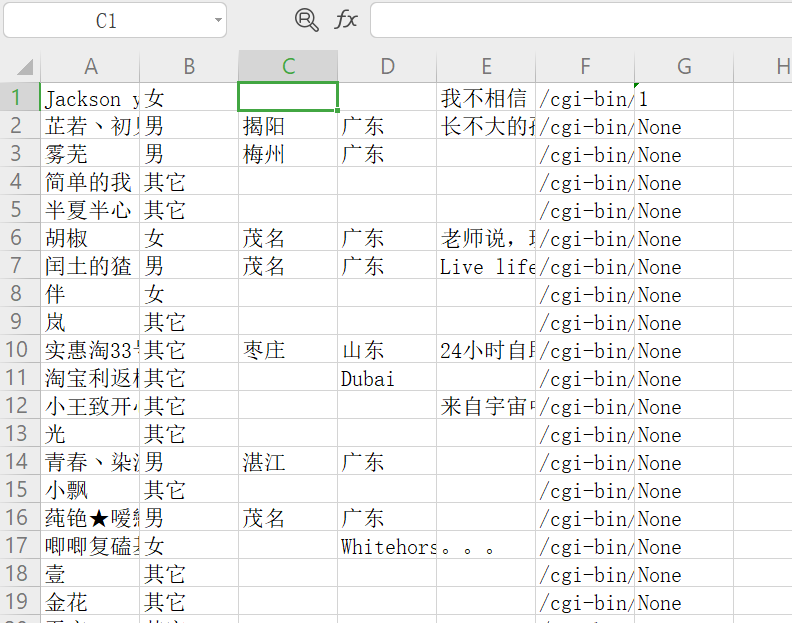
将lis()保存到excel中
def list_excel(filename,lis):
    '''
    将列表写入excel中,其中列表中的元素是列表.
    filename:保存的文件名(含路径)
    lis:元素为列表的列表,如下:
    lis = [["名称", "价格", "出版社", "语言"],
    ["暗时间", "32.4", "人民邮电出版社", "中文"],
    ["拆掉思维里的墙", "26.7", "机械工业出版社", "中文"]]
    '''
    import openpyxl
    wb = openpyxl.Workbook()   #激活worksheet
    sheet = wb.active
    sheet.title = 'sheet1'     #创建一个表格
    file_name = filename +'.xlsx'
    for i in range(0, len(lis)):
        for j in range(0, len(lis[i])):
            sheet.cell(row=i+1, column=j+1, value=str(lis[i][j]))
            #每行每列的存入数据
    wb.save(file_name)
    print("写入数据成功!")
list_excel('yub',lis)
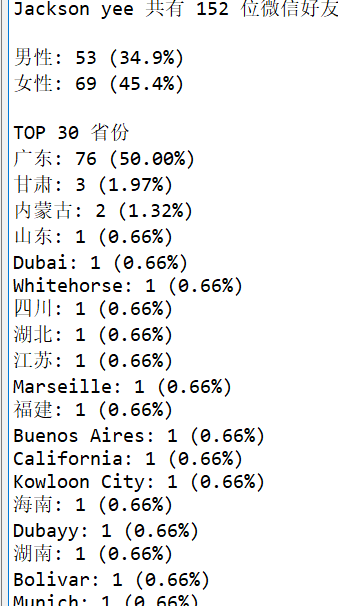
对数据进行简单的分析
Friends=robot.friends()
data = Friends.stats_text(total=True, sex=True,top_provinces=30, top_cities=500)
print(data)
好友所在城市词云图显示:
from pandas import read_excel
df = read_excel('yubg1.xlsx',sheetname='sheet1')
df.tail(5)
df.city.count()
df.city.describe()
from wordcloud import WordCloud
import matplotlib.pyplot as plt
import pandas as pd
from pandas import DataFrame
#df = read_excel('C:/Users/asus/yub.xlsx',sheetname='list2excel07')
word_list= df['city'].fillna('0').tolist()#将 dataframe 的列转化为 list,其中的 nan 用“0”替换
new_text = ' '.join(word_list)
wordcloud = WordCloud(font_path='simhei.ttf', background_color="black").generate(new_text)
plt.imshow(wordcloud)
plt.axis("off")
plt.show()

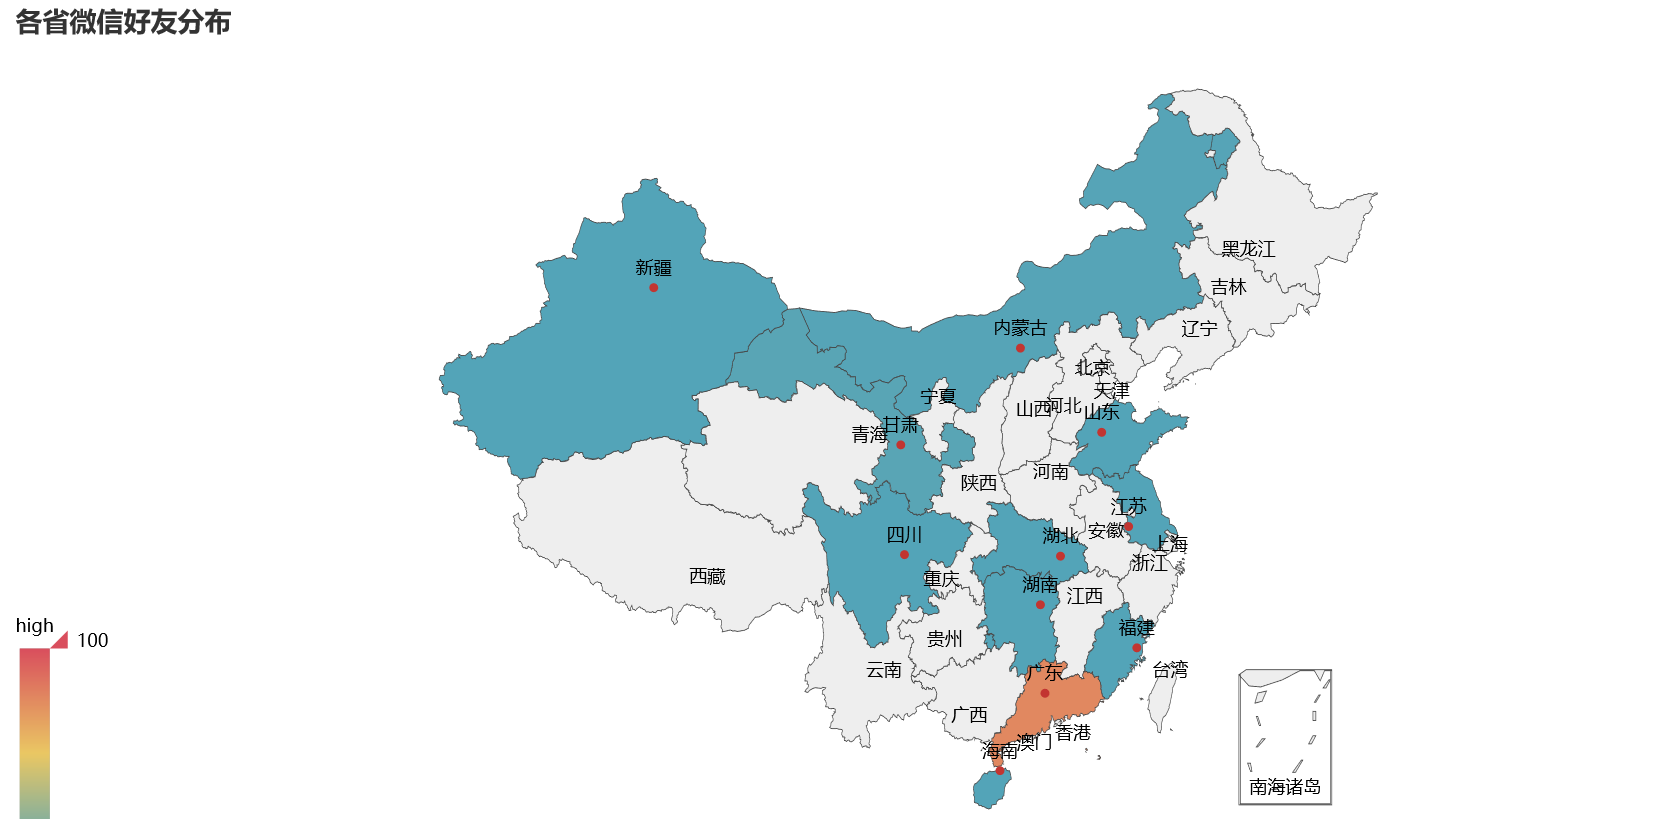
好友在中国地图上的位置显示:
province_list = df['province'].fillna('NAN').tolist()#将 dataframe 的列转化为 list,其中的 nan 用“NAN”替换
count_province = pd.value_counts(province_list)#对 list 进行全频率统计
from pyecharts import Map
value =count_province.tolist()
attr =count_province.index.tolist()
map=Map("各省微信好友分布", width=1200, height=600)
map.add("", attr, value, maptype='china', is_visualmap=True,
 visual_text_color='#000',
is_label_show = True) #显示地图上的省份
map.show_config()
map.render(r'C:/Users/asus/Pictures/Saved Pictures/thirdmap.html')
完整代码:
# -*- coding: utf-8 -*-
"""
Created on Mon Jun  3 23:28:34 2019

@author: asus
"""
# -*- coding: utf-8 -*-
"""
Created on Sun Jun  2 21:23:49 2019

@author: asus
"""
from wxpy import Bot
bot = Bot(cache_path=True)
#获取我的所有微信好友信息
friend_all = bot.friends()
print(friend_all)
print(len(friend_all))
lis=[] #创建一个空列表
for a_friend in friend_all:
    NickName = a_friend.raw.get('NickName',None)
    #Sex = a_friend.raw.get('Sex',None)
    Sex ={1:"男",2:"女",0:"其它"}.get(a_friend.raw.get('Sex',None),None)
    City = a_friend.raw.get('City',None)
    Province = a_friend.raw.get('Province',None)
    Signature = a_friend.raw.get('Signature',None)
    HeadImgUrl = a_friend.raw.get('HeadImgUrl',None)
    HeadImgFlag = a_friend.raw.get('HeadImgFlag',None)
    list_0=[NickName,Sex,City,Province,Signature,HeadImgUrl,HeadImgFlag]
    lis.append(list_0)
def list_excel(filename,lis):
    import openpyxl
    wb = openpyxl.Workbook()   #激活worksheet
    sheet = wb.active
    sheet.title = 'sheet1'     #创建一个表格
    file_name = filename +'.xlsx'
    for i in range(0, len(lis)):
        for j in range(0, len(lis[i])):
            sheet.cell(row=i+1, column=j+1, value=str(lis[i][j]))
            #每行每列的存入数据
    wb.save(file_name)
    print("写入数据成功!")
list_excel('yub',lis)
Friends=bot.friends()
data = Friends.stats_text(total=True, sex=True,top_provinces=30, top_cities=500)
print(data)
from pandas import read_excel
df = read_excel('yubg1.xlsx',sheetname='sheet1')
df.tail(5)
df.city.count()
df.city.describe()
from wordcloud import WordCloud
import matplotlib.pyplot as plt
import pandas as pd
from pandas import DataFrame
#df = read_excel('C:/Users/asus/yub.xlsx',sheetname='list2excel07')
word_list= df['city'].fillna('0').tolist()#将 dataframe 的列转化为 list,其中的 nan 用“0”替换
new_text = ' '.join(word_list)
wordcloud = WordCloud(font_path='simhei.ttf', background_color="black").generate(new_text)
plt.imshow(wordcloud)
plt.axis("off")
plt.show()
province_list = df['province'].fillna('NAN').tolist()#将 dataframe 的列转化为 list,其中的 nan 用“NAN”替换
count_province = pd.value_counts(province_list)#对 list 进行全频率统计
from pyecharts import Map
value =count_province.tolist()
attr =count_province.index.tolist()
map=Map("各省微信好友分布", width=1200, height=600)
map.add("", attr, value, maptype='china', is_visualmap=True,
 visual_text_color='#000',
is_label_show = True) #显示地图上的省份
map.show_config()
map.render(r'C:/Users/asus/Pictures/Saved Pictures/thirdmap.html')
创建机器人聊天
#-*- coding:utf-8 -*-
import itchat
import requests

def get_response(msg):
    apiurl = 'http://i.itpk.cn/api.php'  #//moli机器人的网址
    data={
        "question": msg,    #//获取到聊天的文本信息
        "api_key": "xxxxxxxxxxxxxxxx",
        #"api_secret": "n4gxkdyckd7p"
    }

    r=requests.post(apiurl,data=data)  #//构造网络请求
    return r.text
@itchat.msg_register(itchat.content.TEXT)     #//好友消息的处理
def print_content(msg):
    return get_response(msg['Text'])
@itchat.msg_register([itchat.content.TEXT], isGroupChat=True)    #//群消息的处理
def print_content(msg):
    return get_response(msg['Text'])
itchat.auto_login(True)           #//自动登录
itchat.run()                       #//启动聊天机器人
