在qemu环境中用gdb调试Linux内核
简介
对用户态进程,利用gdb调试代码是很方便的手段。而对于内核态的问题,可以利用crash等工具基于coredump文件进行调试。其实我们也可以利用一些手段对Linux内核代码进行gdb调试,qemu就是一种。qemu是一款完全软件模拟(Binary translation)的虚拟化软件,在虚拟化的实现中性能相对较差。但利用它来在测试环境中gdb调试Linux内核代码,是熟悉Linux内核代码的一个好方法。本文旨在介绍怎么利用qemu搭建Linux的gdb调试环境。其中主要包括了如何编译Linux内核,如何利用gdb远程连接qemu启动的gdbserver,进而进一步进行内核代码调试。
环境
- Linux Distribution: Ubuntu 14.04.5 TLS
- 调试内核版本:3.18.6 (本文将内核编译成x86 32位架构来做演示)
编译内核
下载3.18.6版本内核源代码。
# wget https://www.kernel.org/pub/linux/kernel/v3.x/linux-3.18.6.tar.xz
# xz –d linux-3.18.6.tar.xz
# tar –xvf linux-3.18.6.tar
# cd linux-3.18.6
编译选项
不同的架构有不同的默认文件,比如x86平台,可以在arch/x86/configs找到相关文件:i386_defconfig。通过执行make i386_defconfig 即可基于这个文件生成.config文件,在此基础上可以再运行make menuconfig 来进行个别的调整。更多的细节请参考:Documentation\kbuild\kconfig.txt。 总之,无论怎么配置,最终都是为了生成.config文件。这些宏最终将影响Makefile中参与编译的文件。
代码的编译选项配置很多,这里主要做如下两处配置:
- 让系统内核在32位架构中运行 //只是为了演示,非必须
- 开启"Compile the kernel with debug info"选项 //如果要让内核可调试,这个选项必选
# make i386_defconfig //32位架构
# make menuconfig // 调整编译选项
注意:默认make menuconfig会报错如下,因为最小系统不支持图形显示。
# make menuconfig
HOSTCC scripts/kconfig/mconf.o
In file included from scripts/kconfig/mconf.c:23:0:
scripts/kconfig/lxdialog/dialog.h:38:20: fatal error: curses.h: No such file or directory
#include CURSES_LOC
^
compilation terminated.
解决方法:
# apt-get install libncurses5-dev -y
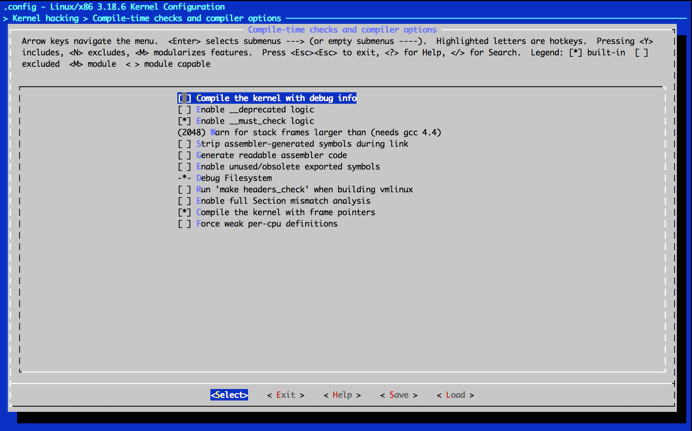
在内核编译选项中,开启如下"Compile the kernel with debug info"
Kernel hacking --->
Compile-time checks and compiler options --->
[ ] Compile the kernel with debug info
示意图如下,利用键盘选中debug选项,然后敲"Y"勾选:

在menuconfig中选完编译选项,结果会写入到.config文件中。可以看到.config文件的CONFIG_DEBUG_INFO被设置成Y。
编译
编译选项选完后,利用make编译,编译需要较长时间。
# make -j2
编译完成之后,会有一些新的文件产生,如:
- linux-3.18.6/arch/x86/boot/bzImage // 相当于/boot目录下vmlinuz,是一个压缩的,可以bootable的Linux kernel文件
- linux-3.18.6/vmlinux // 一个非压缩的,不可以bootable的Linux kernel文件。是用来生成bzImage/vmlinuz的中间步骤。
qemu
安装qemu
# apt-get update
# apt-get install qemu
# 因为用的32位平台环境,所以用下面的qemu
# ln -s /usr/bin/qemu-system-i386 /usr/bin/qemu
qemu主要选项解释:
- -kernel bzImage: Use bzImage as kernel image. The kernel can be either a Linux kernel or in multiboot format. // 指定可以bootable的内核压缩文件
- -initrd file: use 'file' as initial ram disk // 指定initramdisk
- -append cmdline: use 'cmdline' as kernel command line // 指定kernel cmdline
- -S: Do not start CPU at startup (you must type 'c' in the monitor). // 用于调试代码
- -s: Shorthand for -gdb tcp::1234, i.e. open a gdbserver on TCP port 1234. // 开启一个gdbserver, 可以通过TCP端口1234连接
- -nographic: Normally, QEMU uses SDL to display the VGA output. With this option, you can totally disable graphical output so that QEMU is a simple command line application. The emulated serial port is redirected on the console and muxed with the monitor (unless redirected elsewhere explicitly). // 默认qemu使用图形方式,该现象可以启用非图形方式
利用gdb调试
利用qemu启动编译好的内核,如下:
# qemu -kernel linux-3.18.6/arch/x86/boot/bzImage -s -S -append "console=ttyS0" -nographic
在本机另一个terminal利用gdb连接本地的gdbserver 1234端口
# gdb
# (gdb) file linux-3.18.6/vmlinux //load Linux符号表
Reading symbols from linux-3.18.6/vmlinux...done.
# (gdb) target remote:1234 //远程连接监听在TCP 1234的gdb server
(gdb) break start_kernel //在start_kernel函数设置断点
Breakpoint 1 at 0xc1a2f7c5: file init/main.c, line 501.
(gdb) c //continue,继续执行代码
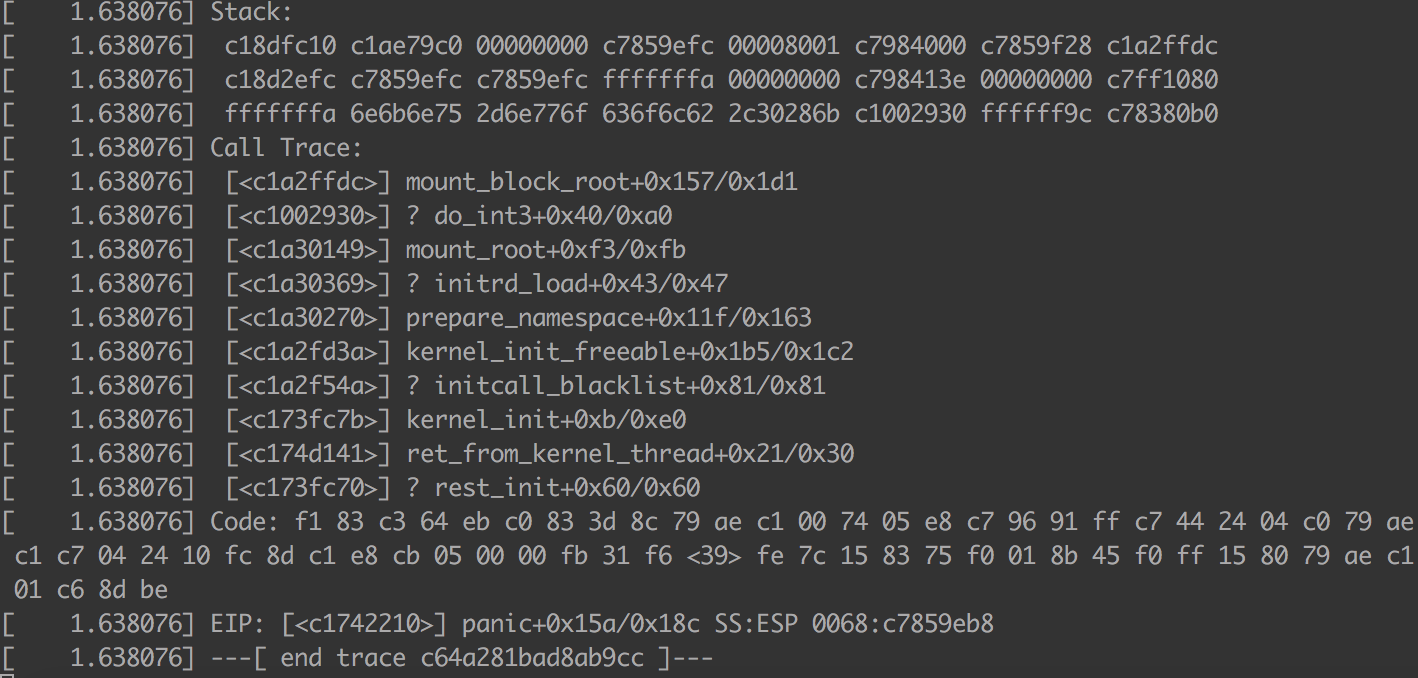
在继续执行后,最终qemu的输出如下,在qemu虚拟机里运行的Linux系统能成功启动,并且最终以Kernel panic宣告结束。看到call trace打出来的是在initrd_load的时候出错,原因很简单,因为启动系统的时候只指定了bzImage,没有指定initrd文件,系统无法mount上initrd (init ram disk) 及其initramfs文件系统。

到此为止,gdb调试Linux内核代码的基本环境已经搭建完成,可以利用断点来调试启动启动中的细节。后面将介绍如何构建initramfs文件系统,能让qemu运行的Linux系统更像“完整的系统”。


