201871010101-陈来弟《面向对象程序设计(JAVA)》 第13周学习总结
201871010101-陈来弟《面向对象程序设计(JAVA)》 第13周学习总结
实验十一 图形界面事件处理技术
实验时间 2019-11-22
第一部分:理论知识
一、事件处理
1.事件源:能够产生事件的对象都可以成为事件源,如文本框,按钮等。一个事件源是一个能够注册监听器并向监听器发送事件对象的对象。
2.事件监听器:事件监听器对象接收事件源发送的通告(事件对象),并对发生的事件作出响应。一个监听器对象就是一个实现了专门监听器接口的类实例,该类必须实现接口中的方法,这些方法当事件发生时,被自动执行。
3.事件对象:Java将事件的相关信息封装在一个事件对象中,所有的事件对象都最终被派生于Java.util.EventObject类。不同的事件源可以产生不同类别的事件。
2.AWT事件处理机制的概要;
监听器对象 :是一个实现了特定监听器接口 ( listener interface )的类实例 。
当事件发生时,事件源将事件对象自动传递给所有注册的监听器 。
监听器对象利用事件对象中的信息决定如何对事件做出响应。
3.事件源与监听器之间的关系:
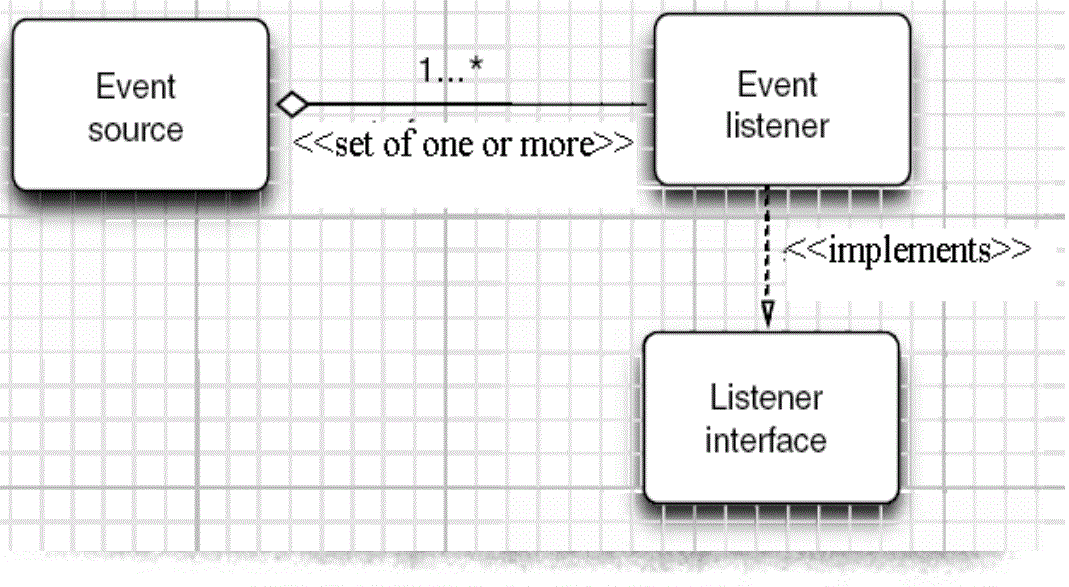
4.GUI设计中,程序员需要对组件的某种事件进行响应和处理时,必须完成两个步骤;
(1)定义实现某事件监听器接口的事件监听器类,并具体化接口中声明的事件的处理抽象方法。
(2)为组件注册实现了规定接口的事件监听器对象;
事件:用户对程序的某一种功能性操作。
Java中的事件主要有两种:
1.组件类事件
componentEvent、ContainerEvent、WindowEvent、FocusEvent、PaintEvent、MouseEvent共六大类,
它们均是当组件的状态发生变化时产生。
2.动作类事件
ActionEvent、TextEvent、AdjustmentEvent、ItemEvent共四类。
它们均对应用户的某一种功能性操作动作。
Java中的事件类都包含在JDK的 Java.awt.event包中。
2)事件编程:
用户编程定义每个特定事件发生时程序应做出何种响应,并且这些响应代码会在对应的事件发生时由系统自动调用。
3)事件委托授权处理模型
JDK1.1以上版本实现了事件委托授权处理模型的机制。
① 事件源:产出事件的组件。
② 监听器:对组件所产生的事件作出具体响应的代吗,即事件产出与处理分别由两个不同类(它们可以分别放在不同的程序中)加以编程实现。
③ 事件处理机制:AWT组件自身不编程处理相应的事件,面是交由事件监听器(它可以是组件所在的容器类或另外的Java程序类,只要它们实现了相关的事件监听器接口即可)处理(事件授权处理模型)。
④ 事件处理的包:java.awt.event包,它提供AWT事件所需的类和接口
ActionEvent类对应ActionListener接口;
MouseEvent类对应MouseMotionListener接口和MouseListener接口;
WindonEvent类对应WindonListener接口---即发生了XXXEvent类型的事件,那么处理该事件的接口为XXXListener);它们的父类为EventObject类。
各个事件类的说明:
EventObject:所有事件类的超类
最重要的方法-- getSource(),返回产生某事件的对象
AWTEvent:所有AWT事件类的超类
最重要的方法-- getID(),返回某事件的ID号,事件的ID是一个整数,它指定事件的类型,例如按钮事件或鼠标点击事件
ActionEvent:激活组件时发生的事件
AdjustmentEvent:调节可调整的组件(如移动滚动条)时发生的事件
ComponentEvent:操纵某组件时发生的一个高层事件
ContainerEvent:向容器添加或删除组件时发生
InputEvent:由某输入设备产生的一个高层事件
ItemEvent:从选择项,复选框或列表中选择时发生
KeyEvent:操作键盘时发生
MouseEvent:操作鼠标时发生
PaintEvent:描绘组件时发生的一个事件
TextEvent:更改文本时发生
WindowEvent:操作窗口时发生的事件,如最大化或最小化某一窗口。
4)事件编程的基本原则:
事件处理的类代码要对某一类事件加以处理,则应实现它们所对应的接口,并且给出该接口中定义的全部事件响应函数的功能实现(重写其函数体);然后在创建组件时注册该事件的监听器(响应者)。
5)事件注册:
事件源通过对特定的事件进行注册,以指定该事件的监听器(响应者)是谁。
6)事件注册函数:
函数名由“add + 事件类型对应的监听器接口名称”组成;函数参数为监听器对象(实现事件响应的类的对象,如容器组件自身响应该事件,则监听器对象应用this代表)。
public void add< listenerType >(< listenerType > ListenerObj)
{
}
7)事件编程的基本规则:
(1)组件对事件的响应形式:忽略它(本类不实现对应的监听器接口)或编程事件函数以处理它(可根据应用需要替换某一个组件的相应缺省事件处理函数,从而响应用户对该组件的操作。本类实现某类事件对应的监听器接口,并实现对应的响应函数),也可屏蔽它(将其事件响应函数体置空)。
(2)事件响应类(监听器)可以实现多个监听器接口,以响应多组不同事件,从而可使同一个组件可以注册多种事件。
(3)利用事件响应函数中的事件对象获取事件产生时的相关信息(event.getSource())事件源对象,event.getX(), event.getY(),事件产生时的鼠标位置,event.getActionCommand(),获取组件的字符串名称。
5.注册监听器方法:eventSourceObject.addEventListener(eventListenerObject)
6.动态事件:当特定组件动作(点击按钮)发生时,该组件生成此动作事件。该事件被传递给组件注册的每一个ActionListener对象,并调用监听器对象的actionPerformed方法以接受这类事件对象。能够触发事件动作的动作,主要包括:
(1)点击按钮
(2)双击一个列表中的选项
(3)选择菜单项
(4)在文本框中输入回车
7.监听器接口的实现
监听器类必须实现与事件源相对应的接口,即必须提供接口中方法的实现。监听器接口的方法实现
class MyListener implenments ActionListener
{
public void actionPerformed(ActionEvent event)
{......}
}
8.命令按钮Jbutton主要API
(1)创建按钮对象
Jbutton类常用的一组构造方法;
(1) JButton(String text):创建一个带文本的按钮。
(2) JButton(Icon icon) :创建一个带图标的按钮。
(3)JButton(String text, Icon icon) :创建一个带文本和图标
的按钮
(2)按钮对象的常用方法:
① getLabel( ):返回按钮的标签字符串;
② setLabel(String s):设置按钮的标签为字符串s。
9. 用匿名类、lambda表达式简化程序
例ButtonTest.java中,各按钮需要同样的处理:
1) 使用字符串构造按钮对象;
2) 把按钮添加到面板上;
3) 用对应的颜色构造一个动作监听器;
4) 注册动作监听器
10.适配器类
当程序用户试图关闭一个框架窗口时,Jframe对象就是WindowEvent的事件源。
⚫ 捕获窗口事件的监听器:
WindowListener listener=…..;
frame.addWindowListener(listener);
⚫ 窗口监听器必须是实现WindowListener接口的
类的一个对象,WindowListener接口中有七个
方法,它们的名字是自解释的。
11.鉴于代码简化的要求,对于有不止一个方法的AWT监听器接口都有一个实现了它的所有方法,但却不做任何工作的适配器类。例:WindowAdapter类。适配器类动态地满足了Java中实现监视器类的技术要求。
⚫ 通过扩展适配器类来实现窗口事件需要的动作
12.注册事件监听器
可将一个Terminator对象注册为事件监听器:WindowListener listener=new Terminator();frame.addWindowListener(listener);
⚫ 只要框架产生一个窗口事件,该事件就会传递给监听器对象。创建扩展于WindowAdapter的监听器类是很好的改进,但还可以进一步将上面语句也可简化为:frame.addWindowListener(new Terminator());
13.动作事件
(1)激活一个命令可以有多种方式,如用户可以通过菜单、击键或工具栏上的按钮选择特定的功能。
(2)在AWT事件模型中,无论是通过哪种方式下达命令(如:点击按钮、菜单选项、按下键盘),其操作动作都是一样的。
14.动作接口及其类
Swing包提供了非常实用的机制来封装命令,并将它们连接到多个事件源,这就是Action接口。
⚫ 动作对象是一个封装下列内容的对象:
–命令的说明:一个文本字符串和一个可选图标;
–执行命令所需要的参数。
⚫ Action是一个接口,而不是一个类,实现这个接
口的类必须要实现它的7个方法。
⚫ AbstractAction 类 实 现 了 Action 接 口 中 除actionPerformed方法之外的所有方法,这个类存储了所有名/值对,并管理着属性变更监听器。在 动 作 事 件 处 理 应 用 中 , 可 以 直 接 扩 展AbstractAction 类 , 并 在 扩 展 类 中 实 现
actionPerformed方法。
15.鼠标事件
用户点击鼠标按钮时,会调用三个监听器方法:
– 鼠标第一次被按下时调用mousePressed方法;
– 鼠标被释放时调用mouseReleased方法;
– 两个动作完成之后,调用mouseClicked方法。
⚫ 鼠标在组件上移动时,会调用mouseMoved方法。
如果鼠标在移动的时候还按下了鼠标,则会调用mouseDragged方法
⚫ 鼠标事件返回值
– 鼠标事件的类型是MouseEvent,当发生鼠标事件时:MouseEvent类自动创建一个事件对象,以及事件发生位置的x和y坐标,作为事件返回值。
第二部分:实验部分
1、实验目的与要求
(1) 掌握事件处理的基本原理,理解其用途;
(2) 掌握AWT事件模型的工作机制;
(3) 掌握事件处理的基本编程模型;
(4) 了解GUI界面组件观感设置方法;
(5) 掌握WindowAdapter类、AbstractAction类的用法;
(6) 掌握GUI程序中鼠标事件处理技术。
2、实验内容和步骤
实验1: 导入第11章示例程序,测试程序并进行代码注释。
测试程序1:
l 在elipse IDE中调试运行教材443页-444页程序11-1,结合程序运行结果理解程序;
l 在事件处理相关代码处添加注释;
l 用lambda表达式简化程序;
l 掌握JButton组件的基本API;
l 掌握Java中事件处理的基本编程模型。
 11-1 代码:

 1 package button;
 2
 3 import java.awt.*;
 4 import java.awt.event.*;
 5 import javax.swing.*;
 6
 7 /**
 8  * A frame with a button panel.带纽带面板的框架
 9  */
10 public class ButtonFrame extends JFrame
11 {
12    private JPanel buttonPanel;//定义Jpanel属性
13    private static final int DEFAULT_WIDTH = 300;
14    private static final int DEFAULT_HEIGHT = 200;
15
16    public ButtonFrame()
17    {
18       setSize(DEFAULT_WIDTH, DEFAULT_HEIGHT);//通过setSize更改了宽度和高度的属性值
19
20             //创建按钮         生成了三个按钮对象,显示在窗口对象上的title文本
21       JButton yellowButton = new JButton("Yellow");
22       JButton blueButton = new JButton("Blue");
23       JButton redButton = new JButton("Red");
24
25       buttonPanel = new JPanel();//使new JPanel指向对象buttonPanel
26
27       // 向面板添加按钮      通过add方法添加三个按钮组件
28       buttonPanel.add(yellowButton);
29       buttonPanel.add(blueButton);
30       buttonPanel.add(redButton);
31
32       // 将面板添加到帧
33       add(buttonPanel);
34
35       // 创建按钮动作
36       ColorAction yellowAction = new ColorAction(Color.YELLOW);
37       ColorAction blueAction = new ColorAction(Color.BLUE);
38       ColorAction redAction = new ColorAction(Color.RED);
39
40       //用按钮关联动作   监听器对象与组件之间的注册机制
41       yellowButton.addActionListener(yellowAction);
42       blueButton.addActionListener(blueAction);
43       redButton.addActionListener(redAction);
44    }
45
46    /**
47     * An action listener that sets the panel's background color.
48     */
49    private class ColorAction implements ActionListener
50    {
51       private Color backgroundColor;
52
53       public ColorAction(Color c)
54       {
55          backgroundColor = c;
56       }
57
58       public void actionPerformed(ActionEvent event)
59       {
60          buttonPanel.setBackground(backgroundColor);
61       }
62    }
63 }
 1 package button;
 2
 3 import java.awt.*;
 4 import javax.swing.*;
 5
 6 /**
 7  * @version 1.35 2018-04-10
 8  * @author Cay Horstmann
 9  */
10 public class ButtonTest
11 {
12    public static void main(String[] args)//String类代表字符串。Java 程序中的所有字符串字面值(如 "abc" )都作为此类的实例实现。
13    {
14       EventQueue.invokeLater(() -> {
15          ButtonFrame frame = new ButtonFrame();//生成ButtonFrame对象
16          frame.setTitle("ButtonTest");//设置组建的自定义标题测试按钮
17          frame.setDefaultCloseOperation(JFrame.EXIT_ON_CLOSE);//设置默认的关闭操作,参数在关闭动作时退出
18          frame.setVisible(true);//一个图形界面默认都是不可见的,setVisible把图形界面设置为可见
19       });
20    }
21 }
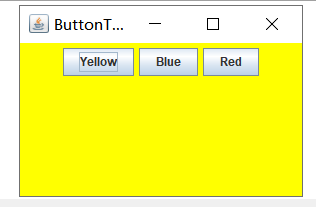
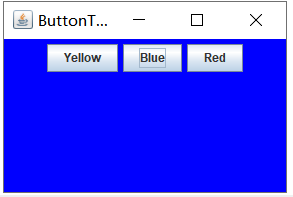
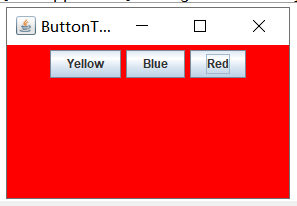
程序的运行结果如图:
改进代码:
 1 package button;
 2
 3  import java.awt.*;
 4   import java.awt.event.*;
 5   import java.nio.charset.CodingErrorAction;
 6   import java.util.Collection;
 7
 8   import javax.swing.*;
 9
10  /**
11   * 带按钮面板的框架
12   */
13  @SuppressWarnings("serial")
14  public class ButtonFrame extends JFrame {
15      private JPanel buttonPanel;// 定义JPanel属性
16      private static final int DEFAULT_WIDTH = 600;
17      private static final int DEFAULT_HEIGHT = 400;
18
19      public ButtonFrame() {
20          setSize(DEFAULT_WIDTH, DEFAULT_HEIGHT);// 通过setSize更改了宽度和高度的属性值
21          buttonPanel = new JPanel();// 使new JPanel指向对象buttonPanel
22
23          // 将面板添加到帧         add(buttonPanel);
24          makeButton1("Yellow", Color.yellow);
25          makeButton1("White", Color.white);
26          makeButton1("Black", Color.black);         makeButton1("Green", Color.green);
27          makeButton1("Pink", Color.pink);
28          makeButton1("Blue", Color.blue);
29          makeButton1("Gray", Color.gray);
30          makeButton1("Red", Color.red);
31      }
32
33      public void makeButton1(String name, Color backgroundColor) {
34          JButton button = new JButton(name);         buttonPanel.add(button);
35          button.addActionListener(new ActionListener() {
36
37              @Override
38              public void actionPerformed(ActionEvent e) {
39                  buttonPanel.setBackground(backgroundColor);
40              }
41          });
42
43      }
44  }
其结果:
测试程序2:
l 在elipse IDE中调试运行教材449页程序11-2,结合程序运行结果理解程序;
l 在组件观感设置代码处添加注释;
l 了解GUI程序中观感的设置方法。
代码:
 package plaf;

  import javax.swing.JButton;
  import javax.swing.JFrame;
  import javax.swing.JPanel;
  import javax.swing.SwingUtilities;
  import javax.swing.UIManager;

  /**
  * 带有按钮面板的框架,用于改变外观和感觉
  */
 public class PlafFrame extends JFrame
 {
    private JPanel buttonPanel;

    public PlafFrame()
    {
       buttonPanel = new JPanel();//实例化一个新的JPanel

       //获取所有的显示样式UIManager.setLookAndFeel(infos[0].getClassName())
       UIManager.LookAndFeelInfo[] infos = UIManager.getInstalledLookAndFeels();
       for (UIManager.LookAndFeelInfo info : infos)
          makeButton(info.getName(), info.getClassName());

       add(buttonPanel);//增加按键点击事件
       pack();
    }

    /**
     * 制作一个按钮来改变可插入的外观和感觉。
     * @param name the button name
     * @param className the name of the look-and-feel class
     */
    private void makeButton(String name, String className)
    {
       // 向面板添加按钮

       JButton button = new JButton(name);
       buttonPanel.add(button);

       // 设置按钮动作

       button.addActionListener(event -> {
          // 按钮动作:切换到新的外观和感觉
          try
          {
             //设置成你所使用的平台的外观。  java的图形界面外观有3种,默认是java的金属外观,还有就是windows系统,motif系统外观.
             UIManager.setLookAndFeel(className);
             //简单的外观更改:将树结构中的每个节点转到 updateUI() 也就是说,通过当前外观初始化其 UI 属性。
             SwingUtilities.updateComponentTreeUI(this);
             pack();//依据放置的组件设定窗口的大小, 使之正好能容纳放置的所有组件
          }
          catch (Exception e)//抛出异常
          {
            e.printStackTrace();//深层次的输出异常调用的流程。
          }
          });
    }
 }
package plaf;

  import java.awt.*;
  import javax.swing.*;

  /**
   * @version 1.32 2015-06-12
   * @author Cay Horstmann
   */
 public class PlafTest
 {
    public static void main(String[] args)
    {
       EventQueue.invokeLater(() -> {
          JFrame frame = new PlafFrame();//生成PlafFrame对象
          frame.setTitle("PlafTest");//设置组建的自定义标题测试按钮
          frame.setDefaultCloseOperation(JFrame.EXIT_ON_CLOSE);//设置默认的关闭操作,参数在关闭动作时退出
          frame.setVisible(true);//一个图形界面默认都是不可见的,setVisible把图形界面设置为可见
       });
    }
 }
运行结果:

测试程序3:
l 在elipse IDE中调试运行教材457页-458页程序11-3,结合程序运行结果理解程序;
l 掌握AbstractAction类及其动作对象;
l 掌握GUI程序中按钮、键盘动作映射到动作对象的方法。
package action;

import java.awt.*;
import java.awt.event.*;
import javax.swing.*;

/**
 * A frame with a panel that demonstrates color change actions.
 */
public class ActionFrame extends JFrame
{
   private JPanel buttonPanel;
   private static final int DEFAULT_WIDTH = 300;
   private static final int DEFAULT_HEIGHT = 200;

   public ActionFrame()
   {
      setSize(DEFAULT_WIDTH, DEFAULT_HEIGHT);

      buttonPanel = new JPanel();

      // define actions
      ColorAction yellowAction = new ColorAction("Yellow", new ImageIcon("yellow-ball.gif"),
            Color.YELLOW);
      ColorAction blueAction = new ColorAction("Blue", new ImageIcon("blue-ball.gif"), Color.BLUE);
      ColorAction redAction = new ColorAction("Red", new ImageIcon("red-ball.gif"), Color.RED);

      // add buttons for these actions
      buttonPanel.add(new JButton(yellowAction));
      buttonPanel.add(new JButton(blueAction));
      buttonPanel.add(new JButton(redAction));

      // add panel to frame
      add(buttonPanel);

      // associate the Y, B, and R keys with names
      InputMap inputMap = buttonPanel.getInputMap(JComponent.WHEN_ANCESTOR_OF_FOCUSED_COMPONENT);
      inputMap.put(KeyStroke.getKeyStroke("ctrl Y"), "panel.yellow");
      inputMap.put(KeyStroke.getKeyStroke("ctrl B"), "panel.blue");
      inputMap.put(KeyStroke.getKeyStroke("ctrl R"), "panel.red");

      // associate the names with actions
      ActionMap actionMap = buttonPanel.getActionMap();
      actionMap.put("panel.yellow", yellowAction);
      actionMap.put("panel.blue", blueAction);
      actionMap.put("panel.red", redAction);
   }

   public class ColorAction extends AbstractAction
   {
      /**
       * Constructs a color action.
       * @param name the name to show on the button
       * @param icon the icon to display on the button
       * @param c the background color
       */
      public ColorAction(String name, Icon icon, Color c)
      {
         putValue(Action.NAME, name);
         putValue(Action.SMALL_ICON, icon);
         putValue(Action.SHORT_DESCRIPTION, "Set panel color to " + name.toLowerCase());
         putValue("color", c);
      }

      public void actionPerformed(ActionEvent event)
      {
         Color color = (Color) getValue("color");
         buttonPanel.setBackground(color); // 调用setBackground方法,设置背景颜色
      }
   }
}
package action;

import java.awt.*;
import javax.swing.*;

/**
 * @version 1.34 2015-06-12
 * @author Cay Horstmann
 */
public class ActionTest
{
   public static void main(String[] args)
   {
      EventQueue.invokeLater(() -> {
         ActionFrame frame = new ActionFrame();//生成ActionFrame对象
         frame.setTitle("ActionTest");
         frame.setDefaultCloseOperation(JFrame.EXIT_ON_CLOSE);//设置默认的关闭操作
         frame.setVisible(true);//一个图形界面默认都是不可见的,setVisible把图形界面设
      });
   }
}
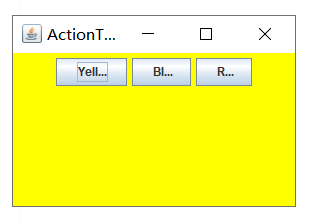
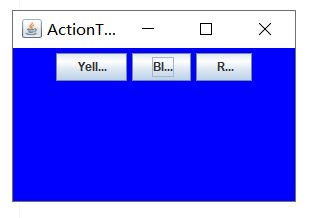
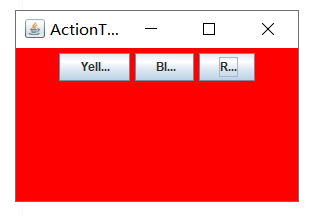
其结果:
AbstractAction类的简单认识
<br><br>AbstractAction类是Action接口的抽象实现。AbstractAction为Action接口中的大多数方法提供了默认功能,我们可以扩展AbstractAction类来建立自定义的特定动作。由此,必须为接口的实现提供唯一的方法:<br>actionPerformed()方法。我们可以在actionPerformed()方法中提供我们想要的功能。以下是个简单例子:
class MyAction extends AbstractAction{
public MyAction(String name,Icon icon){
super(name,icon);
}
public void actionPerformed(ActionEvent e){
System.out.println("Action:"+e.getActionCommand());
}
}
测试程序4:
l 在elipse IDE中调试运行教材462页程序11-4、11-5,结合程序运行结果理解程序;
l 掌握GUI程序中鼠标事件处理技术。
package mouse;

import java.awt.*;
import java.awt.event.*;
import java.awt.geom.*;
import java.util.*;
import javax.swing.*;

/**
 * A component with mouse operations for adding and removing squares.
 */
public class MouseComponent extends JComponent
{
   private static final int DEFAULT_WIDTH = 300;
   private static final int DEFAULT_HEIGHT = 200;

   private static final int SIDELENGTH = 10;//定义创造的正方形的边长
   private ArrayList<Rectangle2D> squares;//声明一个正方形集合
   private Rectangle2D current; // Java类库中用来描述矩形的类,它的对象可以看作是一个矩形

   public MouseComponent()
   {
      squares = new ArrayList<>();
      current = null;

      addMouseListener(new MouseHandler());
      //添加一个我们实现的类,这个类继承了监测鼠标点击情况的MouseListener
      addMouseMotionListener(new MouseMotionHandler());
      // 添加另一个实现类,这个类继承了监测鼠标移动情况的MouseMotionListener

   }

   public Dimension getPreferredSize()
   {
      return new Dimension(DEFAULT_WIDTH, DEFAULT_HEIGHT);
   }

   public void paintComponent(Graphics g)
   {
      Graphics2D g2 = (Graphics2D) g;// 转换为我们需要使用的类

      // draw all squares
      for (Rectangle2D r : squares)
         g2.draw(r);
   }

   /**
    * Finds the first square containing a point.
    * @param p a point
    * @return the first square that contains p
    */
   public Rectangle2D find(Point2D p)
   {
      for (Rectangle2D r : squares)
      {
         if (r.contains(p)) return r;
      }
      return null;
   }

   /**
    * Adds a square to the collection.
    * @param p the center of the square
    */
   public void add(Point2D p)
   {
      double x = p.getX();
      double y = p.getY();
    //获取x和y的坐标
      current = new Rectangle2D.Double(x - SIDELENGTH / 2, y - SIDELENGTH / 2,
         SIDELENGTH, SIDELENGTH);
    //用获得的坐标和既定的边长构建一个新的正方形,并将其赋值给current

      squares.add(current);//将current添加到squares队列中
      repaint();//重绘图像
   }

   /**
    * Removes a square from the collection.
    * @param s the square to remove
    */
   public void remove(Rectangle2D s)
   {
      if (s == null) return;//如果要移除的内容为空,直接返回
      if (s == current) current = null;
    //如果要移除的内容和current正指向的内容相同,则将current清空
    //避免发生不必要的错误


      squares.remove(s);//将s从squares的列表中直接删去
      repaint();//重绘component的方法
   }

   private class MouseHandler extends MouseAdapter
   {
      public void mousePressed(MouseEvent event)//鼠标按下方法
      {
         // 如果光标不在正方形中,则添加一个新的正方形
         current = find(event.getPoint());
      // 将鼠标单击的这个点的坐标的对象赋给current
         if (current == null)
            //如果这个点没有对象,当前指向空的位置
             add(event.getPoint());
      }

      public void mouseClicked(MouseEvent event)//鼠标按下方法
      {
         // 如果光标不在正方形中,则添加一个新的正方形中
         current = find(event.getPoint());
         //将鼠标单击的这个点的坐标的对象赋给current
         if (current != null && event.getClickCount() >= 2) remove(current);
      }
   }

   private class MouseMotionHandler implements MouseMotionListener
   {
      public void mouseMoved(MouseEvent event)
      {
         // set the mouse cursor to cross hairs if it is inside a rectangle

         if (find(event.getPoint()) == null) setCursor(Cursor.getDefaultCursor());
         else setCursor(Cursor.getPredefinedCursor(Cursor.CROSSHAIR_CURSOR));
      }

      public void mouseDragged(MouseEvent event)
      {
         if (current != null)
         {
             //因为在调用这个方法之前肯定会调用点击鼠标的方法
             //所以我们直接判断:如果现在current不为空
             //像素(强制转换为int)
            int x = event.getX();
            int y = event.getY();
           //获取带坐标


            // drag the current rectangle to center it at (x, y)
            current.setFrame(x - SIDELENGTH / 2, y - SIDELENGTH / 2, SIDELENGTH, SIDELENGTH);
            //最后在鼠标放下时进行图形绘制
            repaint();
         }
      }
   }
}
package mouse;

import java.awt.*;
import javax.swing.*;

/**
 * @version 1.35 2018-04-10
 * @author Cay Horstmann
 */
public class MouseTest
{
   public static void main(String[] args)
   {
      EventQueue.invokeLater(() -> {
         MouseFrame frame = new MouseFrame();//生成MouseFrame对象
         frame.setTitle("MouseTest");//设置组建的自定义标题测试按钮
         frame.setDefaultCloseOperation(JFrame.EXIT_ON_CLOSE);//设置默认的关闭操作,参数在关闭动作时退出
         frame.setVisible(true);//一个图形界面默认都是不可见的,setVisible把图形界面设置为可见
      });
   }
}
package mouse;

import javax.swing.*;

/**
 * A frame containing a panel for testing mouse operations
 */
public class MouseFrame extends JFrame
{
   public MouseFrame()
   {
      add(new MouseComponent());//向框架中添加一个JComponent的实例
      pack();//依据放置的组件设定窗口的大小, 使之正好能容纳放置的所有组件
   }
}
其结果:
实验2:结对编程练习
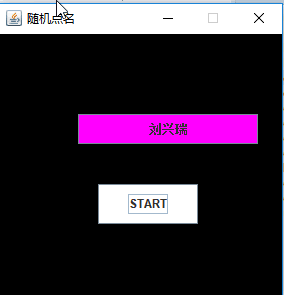
利用班级名单文件、文本框和按钮组件,设计一个有如下界面(图1)的点名器,要求用户点击开始按钮后在文本输入框随机显示2018级计算机科学与技术(1)班同学姓名,如图2所示,点击停止按钮后,文本输入框不再变换同学姓名,此同学则是被点到的同学姓名,如图3所示。

图1 点名器启动界面
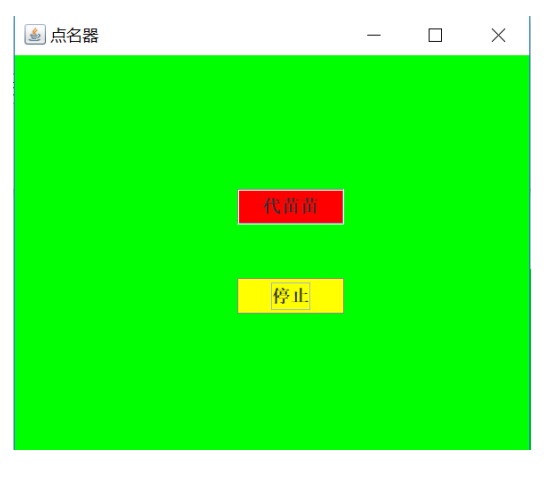
图2 点名器随机显示姓名界面
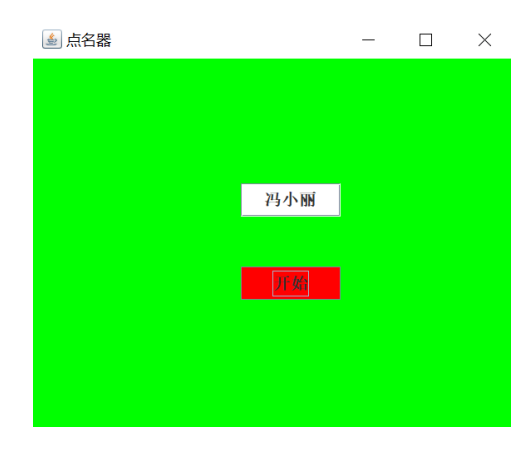
图3 点名器点名界面
package chart13;
import java.util.*;
import java.awt.*;
import javax.swing.*;
import java.awt.event.*;
import java.awt.Frame;
import java.io.File;
import java.io.FileNotFoundException;

public class ButtonFrame extends JFrame implements ActionListener{
    private static final long serialVersionUID = 1L;
    //serialVersionUID适用于Java的序列化机制,简单来说,Java的序列化机制是通过判断类的

    private JButton but ;
    private JButton show;
    private static boolean flag = true;
    public static void main(String arguments []) {
         new ButtonFrame();

        }

public  ButtonFrame(){

but = new JButton("START");//创建一个“开始”按钮
but.setBounds(100,150,100,40);
show = new JButton("随机点名");//创建一个“随机点名”按钮
show.setBounds(80,80,180,30);
add(but);//将按钮添加到面板中
add(show);
setLayout(null);
setVisible(true);//面板的可视化处理
setResizable(false);
setBounds(100,100,300,300);
this.getContentPane().setBackground(Color.black);//面板背景色为白色
setTitle("随机点名");//设置框架标题
setDefaultCloseOperation(JFrame.EXIT_ON_CLOSE);//关闭该面板
but.addActionListener(this);
}

    public void actionPerformed(ActionEvent e){
        int i=0;
        String names[]=new String[50];//创建一个数组,大小为50
        try {
            Scanner in=new Scanner(new File("D:\\2019studentlist.txt"));//将文件写入程序
            while(in.hasNextLine())
            {
                names[i]=in.nextLine();//读取文件,遍历全班姓名
                i++;
            }
        } catch (FileNotFoundException e1) {

            e1.printStackTrace();//异常处理
        }

     //点击开始后的操作
        if(but.getText()=="START"){

    show.setBackground(Color.GREEN);
    flag=true;
    new Thread(){
        public void run(){
            while(ButtonFrame.flag){
            Random r = new Random(); //随机点名
            int i= r.nextInt(43);
            show.setText(names[i]);
            }
        }
    }.start();
    but.setText("STOP");
    but.setBackground(Color.BLUE);
}
else if(but.getText()=="STOP"){
    flag = false;
    but.setText("START");
    but.setBackground(Color.WHITE);
    show.setBackground(Color.magenta);
}
    }


}
运行结果:
第三部分:实验总结
本章主要学习了事件处理的基本原理,理解其用途;掌握AWT事件模型的工作机制; 掌握事件处理的基本编程模型;了解GUI界面组件观感设置方法; 掌握WindowAdapter类、AbstractAction类的用法; 掌握GUI程序中鼠标事件处理技术。由于自己的基础等各方面的原因,以及前面知识与后面知识的衔接等原因,这一章的学习对于我来说还是相比较上一章来说有较大的困难的。而且此次的作业也借鉴了其他同学的,而且最后的编程题是和陈园园、曹玉中结对完成的。所以在完成作业的过程中也学习到了很多,从结对小伙伴的身上。这也是关于本章学习收获较大的一点。


