Electron App 安装包定制 -- Inno Setup 脚本 Pascal Scripting 初探
在做 Electron 项目时,有个需求是安装包安装时要给客户机上装上某个软件
在查看 Inno Setup 官网后发现是通过 .iss 脚本编写实现自定义安装过程
可在 .iss 内可以添加脚本为安装过程添加逻辑
为了测试方便我用 vite 新建一个全新的 electron 项目
用的是这个脚手架 https://github.com/electron-vite/electron-vite-vue
用其它脚手架也行,反正我们对 app 内容本身并不关注,只关心制作安装包
新建 electron 项目
安装注意事项(都是我踩过的坑..)
yarn config get registry
我用的是这个 https://registry.npm.taobao.org/
yarn create electron-vite
项目名 first-electron
模板我选了 vue ,其实无所谓我们只是跑个electron demo 目的是打包而不是开发
Project name: first-electron
Project template: Vue
成功后
 cd first-electron
 yarn
 yarn dev
项目应该跑起来了可以看到 electron 窗口
关掉项目, 下一步测一下打包功能
编译打包 app
项目已经帮你整合了 electron-builder
直接运行打包命令
yarn build
大概率会失败

从 github 拉 electron 失败
需要从镜像服务器,设置 electron_mirror 到专门镜像 后再打包

yarn config set electron_mirror https://npm.taobao.org/mirrors/electron/
yarn build
成功后在项目 first-electron\release 目录下就是编译完成的 electron app 了
我的是在 first-electron\release\0.0.0 目录下,0.0.0 一看就是软件版本号了
项目根目录的 electron-builder.json5 就是 electron-builder 配置文件
配置文件内的 "output": "release/${version}" 就是定义编译后的文件目录,一般不会去改
first-electron_0.0.0.exe 这个文件就是单独文件的安装版,双击安装时会有安装过程
win-unpacked 就是绿色版, 安装包的制作就是把这个文件夹内的文件进行打包
安装包自定义安装过程
如果想对安装包安装过程进行自定义
那么首先电脑上先安装 Inno Setup Compiler, 再创建 setup.iss 文件
通过 ide 新建 .iss 文件
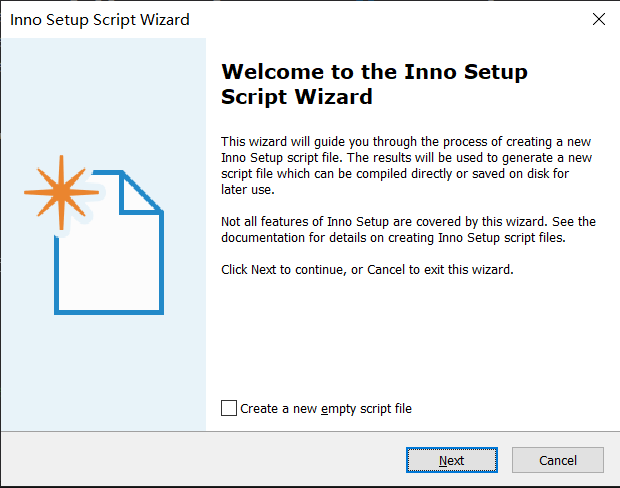
过程如下:
-
打开 Inno Setup Compiler
-
新建一个 Inno Setup Script Wizard 开始创建 .iss 脚本文件
-
按提示一步步往下走,可以选择填写 app 名字,版本,公司之类的信息这些都不重要
-
直到
Application FilesApplication main executable file 原默认的 Myprog.exe 主执行文件变更到我们自己 first-electron 的主执行文件,如下:
first-electron\release\0.0.0\win-unpacked\first-electron.exe另外 Other application files: 这一项点击 Add folder... 按钮
把 win-unpacked 整个文件夹也添加进来
继续按提示往下走,直到 Compiler Settings 这一页
-
Custom compiler output folder: 选择打包文件输出目录
我选择输出到 first-electron\dist-setup 目录
-
继续按提示往下走,最后会让你保存成 .iss 文件,这个 .iss 文件就是打包脚本了
我在这个例子中输出文件保存为了 setup.iss
先不动这个脚本。直接编译,完成后可以在 first-electron\dist-setup 看到 windows 安装包了
安装程序完成后调用其它程序
比如主程序安装完后想自动执行安装东方财富的的安装文件 “dfcft8.exe”
(别问为什么是 “东方财富” 这个安装包,我的电脑的下载文件夹内刚好看到有这个.exe 执行文件就用这个来测试吧)
为什么要做这么流氓的事? 这只是举个例子而已!
其实,真实项目中有可能是客户机器上缺少某种环境或文件之类的东西,那么你可以利用此方法帮用户安装上
让我们开始吧。 非常的简单!
修改之前保存的 setup.iss 文件
在 setup.iss 文件中找到 [Run] 节点添加如下代码:
[Run]
Filename: "{app}\resources\bin\dfcft8.exe"; Description: ""; Flags: nowait postinstall skipifsilent
使用 Inno setup compiler 编译该文件
安装程序最后会显示这样的画面:
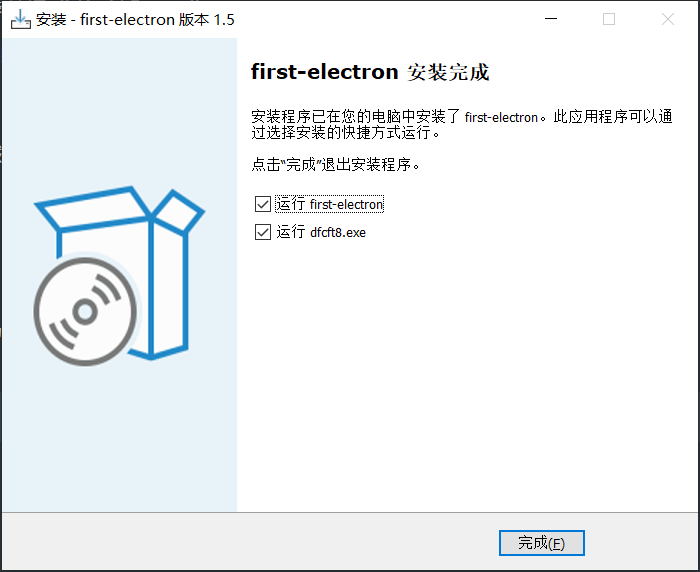
点击 “完成” 按钮就会出现以下画面:
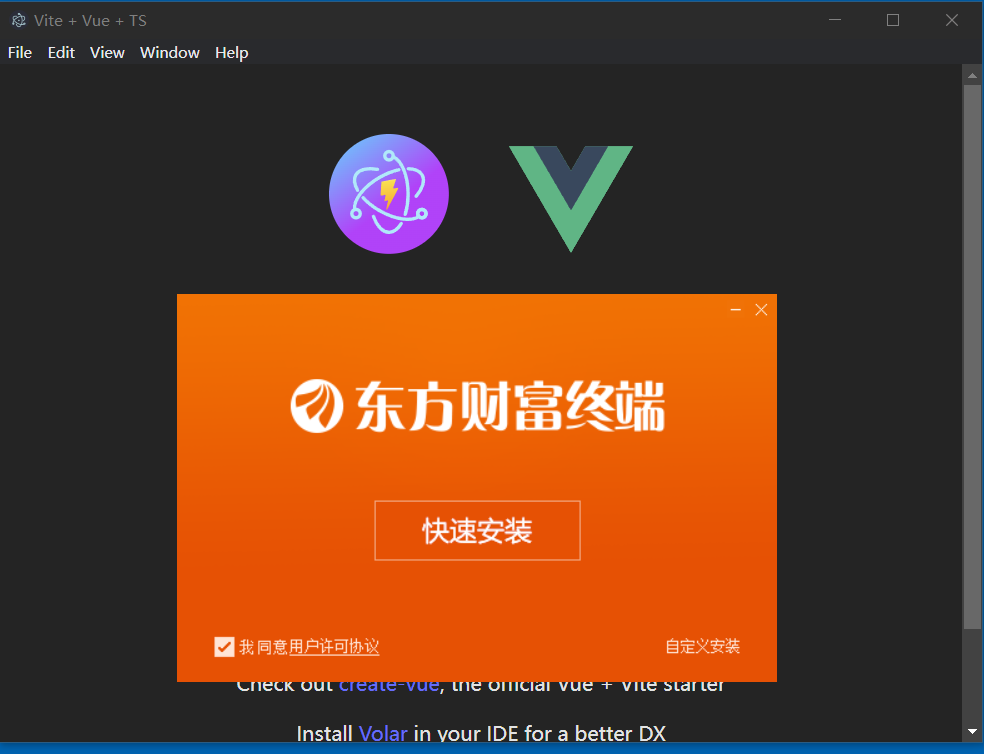
非常简单!
能不能在安装开始前就调用某个程序?
上面说的是安装程序安装完成后执行另外的一个程序,那么如果想在安装程序安装前执行呢?
[code]节点脚本控制安装过程
需要 Pascal 脚本了, 开始吧!
说实话作为长期使用 Javascript 的我来说第一次接触 Pascal Scripting 我心里一万头xx马奔腾而过
而且我看 Inno Setup Compiler 官网 <jrsoftware.org> 的大概意思是 Pascal Scripting 不太好弄
官方建议用户从
Inno Setup 6\Examples安装目录下的 Examples 目录下参考官方提供的脚本例子
在 setup.iss 文件内添加 [code] 节点
这个节点允许你为安装过程添加逻辑,可细化到安装的每一步
它通过在 [code] 节点下暴露 Event Functions 实现,比如:
- function InitializeSetup(): Boolean;
- procedure DeinitializeSetup();
- function InitializeUninstall(): Boolean;
- ...
我姑且把它理解为生命周期吧!
那么如果想在安装开始时就调用
使用 InitializeSetup 并在其内用 Exec 方法调用 'dfcft8.exe'
下面实现安装过程开始之前前调用
[code]
function InitializeSetup(): Boolean;
var
  ResultCode: Integer;
begin
  ExtractTemporaryFile('dfcft8.exe');
  Exec(ExpandConstant('{tmp}\dfcft8.exe'), '', '', SW_SHOW, ewWaitUntilTerminated, ResultCode)
  Log('InitializeSetup called');
  Result := true
end;
为 setup.iss 添加上面代码后用 Inno Setup Compiler Ide 按 F9 或 Run 菜单 Run选项 "编译并启动"
安装包启动后点击"确定"按钮,Ide 会输出日志,也可以看到东方财富的安装程序也启动了
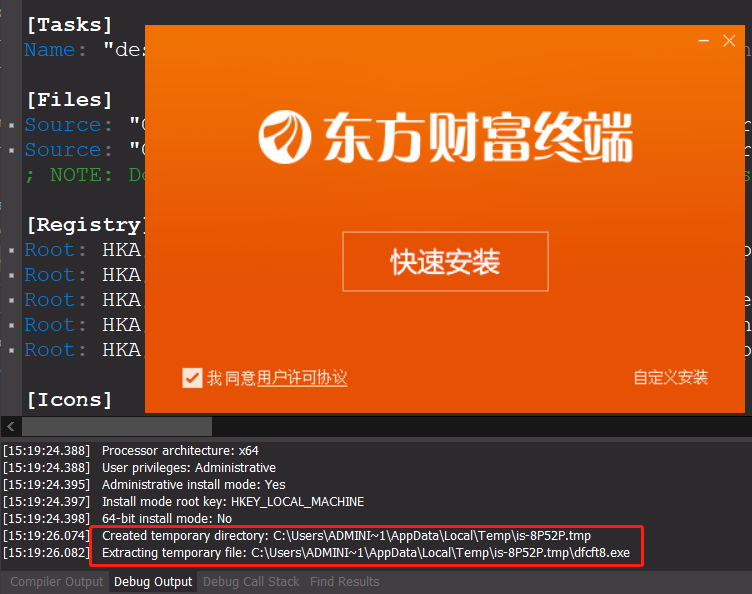
注意日志输出画面中的 这两句:
[15:19:26.074]   Created temporary directory: C:\Users\ADMINI~1\AppData\Local\Temp\is-8P52P.tmp
[15:19:26.082]   Extracting temporary file: C:\Users\ADMINI~1\AppData\Local\Temp\is-8P52P.tmp\dfcft8.exe
意思是先建个临时文件夹,再从安装包中先解压出 "dfctt8.exe" 这个文件放到临时文件夹内
此时安装目录内是取不到文件的, 因为我们的 first-electron 程序还没有安装成功,也不会在客户电脑上有安装目录
只能从安装包这个压缩文件内解压获取临时文件
这是 setup.iss 现在的代码
; Script generated by the Inno Setup Script Wizard.
; SEE THE DOCUMENTATION FOR DETAILS ON CREATING INNO SETUP SCRIPT FILES!

#define MyAppName "first-electron"
#define MyAppVersion "1.5"
#define MyAppPublisher "My Company, Inc."
#define MyAppURL "https://www.example.com/"
#define MyAppExeName "first-electron.exe"
#define MyAppAssocName MyAppName + " File"
#define MyAppAssocExt ".myp"
#define MyAppAssocKey StringChange(MyAppAssocName, " ", "") + MyAppAssocExt

[Setup]
; NOTE: The value of AppId uniquely identifies this application. Do not use the same AppId value in installers for other applications.
; (To generate a new GUID, click Tools | Generate GUID inside the IDE.)
AppId={{72C0FB3C-108B-4530-8D27-5D31B5349C3C}
AppName={#MyAppName}
AppVersion={#MyAppVersion}
;AppVerName={#MyAppName} {#MyAppVersion}
AppPublisher={#MyAppPublisher}
AppPublisherURL={#MyAppURL}
AppSupportURL={#MyAppURL}
AppUpdatesURL={#MyAppURL}
DefaultDirName={autopf}\{#MyAppName}
ChangesAssociations=yes
DisableProgramGroupPage=yes
; Uncomment the following line to run in non administrative install mode (install for current user only.)
;PrivilegesRequired=lowest
OutputDir=C:\Users\Administrator\Desktop\first-electron\dist-setup
OutputBaseFilename=first-electron-setup
Compression=lzma
SolidCompression=yes
WizardStyle=modern

[Languages]
Name: "english"; MessagesFile: "compiler:Default.isl"

[Tasks]
Name: "desktopicon"; Description: "{cm:CreateDesktopIcon}"; GroupDescription: "{cm:AdditionalIcons}"; Flags: unchecked

[Files]
Source: "C:\Users\Administrator\Desktop\first-electron\release\0.0.0\win-unpacked\{#MyAppExeName}"; DestDir: "{app}"; Flags: ignoreversion
Source: "C:\Users\Administrator\Desktop\first-electron\release\0.0.0\win-unpacked\*"; DestDir: "{app}"; Flags: ignoreversion recursesubdirs createallsubdirs
; NOTE: Don't use "Flags: ignoreversion" on any shared system files

[Registry]
Root: HKA; Subkey: "Software\Classes\{#MyAppAssocExt}\OpenWithProgids"; ValueType: string; ValueName: "{#MyAppAssocKey}"; ValueData: ""; Flags: uninsdeletevalue
Root: HKA; Subkey: "Software\Classes\{#MyAppAssocKey}"; ValueType: string; ValueName: ""; ValueData: "{#MyAppAssocName}"; Flags: uninsdeletekey
Root: HKA; Subkey: "Software\Classes\{#MyAppAssocKey}\DefaultIcon"; ValueType: string; ValueName: ""; ValueData: "{app}\{#MyAppExeName},0"
Root: HKA; Subkey: "Software\Classes\{#MyAppAssocKey}\shell\open\command"; ValueType: string; ValueName: ""; ValueData: """{app}\{#MyAppExeName}"" ""%1"""
Root: HKA; Subkey: "Software\Classes\Applications\{#MyAppExeName}\SupportedTypes"; ValueType: string; ValueName: ".myp"; ValueData: ""

[Icons]
Name: "{autoprograms}\{#MyAppName}"; Filename: "{app}\{#MyAppExeName}"
Name: "{autodesktop}\{#MyAppName}"; Filename: "{app}\{#MyAppExeName}"; Tasks: desktopicon

[Run]
Filename: "{app}\{#MyAppExeName}"; Description: "{cm:LaunchProgram,{#StringChange(MyAppName, '&', '&&')}}"; Flags: nowait postinstall skipifsilent
; Filename: "{app}\resources\bin\dfcft8.exe"; Description: ""; Flags: nowait postinstall skipifsilent


[code]
function InitializeSetup(): Boolean;
var
  ResultCode: Integer;
begin
  ExtractTemporaryFile('dfcft8.exe');
  Exec(ExpandConstant('{tmp}\dfcft8.exe'), '', '', SW_SHOW, ewWaitUntilTerminated, ResultCode);
  Log('InitializeSetup called');
  Result := true
end;
这里有个疑问,ExtractTemporaryFile('dfcft8.exe') 路径
这里可没指定过 'dfcft8.exe' 文件位置,而且我明明是把它放在了 resources\bin\dfcft8.exe 下,难道会自动搜索?
测试一下猜想
为了测试我把用另一个 "electron-fiddle.exe" 安装包放在 resources 文件夹并且名称改为同样的 'dfcft8.exe' ,这样就有两个同名文件在不同文件夹下
resources\bin\'dfcft8.exe'
resources\'dfcft8.exe'
编译测试结果:
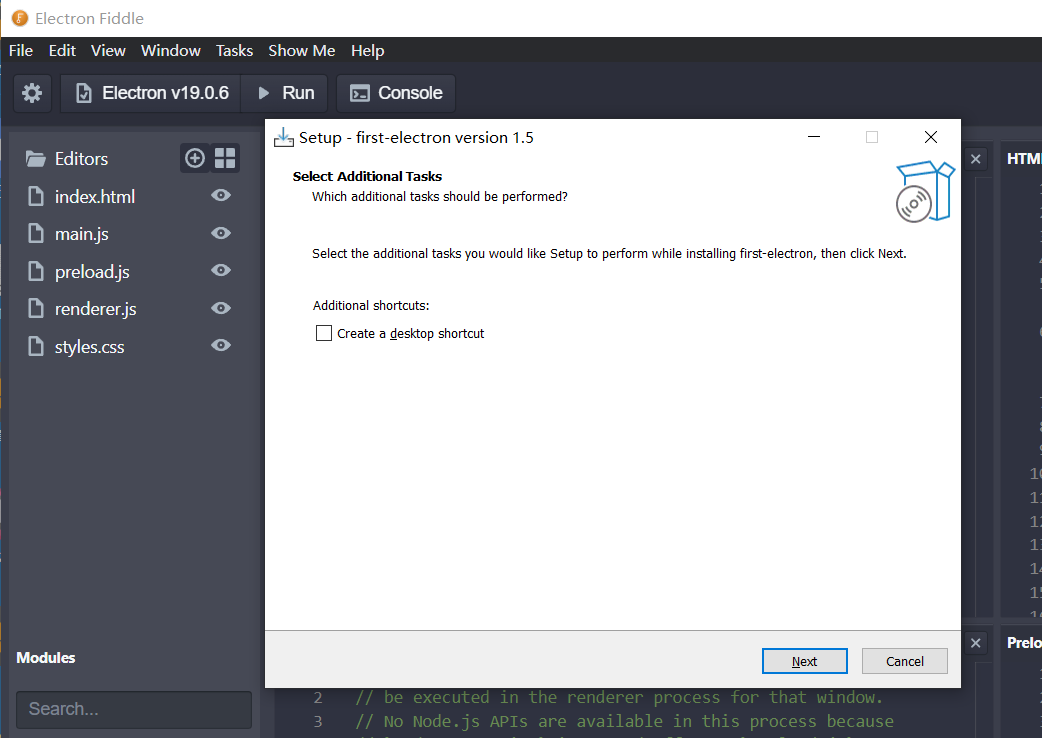
果然被改名为 'dfcft8.exe' 的 'electron-fiddle.exe' 被启动代替了东方财富的安装程序
官网我找不到资料,但测试后得到的结论是 ExtractTemporaryFile 会返回搜索到的第一个匹配文件
如果非要解压指定文件夹下的指定文件呢?
那么需要换种方法,像下面这样改:
[Files]
Source: "C:\Users\Administrator\Desktop\first-electron\release\0.0.0\win-unpacked\resources\bin\dfcft8.exe"; DestDir: "{tmp}\resources\bin"

[code]
function InitializeSetup(): Boolean;
var
  ResultCode: Integer;
begin
  ExtractTemporaryFiles('{tmp}\resources\bin\dfcft8.exe')
  Exec(ExpandConstant('{tmp}\resources\bin\dfcft8.exe'), '', '', SW_SHOW, ewWaitUntilTerminated, ResultCode);
  Log('InitializeSetup called');
  Result := true
end;
[Files] 节点指定 DestDir: "{tmp}\resources\bin"
[code] 节点内使用 ExtractTemporaryFiles('{tmp}\resources\bin\dfcft8.exe') 解压
并且 Exec 方法调用时也要传路径 ExpandConstant('{tmp}\resources\bin\dfcft8.exe')
编译测试一下
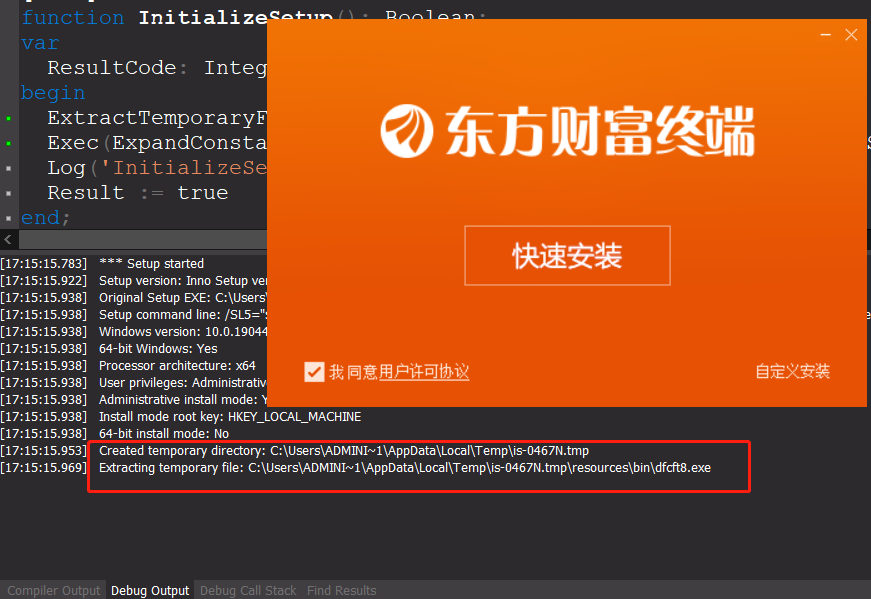
可以看到已经执行调用东方财富的安装程序
先别急着关掉,我们可以通过 log 输出的临时路径信息,找到对应的文件夹打开查看 C:\Users\ADMINI~1\AppData\Local\Temp\is-0467N.tmp
[17:15:15.953] Created temporary directory: C:\Users\ADMINI~1\AppData\Local\Temp\is-0467N.tmp

果然临时文件夹内文件夹结构如我们所指定的那样
该路径会在安装程序结束时自动删除
用 [code] 实现安装完成后执行 "dfcft8.exe" 可执行文件
之前是在 [Run] 节点下实现,其实也可以用 procedure DeinitializeSetup() 实现类似的功能
改动如下:
[code]
function InstallDfcf: Boolean;
var
  ResultCode: Integer;
begin
  if not Exec(ExpandConstant('{app}\resources\bin\dfcft8.exe'), '', '', SW_SHOW, ewWaitUntilTerminated, ResultCode) then
  begin
    Log('安装东方财富失败. Error code: ' + IntToStr(ResultCode));
  end;
end;

procedure DeinitializeSetup();
begin
  InstallDfcf;
end;
函数 DeinitializeSetup 就是安装结束时调用自定义函数 InstallDfcf
InstallDfcf 函数内部的 Exec 调用了 'dfcft8.exe'
还有更多..
Inno Setup 其实可定制化的功能还有很多,官网文档就仁者见仁智者见智了
全面详细学习 Inno Setup 没啥意义,用哪个功能直接了解这一块儿就行,就是学习各种配置
现在有 chatgpt,还记啥配置呢,不明白可以直接问它,chatgpt 真是事半功倍啊,反正我就是这么做的
我们该把时间用于更有意义的地方,比如摸鱼!
博客园: http://cnblogs.com/willian/
github: https://github.com/willian12345/


 浙公网安备 33010602011771号