
Linux7 升级openssh9.3
漏洞名称:
OpenSSH 输入验证错误漏洞(CVE-2019-16905)
漏洞描述:
OpenSSH(OpenBSD Secure Shell)是OpenBSD计划组的一套用于安全访问远程计算机的连接工具。该工具是SSH协议的开源实现,支持对所有的传输进行加密,可有效阻止窃听、连接劫持以及其他网络级的攻击。
OpenSSH 7.7版本至7.9版本和8.1之前的8.x版本中存在输入验证错误漏洞。该漏洞源于网络系统或产品未对输入的数据进行正确的验证。
查看服务器版本:cat /etc/redhat-release
[root@localhost bin]# cat /etc/redhat-release
CentOS Linux release 7.8.2003 (Core
查看openssh版本:ssh -V
[root@localhost bin]# ssh -V
OpenSSH_7.8p1, OpenSSL 1.0.2k-fips 26 Jan 2017
解决升级: 查看openssh版本,发现是7.8版本,将openssh升级至最新版本
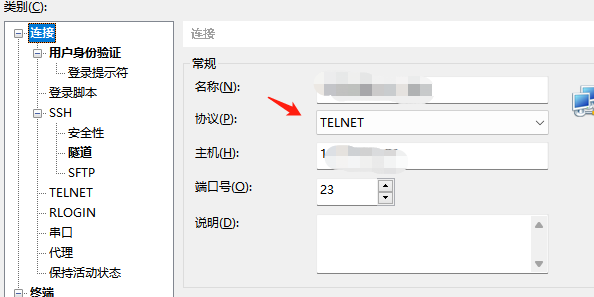
1、升级过程中,sshd可能无法使用,因此需要安装telnete服务 telnet-server、xinetd、telnet
[root@localhost bin]#yum -y install xinetd telnet-server telnet
2、配置telnet登录的终端类型 ,在 /etc/securetty 文件末尾加一些pts终端如下:
[root@localhost bin]#vim /etc/securetty
pts/3
pts/1
pts/2
pts/0
pts/4
按【Esc】键,: wq 保存退出
#启动telnet服务,并设置开机自动启动
systemctl enable xinetd
systemctl enable telnet.socket
systemctl start telnet.socket
systemctl start xinetd
#查看telnet端口:
netstat -lntp | grep 23
tcp6 0 0 :::23 :::* LISTEN 1/systemd
#切换到telnet方式登录,防止ssh连接意外中断造成升级失败
3、安装依赖包
[root@localhost bin]# yum install -y perl perl-devel gcc gcc-c++ zlib zlib-devel
[root@localhost bin]# yum install -y pam* zlib*
#下载openssh 和openssl的包上传至服务器,我这边下载的是以下版本
openssl下载地址:https://www.openssl.org/source/old/1.1.1/
openssh下载地址:https://cdn.openbsd.org/pub/OpenBSD/OpenSSH/portable/
openssh-9.3p1.tar.gz openssl-1.1.1q.tar.gz

(注意:目前openssl 最新版为 1.1.1w,openssh最新版为 9.5p1官网下载最新版即可)
4、安装openssl
#备份老版本ssl,备份下面两个文件
[root@localhost bin]# mv /usr/bin/openssl /usr/bin/openssl.bak
[root@localhost bin]# mv /usr/include/openssl /usr/include/openssl.bak
#解压openssl
[root@localhost home]# tar -zxvf openssl-1.1.1q.tar.gz
[root@localhost home]# cd openssl-1.1.1q
#编译和安装(我这边安装到/usr/local/openssl目录)
[root@localhost openssl-1.1.1q]# ./config shared --openssldir=/usr/local/openssl --prefix=/usr/local/openssl
[root@localhost openssl-1.1.1q]# make && make install
#安装完成后,echo $? 查看下最后的 make install 是否有报错,0标识没有问题
[root@localhost openssl-1.1.1q]# echo $?
#重新做软链接
[root@localhost openssl-1.1.1q]# ln -s /usr/local/openssl/bin/openssl /usr/bin/openssl
[root@localhost openssl-1.1.1q]# ln -s /usr/local/openssl/include/openssl /usr/include/openssl
# 可能还需要以下软链接
ln -sf /usr/local/openssl/lib/libssl.so.1.1 /usr/lib64/libssl.so.1.1
ln -sf /usr/local/openssl/lib/libcrypto.so.1.1 /usr/lib64/libcrypto.so.1.1
[root@localhost openssl-1.1.1q]# ll /usr/bin/openssl
[root@localhost openssl-1.1.1q]# ll /usr/include/openssl -ld
#执行下面2个命令加载新配置
[root@localhost openssl-1.1.1q]# echo "/usr/local/openssl/lib" >> /etc/ld.so.conf
[root@localhost openssl-1.1.1q]# /sbin/ldconfig
#查看确认版本
[root@localhost openssl-1.1.1q]# openssl version
OpenSSL 1.1.1q 5 Jul 2022
5、安装openssh
#备份openssh
[root@localhost home]# mv /etc/ssh /etc/ssh_bak
#解压授权
[root@localhost home]# tar -zxvf openssh-9.3p1.tar.gz
[root@localhost home]# chown -R root.root openssh-9.3p1
[root@localhost home]# cd openssh-9.3p1/
#修改版本号(不改的话会扫出低危漏洞)
[root@localhost openssh-9.3p1]# vi version.h
#找到版本那一行 将"openSSH_9.3" 修改为自定义的 "welcome back"
cat version.h
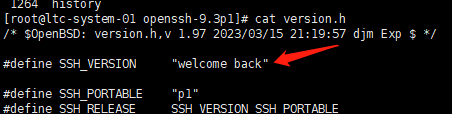
/* $OpenBSD: version.h,v 1.97 2023/03/15 21:19:57 djm Exp $ */
#define SSH_VERSION "welcome back"
#define SSH_PORTABLE "p1"
#define SSH_RELEASE SSH_VERSION SSH_PORTABLE
#配置、编译、安装
[root@localhost openssh-9.3p1]# ./configure --prefix=/usr --sysconfdir=/etc/ssh --with-openssl-includes=/usr/local/openssl/include --with-md5-passwords--with-pam --with-tcp-wrappers --with-ssl-dir=/usr/local/openssl --without-hardening
[root@localhost openssh-9.3p1]# make && make install
#安装完成后,echo $? 查看下最后的 make install 是否有报错,0标识没有问题
[root@localhost openssh-9.3p1]#echo $?
[root@localhost openssh-9.3p1]# chmod 600 /etc/ssh/ssh_host_rsa_key
[root@localhost openssh-9.3p1]# chmod 600 /etc/ssh/ssh_host_ecdsa_key
[root@localhost openssh-9.3p1]# chmod 600 /etc/ssh/ssh_host_ed25519_key
[root@localhost openssh-9.3p1]# echo "PasswordAuthentication yes" >> /etc/ssh/sshd_config
[root@localhost openssh-9.3p1]# echo "PermitRootLogin yes" >> /etc/ssh/sshd_config
[root@localhost openssh-9.3p1]# cp -r contrib/redhat/sshd.init /etc/init.d/sshd
[root@localhost openssh-9.3p1]# cp -r contrib/redhat/sshd.pam /etc/pam.d/sshd.pam
[root@localhost openssh-9.3p1]# chmod +x /etc/init.d/sshd
[root@localhost openssh-9.3p1]# chkconfig --add sshd
[root@localhost openssh-9.3p1]# chkconfig sshd on
(systemctl enable sshd #也是添加开机自启动,与上述命令一致)
#systemd管理的sshd文件删除或者移走,不移走的话影响我们重启sshd服务
[root@localhost openssh-9.3p1]# mv /usr/lib/systemd/system/sshd.service /tmp
[root@localhost openssh-9.3p1]# mv /usr/lib/systemd/system/sshd.socket /tmp
[root@localhost openssh-9.3p1]# systemctl daemon-reexec
[root@localhost openssh-9.3p1]# systemctl restart sshd
[root@localhost openssh-9.3p1]# ssh -V
welcome backp1, OpenSSL 1.1.1q 5 Jul 2022
#注:升级成功后可关闭telnet服务,端口开放不安全
关闭自启动,关闭服务
systemctl disable xinetd.service
systemctl disable telnet.socket
systemctl stop xinetd.service
systemctl stop telnet.socket
-------------------------------问题排查解决-----------------------------------
问题一、升级openssh后,远程无法登录
排查:查看系统是否启用了selinux
--查看 SELinux 状态
sestatus
--临时关闭 SELinux
setenforce 0
--永久关闭 SELinux
使用 vi 等编辑器,编辑 /etc/selinux/config 文件,修改或进行如下设置:
SELINUXTYPE=disabled
重启服务器,用以永久禁用SELinux。
查看 SELinux 状态
重新登录,即可正常。
如果还无法登录
查看日志
tail -f /var/log/messages
Oct 11 14:46:45 localhost sshd[3687325]: Unable to negotiate with 210.29.79.62 port 57665: no matching key exchange method found. Their offer: diffie-hellman-group-exchange-sha1,diffie-hellman-group14-sha1,diffie-hellman-group1-sha1 [preauth]
解决:
第一种:
cd ~
cd .ssh (没有该目录的话,创建)
vi config (host * 代表不限制ip)
Host *
HostkeyAlgorithms +ssh-rsa
PubkeyAcceptedKeyTypes +ssh-rsa
KexAlgorithms +diffie-hellman-group-exchange-sha1
如果是指定ip则如下:
Host 192.168.xx.xx
KexAlgorithms +diffie-hellman-group1-sha1
第二种:
ssh -o KexAlgorithms=+diffie-hellman-group-exchange-sha1 -o HostKeyAlgorithms=+ssh-rsa username@hostname
ssh -o KexAlgorithms=+diffie-hellman-group-exchange-sha1 -o HostKeyAlgorithms=+ssh-rsa sunmin@210.29.79.62
ssh -oKexAlgorithms=+diffie-hellman-group1-sha1 -oHostKeyAlgorithms=+ssh-dss -oCiphers=+3des-cbc user@hostname
改完重新连接还是报错,排查发现内网可以直接连接服务器,但是通过堡垒机连接服务器连不上 原因为:ssh升级后,堡垒机没有更新服务器秘钥,需要联系信息中心(网信办)更新堡垒机秘钥即。内网本地直接连接的话(windows系统会提示是否更新服务器秘钥,更新后直接能正常登录,堡垒机不会自动更新秘钥) 所以以上解决方法都没有用,最后联系信息中心解决

 浙公网安备 33010602011771号