FloatingActionButtonDemo【悬浮按钮的使用,顺带snackBar的使用】
版权声明:本文为HaiyuKing原创文章,转载请注明出处!
前言
FloatingActionButton简称FAB。
一. 对于App或某个页面中是否要使用FloatingActionButton必要性:
FAB代表一个App或一个页面中最主要的操作,如果一个App的每个页面都有FAB,则通常表示该App最主要的功能是通过该FAB操作的。
为了突出FAB的重要性,一个页面最好只有一个FAB。
二. FloatingActionButton大小
通常有两种尺寸:
1. 56 * 56dp :默认的大小,最常用的尺寸。
2. 40 * 40 dp :Mini版。
当然也可以改它的大小。
FAB中间的图标,google推荐的大小是:24 * 24dp
三. 哪些操作推荐使用FloatingActionButton
如: 添加,收藏,编辑,分享,导航等,而如:删除,警告,错误,剪切等操作,则不推荐使用FloatingActionButton。
--摘自《FloatingActionButton(悬浮按钮)使用学习<一>》
效果图
代码分析
FloatingActionButton和普通的Button没有什么两样,唯一区别就是FloatActionButton属于Design Support库中的一个控件,如果搭配CoordinatorLayout的话,就可以被CoordinatorLayout监听。
布局文件中,一般FloatActionButton和FrameLayout搭配即可,但是考虑到Design Support库的优势,建议将FrameLayout替换成CoordinatorLayout。
CoordinatorLayout可以说是一个加强版的FrameLayout,这个布局也是由Design Support库提供的。它在普通情况下跟FrameLayout基本一致。特殊在于CoordinatorLayout可以监听其所有子控件的各种事件,然后自动帮助我们做出最为合理的响应。比如Demo中刚才弹出的Snackbar提示将悬浮按钮遮挡住了,而如果我们能让CoordinatorLayout监听到Snackbar的弹出事件,那么CoordinatorLayout就会自动将内部的FloatingActionButton向上偏移,从而确保不会被Snackbar遮挡住。
--摘自《第一行代码(第2版)》
使用步骤
一、项目组织结构图
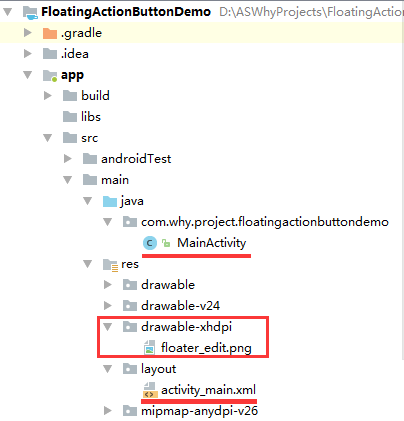

注意事项:
1、 导入类文件后需要change包名以及重新import R文件路径
2、 Values目录下的文件(strings.xml、dimens.xml、colors.xml等),如果项目中存在,则复制里面的内容,不要整个覆盖
二、导入步骤
(1)在build.gradle中引入design支持库【版本号跟appcompat保持一致】
apply plugin: 'com.android.application'

android {
    compileSdkVersion 27
    defaultConfig {
        applicationId "com.why.project.floatingactionbuttondemo"
        minSdkVersion 16
        targetSdkVersion 27
        versionCode 1
        versionName "1.0"
        testInstrumentationRunner "android.support.test.runner.AndroidJUnitRunner"
    }
    buildTypes {
        release {
            minifyEnabled false
            proguardFiles getDefaultProguardFile('proguard-android.txt'), 'proguard-rules.pro'
        }
    }
}

dependencies {
    implementation fileTree(dir: 'libs', include: ['*.jar'])
    implementation 'com.android.support:appcompat-v7:27.1.1'
    implementation 'com.android.support.constraint:constraint-layout:1.1.2'
    testImplementation 'junit:junit:4.12'
    androidTestImplementation 'com.android.support.test:runner:1.0.2'
    androidTestImplementation 'com.android.support.test.espresso:espresso-core:3.0.2'

    //引入design库
    implementation 'com.android.support:design:27.1.1'
}
(2)修改styles.xml文件中的样式为NoActionBar【为了使用ToolBar】
<resources>

    <!-- Base application theme. -->
    <style name="AppTheme" parent="Theme.AppCompat.Light.NoActionBar">
        <!-- Customize your theme here. -->
        <item name="colorPrimary">@color/colorPrimary</item>
        <item name="colorPrimaryDark">@color/colorPrimaryDark</item>
        <item name="colorAccent">@color/colorAccent</item>
    </style>

</resources>
(3)在布局文件中添加FloatingActionButton控件
这里没有用到app:layout_anchor="@id/xxxx" app:layout_anchorGravity="bottom|end"这两个属性。app:layout_anchor这个设置锚定在了某个id的布局下方。
<?xml version="1.0" encoding="utf-8"?>
<!-- 一般情况是使用FrameLayout,不过既然FloatingActionButton是design库中的,那么也将FrameLayout替换成design库中的CoordinatorLayout -->
<android.support.design.widget.CoordinatorLayout
    xmlns:android="http://schemas.android.com/apk/res/android"
    xmlns:app="http://schemas.android.com/apk/res-auto"
    android:layout_width="match_parent"
    android:layout_height="match_parent"
    android:background="#F4F4F4">

    <LinearLayout
        android:layout_width="match_parent"
        android:layout_height="match_parent"
        android:orientation="vertical">

        <!-- 这里只是放一个Toolbar,不做任何处理 -->
        <android.support.v7.widget.Toolbar
            android:id="@+id/toolbar_base"
            android:layout_width="match_parent"
            android:layout_height="?attr/actionBarSize"
            android:minHeight="?attr/actionBarSize"
            android:background="#ffffff"
            app:contentInsetStart="0dp"
            app:contentInsetStartWithNavigation="0dp"
            app:title="ToolBar"
            />

        <Button
            android:id="@+id/btn_open"
            android:layout_width="wrap_content"
            android:layout_height="wrap_content"
            android:text="打开Snackbar"
            android:layout_marginTop="15dp"/>

    </LinearLayout>

    <android.support.design.widget.FloatingActionButton
        android:id="@+id/fab_btn"
        android:layout_width="wrap_content"
        android:layout_height="wrap_content"
        android:src="@drawable/floater_edit"
        app:backgroundTint="#50A3F5"
        android:layout_gravity="bottom|end"
        android:layout_margin="16dp"
        />

</android.support.design.widget.CoordinatorLayout>
(4)将悬浮按钮中间的图标复制到项目中


三、使用方法
package com.why.project.floatingactionbuttondemo;

import android.graphics.Color;
import android.os.Bundle;
import android.support.design.widget.FloatingActionButton;
import android.support.design.widget.Snackbar;
import android.support.v7.app.AppCompatActivity;
import android.view.View;
import android.widget.Button;
import android.widget.Toast;

public class MainActivity extends AppCompatActivity {

    private FloatingActionButton mFab;
    private Button mBtn;

    @Override
    protected void onCreate(Bundle savedInstanceState) {
        super.onCreate(savedInstanceState);
        setContentView(R.layout.activity_main);

        initViews();
        initEvents();
    }

    private void initViews() {
        mFab = findViewById(R.id.fab_btn);
        mBtn = findViewById(R.id.btn_open);
    }

    private void initEvents() {
        mFab.setOnClickListener(new View.OnClickListener() {
            @Override
            public void onClick(View view) {
                Snackbar.make(view,"删除成功",Snackbar.LENGTH_SHORT).setAction("撤销", new View.OnClickListener() {
                    @Override
                    public void onClick(View view) {
                        Toast.makeText(MainActivity.this,"撤销成功",Toast.LENGTH_SHORT).show();
                    }
                }).setActionTextColor(Color.parseColor("#ffffff")).show();
            }
        });

        mBtn.setOnClickListener(new View.OnClickListener() {
            @Override
            public void onClick(View view) {
                Snackbar.make(view,"删除成功",Snackbar.LENGTH_SHORT).setAction("撤销", new View.OnClickListener() {
                    @Override
                    public void onClick(View view) {
                        Toast.makeText(MainActivity.this,"撤销成功",Toast.LENGTH_SHORT).show();
                    }
                }).show();
            }
        });
    }
}
混淆配置
无
参考资料
《第一行代码(第2版)》
FloatingActionButton(悬浮按钮)使用学习<一>

 浙公网安备 33010602011771号