eBackup搭建nfs挂载超详细教程
一、创建虚拟机
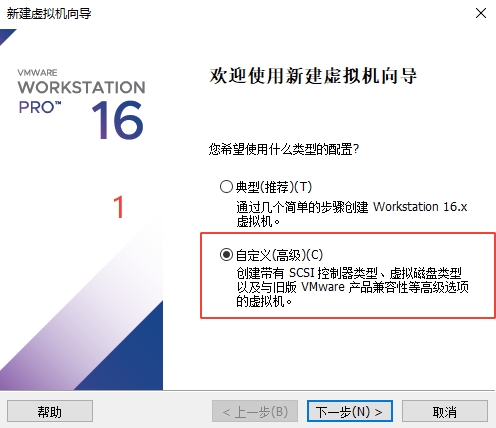
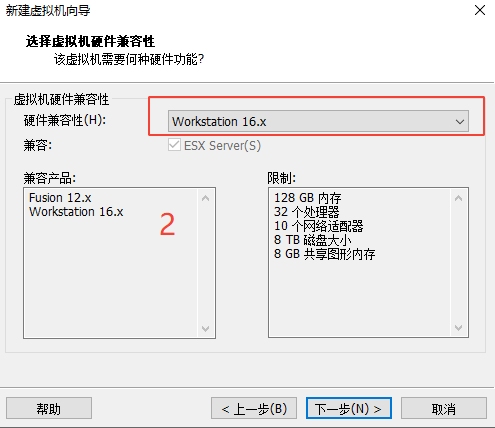
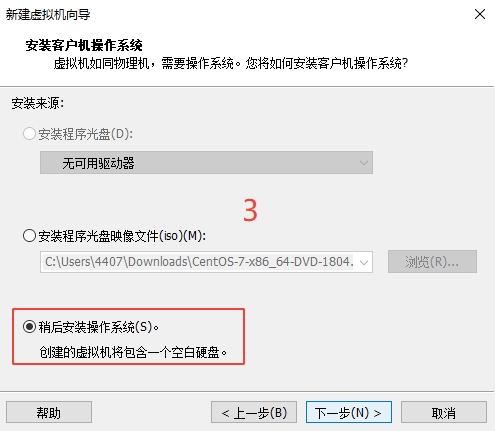

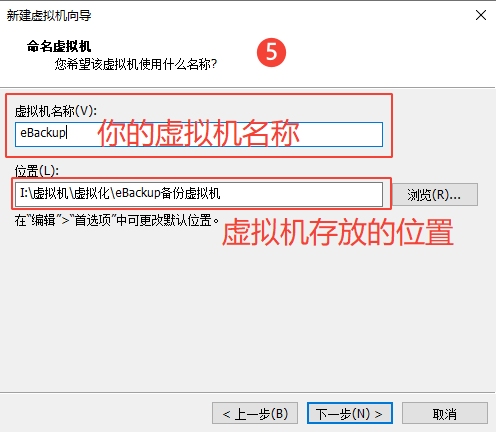

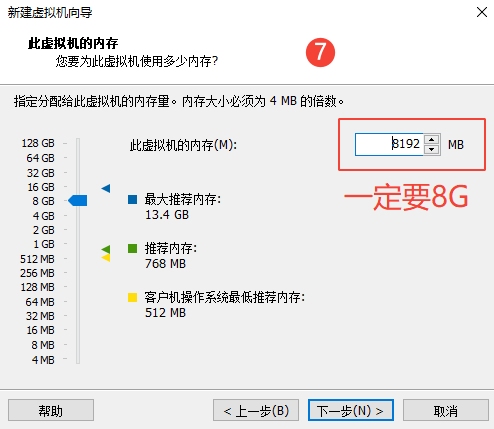
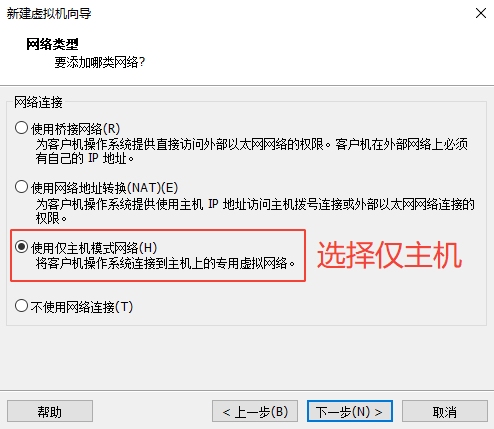
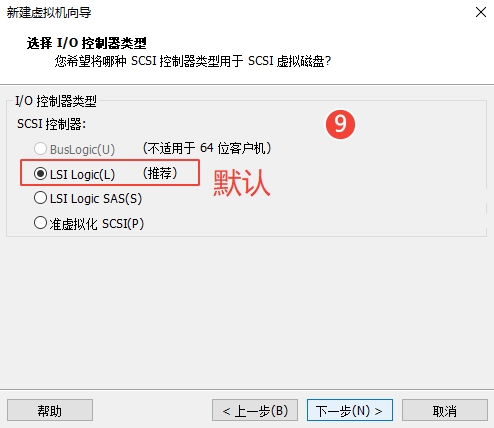

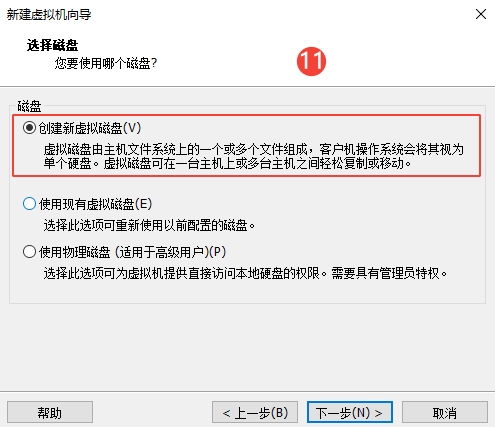
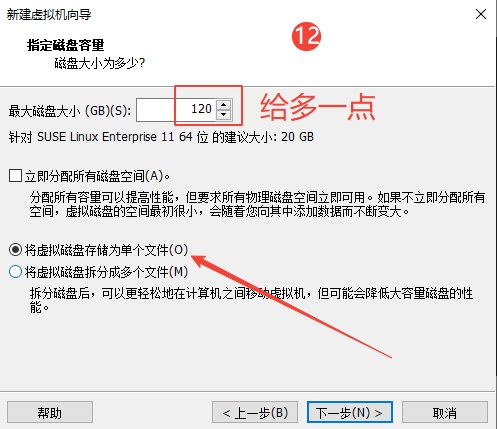
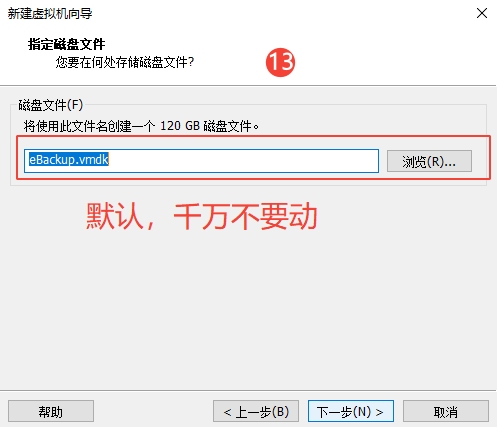

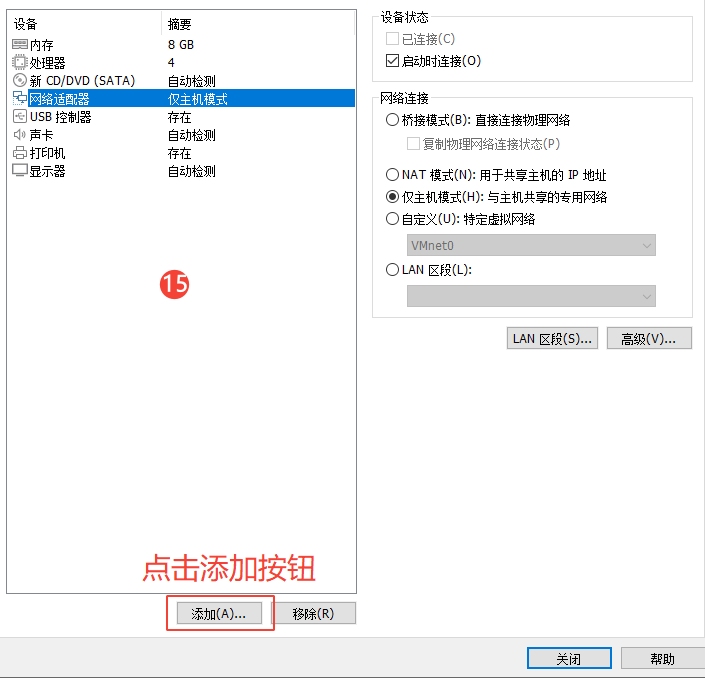
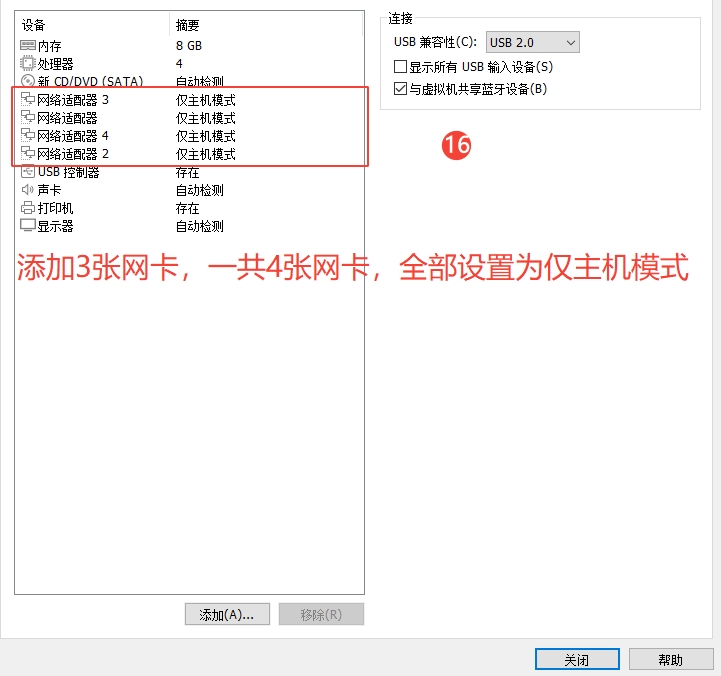


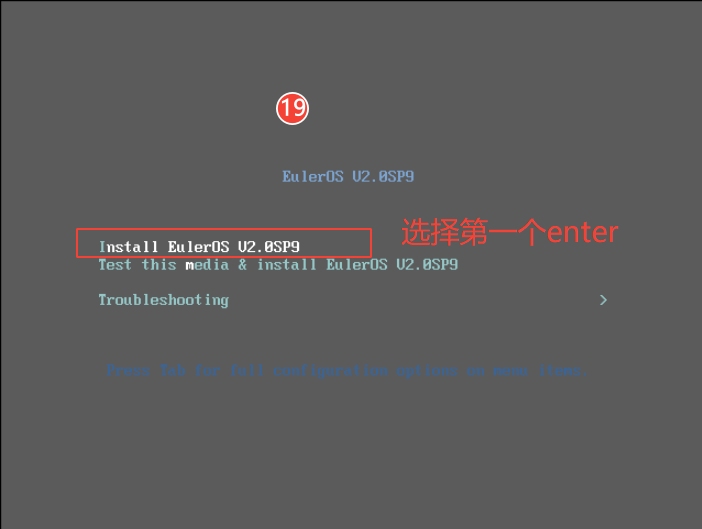
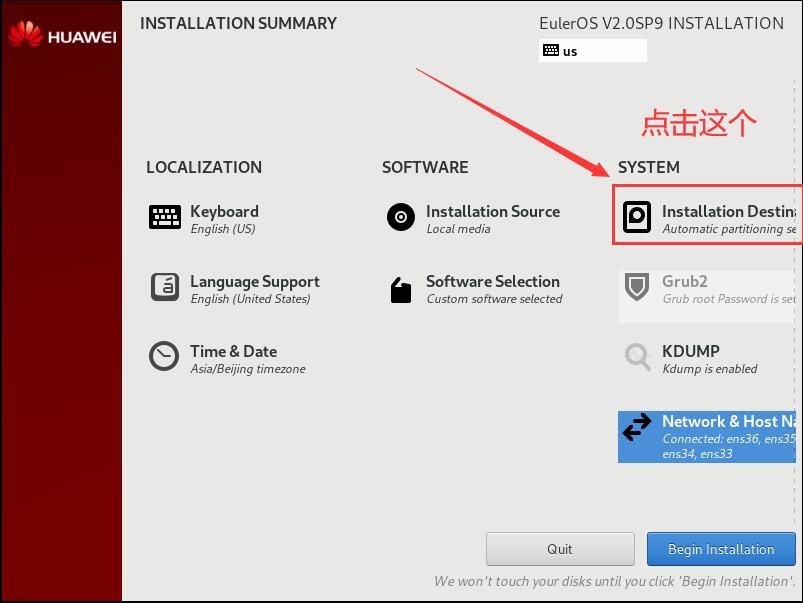
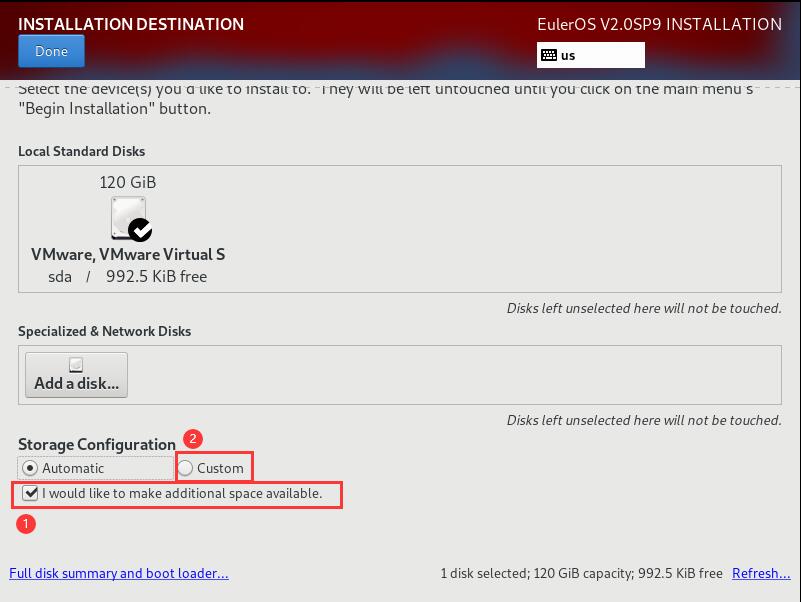

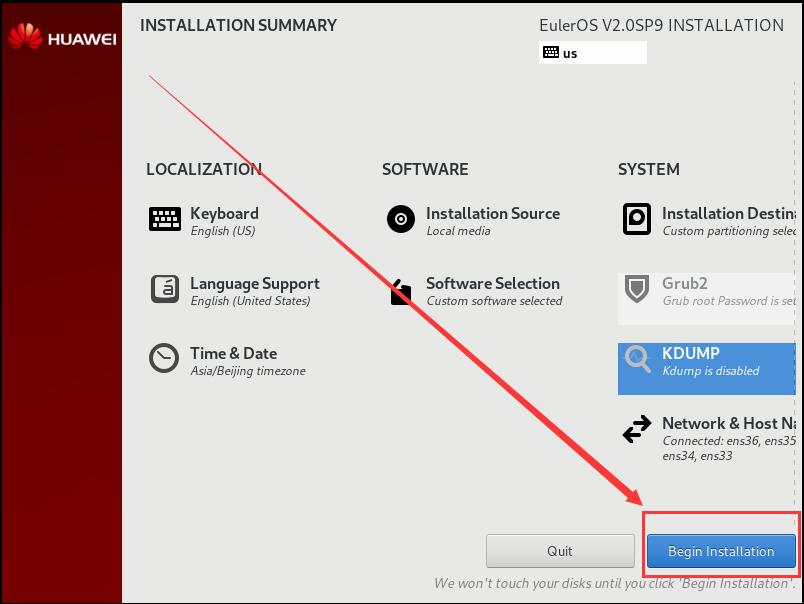
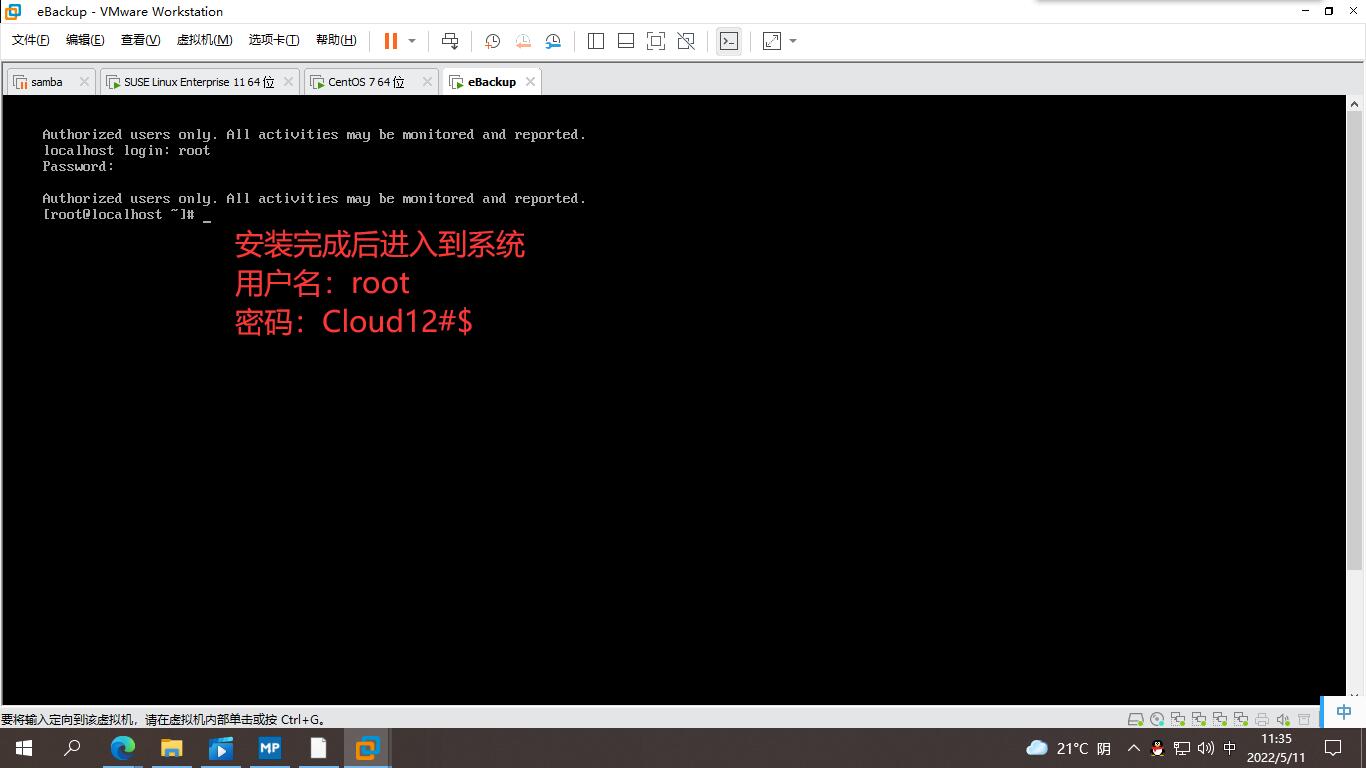
二、将以下软件包导入到虚拟机


三、安装备份软件
#解压安装包
tar -xf eBackup_8.1.0_Euler_x86_64.tar.gz

#进入脚本所在目录
[root@localhost ~]# cd eBackup_8.1.0/action/

#查看脚本
[root@localhost action]# ls
appctl.sh           ebackup_dedupe_config.sh  log_comm.sh
commonFunction.sh   ebackup_utilities.sh      remote_spawn.sh
eBackup_Config.ini  hcp_utilities.sh          SetDataDisk.sh

#运行脚本
[root@localhost action]# sh ebackup_utilities.sh install virtual
运行脚本成功

四、安装补丁
#进入/home/hcp
[root@localhost ~]# cd /home/hcp

#解压安装包
[root@localhost hcp]# tar xf /root/OceanStor\ BCManager\ 8.1.0_eBackup_Patch.tar.gz

#进入/home/hcp/patch
[root@localhost hcp]# cd /home/hcp/patch/

#执行脚本
[root@localhost patch]# sh patch.sh
运行脚本成功

五、配置eBackup备份服务器
#防止系统超时退出
[root@localhost ~]# TMOUT=0

#进入脚本所在目录
[root@localhost ~]# cd eBackup_8.1.0/action/

#执行脚本配置
[root@localhost action]# sh ebackup_utilities.sh config

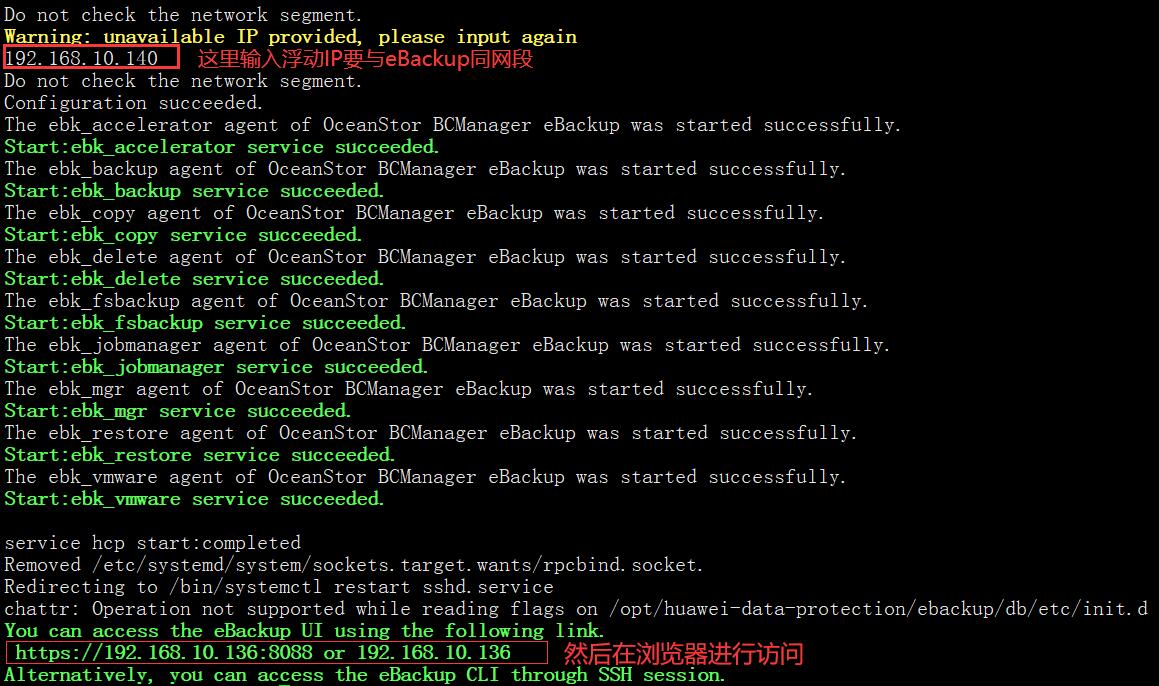
#按照顺序输入
1  1  1  1  2  1  3  4  浮动IP


六、进入web网页
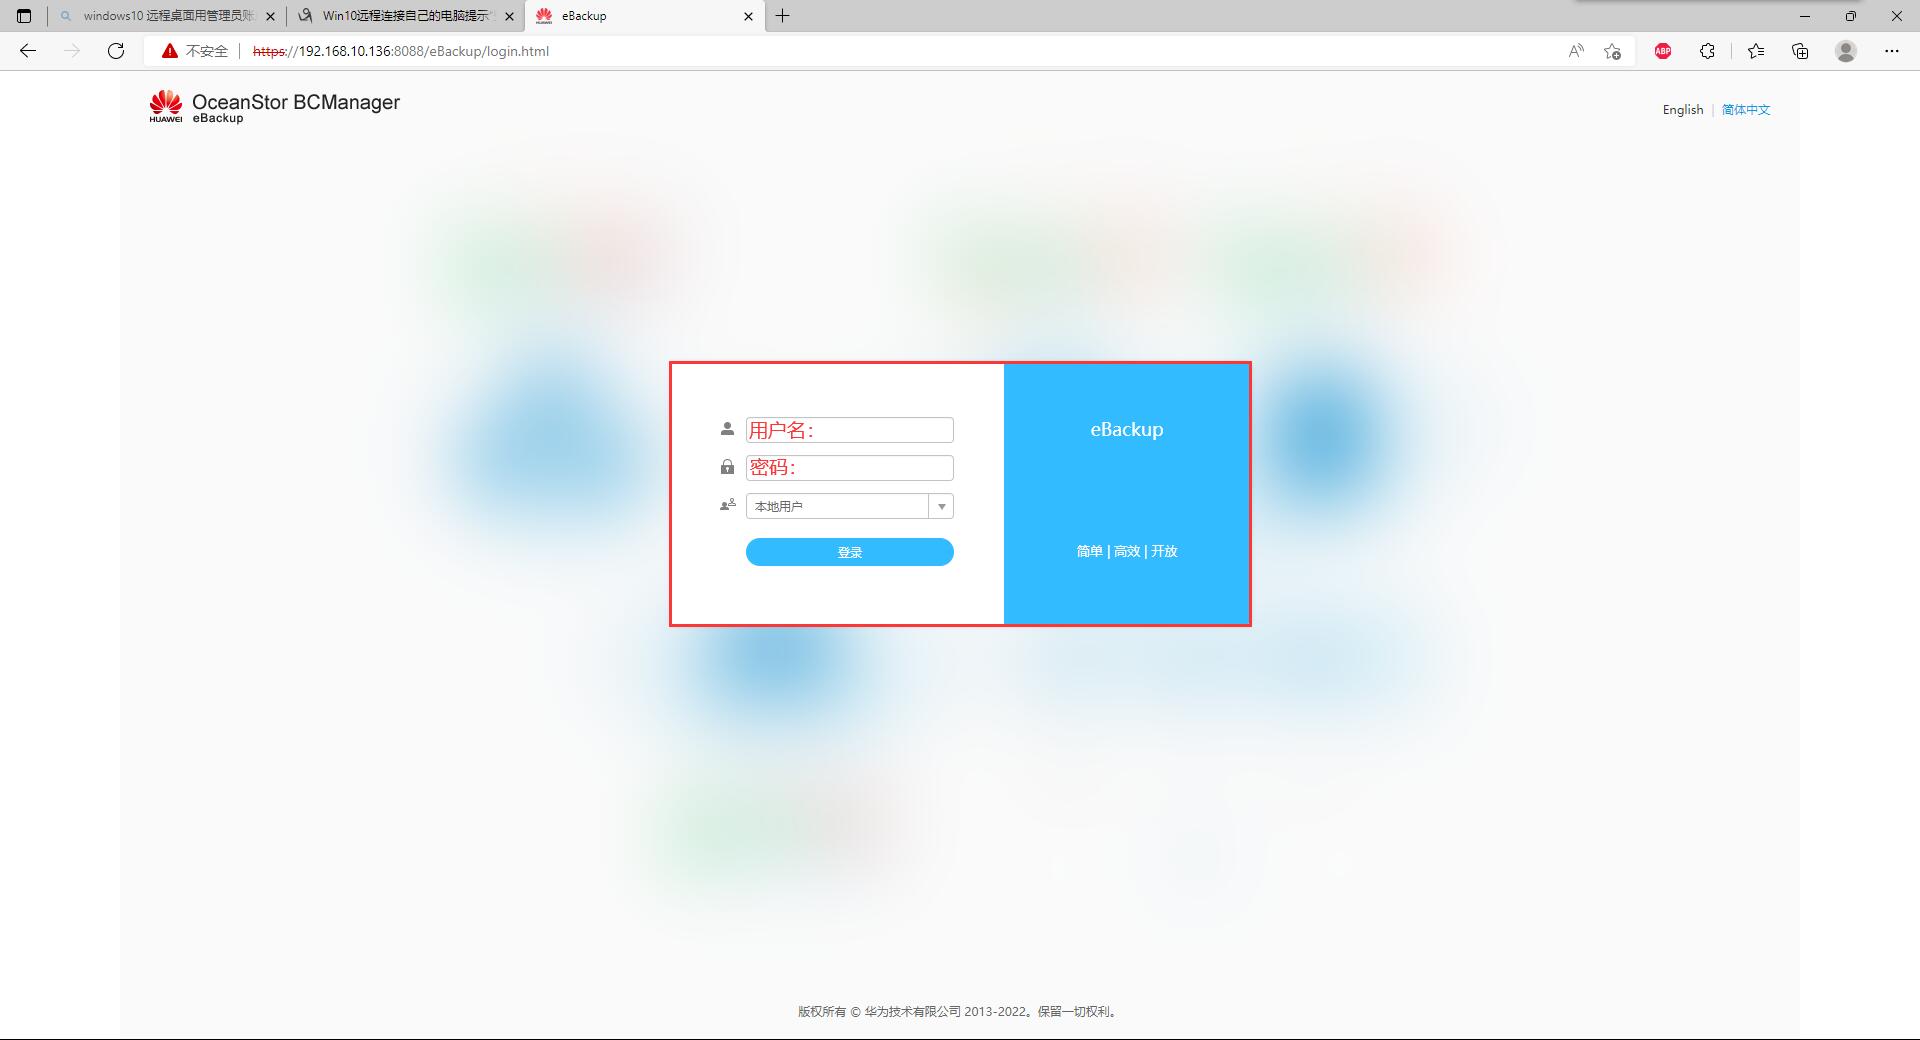
https://192.168.10.136:8088(输入你自己的网址,这是我的)
用户名admin

密码PXU9@ctuNov17!

七、用eBackup挂载一个nfs
1.首先准备一台虚拟机(与eBackup能够相互通信)
[root@localhost ~]# ping -c 3 192.168.10.136
PING 192.168.10.136 (192.168.10.136) 56(84) bytes of data.
64 bytes from 192.168.10.136: icmp_seq=1 ttl=64 time=0.297 ms
64 bytes from 192.168.10.136: icmp_seq=2 ttl=64 time=0.429 ms
64 bytes from 192.168.10.136: icmp_seq=3 ttl=64 time=0.361 ms

--- 192.168.10.136 ping statistics ---
3 packets transmitted, 3 received, 0% packet loss, time 2000ms
rtt min/avg/max/mdev = 0.297/0.362/0.429/0.056 ms
2.如果是图形化就直接启动服务
如果是最小化就要配置yum源安装服务
这里就参考我的另一篇文章(搭建nfs服务)https://www.cnblogs.com/whwh/p/16147828.html
我这里就演示图形化的步骤
#重启服务
[root@localhost ~]# systemctl restart rpcbind
[root@localhost ~]# systemctl restart nfs

#关闭防火墙和Selinux
[root@localhost ~]# systemctl stop firewalld

[root@localhost ~]# cat /etc/selinux/config
# This file controls the state of SELinux on the system.
# SELINUX= can take one of these three values:
#     enforcing - SELinux security policy is enforced.
#     permissive - SELinux prints warnings instead of enforcing.
#     disabled - No SELinux policy is loaded.
SELINUX=disabled
# SELINUXTYPE= can take one of three two values:
#     targeted - Targeted processes are protected,
#     minimum - Modification of targeted policy. Only selected processes are protected.
#     mls - Multi Level Security protection.
SELINUXTYPE=targeted

#创建共享目录
[root@localhost ~]# mkdir -p /opt/wenhan

#给共享目录赋予777权限
[root@localhost ~]# chmod 777 /opt/wenhan/

#给配置文件里面写入以下内容(这里的IP写上你自己的IP,这是我的!)
[root@localhost ~]# cat /etc/exports
/opt/wenhan  192.168.10.0/24(rw,sync)

#重启服务
[root@localhost ~]# systemctl restart rpcbind
[root@localhost ~]# systemctl restart nfs

#挂载并显示共享目录
[root@localhost ~]# exportfs -rv
exporting 192.168.10.0/24:/opt/wenhan

#查看挂载信息
[root@localhost ~]# showmount -e
Export list for localhost.localdomain:
/opt/wenhan 192.168.10.0/24
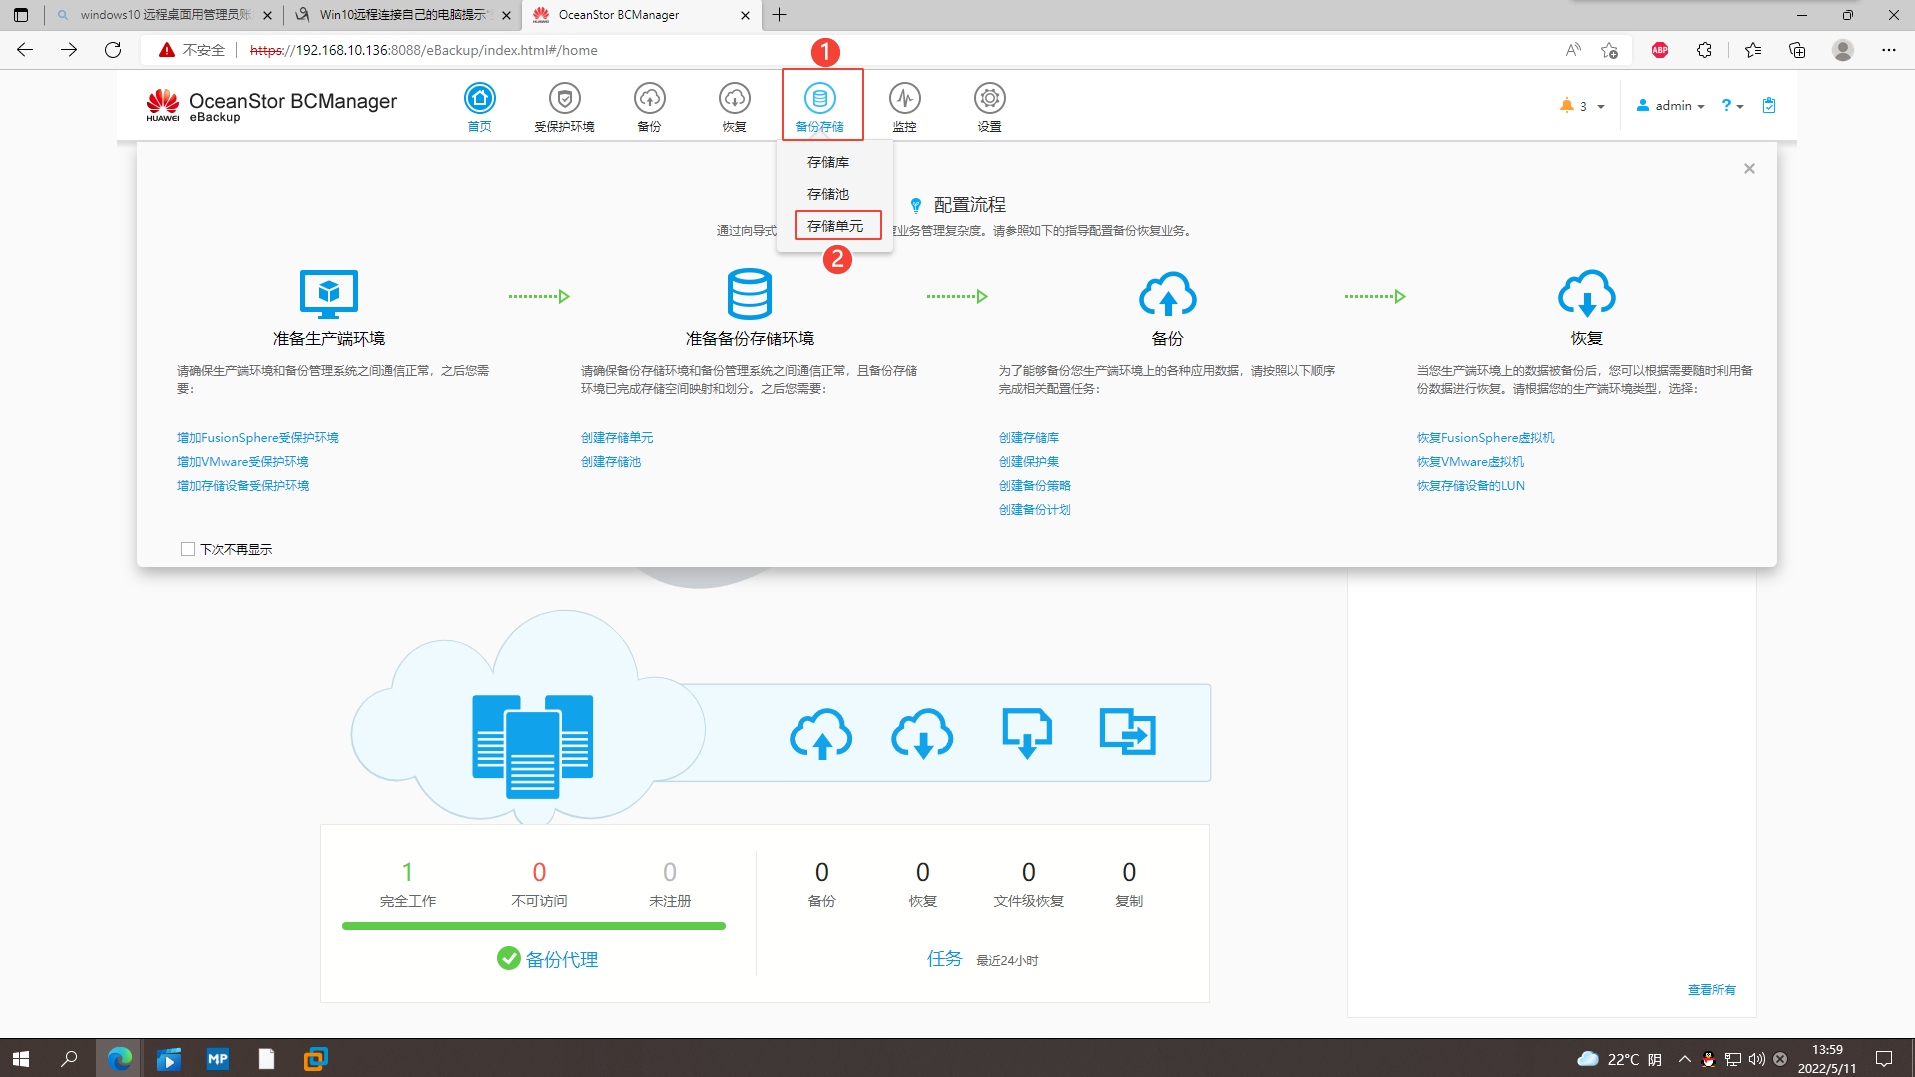
3.登陆进进入web网页
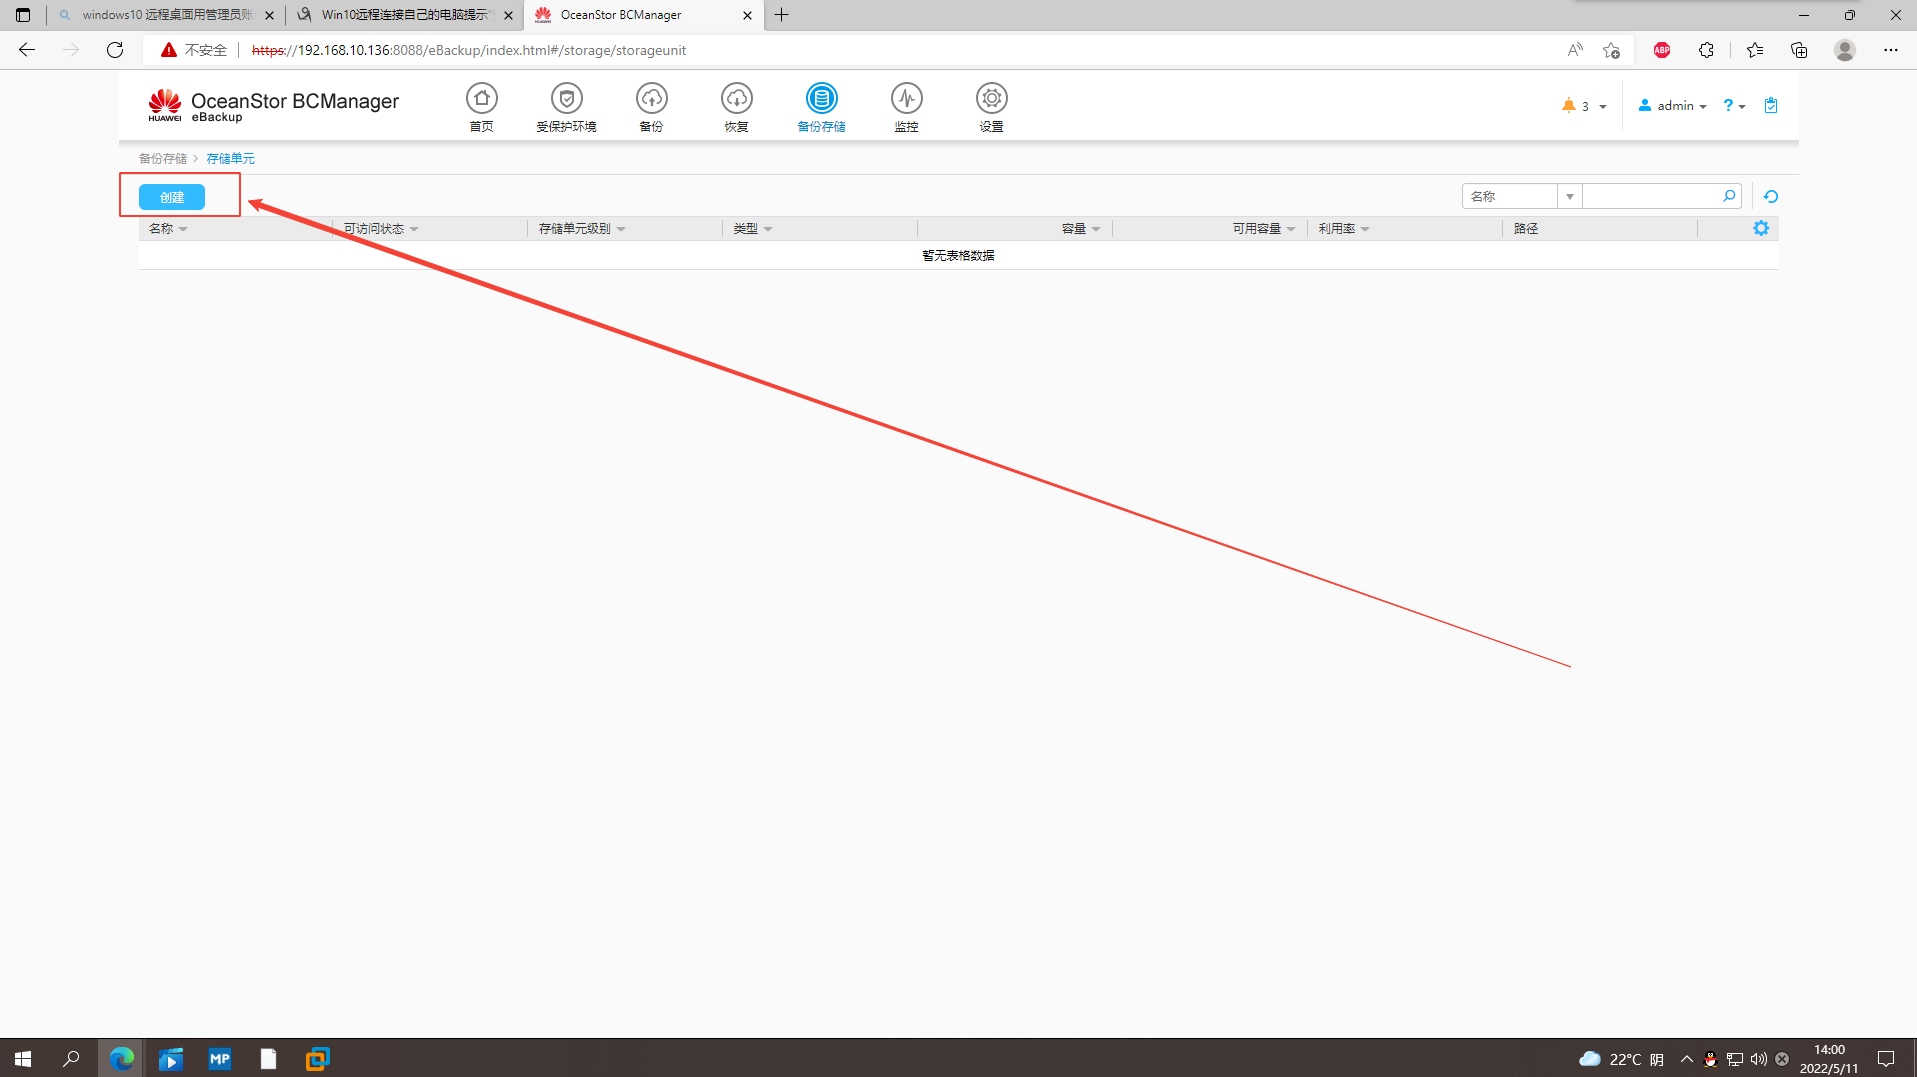
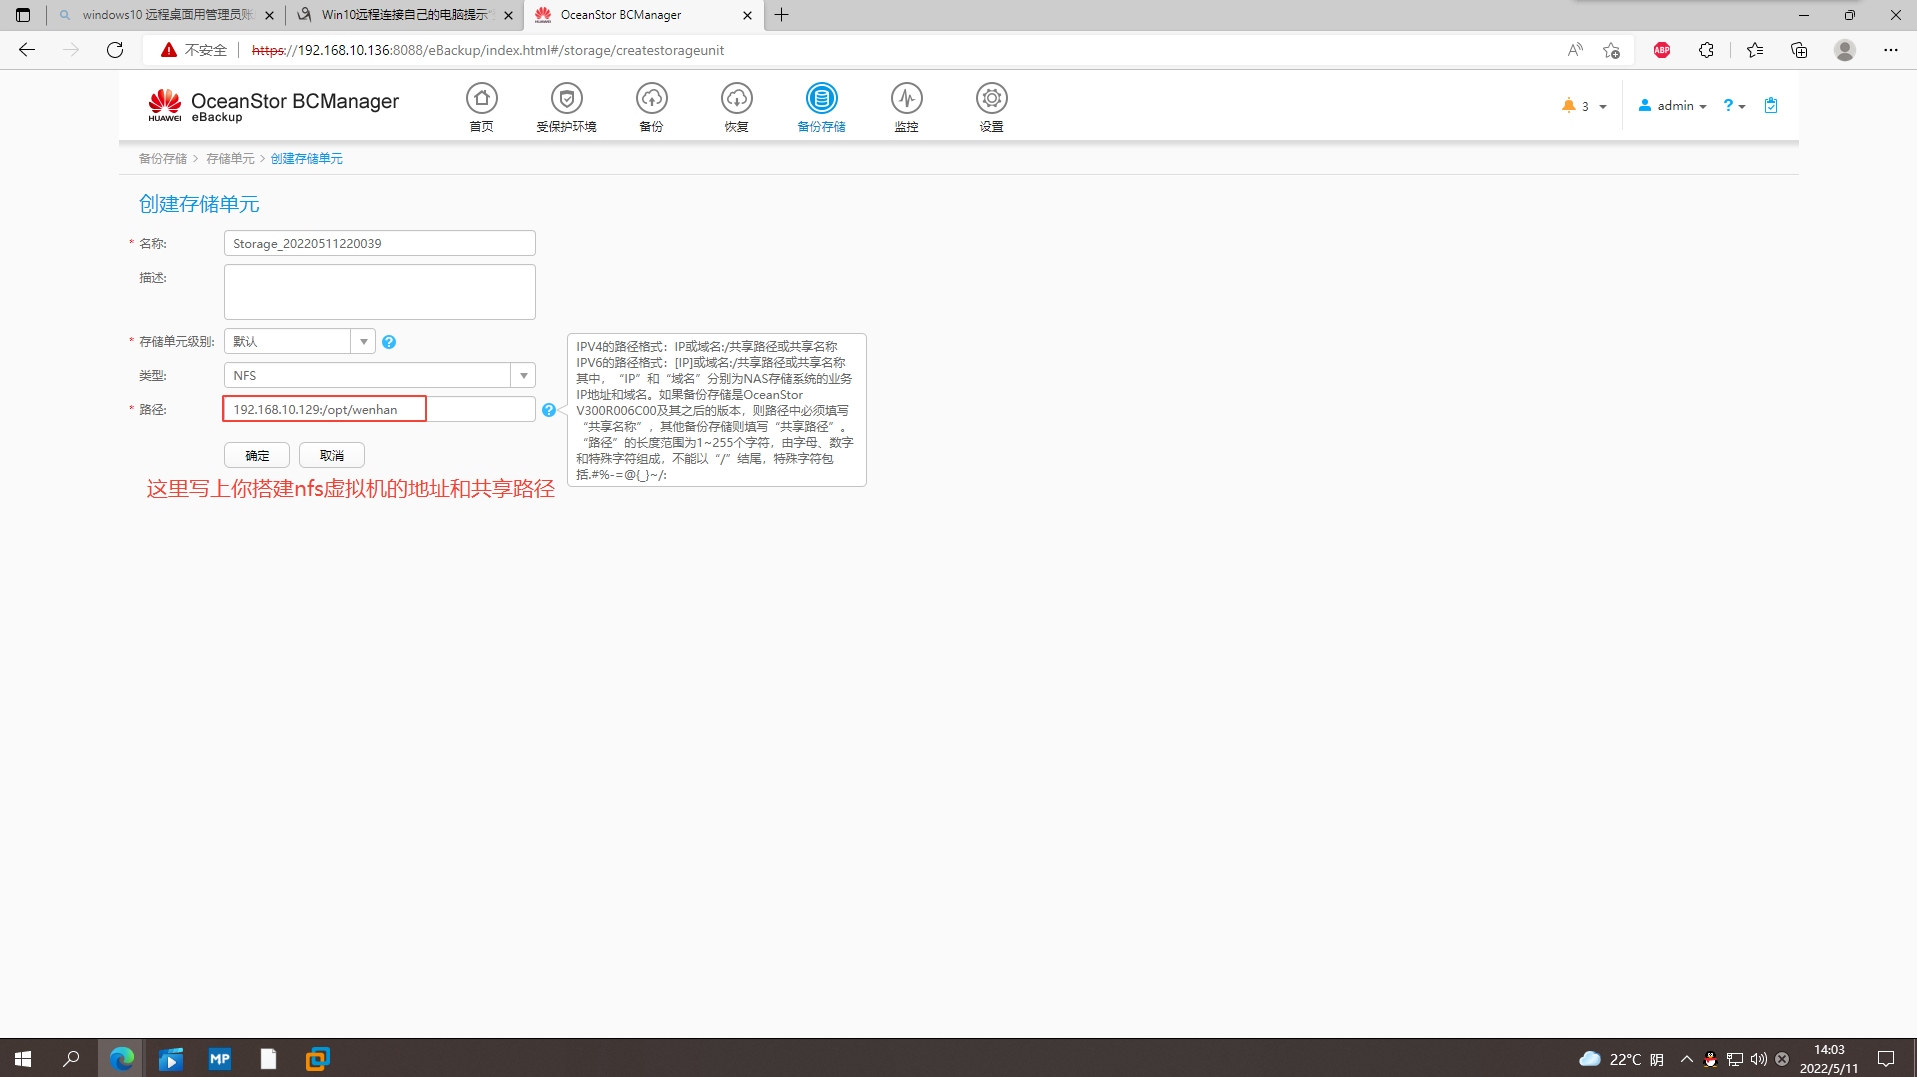
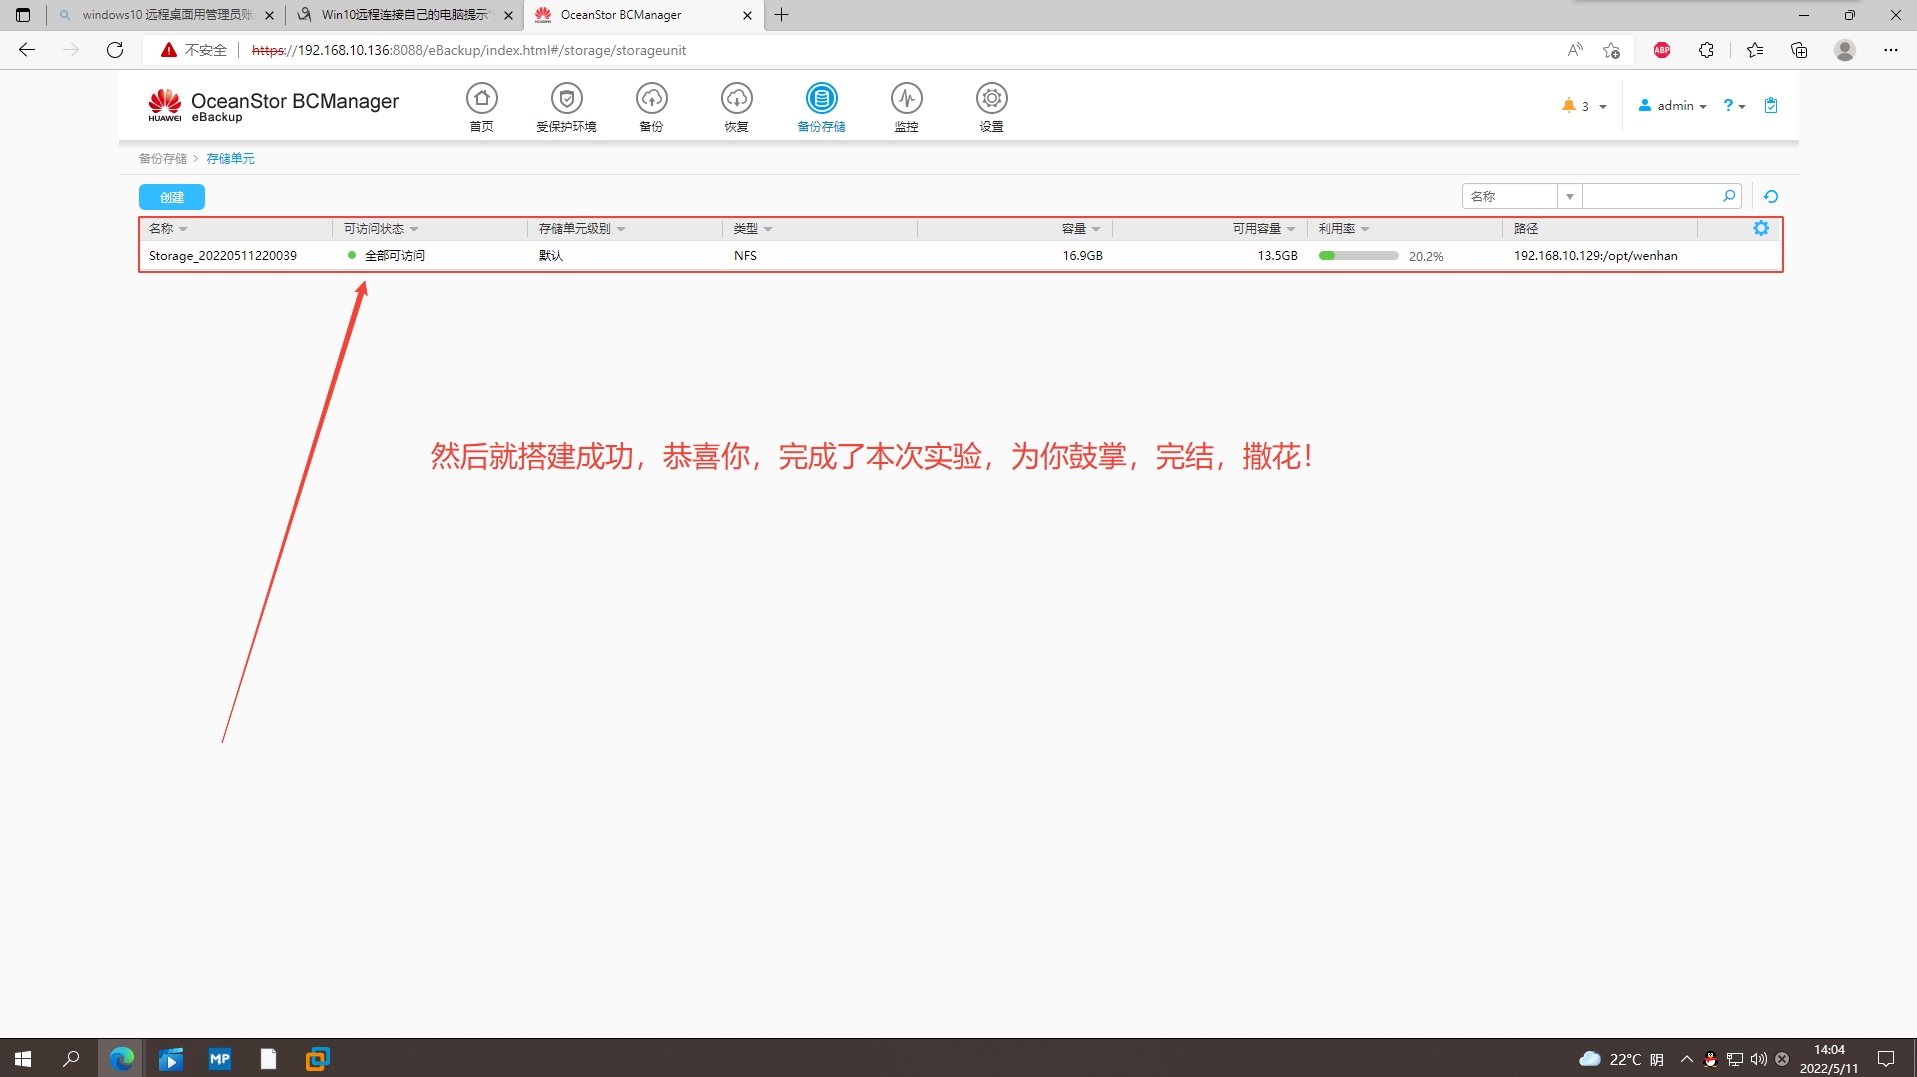
本文来自博客园,作者:Cloudservice,转载请注明原文链接:https://www.cnblogs.com/whwh/p/16257582.html,只要学不死,就往死里学!


 浙公网安备 33010602011771号