TensorFlow实战Google深度学习框架(3)
第3章 TensorFlow入门
3.1 TensorFlow计算模型-计算图
3.1.1 计算图的概念
Tensorflow中所有计算都会被转化成计算图的一个节点,计算图上的边表示了他们之间的相互依赖关系。
3.1.2 计算图的使用
Tensorflow的程序可以分成两个阶段:定义计算、执行计算。
默认的计算图使用tf.get_default_graph()获取
Tensorflow支持通过tf.Graph()函数来生成新的计算图,不同计算图上的张量和运算不会共享。
import tensorflow.compat.v1 as tf
tf.disable_v2_behavior()

g1 = tf.Graph()
with g1.as_default():
    # define variable v in g1, and set the default value is zero
    v = tf.get_variable("v", initializer=tf.zeros_initializer()(shape=[1]))

g2 = tf.Graph()
with g2.as_default():
    # define variable v in g2, and set the default value is one
    v = tf.get_variable("v", initializer=tf.ones_initializer()(shape=[1]))

with tf.Session(graph=g1) as sess:
    # show the value of variable v in g1
    tf.initialize_all_variables().run()
    with tf.variable_scope("", reuse=True):
        print(sess.run(tf.get_variable("v")))

with tf.Session(graph=g2) as sess:
    # show the value of variable v in g2
    tf.initialize_all_variables().run()
    with tf.variable_scope("", reuse=True):
        print(sess.run(tf.get_variable("v")))
运行结果:

不同的计算图不仅仅可以用来隔离张量和计算,还可以用来管理张量和计算的机制。因此我们在运行计算图的时候可以使用tf.Graph.device指定计算图的运行设备。
在一个计算图中可以使用collection来管理不同类别的资源。比如通过tf.add_to_collection可以将资源加入到一个或多个集合中,然后使用tf.get_collection可以获取到集合中的所有资源。
3.2 TensorFlow数据模型-张量
3.2.1 张量的概念
张量是TensorFlow管理数据的形式,可以被简单理解为多维数组。张量并没有真正的保存数字,而是保存了这些数字的计算过程。
import tensorflow.compat.v1 as tf
tf.disable_v2_behavior()

a = tf.constant([1.0, 2.0], name="a")
b = tf.constant([2.0, 3.0], name="b")
result = tf.add(a, b, name="add")
print(result)
运行结果:

从结果上可知: TensorFlow计算的不是一个结果,而是一个张量的结构。一个张量中保存了三个属性: 名字,维度,类型。张量的命名方式为"node: src_output",其中node表示节点的名称,src_output表示当前张量来自节点的第几个输出。张量会有一个唯一的类型,TensorFlow会对参与运算的所有张量进行类型的检查,当发现类型不匹配的时候会报错。
3.2.2 张量的使用
张量的用途有两类:一种是作为中间计算结果的引用。另一种是当计算图构造完成之后,张量可以用来获得计算结果,得到真实的数字。
3.3 TensorFlow运行模型-会话
会话拥有并管理TensorFlow程序运行时的所有资源。TensorFlow使用会话有两种方式:
# first method
sess = tf.Session()
sess.run()
sess.close()

# second method
with tf.Session() as sess:
  sess.run()
后者比前者更好,因为可以避免异常退出时的资源释放问题和忘记调用Session.close函数而产生的资源泄漏问题。
张量的eval函数可以用来计算张量的取值,其方式为:
sess = tf.Session()

# two command below have same effect
print(sess.run(result))
print(result.eval(session=sess))
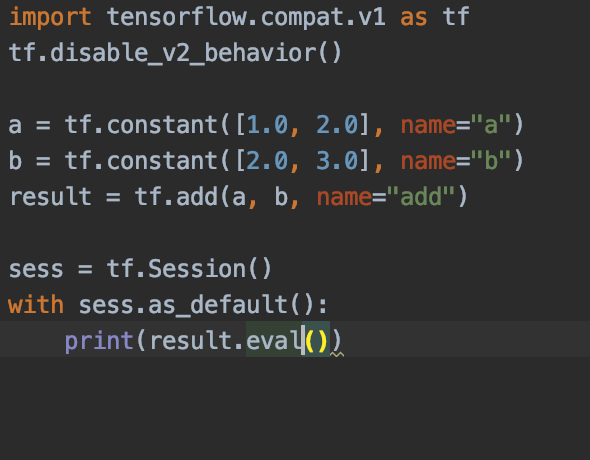
会话和张量一样可以设置默认值,但不同的是,默认会话需要被手动指定。有了默认会话之后,张量就可以直接用eval函数计算取值:

结果如下:

如果使用Session函数来获取会话的话,需要手动指定某个会话作为默认会话,为了合并此过程,tf设计了InteractiveSession函数。该函数指定的会话,是一个默认会话。
sess2 = tf.InteractiveSession()
print(result.eval())
sess2.close()
实验结果

不管是InteractiveSession还是Session都可以使用ConfigProto函数来配置会话运行配置。他可以配置并行的线程数、GPU分配策略、运算超时时间等参数。其中最重要的两个参数是:
1. allow_soft_placement: 一般设置为True。当某些运算无法被GPU支持的时候会自动调整到CPU上。
2. log_device_placement: 测试环境设置为True,生产环境设置为False。用来记录每个节点在设备上位置。
3.4 TensorFlow实现神经网络
3.4.1 TensorFlow游乐场及神经网络简介
TensorFLow游乐场网址:http://playground.tensorflow.org
没啥特别,就是能直观的感受神经网络的建模能力。
3.4.2 前向传播算法简介
一个神经元对应着多个输入和一个输出。不同输入的权重就是神经元的参数。神经网络的优化过程就是优化神经元中参数取值的过程。
前向传播需要三个信息:1. 神经网络的输入,就是从实体中提取的特征向量。 2. 神经网络的连接结构。神经网络中的神经元简称为节点。 3. 每个节点的参数。
前向传播算法简单来说就是一个矩阵乘法,因此可以用tensorflow的matmul函数实现。
a = tf.matmul(x, w1)
y = tf.matmul(a, w2)
3.4.3 神经网络参数与TensorFlow变量
变量(tf.Variable)是用来保存和更新神经网络结构中的参数的。变量需要指定初始值,一般变量的初始值是随机指定的。
变量的典型定义方式:
weight = tf.Variable(tf.random_normal([2, 3], stddev=2))
典型的随机函数有:
1. random_normal: 正态分布,默认的平均值为0,可以用mean指定平均值
2. truncated_normal: 正态分布,但是如果一个数偏离平均值两个标准差就会被重新随机
3. random_uniform: 均匀分布
4. random_gamma: Gamma分布
变量也可以用常数来指定:
1. ones: 值为1
2. zeros: 值为0
3. fill: 值为指定数字。如tf.fill([2,3], 9)表示值为9的2*3的矩阵
4. constant: 一个指定值的常量。如tf.constant([1,2])表示[1,2]
还可以使用其他参数的初始值作为变量的初始值:
w2 = tf.Variable(weight.initialized_value())
利用变量的定义,我们可以得到前向传播的代码:
import tensorflow.compat.v1 as tf
tf.disable_v2_behavior()

# define two variable and set the seed to keep the same result
w1 = tf.Variable(tf.random_normal([2, 3], stddev=1, seed=1))
w2 = tf.Variable(tf.random_normal([3, 1], stddev=1, seed=1))

# set the test input tensor
x = tf.constant([[0.7, 0.9]])

# forward process
a = tf.matmul(x, w1)
y = tf.matmul(a, w2)

# run with session
with tf.Session() as sess:
    sess.run(w1.initializer)
    sess.run(w2.initializer)
    print(sess.run(y))
实验结果:

在实际的程序中会有许多的变量,可以使用tf.initialize_all_variable函数对所有的参数进行初始化。
在构建机器学习模型的时候,可以使用trainable参数来区分参数是否需要优化,trainable为true的变量会被加入GraphKeys.TRAINABLEVARIBLES集合中 。
维度和类型也是变量的两个重要属性。但是对于变量来说,维度是可变的,只需要设置validate_shape=False。类型是不可变的。
3.4.4 通过TensorFlow训练神经网络模型
tensorflow的输入数据是由placeholder给出的。placeholder只定义数据的类型,数据的维度是由输入数据推导出来的。placeholder中的数据是由feed_dict来指定的。
import tensorflow.compat.v1 as tf
tf.disable_v2_behavior()

# define two variable and set the seed to keep the same result
w1 = tf.Variable(tf.random_normal([2, 3], stddev=1, seed=1))
w2 = tf.Variable(tf.random_normal([3, 1], stddev=1, seed=1))

x = tf.placeholder(tf.float32, shape=[1, 2], name="input")
a = tf.matmul(x, w1)
y = tf.matmul(a, w2)

with tf.Session() as sess:
    init_op = tf.initialize_all_variables()
    sess.run(init_op)
    print(sess.run(y, feed_dict={x: [[0.7, 0.9]]}))
实验结果:

要实现batch的效果只需要将feed_dict中的数据转化为多维数据即可。
进行神经网络的模型训练还有两个非常重要的内容就是loss function和optimizer。目前tensorflow主要支持7种optimizer,其中Adam是其中最常用的一种。
# loss function
cross_entropy = -tf.reduce_mean(y_*tf.log(tf.clip_by_value(y, 1e-10, 1.0)))

# optimizer
learning_rate = 0.0001
train_step = tf.train_AdamOptimizer(learning_rate).minimize(cross_entropy)
3.4.5 完整神经网络样例程序


