Xcode辅助工具之热重载插件利器
该博客首发于github.io 2018-06-13 13:43:44
文章最新修改于: 2019-03-31 13:47:20
昨天刚刚看完iOSTips微信公众号推送的文章, Injection:iOS热重载背后的黑魔法 , 效果明显,惊为天人!,
底层原理啥的受限目前水平,咱先不研究,使用方法还是得总结一波的,于是开始琢磨了一下。
第一步 , 去App Store 或者 github下载开源免费的应用 InjectionIII,没错就是这货,长得跟注射器💉似的

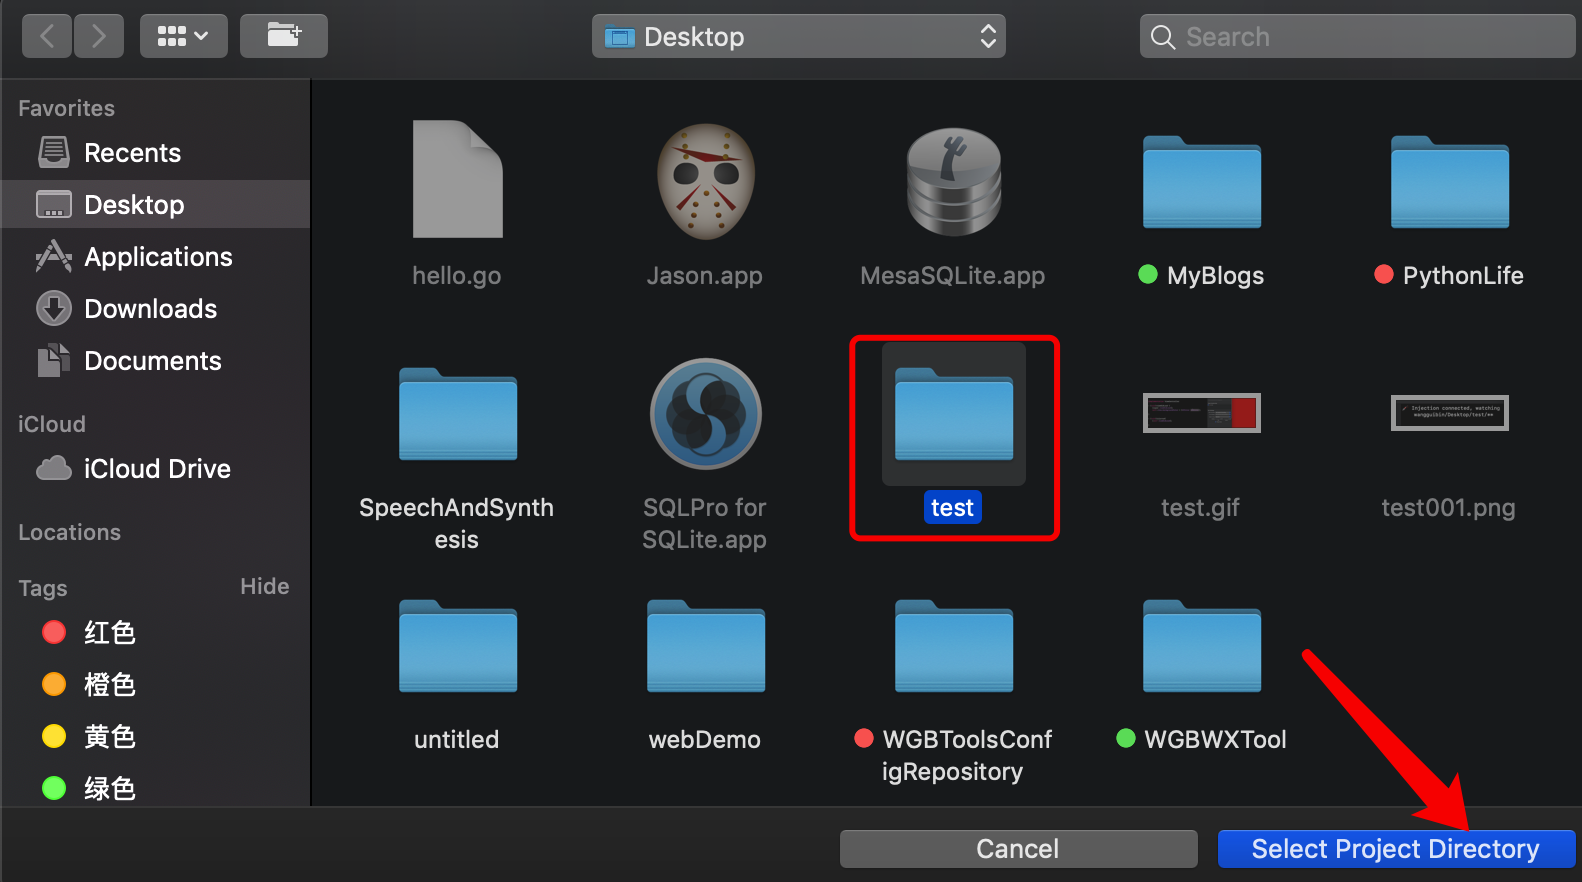
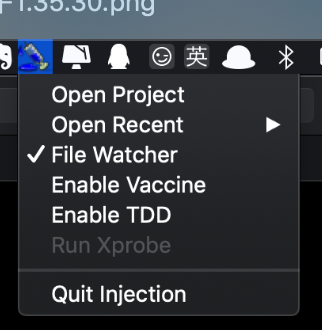
第二步, 打开InjectionIII应用,open project选择Xcode项目的根目录路径, 把File Watcher钩子打上即可


第三步 , 打开项目添加类似入口的代码或者是监听的代码 (!!!: 值得注意的是Xcode10之后需要修改路径名iOSInjection.bundle修改为iOSInjection10.bundle)
- (BOOL)application:(UIApplication *)application didFinishLaunchingWithOptions:(NSDictionary *)launchOptions {
	// Override point for customization after application launch.
  //Xcode 10.0之前
#if DEBUG
	 [[NSBundle bundleWithPath:@"/Applications/InjectionIII.app/Contents/Resources/iOSInjection.bundle"] load];
	//for tvOS:
	[[NSBundle bundleWithPath:@"/Applications/InjectionIII.app/Contents/Resources/tvOSInjection.bundle"] load];
	//Or for macOS:
	[[NSBundle bundleWithPath:@"/Applications/InjectionIII.app/Contents/Resources/macOSInjection.bundle"] load];

		//	Bundle(path: "/Applications/InjectionIII.app/Contents/Resources/iOSInjection.bundle")?.load()
//		//for tvOS:
//	Bundle(path: "/Applications/InjectionIII.app/Contents/Resources/tvOSInjection.bundle")?.load()
//		//Or for macOS:
//	Bundle(path: "/Applications/InjectionIII.app/Contents/Resources/macOSInjection.bundle")?.load()
#endif

 //Xcode 10.0之后 (有点凑字数的嫌疑,但是我想的是一劳永逸~)
#if DEBUG
	 [[NSBundle bundleWithPath:@"/Applications/InjectionIII.app/Contents/Resources/iOSInjection10.bundle"] load];
	//for tvOS:
	[[NSBundle bundleWithPath:@"/Applications/InjectionIII.app/Contents/Resources/tvOSInjection10.bundle"] load];
	//Or for macOS:
	[[NSBundle bundleWithPath:@"/Applications/InjectionIII.app/Contents/Resources/macOSInjection10.bundle"] load];

		//	Bundle(path: "/Applications/InjectionIII.app/Contents/Resources/iOSInjection10.bundle")?.load()
//		//for tvOS:
//	Bundle(path: "/Applications/InjectionIII.app/Contents/Resources/tvOSInjection10.bundle")?.load()
//		//Or for macOS:
//	Bundle(path: "/Applications/InjectionIII.app/Contents/Resources/macOSInjection10.bundle")?.load()
#endif
	return YES;
}
第四步 , 运行代码,修改局部UI布局或者属性,command+s保存一下看效果,貌似不用保存也能看到效果... 真的是有点强大 (PS: 从此告别coding五分钟 编译两小时 提升效率杠杠的)
首次运行代码可以看到控制台打印,如图则是正确的打印:

- (void)injected{
	//写在这个方法里调用你的UI修改才会生效 command+s 检查监听到文件的修改 然后重新绘制UI
		//[self setup];
		[self viewDidLoad]; //即调用生效的地方 Debug的时候才会调用 无须担心项目上线后的影响 开发调试完可移除
}
最后, 大功告成,甩上一张gif查看效果

未经作者授权,禁止转载
本文来自博客园,作者:CoderWGB,转载请注明原文链接:https://www.cnblogs.com/wgb1234/p/12425990.html
THE END


