
版本控制gitlab
版本控制gitlab
1. 版本控制介绍
版本控制是指对软件开发过程中各种程序代码、配置文件及说明文档等文件变更的管理,是软件配置管理的核心思想之一。
版本控制最主要的功能就是追踪文件的变更。它将什么时候、什么人更改了文件的什么内容等信息忠实地了记录下来。每一次文件的改变,文件的版本号都将增加。除了记录版本变更外,版本控制的另一个重要功能是并行开发。软件开发往往是多人协同作业,版本控制可以有效地解决版本的同步以及不同开发者之间的开发通信问题,提高协同开发的效率。并行开发中最常见的不同版本软件的错误(Bug)修正问题也可以通过版本控制中分支与合并的方法有效地解决。
具体来说,在每一项开发任务中,都需要首先设定开发基线,确定各个配置项的开发初始版本,在开发过程中,开发人员基于开发基线的版本,开发出所需的目标版本。当发生需求变更时,通过对变更的评估,确定变更的影响范围,对被影响的配置项的版本进行修改,根据变更的性质使配置项的版本树继续延伸或产生新的分支,形成新的目标版本,而对于不受变更影响的配置项则不应发产生变动。同时,应能够将变更所产生的对版本的影响进行记录和跟踪。必要时还可以回退到以前的版本。例如当开发需求或需求变更被取消时,就需要有能力将版本回退到开发基线版本。在曾经出现过的季度升级包拆包和重新组包的过程中,其实就是将部分配置项的版本回退到开发基线,将对应不同需求的不同分支重新组合归并,形成新的升级包版本。
版本控制是软件配置管理的核心功能。所有置于配置库中的元素都应自动予以版本的标识,并保证版本命名的唯一性。版本在生成过程中,自动依照设定的使用模型自动分支、演进。除了系统自动记录的版本信息以外,为了配合软件开发流程的各个阶段。还需要定义、收集一些元数据来记录版本的辅助信息和规范开发流程,并为今后对软件过程的度量做好准备。当然如果选用的工具支持,这些辅助数据将能直接统计出过程数据,从而方便软件过程改进活动的进行。对于配置库中的各个基线控制项,应该根据其基线的位置和状态来设置相应的访问权限。一般来说,对于基线版本之前的各个版本都应处于被锁定的状态,如需要对它们进行变更,则应按照变更控制的流程来进行操作。
常用的版本控制工具:
- gitlab
- subversion
2. gitlab部署
部署需要至少4GB内存运行,如果不够尽量调制最高,方便后面编译
//需提前配置yum源和epel源
[root@localhost ~]# cd /etc/yum.repos.d/
[root@localhost yum.repos.d]# ls
CentOS-Base.repo  epel-modular.repo  epel.repo  epel-testing-modular.repo  epel-testing.repo
//安装依赖包
[root@localhost ~]# dnf -y install curl openssh-server openssh-clients postfix  cronie
软件包 curl-7.61.1-22.el8.x86_64 已安装。
软件包 openssh-server-8.0p1-12.el8.x86_64 已安装。
软件包 openssh-clients-8.0p1-12.el8.x86_64 已安装。
软件包 cronie-1.5.2-6.el8.x86_64 已安装。
依赖关系解决。
===================================================================================================
 软件包                架构                 版本                          仓库                大小
===================================================================================================
安装:
 postfix               x86_64               2:3.5.8-2.el8                 base               1.5 M

事务概要
===================================================================================================
安装  1 软件包

总下载:1.5 M
安装大小:4.3 M
下载软件包:
postfix-3.5.8-2.el8.x86_64.rpm                                     4.2 MB/s | 1.5 MB     00:00
---------------------------------------------------------------------------------------------------
总计                                                               4.2 MB/s | 1.5 MB     00:00
运行事务检查
事务检查成功。
运行事务测试
事务测试成功。
运行事务
  准备中  :                                                                                    1/1
  运行脚本: postfix-2:3.5.8-2.el8.x86_64                                                       1/1
  安装    : postfix-2:3.5.8-2.el8.x86_64                                                       1/1
  运行脚本: postfix-2:3.5.8-2.el8.x86_64                                                       1/1
  验证    : postfix-2:3.5.8-2.el8.x86_64                                                       1/1

已安装:
  postfix-2:3.5.8-2.el8.x86_64

完毕!

//关闭防火墙
[root@localhost ~]# systemctl disable --now firewalld.service
Removed /etc/systemd/system/multi-user.target.wants/firewalld.service.
Removed /etc/systemd/system/dbus-org.fedoraproject.FirewallD1.service.
[root@localhost ~]# setenforce 0
[root@localhost ~]# vim /etc/selinux/config
SELINUX=disabled
下载gitlab的包
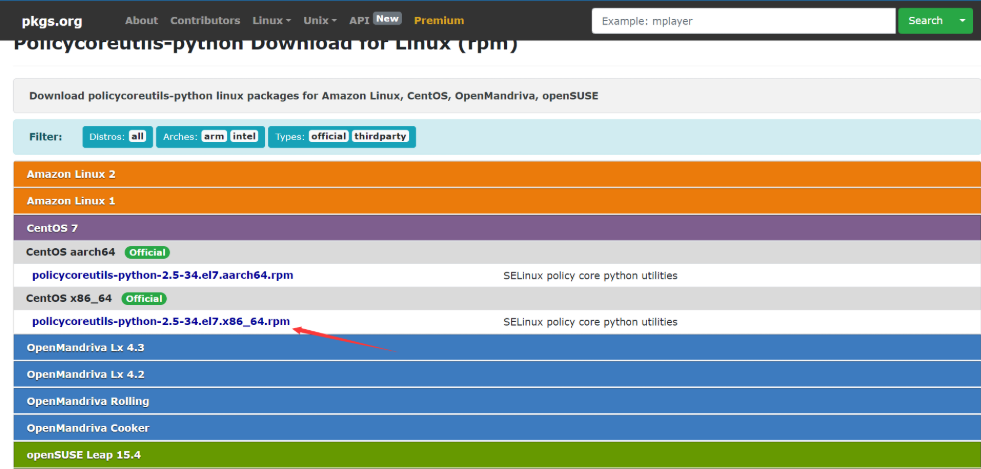
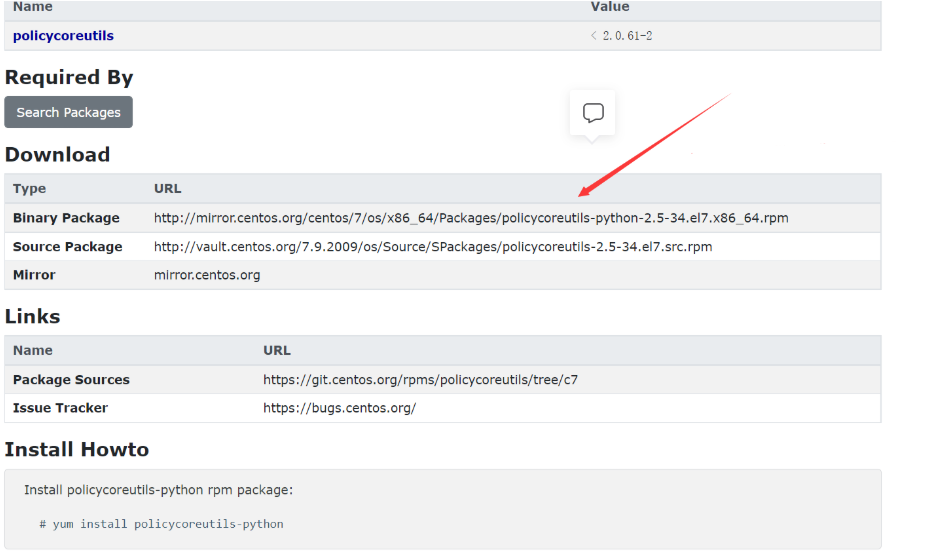
[root@localhost ~]# wget http://mirror.centos.org/centos/7/os/x86_64/Packages/policycoreutils-python-2.5-34.el7.x86_64.rpm
[root@localhost ~]# rpm -ivh --nodeps policycoreutils-python-2.5-34.el7.x86_64.rpm
警告:policycoreutils-python-2.5-34.el7.x86_64.rpm: 头V3 RSA/SHA256 Signature, 密钥 ID h3c66eb5: NOKEY
Verifying...                          ################################# [100%]
准备中...                          ################################# [100%]
正在升级/安装...
   1:policycoreutils-python-2.5-34.el7################################# [100%]

[root@localhost ~]# rpm -ivh gitlab-ce-15.2.2-ce.0.el7.x86_64.rpm
警告:gitlab-ce-15.2.2-ce.0.el7.x86_64.rpm: 头V4 RSA/SHA1 Signature, 密钥 ID h3c66b47: NOKEY
Verifying...                          ################################# [100%]
准备中...                          ################################# [100%]
正在升级/安装...
   1:gitlab-ce-15.2.2-ce.0.el7        ################################# [100%]
It looks like GitLab has not been configured yet; skipping the upgrade script.

       *.                  *.
      ***                 ***
     *****               *****
    .******             *******
    ********            ********
   ,,,,,,,,,***********,,,,,,,,,
  ,,,,,,,,,,,*********,,,,,,,,,,,
  .,,,,,,,,,,,*******,,,,,,,,,,,,
      ,,,,,,,,,*****,,,,,,,,,.
         ,,,,,,,****,,,,,,
            .,,,***,,,,
                ,*,.


     _______ __  __          __
    / ____(_) /_/ /   ____ _/ /_
   / / __/ / __/ /   / __ `/ __ \
  / /_/ / / /_/ /___/ /_/ / /_/ /
  \____/_/\__/_____/\__,_/_.___/


Thank you for installing GitLab!
GitLab was unable to detect a valid hostname for your instance.
Please configure a URL for your GitLab instance by setting `external_url`
configuration in /etc/gitlab/gitlab.rb file.
Then, you can start your GitLab instance by running the following command:
  sudo gitlab-ctl reconfigure

//启动postfix服务并设置开机自启
[root@localhost ~]# systemctl restart postfix
[root@localhost ~]# systemctl enable --now postfix.service
Created symlink /etc/systemd/system/multi-user.target.wants/postfix.service → /usr/lib/systemd/system/postfix.service.
[root@localhost ~]# systemctl status postfix
● postfix.service - Postfix Mail Transport Agent
   Loaded: loaded (/usr/lib/systemd/system/postfix.service; enabled; vendor preset: disabled)
   Active: active (running) since Wed 2022-08-10 04:23:16 EDT; 40s ago
 Main PID: 188909 (master)
    Tasks: 3 (limit: 23648)
   Memory: 21.3M
   CGroup: /system.slice/postfix.service
           ├─188909 /usr/libexec/postfix/master -w
           ├─188910 pickup -l -t unix -u
           └─188911 qmgr -l -t unix -u
[root@localhost ~]# ss -antl         //查看25号端口
State       Recv-Q      Send-Q            Local Address:Port             Peer Address:Port
LISTEN      0           5                     127.0.0.1:631                   0.0.0.0:*
LISTEN      0           100                   127.0.0.1:25                    0.0.0.0:*
LISTEN      0           128                     0.0.0.0:111                   0.0.0.0:*
LISTEN      0           32                192.168.122.1:53                    0.0.0.0:*
LISTEN      0           128                     0.0.0.0:22                    0.0.0.0:*
LISTEN      0           5                         [::1]:631                      [::]:*
LISTEN      0           100                       [::1]:25                       [::]:*
修改配置文件
[root@localhost ~]# vim /etc/gitlab/gitlab.rb
##! On AWS EC2 instances, we also attempt to fetch the public hostname/IP
##! address from AWS. For more details, see:
##! https://docs.aws.amazon.com/AWSEC2/latest/UserGuide/instancedata-data-retrieval.html
external_url 'http://192.168.78.143' //修改为本机的IP
## Roles for multi-instance GitLab
//重载配置文件(需要等待一段时间)
[root@localhost ~]# gitlab-ctl reconfigure
//重启
[root@localhost ~]# gitlab-ctl restart
ok: run: alertmanager: (pid 9396) 1s
ok: run: gitaly: (pid 9407) 0s
ok: run: gitlab-exporter: (pid 9421) 1s
ok: run: gitlab-kas: (pid 9423) 0s
ok: run: gitlab-workhorse: (pid 9431) 0s
ok: run: grafana: (pid 9446) 1s
ok: run: logrotate: (pid 9457) 0s
ok: run: nginx: (pid 9470) 1s
ok: run: node-exporter: (pid 9476) 0s
ok: run: postgres-exporter: (pid 9481) 0s
ok: run: postgresql: (pid 9493) 1s
ok: run: prometheus: (pid 9579) 0s
ok: run: puma: (pid 9625) 0s
ok: run: redis: (pid 9630) 1s
ok: run: redis-exporter: (pid 9636) 0s
ok: run: sidekiq: (pid 9649) 1s
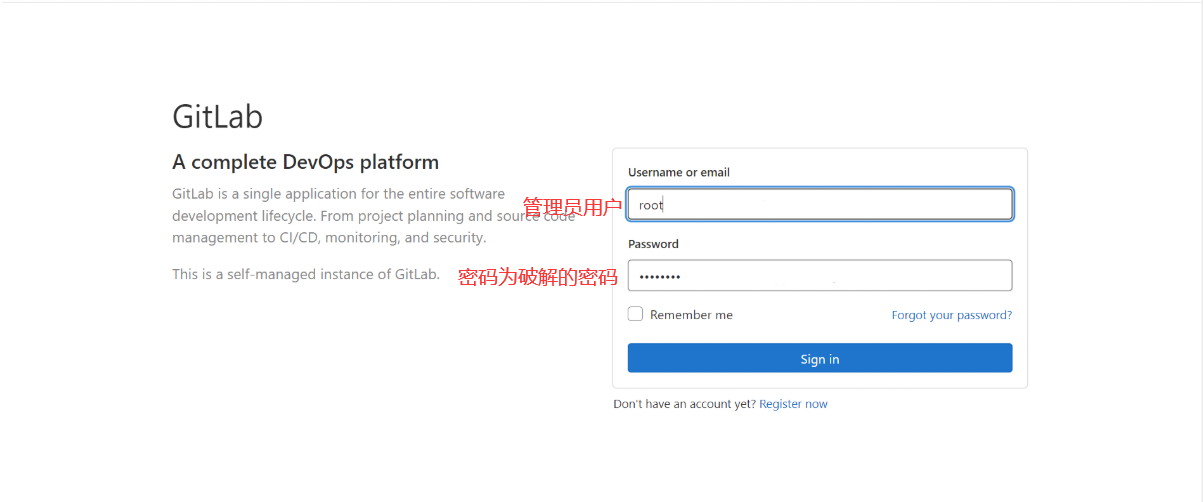
//破解密码
[root@localhost ~]# gitlab-rails console -e production
--------------------------------------------------------------------------------
Ruby: ruby 2.7.5p203 (2021-11-24 revision f69aeb8314) [x86_64-linux]
GitLab: 15.2.2 (4ecb014a935) FOSS
GitLab Shell: 14.9.0
PostgreSQL: 13.6
------------------------------------------------------------[ booted in 46.75s ]
Loading production environment (Rails 6.1.4.7)
irb(main):001:0> user = User.where(id: 1).first //id为root用户
=> #<User id:1 @root>
irb(main):002:0> user.password = '123456' //修改密码
=> "123456"
irb(main):003:0> user.password_confirmation = '123456'
=> "123456"
irb(main):004:0> user.save! //保存修改
=> true
irb(main):005:0> exit
[root@localhost ~]#
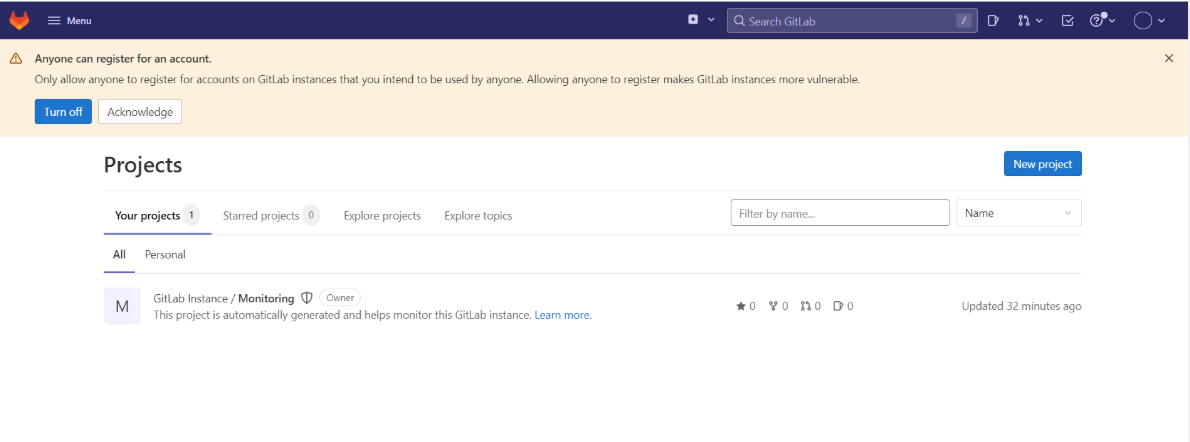
gitlab管理

 浙公网安备 33010602011771号