Spring基础使用四
Spring基础使用四
FactoryBean
概念:
FactoryBean是一个接口,需要创建一个类实现该接口
其中有三个方法:
- getObject( ): 通过一个对象交给IOC容器处理
- getObjectType(): 设置所提供对象的类型
- isSingleton(): 所提供的对象是否单例
注意:
当把FactoryBean的实现类配置为bean时,会将当前类中getObject()所返回的对象交给IOC容器管理
package com.wfy.pojo;
import org.springframework.beans.factory.FactoryBean;
public class UserFactoryBean  implements FactoryBean<User> {
    @Override
    public User getObject() throws Exception {
        return new User();
    }
    @Override
    public Class<?> getObjectType() {
        return User.class;
    }
}
<?xml version="1.0" encoding="UTF-8"?>
<beans xmlns="http://www.springframework.org/schema/beans"
       xmlns:xsi="http://www.w3.org/2001/XMLSchema-instance"
       xsi:schemaLocation="http://www.springframework.org/schema/beans http://www.springframework.org/schema/beans/spring-beans.xsd">

    <bean class="com.wfy.pojo.UserFactoryBean"></bean>

</beans>
package com.wfy.spring;

import com.wfy.pojo.User;
import org.junit.Test;
import org.springframework.context.ApplicationContext;
import org.springframework.context.support.ClassPathXmlApplicationContext;

public class FactoryBeanTest {
    @Test
    public void FactoryBean(){
        ApplicationContext ioc =  new ClassPathXmlApplicationContext("spring-factory.xml");
        User bean = ioc.getBean(User.class);
        System.out.println(bean);
    }
}
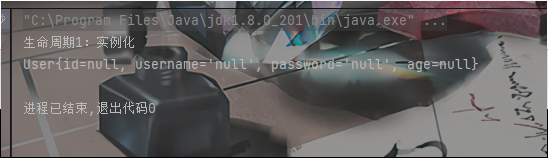
结果:
基于xml的自动装配
自动装配:
根据指定的策略,在IOC容器中匹配某一个bean,自动为指定的bean中所依赖的类类型或接口类型属性赋值
可以通过bean标签中的autowire属性设置自动装配的策略
自动装配的策略:
autowire=" no/default" : 表示不装配,即bean中的属性不会自动匹配某个bean为属性赋值,此时属性使用默认值
autowrie="byType" : 根据要赋值的属性的类型,在IOC容器中匹配某个bean,为属性赋值
注意:
- 若通过类型没有找到任何一个类型匹配的bean,此时不装配,属性使用默认值
- 若通过类型找到了多个类型匹配的bean,此时就会抛出异常:NoUniqueBeanDefinitionException
总结:当使用byType实现自动装配时,IOC容器中有且只有一个类型匹配的bean能够为属性赋值
autowire="byName" : 将要赋值的属性的属性名作为bean的id在IOC容器中匹配某个bean,为属性赋值
总结:当类型匹配的bean有多个时,此时可以使用byName实现自动装配
通过三层架构进行演示:
一、创建Controller(Servlet)层
package com.wfy.controller;

import com.wfy.service.UserService;
import com.wfy.service.impl.UserServiceImpl;

public class UserController {
    private UserService userService ;

    public UserService getUserService() {
        return userService;
    }

    public void setUserService(UserService userService) {
        this.userService = userService;
    }

    public void saveUser(){
        userService.saveUser();
    }
}
二、Service层
package com.wfy.service;

public interface UserService {

    //保存用户信息
    void saveUser();
}
package com.wfy.service.impl;

import com.wfy.dao.UserDao;
import com.wfy.service.UserService;

public class UserServiceImpl implements UserService {

    private UserDao  userDao ;

    public UserDao getUserDao() {
        return userDao;
    }

    public void setUserDao(UserDao userDao) {
        this.userDao = userDao;
    }

    @Override
    public void saveUser() {
        userDao.saveUser();
    }
}
三、Dao层
package com.wfy.dao;

public interface UserDao {

    //保存用户信息
    void saveUser();
}
package com.wfy.dao.impl;
import com.wfy.dao.UserDao;
import com.wfy.service.UserService;


public class UserDaoImpl implements UserDao {
     private UserService userService;

    public UserService getUserService() {
        return userService;
    }

    public void setUserService(UserService userService) {
        this.userService = userService;
    }

    @Override
    public void saveUser() {
        System.out.println("保存成功~");
    }
}
四、配置xml文件
<?xml version="1.0" encoding="UTF-8"?>
<beans xmlns="http://www.springframework.org/schema/beans"
       xmlns:xsi="http://www.w3.org/2001/XMLSchema-instance"
       xsi:schemaLocation="http://www.springframework.org/schema/beans http://www.springframework.org/schema/beans/spring-beans.xsd">

    <bean id="userController" class="com.wfy.controller.UserController" autowire="byType">
<!--        <property name="userService" ref="userService"></property>-->
    </bean>

    <bean  id="userService" class="com.wfy.service.impl.UserServiceImpl" autowire="byType">
<!--        <property name="userDao" ref="userDao"></property>-->
    </bean>
    <bean id="userDao"  class="com.wfy.dao.impl.UserDaoImpl"></bean>
</beans>
五、案例测试
package com.wfy.spring.Test;

import com.wfy.controller.UserController;
import org.junit.Test;
import org.springframework.context.ApplicationContext;
import org.springframework.context.support.ClassPathXmlApplicationContext;

public class AutowireByXMLTest {
    /**
     *
     */

    @Test
    public void AutowireTest(){
        ApplicationContext  ioc = new ClassPathXmlApplicationContext("spring-autowire.xml");
        UserController userController = ioc.getBean(UserController.class);
        userController.saveUser();
    }
}
基于注解管理Bean
标识组件的常见注解
- @Component: 将类标识为普通组件
- @Controller: 将类标识为控制层组件
- @Service: 将类标识为业务层组件
- @Repository: 将类标识为持久层组件
案例展示
Controller:
package com.wfy.controller;
import org.springframework.stereotype.Controller;
@Controller
public class UserController {
}
Service:
package com.wfy.service;
public interface UserService {
}
package com.wfy.service.impl;
import com.wfy.service.UserService;
import org.springframework.stereotype.Service;
@Service
public class UserServiceImpl implements UserService {
}
Dao:
package com.wfy.dao;
public interface UserDao {
}
package com.wfy.dao.impl;
import com.wfy.dao.UserDao;
import org.springframework.stereotype.Repository;
@Repository
public class UserDaoImpl implements UserDao {
}
xml文件:
<?xml version="1.0" encoding="UTF-8"?>
<beans xmlns="http://www.springframework.org/schema/beans"
       xmlns:xsi="http://www.w3.org/2001/XMLSchema-instance"
       xmlns:context="http://www.springframework.org/schema/context"
       xsi:schemaLocation="http://www.springframework.org/schema/beans http://www.springframework.org/schema/beans/spring-beans.xsd http://www.springframework.org/schema/context https://www.springframework.org/schema/context/spring-context.xsd">

<!--扫描组件-->
    <context:component-scan base-package="com.wfy"></context:component-scan>
</beans>
测试:
package com.wfy.spring.Test;

import com.wfy.controller.UserController;
import com.wfy.dao.UserDao;
import com.wfy.service.UserService;
import org.junit.Test;
import org.springframework.context.ApplicationContext;
import org.springframework.context.support.ClassPathXmlApplicationContext;
public class IOCByAnnotationTest {
    @Test
    public void IOCByAnnotationTest(){
        ApplicationContext ioc = new ClassPathXmlApplicationContext("spring-annotation.xml");
        UserController controller = ioc.getBean(UserController.class);
        System.out.println(controller);
        UserDao userDao = ioc.getBean(UserDao.class);
        System.out.println(userDao);
        UserService userService = ioc.getBean(UserService.class);
        System.out.println(userService);
    }
}
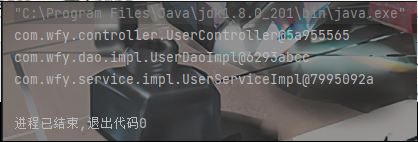
结果:
XML文件中的标签属性
- context:exclude-filter: 排除扫描
- type: 设置排除扫描的方式
- type="annotation/assignable"
- annotation: 根据注解的类型进行排除,expression需要设置排除的注解的全类名
- assignable: 根据类的类型进行排除,expression需要设置排除的类的全类名
- context:include-filter: 包含扫描
- 注意:需要在context:component-scan标签中设置use-default-filters="false"
- use-default-filters="true"(默认情况下) ,所设置的包下的所有类都需要扫描,此时可以使用排除扫描
- use-default-filters="false",所设置的包下的所有类都不需要扫描,此时可以使用包含扫描
通过注解+扫描所配置的bean的id,默认值为类的小驼峰,即类名的首字母为小写结果
在注解中可以设置别名来重新定义,即可以通过标识组件的注解的value属性值定义bean的自定义id


