SpringCloud(Greenwich版)Eureka注册中心
推荐以下稳定版本号:
Spring Boot: 2.1.9.RELEASE
Spring Cloud: Greenwich.SR3
一、Eureka简介
Eureka 是 Netflix 开源的服务发现组件,本身是一个基于 REST 风格服务。它包含 Server(服务端)和 Client(客户端)两部分。Spring Cloud将它集成在子项目Spring Cloud Netflix中,从而实现微服务的注册与发现。Eureka Server 有时即是服务端也是客户端。
Eureka 包含两个组件:
-
Eureka Server:各个微服务节点通过配置启动后,会在 Eureka Server 中进行注册,这样 Eureka Server 中的服务注册列表中将会存储所有可用服务节点的信息,服务节点的信息可以在界面中。
-
Eureka Client:是一个 Java 客户端,用于简化 Eureka Server 的交互,客户端同时也具备一个内置的、使用 (round-robin) 轮询负载算法的负载均衡器。在应用启动后,将会向 Eureka Server 发送心跳 (默认周期30秒)。如果 Eureka Server 在多个心跳周期内没有接收到某个节点的心跳,Eureka Server 将会从服务注册列表中把这个服务节点剔除 (默认90秒)。
二、基础架构
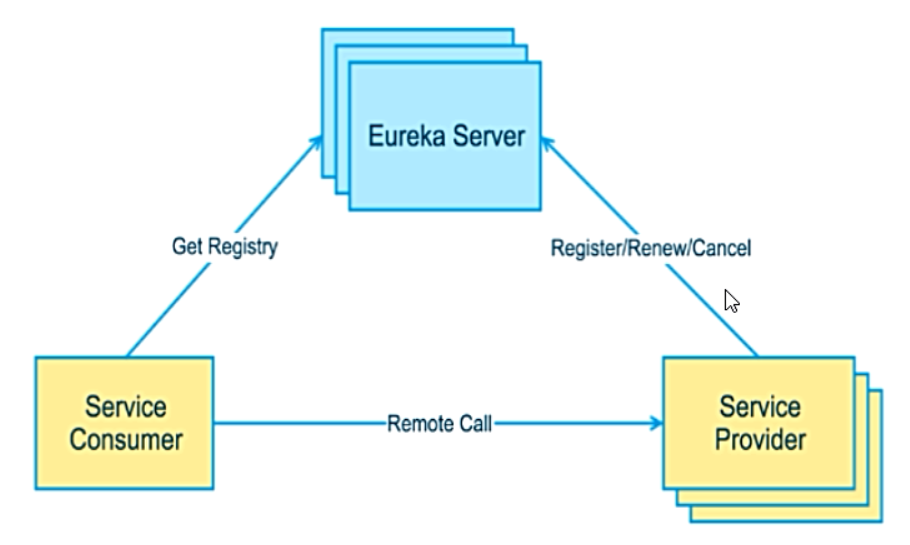
-
Eureka Server:提供服务注册和发现。
-
Service Provider:服务提供者将自身服务注册到Eureka,从而使服务消费者能够找到。
-
Service Consumer:服务消费者从Eureka获取注册服务实例列表,从而能够消费服务。
三、创建Eureka Server端
1)build.gradle项目依赖
dependencies {
   compile group: 'org.springframework.cloud', name: 'spring-cloud-starter-netflix-eureka-server'
}
2)application.yaml配置文件
配置独立运行模式

server:
  port: 8761
spring:
  application:
    name: eureka-server
eureka:
  instance:
    hostname: localhost
  client:
    fetch-registry: false
    register-with-eureka: false
    service-url:
      defaultZone: http://${eureka.instance.hostname}:${server.port}/eureka/
-
-
eureka.client.fetch-registry:指定是否要从注册中心获取服务(默认为true,注册中心不需要开启)
-
eureka.client.register-with-eureka:指定是否将自己注册到注册中心(默认为true,注册中心不需要开启)
-
eureka.client.serviceUrl.defaultZone:设置与注册中心交互地址(查询服务和注册服务需要依赖此地址)
在启动类上添加@EnableEurekaServer,注解含义:激活Eureka服务端相关配置。

package org.wesson.springcloud.eureka;

import org.springframework.boot.SpringApplication;
import org.springframework.boot.autoconfigure.SpringBootApplication;
import org.springframework.cloud.netflix.eureka.server.EnableEurekaServer;

@EnableEurekaServer
@SpringBootApplication
public class EurekaServerApplication {

    public static void main(String[] args) {
        SpringApplication.run(EurekaServerApplication.class, args);
    }

}
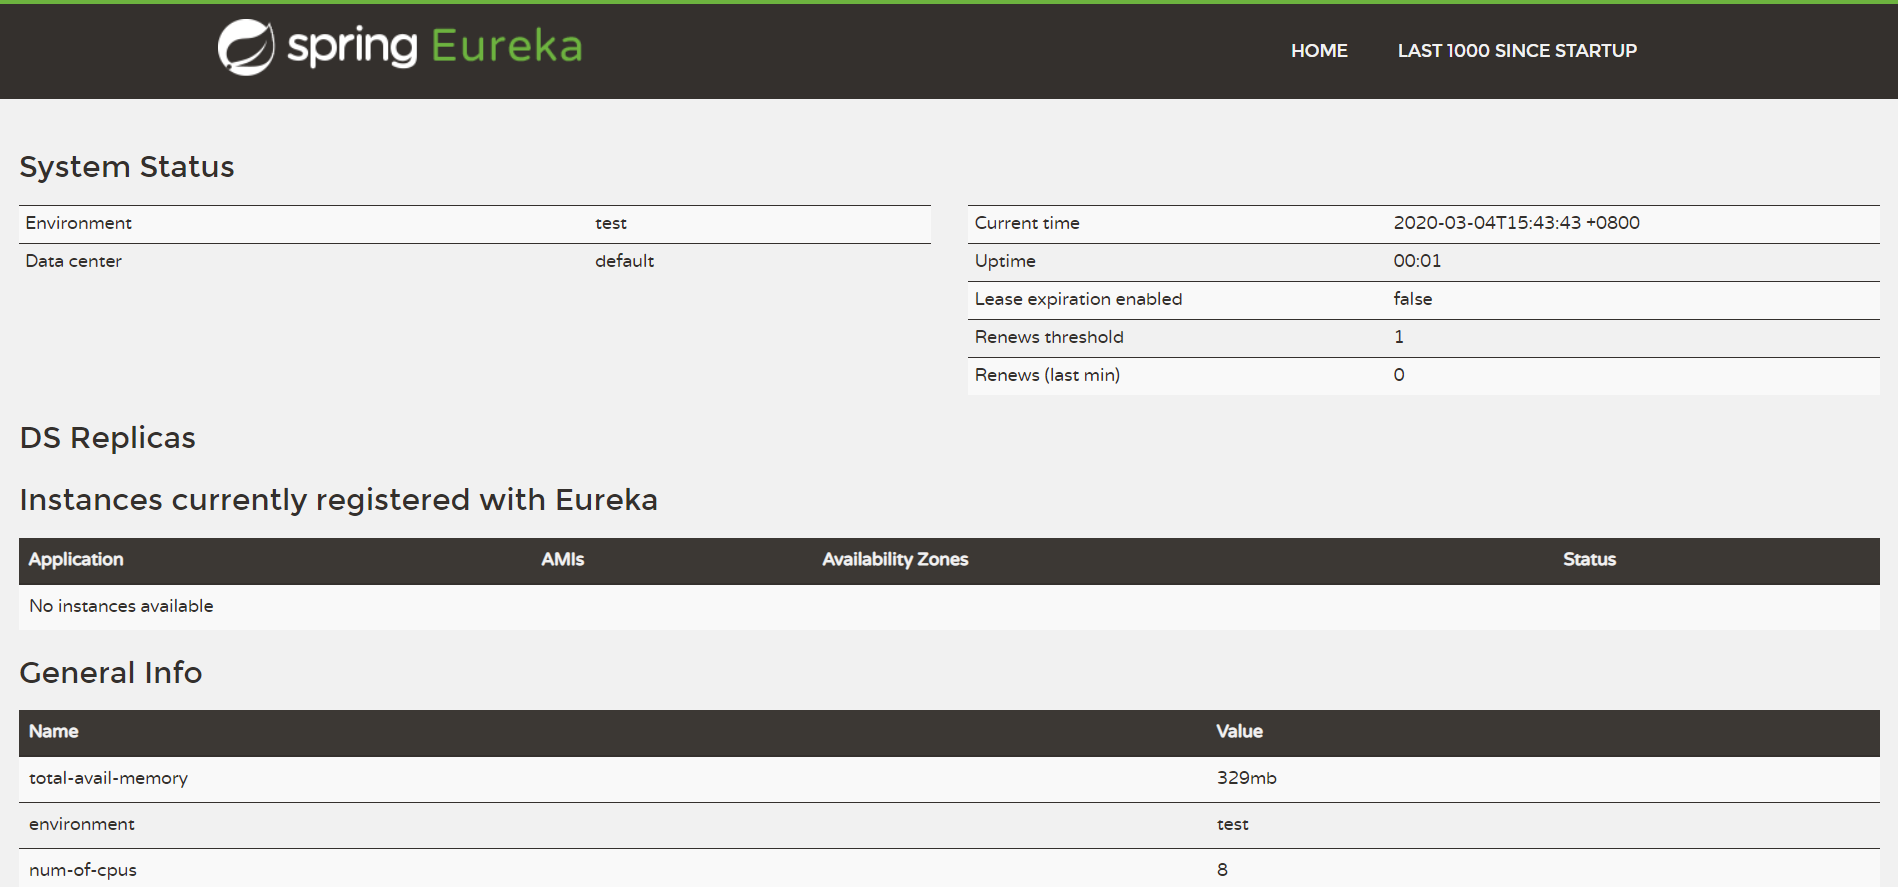
运行eureka-server启动类,访问http://localhost:8761/。可以看到如下图所示的Eureka信息面板,其中 Instances currently registered with Eureka 栏是空的,说明该注册中心还没有注册任何服务:
四、创建Eureka Client端
在完成了服务注册中心的搭建后,接下来我们尝试将一个Spring Boot应用加入Eureka的服务治理体系中去。
创建gradle模块provider-service并添加web与eureka客户端依赖
dependencies {
    compile group: 'org.springframework.boot', name: 'spring-boot-starter-web'

    compile group: 'org.springframework.cloud', name: 'spring-cloud-starter-netflix-eureka-client'
}
配置服务提供者代码

server:
  port: 8081
spring:
  application:
    name: provider-service
eureka:
  instance:
    hostname: localhost
  client:
    fetch-registry: true #eureka集群必须设置为true,才能配合ribbon使用负载均衡
    register-with-eureka: true
    service-url:
      defaultZone: http://localhost:8761/eureka/ #单机版

package org.wesson.springcloud.eureka;

import org.springframework.boot.SpringApplication;
import org.springframework.boot.autoconfigure.SpringBootApplication;
import org.springframework.cloud.client.discovery.EnableDiscoveryClient;

@EnableDiscoveryClient
@SpringBootApplication
public class ProviderServiceApplication {

    public static void main(String[] args) {
        SpringApplication.run(ProviderServiceApplication.class, args);
    }

}
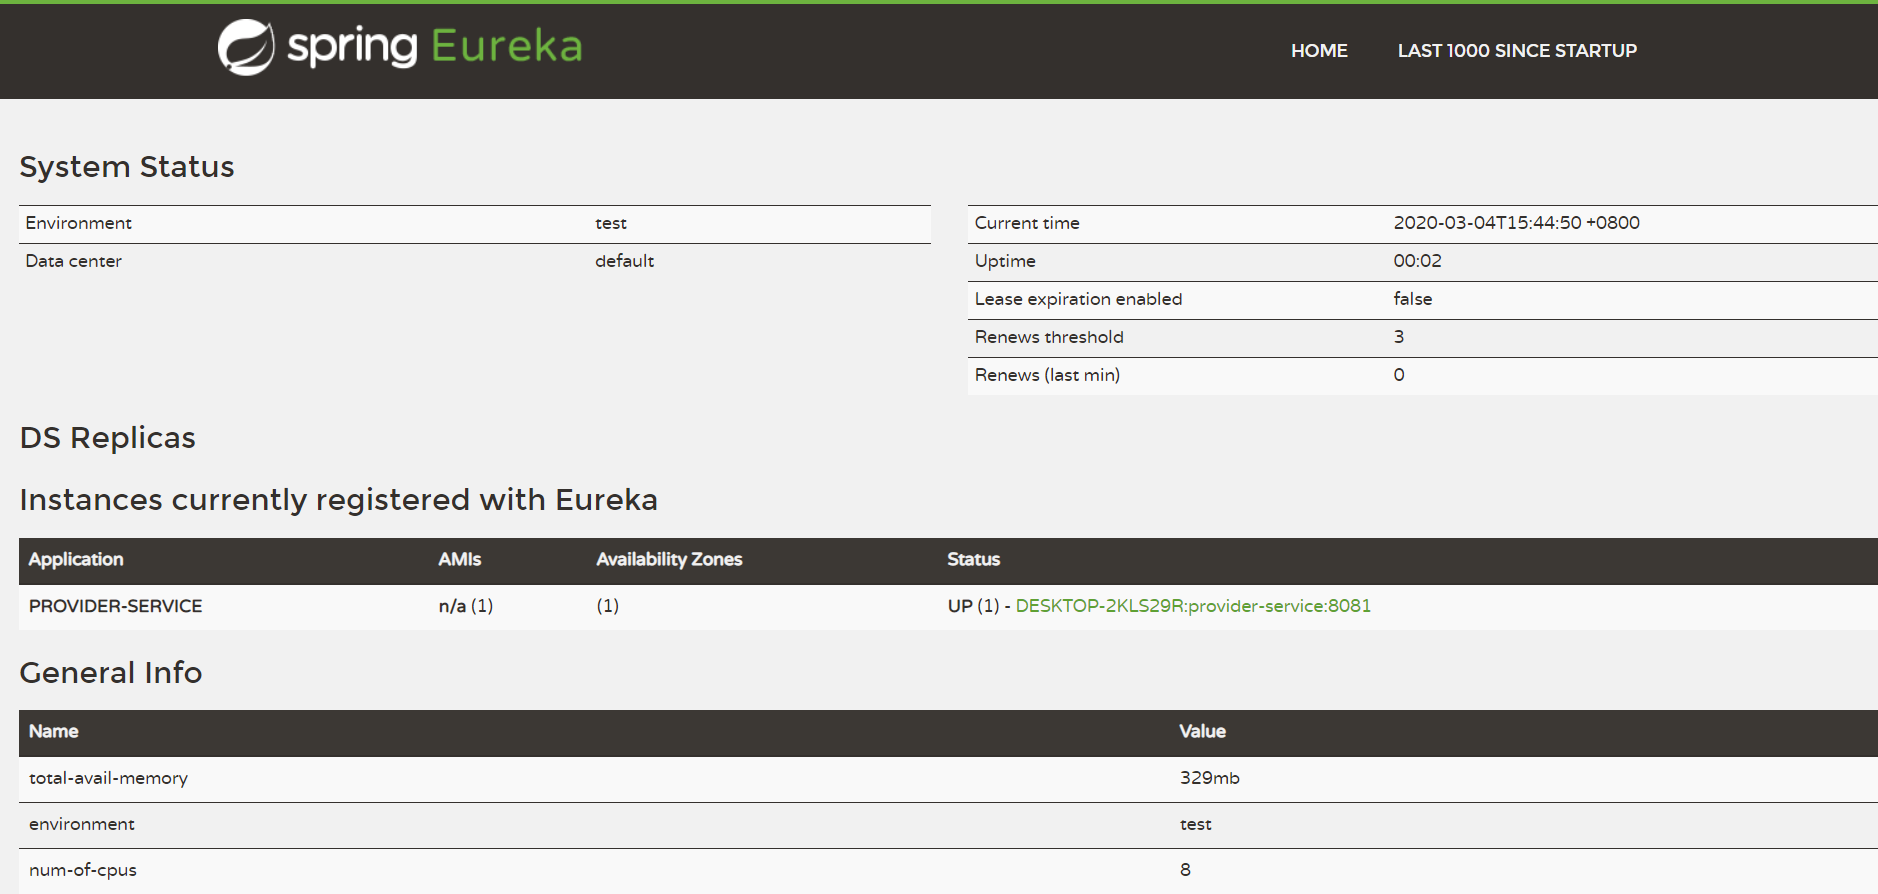
运行eureka-server和provider-serice两个启动类,访问Eureka的信息面板。在Instances currently registered with Eureka 一栏中看到微服务被注册成功了:
4)Controller
/info的请求处理接口

package org.wesson.springcloud.eureka.controller;

import org.springframework.beans.factory.annotation.Value;
import org.springframework.web.bind.annotation.GetMapping;
import org.springframework.web.bind.annotation.RequestMapping;
import org.springframework.web.bind.annotation.RestController;

@RestController
@RequestMapping("/client")
public class EurekaController {

    @Value("${server.port}")
    private String serverPort;

    @GetMapping("/info")
    public String info() {
        return "hello, service provider port is from:" + serverPort;
    }

}
访问 http://localhost:8081/client/info,输出结果如下:

这样我们就获取到配置端口号信息了。
五、Eureka Server高可用集群
由于所有服务都会注册到注册中心去,服务之间的调用都是通过从注册中心获取的服务列表来进行调用,注册中心一旦宕机,所有服务调用都会出现问题。所以在做项目中必然需要多个注册中心组成集群来提供服务,官网称之为结伴注册。
本机模拟准备工作:将电脑上hosts 添加如下配置 (windows下位置:C:\Windows\System32\drivers\etc下的hosts文件):
-
127.0.0.1 eureka8761.com 1号机域名
-
127.0.0.1 eureka8762.com 2号机域名
搭建Eureka集群环境配置
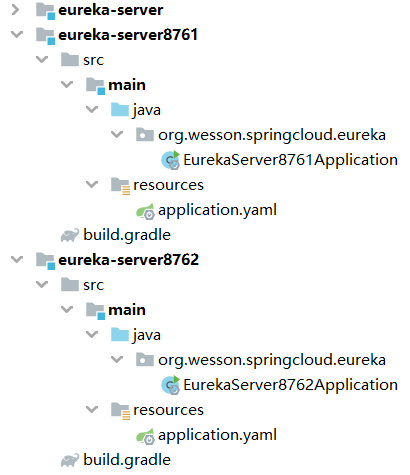
1)eureka-server8761项目工程
编写application.yaml配置第一个注册中心:

server:
  port: 8761
spring:
  application:
    name: eureka-server8761
eureka:
  instance:
    hostname: eureka8761.com #集群不能使用localhost主机名,会导致主机名重复
  client:
    fetch-registry: false
    register-with-eureka: false
    service-url:
      defaultZone: http://eureka8762.com:8762/eureka/ #注册到另一个Eureka注册中心
2)eureka-server8762项目工程
编写application.yaml配置第二个注册中心:

server:
  port: 8762
spring:
  application:
    name: eureka-server8762
eureka:
  instance:
    hostname: eureka8762.com #集群不能使用localhost主机名,会导致主机名重复
  client:
    fetch-registry: false
    register-with-eureka: false
    service-url:
      defaultZone: http://eureka8761.com:8761/eureka/ #注册到另一个Eureka注册中心
Step1:运行 eureka-server8761 启动类,端口为8761
Step2:
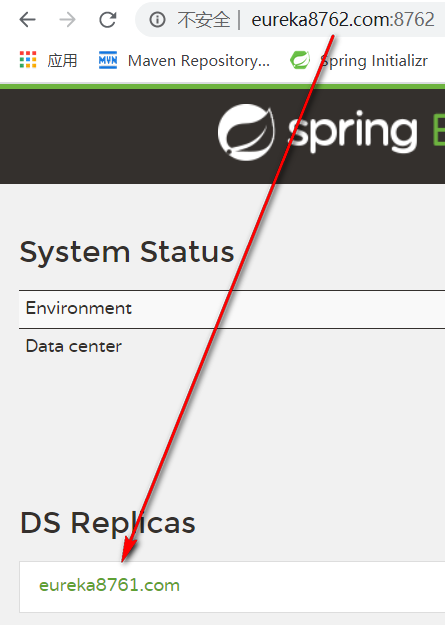
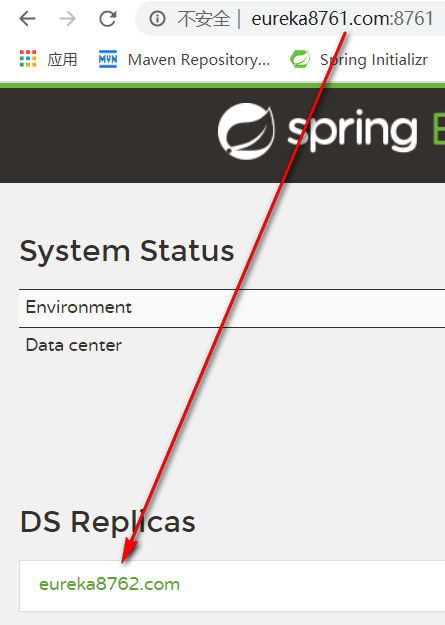
Step3:访问 http://eureka8761.com:8761/,下图能够发现eureka8762.com的域名:
将微服务注册到Eureka集群
1)更改服务提供者application.yaml配置文件
主要看 service-url.defaultZone 属性,该服务提供者需要同时注册到 eureka8761.com:8761/eureka 与 eureka8762.com:8762/eureka 上。

server:
  port: 8081
spring:
  application:
    name: provider-service
eureka:
  instance:
    hostname: localhost
  client:
    fetch-registry: true
    register-with-eureka: true
    service-url:
      defaultZone: http://eureka8761.com:8761/eureka/,http://eureka8762.com:8762/eureka/ #集群版
Step5:运行 provider-service 启动类,端口为8081
Step6:分别访问 http://eureka8761.com:8761/ 与 http://eureka8762.com:8762/ 域名,就能够看到下图注册的服务了:


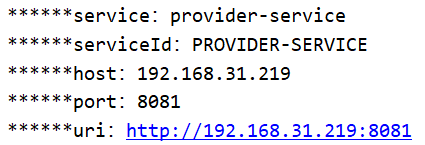
对于注册进 Eureka 里面的微服务,可以通过服务发现来获得该服务的信息,例如:服务ID,主机名,端口和URI地址。类似关于我们这样的功能。
1)补充启动类ProviderServiceApplication.java
@EnableDiscoveryClient
2)补充Controller
添加一个Object类型的discovery方法,需要注入

package org.wesson.springcloud.eureka.controller;

import org.springframework.beans.factory.annotation.Autowired;
import org.springframework.cloud.client.ServiceInstance;
import org.springframework.cloud.client.discovery.DiscoveryClient;
import org.springframework.web.bind.annotation.GetMapping;
import org.springframework.web.bind.annotation.RequestMapping;
import org.springframework.web.bind.annotation.RestController;

import java.util.List;

@RestController
@RequestMapping("/client")
public class EurekaController {

    @Autowired
    private DiscoveryClient discoveryClient;

    @GetMapping("/discovery")
    public Object discovery() {
        // 盘点Eureka可以获取多个服务清单列表,默认为List类型
        List<String> services = discoveryClient.getServices();
        // 遍历控制台打印出微服务名称或serviceId
        for (String service: services) {
            System.out.println("******service:" + service);
        }
        // 获取与特定serviceId关联的所有服务实例信息
        List<ServiceInstance> instances = discoveryClient.getInstances("provider-service");
        for (ServiceInstance serviceInstance: instances) {
            // 已注册的服务ID
            System.out.println("******serviceId:" + serviceInstance.getServiceId());
            // 已注册服务实例的主机名
            System.out.println("******host:" + serviceInstance.getHost());
            // 已注册服务实例的端口
            System.out.println("******port:" + serviceInstance.getPort());
            // 服务URI地址
            System.out.println("******uri:" + serviceInstance.getUri());
        }
        // 返回当前的discoveryClient
        return this.discoveryClient;
    }

}
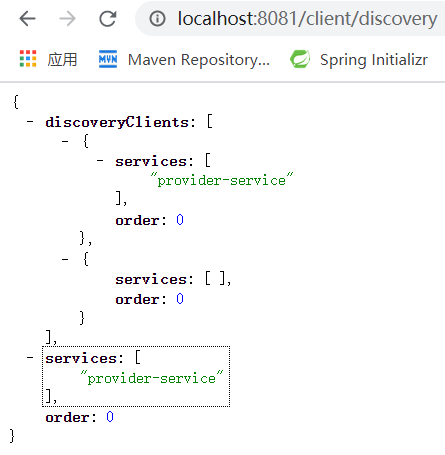
浏览器直接访问 http://localhost:8081/client/discovery 请求,能够看到下图返回结果:
