
创建一个新的Vue项目
一、安装脚手架(Vue CLI)
检查是否有安装脚手架
在DOS中输入vue命令,如果出现提示,说明没有安装

修改NPM镜像地址
修改NPM镜像地址为淘宝的,要不然在安装时可能会很慢
#查看当前NPM的镜像地址
npm config get registry

#修改NPM镜像地址
npm config set registry https://registry.npm.taobao.org
执行安装命令
执行该命令即可在DOS上使用vue命令
// -g 表示全局安装
npm install -g @vue/cli
安装完后,重新打开DOS窗口,输入vue命令,即可执行vue命令
二、创建Vue项目
切换目录:到你要创建项目的目录,然后使用命令创建项目
//创建一个vue_test的项目
vue create vue_test
等待创建...
选择要使用的Vue版本,通过上下键选择Vue版本,按回车确认,这里选择的是Vue2。
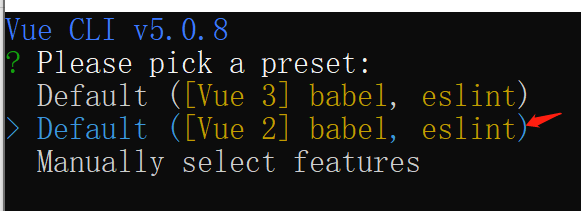
第一行显示的是脚手架的版本,如上图脚手架的版本是v5.0.8
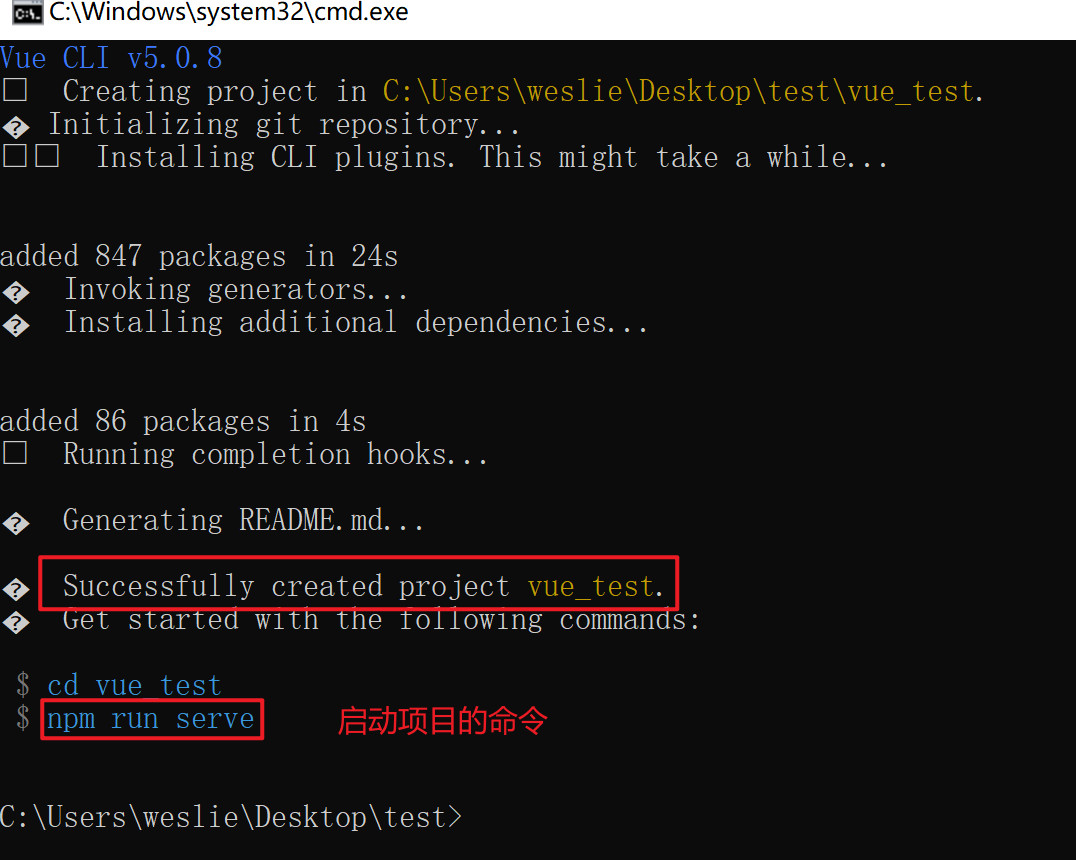
三、启动项目
进入项目目录,并执行启动命令
//进入项目目录
cd vue_test

//启动项目
npm run serve
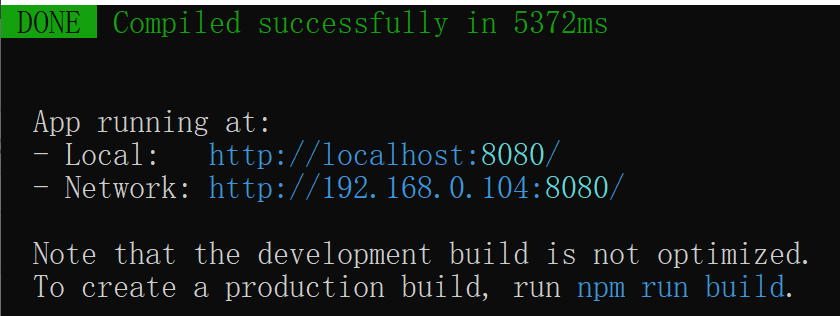
如上项目启动成功,要停止项目可以按两下Ctrl + C或直接关掉DOS窗口
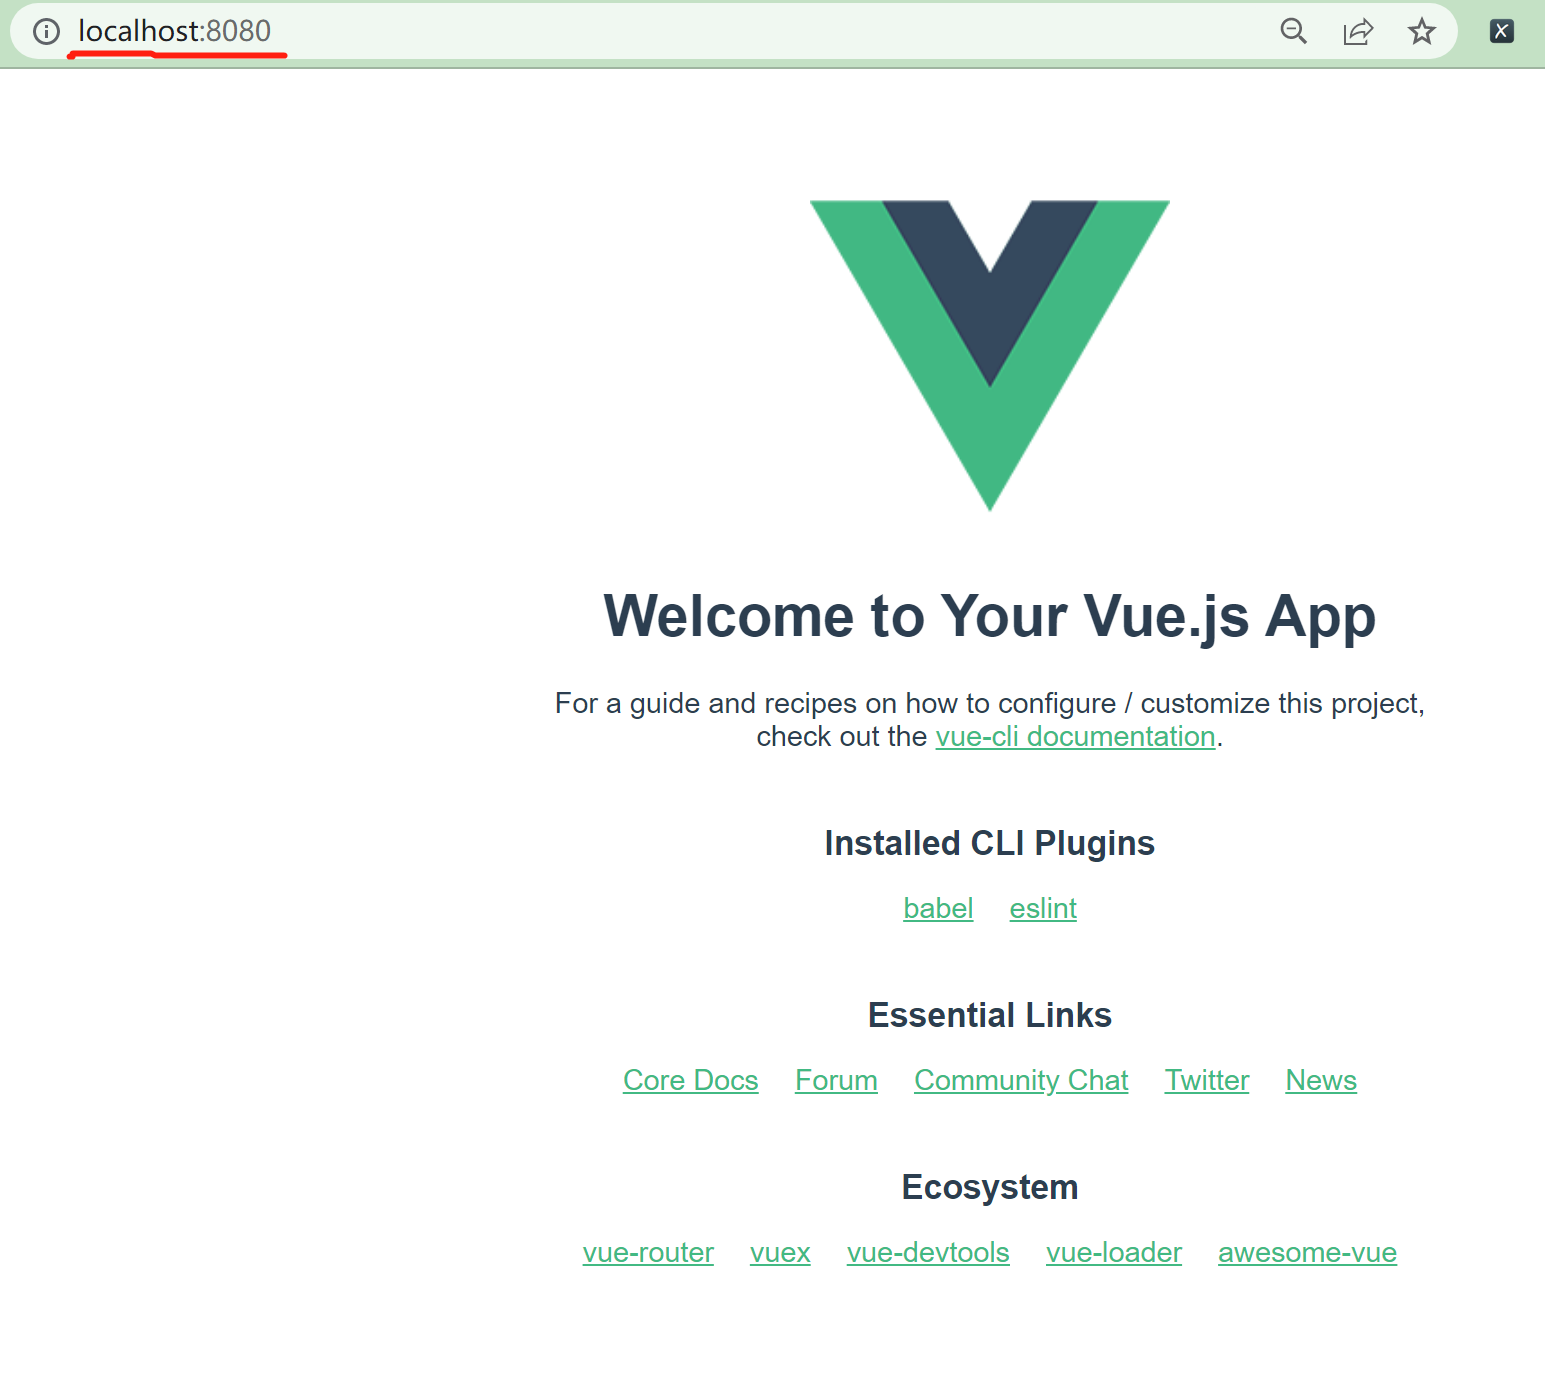
访问http://localhost:8080/
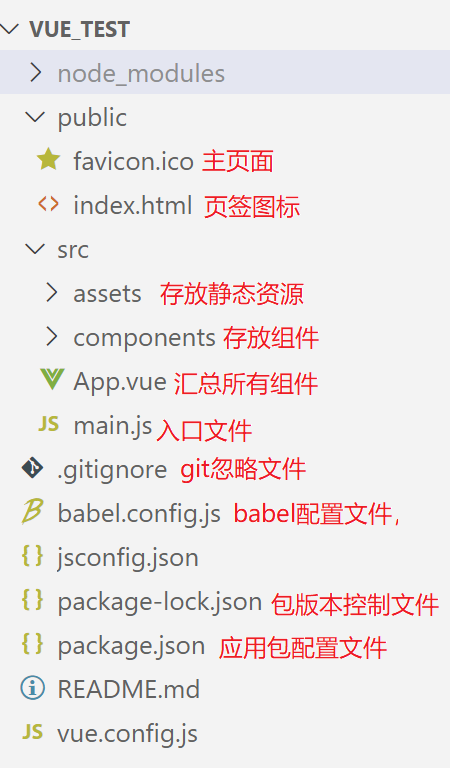
四、分析Vue项目的目录结构
五、代码分析
package.json
{
  "name": "vue_test",
  "version": "0.1.0",
  "private": true,
  "scripts": {
    "serve": "vue-cli-service serve", // 启动命令,比如:npm run serve
    "build": "vue-cli-service build", // 编译打包命令
    "lint": "vue-cli-service lint"    // 语法检查命令,很少用
  },
  "dependencies": {
    "core-js": "^3.8.3",
    "vue": "^2.6.14"
  },
  "devDependencies": {
    "@babel/core": "^7.12.16",
    "@babel/eslint-parser": "^7.12.16",
    "@vue/cli-plugin-babel": "~5.0.0",
    "@vue/cli-plugin-eslint": "~5.0.0",
    "@vue/cli-service": "~5.0.0",
    "eslint": "^7.32.0",
    "eslint-plugin-vue": "^8.0.3",
    "vue-template-compiler": "^2.6.14"
  },
  "eslintConfig": {
    "root": true,
    "env": {
      "node": true
    },
    "extends": [
      "plugin:vue/essential",
      "eslint:recommended"
    ],
    "parserOptions": {
      "parser": "@babel/eslint-parser"
    },
    "rules": {}
  },
  "browserslist": [
    "> 1%",
    "last 2 versions",
    "not dead"
  ]
}
main.js
//注意:在脚手架里,无论import是在前还是在后,无论import中间还有什么其他代码,都会是先执行import再执行当前页的其他代码
//引入Vue
import Vue from 'vue'
//引入App组件
import App from './App.vue'

//关闭Vue的生产提示
Vue.config.productionTip = false

//创建vm
new Vue({
  //由于import的Vue是运行时版本的Vue,没有模板解析器。把要编译的模板交给render
  render: h => h(App),//注册App组件,
})
.$mount('#app')//绑定容器,容器位于public/index.html
index.html
<!-- public/index.html -->
<!DOCTYPE html>
<html lang="">
  <head>
    <meta charset="utf-8">
    <!-- 针对IE浏览器的一个特殊配置,含义是让IE浏览器以最高的渲染级别渲染页面 -->
    <meta http-equiv="X-UA-Compatible" content="IE=edge">
    <!-- 开启移动端的理想视口 -->
    <meta name="viewport" content="width=device-width,initial-scale=1.0">
    <!-- 配置页签图标,BASE_URL指的就是public这个目录 -->
    <link rel="icon" href="<%= BASE_URL %>favicon.ico">
    <!-- 引入第三方样式 -->
    <link rel="stylesheet" href="<%= BASE_URL %>css/bootstrap.css">
    <!-- 配置网页标题 -->
    <title>管理系统</title>
  </head>
  <body>
        <!-- 当浏览器不支持js时noscript中的元素就会被渲染 -->
    <noscript>
      <!-- htmlWebpackPlugin是webpack的一个插件,需要了解webpack
          htmlWebpackPlugin.options.title对应的是package.json中的name
      -->
      <strong>We're sorry but <%= htmlWebpackPlugin.options.title %> doesn't work properly without JavaScript enabled. Please enable it to continue.</strong>
    </noscript>
        <!-- 容器 -->
    <div id="app"></div>
    <!-- built files will be auto injected -->
  </body>
</html>
vue导入分析
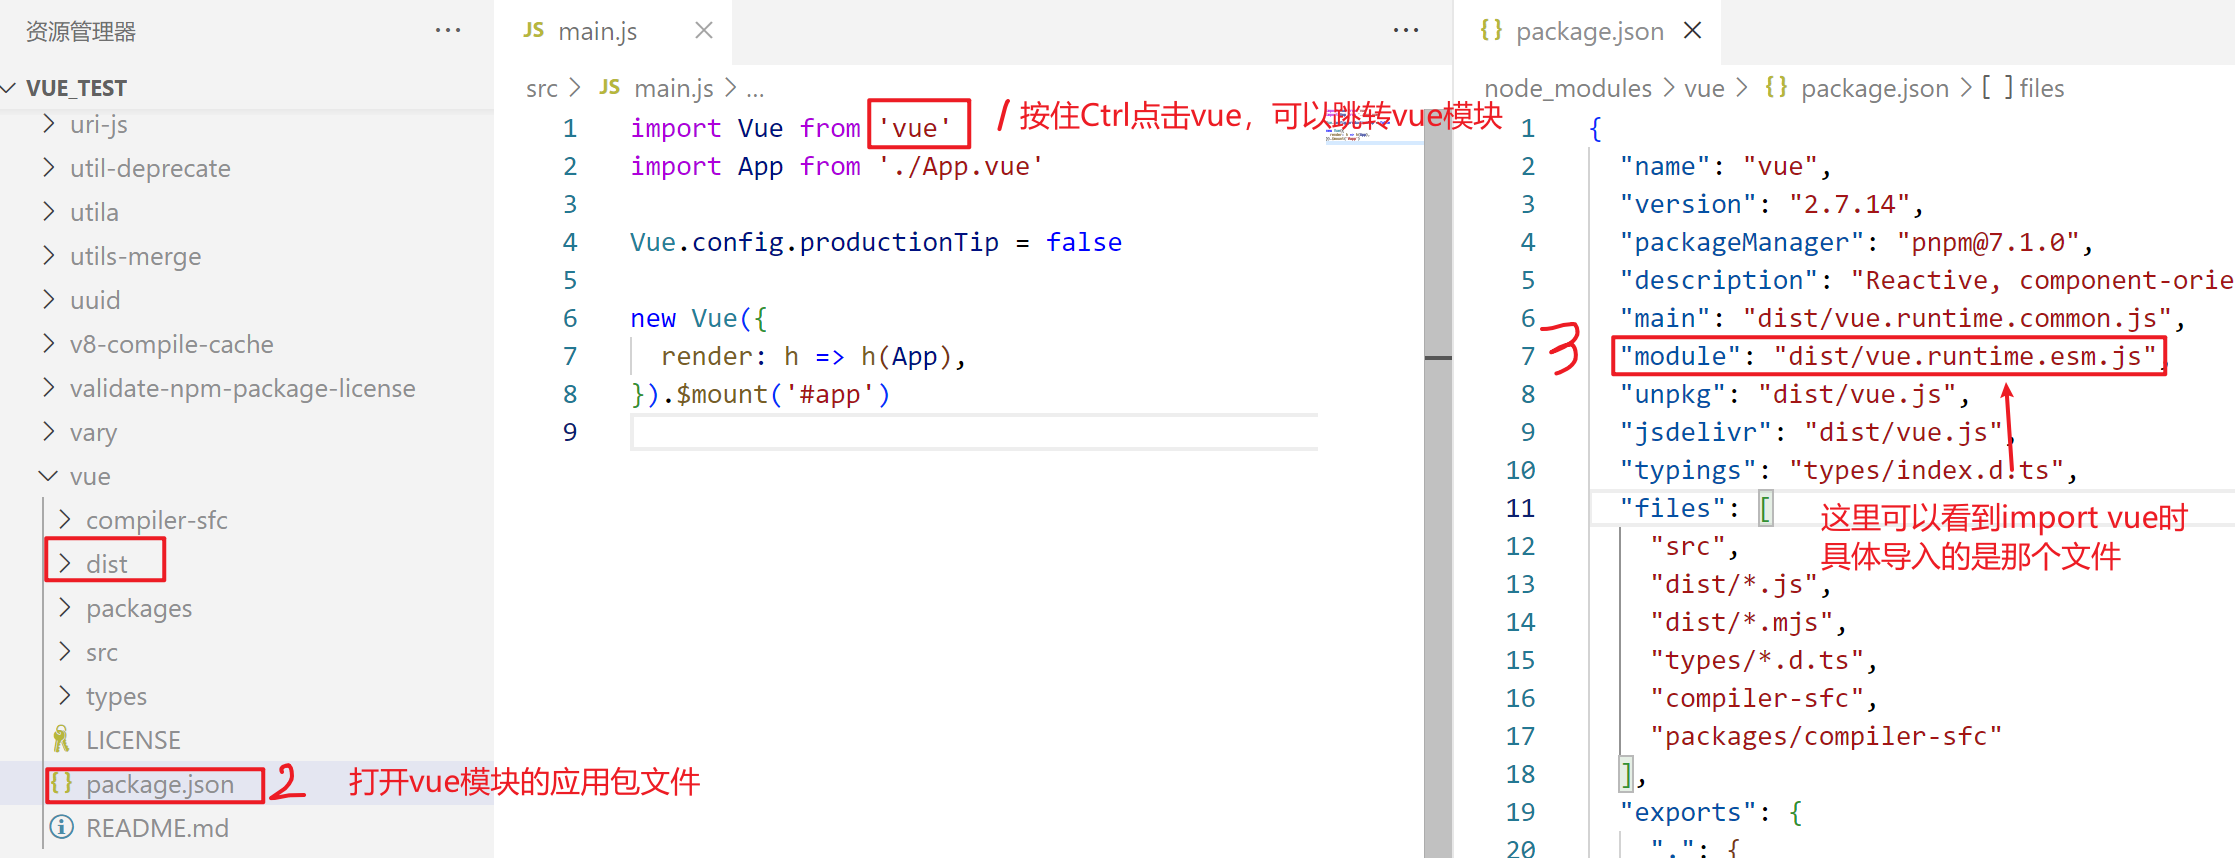
关于不同版本的Vue:
1.vue.js与vue.runtime.xxx.js的区别:
(1).vue.js是完整版的Vue,包含:核心功能+模板解析器。
(2).vue.runtime.xxx.js是运行版的Vue,只包含:核心功能;没有模板解析器。
2.因为vue.runtime.xxx.js没有模板解析器,所以不能使用template配置项,需要使用render函数接收到的createElement函数去指定具体内容。
render
import Vue from 'vue'
new Vue({
  //render的完整写法,作用就是去创建元素
  render(createElement){
    return createElement('h1','你好啊')//创建一个h1元素
  },
// render: h => h(App),//箭头函数写法
// render: h => h('<template><h1>你好<h1/></template>'),//错误
}).$mount('#app')
vue.config.js
在脚手架的默认配置中,定义了main.js为程序的入口,public/index.html为主页面等。
可以通过vue.config.js来进行修改,查看配置详情
查看脚手架的默认配置
//将默认配置输出到output.js文件中
vue inspect > output.js
代码执行顺序
npm run serve后
执行main.js → import vue →import App → 创建Vue并在容器中渲染(index.html)

 浙公网安备 33010602011771号