Java API之增删改操作
1、项目搭建
Elasticsearch 软件是由 Java 语言开发的,所以也可以通过 Java API 的方式对 Elasticsearch服务进行访问。
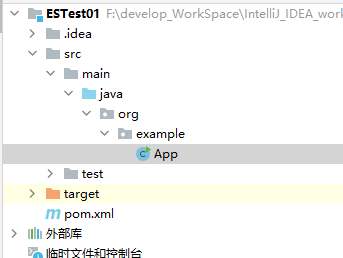
先 IDEA 开发工具中创建简单的 java se Maven 项目(模块也可),如下:
修改 pom 文件,增加 Maven 依赖关系如下:

- <dependencies>
- <dependency>
- <groupId>junit</groupId>
- <artifactId>junit</artifactId>
- <version>4.11</version>
- <scope>test</scope>
- </dependency>
- <dependency>
- <groupId>org.elasticsearch</groupId>
- <artifactId>elasticsearch</artifactId>
- <version>7.8.0</version>
- </dependency>
- <!-- elasticsearch 的客户端 -->
- <dependency>
- <groupId>org.elasticsearch.client</groupId>
- <artifactId>elasticsearch-rest-high-level-client</artifactId>
- <version>7.8.0</version>
- </dependency>
- <!-- elasticsearch 依赖 2.x 的 log4j -->
- <dependency>
- <groupId>org.apache.logging.log4j</groupId>
- <artifactId>log4j-api</artifactId>
- <version>2.8.2</version>
- </dependency>
- <dependency>
- <groupId>org.apache.logging.log4j</groupId>
- <artifactId>log4j-core</artifactId>
- <version>2.8.2</version>
- </dependency>
- <dependency>
- <groupId>com.fasterxml.jackson.core</groupId>
- <artifactId>jackson-databind</artifactId>
- <version>2.9.9</version>
- </dependency>
- </dependencies>
2、Elasticsearch 客户端对象
代码如下:
- import java.io.IOException;
- import org.apache.http.HttpHost;
- import org.elasticsearch.client.RestClient;
- import org.elasticsearch.client.RestHighLevelClient;
- public class HelloElasticsearch {
- public static void main(String[] args) throws IOException {
- // 创建客户端对象
- RestHighLevelClient client = new RestHighLevelClient(
- RestClient.builder(new HttpHost("127.0.0.1", 9200, "http")));
- // ...
- System.out.println("ES客户端对象:" + client);
- // 关闭客户端连接
- client.close();
- }
- }
响应如下:

3、索引操作
3.1、创建索引
- package org.example;
- import org.apache.http.HttpHost;
- import org.elasticsearch.action.admin.indices.create.CreateIndexRequest;
- import org.elasticsearch.action.admin.indices.create.CreateIndexResponse;
- import org.elasticsearch.client.RequestOptions;
- import org.elasticsearch.client.RestClient;
- import org.elasticsearch.client.RestHighLevelClient;
- import java.io.IOException;
- public class CreateIndex {
- public static void main(String[] args) throws IOException {
- // 创建客户端对象
- RestHighLevelClient client = new RestHighLevelClient(
- RestClient.builder(new HttpHost("localhost", 9200, "http")));
- // 创建索引 - 请求对象
- CreateIndexRequest request = new CreateIndexRequest("user2");
- // 发送请求,获取响应
- CreateIndexResponse response = client.indices().create(request,
- RequestOptions.DEFAULT);
- boolean acknowledged = response.isAcknowledged();
- // 响应状态
- System.out.println("操作状态 = " + acknowledged);
- // 关闭客户端连接
- client.close();
- }
- }
响应如下:

再次查看索引可以看到已新建了该索引。
3.2、查询索引
- import org.apache.http.HttpHost;
- import org.elasticsearch.client.RequestOptions;
- import org.elasticsearch.client.RestClient;
- import org.elasticsearch.client.RestHighLevelClient;
- import org.elasticsearch.client.indices.GetIndexRequest;
- import org.elasticsearch.client.indices.GetIndexResponse;
- import java.io.IOException;
- public class SearchIndex {
- public static void main(String[] args) throws IOException {
- // 创建客户端对象
- RestHighLevelClient client = new RestHighLevelClient(
- RestClient.builder(new HttpHost("localhost", 9200, "http")));
- // 查询索引 - 请求对象
- GetIndexRequest request = new GetIndexRequest("user2");
- // 发送请求,获取响应
- GetIndexResponse response = client.indices().get(request,
- RequestOptions.DEFAULT);
- System.out.println("aliases:"+response.getAliases());
- System.out.println("mappings:"+response.getMappings());
- System.out.println("settings:"+response.getSettings());
- client.close();
- }
- }
响应如下:

3.3、删除索引
- import org.apache.http.HttpHost;
- import org.elasticsearch.action.admin.indices.delete.DeleteIndexRequest;
- import org.elasticsearch.action.support.master.AcknowledgedResponse;
- import org.elasticsearch.client.RequestOptions;
- import org.elasticsearch.client.RestClient;
- import org.elasticsearch.client.RestHighLevelClient;
- import java.io.IOException;
- public class DeleteIndex {
- public static void main(String[] args) throws IOException {
- RestHighLevelClient client = new RestHighLevelClient(
- RestClient.builder(new HttpHost("localhost", 9200, "http")));
- // 删除索引 - 请求对象
- DeleteIndexRequest request = new DeleteIndexRequest("user2");
- // 发送请求,获取响应
- AcknowledgedResponse response = client.indices().delete(request,RequestOptions.DEFAULT);
- // 操作结果
- System.out.println("操作结果 : " + response.isAcknowledged());
- client.close();
- }
- }
响应如下:

4、文档操作
由于频繁使用连接 Elasticsearch 和关闭它的代码,于是先对它进行重构。注意,项目 jdk 需保证在 1.8 或以上才能使用下面的 lambda 语法。
- package org.util;
- import org.elasticsearch.client.RestHighLevelClient;
- public interface ElasticsearchTask {
- void doSomething(RestHighLevelClient client) throws Exception;
- }
- package org.util;
- import org.apache.http.HttpHost;
- import org.elasticsearch.client.RestClient;
- import org.elasticsearch.client.RestHighLevelClient;
- public class ConnectElasticsearch{
- public static void connect(ElasticsearchTask task){
- // 创建客户端对象
- RestHighLevelClient client = new RestHighLevelClient(
- RestClient.builder(new HttpHost("localhost", 9200, "http")));
- try {
- task.doSomething(client);
- // 关闭客户端连接
- client.close();
- } catch (Exception e) {
- e.printStackTrace();
- }
- }
- }
4.1、新增文档
先创建一个实体类,如下:
- package org.entity;
- public class User {
- private String name; private Integer age; private String sex;
- public String getName() { return name; }
- public void setName(String name){ this.name = name; }
- public Integer getAge() { return age; }
- public void setAge(Integer age) { this.age = age; }
- public String getSex() { return sex; }
- public void setSex(String sex) { this.sex = sex; }
- }
新增文档:
- package org.example;
- import com.fasterxml.jackson.databind.ObjectMapper;
- import org.elasticsearch.action.index.IndexRequest;
- import org.elasticsearch.action.index.IndexResponse;
- import org.elasticsearch.client.RequestOptions;
- import org.elasticsearch.common.xcontent.XContentType;
- import org.entity.User;
- import org.util.ConnectElasticsearch;
- public class InsertDoc {
- public static void main(String[] args) {
- ConnectElasticsearch.connect(client -> {
- // 新增文档 - 请求对象
- IndexRequest request = new IndexRequest();
- // 设置索引及唯一性标识
- request.index("user").id("1001");
- // 创建数据对象
- User user = new User();
- user.setName("zhangsan");
- user.setAge(30);
- user.setSex("男");
- ObjectMapper objectMapper = new ObjectMapper();
- String productJson = objectMapper.writeValueAsString(user);
- // 添加文档数据,数据格式为 JSON 格式
- request.source(productJson, XContentType.JSON);
- // 客户端发送请求,获取响应对象
- IndexResponse response = client.index(request, RequestOptions.DEFAULT);
- //3.打印结果信息
- System.out.println("_index:" + response.getIndex());
- System.out.println("_id:" + response.getId());
- System.out.println("_result:" + response.getResult());
- });
- }
- }
输出如下:

通过查询文档也可以查看到已经成功创建该文档。
4.2、删除文档
- import org.elasticsearch.action.delete.DeleteRequest;
- import org.elasticsearch.action.delete.DeleteResponse;
- import org.elasticsearch.client.RequestOptions;
- import org.util.ConnectElasticsearch;
- public class DeleteDoc {
- public static void main(String[] args) {
- ConnectElasticsearch.connect(client -> {
- //创建请求对象
- DeleteRequest request = new DeleteRequest().index("user").id("1001");
- //客户端发送请求,获取响应对象
- DeleteResponse response = client.delete(request, RequestOptions.DEFAULT);
- //打印信息
- System.out.println(response.toString());
- });
- }
- }
输出如下:

执行过后再次查询会发现已经无法查询到该文档。
4.3、修改文档
下面修改文档字段值:
- import org.elasticsearch.action.update.UpdateRequest;
- import org.elasticsearch.action.update.UpdateResponse;
- import org.elasticsearch.client.RequestOptions;
- import org.elasticsearch.common.xcontent.XContentType;
- import org.util.ConnectElasticsearch;
- public class UpdateDoc {
- public static void main(String[] args) {
- ConnectElasticsearch.connect(client -> {
- // 修改文档 - 请求对象
- UpdateRequest request = new UpdateRequest();
- // 配置修改参数
- request.index("user").id("1001");
- // 设置请求体,对数据进行修改
- request.doc(XContentType.JSON, "sex", "女");
- // 客户端发送请求,获取响应对象
- UpdateResponse response = client.update(request, RequestOptions.DEFAULT);
- System.out.println("_index:" + response.getIndex());
- System.out.println("_id:" + response.getId());
- System.out.println("_result:" + response.getResult());
- });
- }
- }
输出如下:

4.4、批量操作
4.4.1、批量新增
- import org.elasticsearch.action.bulk.BulkRequest;
- import org.elasticsearch.action.bulk.BulkResponse;
- import org.elasticsearch.action.index.IndexRequest;
- import org.elasticsearch.client.RequestOptions;
- import org.elasticsearch.common.xcontent.XContentType;
- import org.util.ConnectElasticsearch;
- public class BatchInsertDoc {
- public static void main(String[] args) {
- ConnectElasticsearch.connect(client -> {
- //创建批量新增请求对象
- BulkRequest request = new BulkRequest();
- request.add(new
- IndexRequest().index("user").id("1001").source(XContentType.JSON, "name",
- "zhangsan"));
- request.add(new
- IndexRequest().index("user").id("1002").source(XContentType.JSON, "name",
- "lisi"));
- request.add(new
- IndexRequest().index("user").id("1003").source(XContentType.JSON, "name",
- "wangwu"));
- //客户端发送请求,获取响应对象
- BulkResponse responses = client.bulk(request, RequestOptions.DEFAULT);
- //打印结果信息
- System.out.println("took:" + responses.getTook());
- System.out.println("items:" + responses.getItems());
- });
- }
- }
输出如下:

4.4.2、批量删除
- import org.elasticsearch.action.bulk.BulkRequest;
- import org.elasticsearch.action.bulk.BulkResponse;
- import org.elasticsearch.action.delete.DeleteRequest;
- import org.elasticsearch.client.RequestOptions;
- import org.util.ConnectElasticsearch;
- public class BatchDeleteDoc {
- public static void main(String[] args) {
- ConnectElasticsearch.connect(client -> {
- //创建批量删除请求对象
- BulkRequest request = new BulkRequest();
- request.add(new DeleteRequest().index("user").id("1001"));
- request.add(new DeleteRequest().index("user").id("1002"));
- request.add(new DeleteRequest().index("user").id("1003"));
- //客户端发送请求,获取响应对象
- BulkResponse responses = client.bulk(request, RequestOptions.DEFAULT);
- //打印结果信息
- System.out.println("took:" + responses.getTook());
- System.out.println("items:" + responses.getItems());
- });
- }
- }
输出如下:


【推荐】国内首个AI IDE,深度理解中文开发场景,立即下载体验Trae
【推荐】编程新体验,更懂你的AI,立即体验豆包MarsCode编程助手
【推荐】抖音旗下AI助手豆包,你的智能百科全书,全免费不限次数
【推荐】轻量又高性能的 SSH 工具 IShell:AI 加持,快人一步
· TypeScript + Deepseek 打造卜卦网站:技术与玄学的结合
· 阿里巴巴 QwQ-32B真的超越了 DeepSeek R-1吗?
· 【译】Visual Studio 中新的强大生产力特性
· 10年+ .NET Coder 心语 ── 封装的思维:从隐藏、稳定开始理解其本质意义
· 【设计模式】告别冗长if-else语句:使用策略模式优化代码结构