Nginx配置反向代理
1、准备工作
1.1、Linux上安装tomcat
首先需下载 tomcat 安装包,可参考:https://www.cnblogs.com/wenxuehai/p/14133196.html#_label2,注意,下载 tar.gz 格式的安装包。
将安装包上传至 Linux 系统的 /usr/src 目录下,通过 SSH Secure File Transfer Client 工具可以很方便地将本地的 tomcat 压缩包上传至 Linux 系统。
然后通过 tar -xvf 文件名 命令将压缩包解压即可。
1.2、启动 tomcat
切换至 tomcat 目录下的 bin 目录,然后通过 ./startup.sh 命令打开该脚本文件,启动tomcat。
实例:

注意,Linux 系统中默认自动安装了 java,如果没有,我们需要自己安装。

1.2.1、校验启动是否成功
tomcat 启动过后,我们可以在本地 window 的浏览器中通过 linux系统的IP:8080 来访问 tomcat 的默认 ROOT 项目:
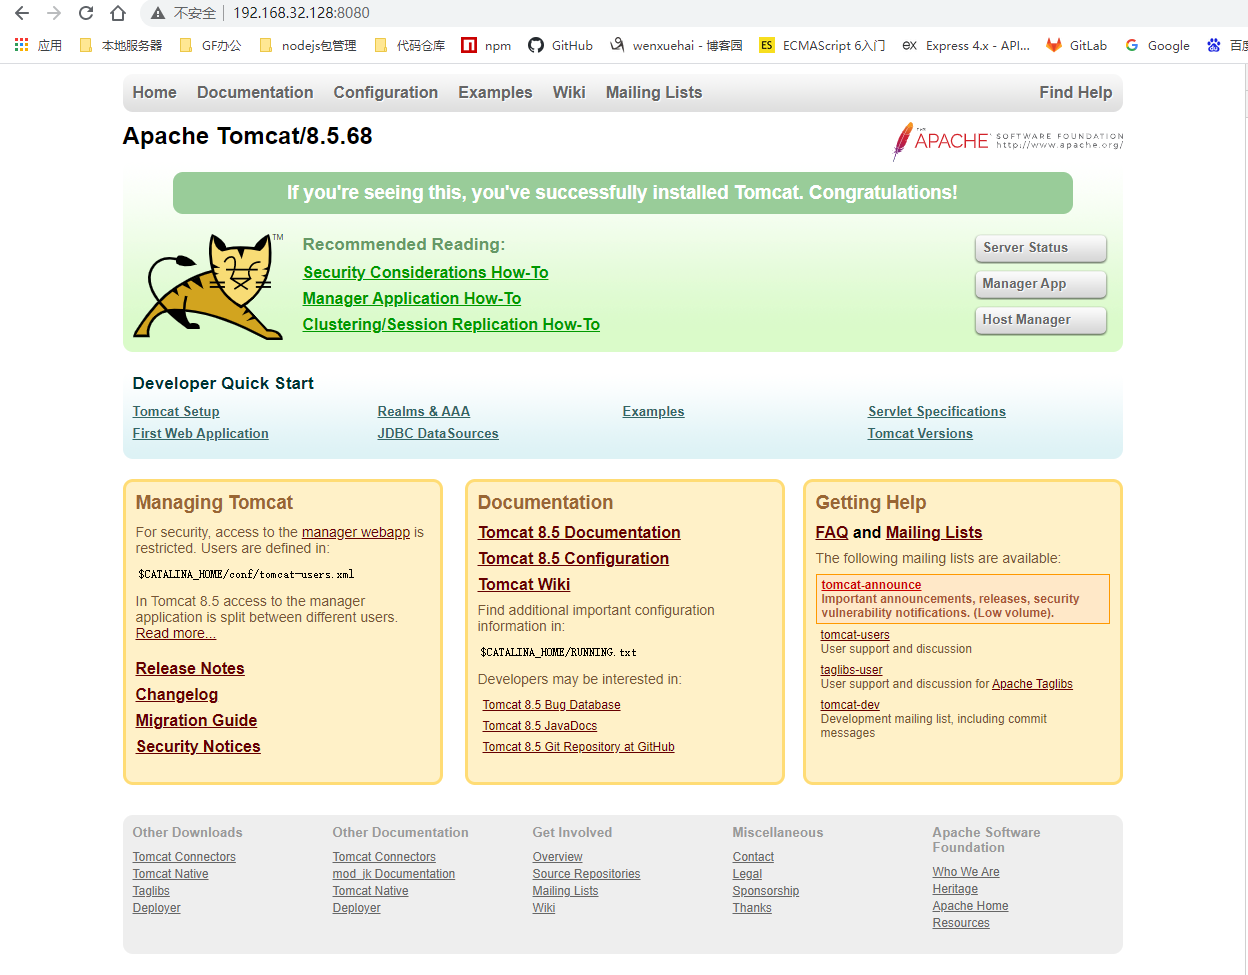
如果访问失败,则可能是 Linux 中未开启 8080 端口的对外访问,此时需开启该端口的对外访问。
通过 firewall-cmd --add-port=8080/tcp --permanent 命令开启端口,通过 firewall-cmd --list-all 命令可查看已开启的端口。实例如下:

1.2.2、查看tomcat的日志文件
在启动过后,我们可以查看 tomcat 的日志文件,看启动是否正常。
首先需切换至 tomcat 根目录下的 logs 目录,然后通过 tail -f 文件名 命令来查看该文件夹下的 catalina.out 文件。
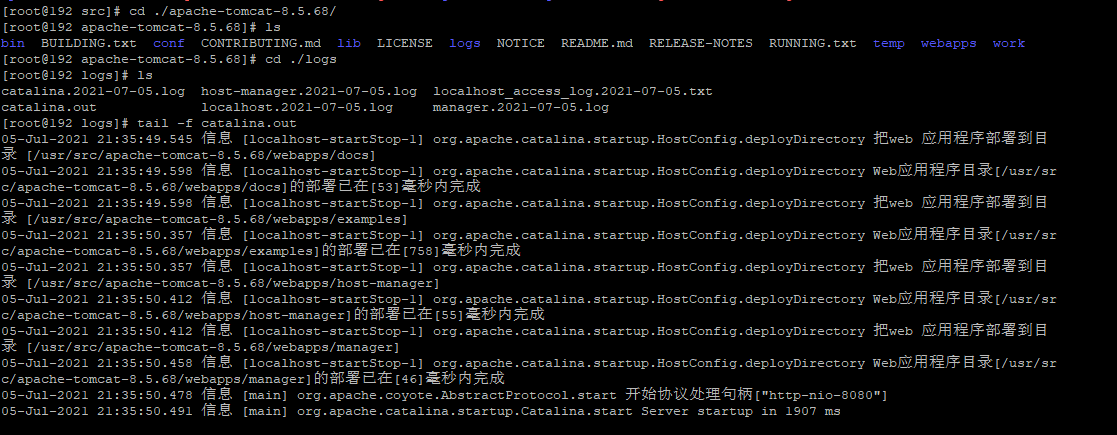
可以看到,tomcat 已正常启动。
2、反向代理分析
Nginx 的反向代理原理图:
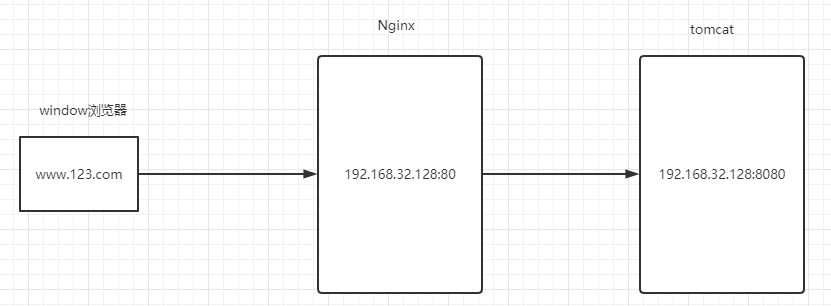
我们需要实现的效果是,在本地访问 www.123.com 能直接访问到 tomcat 里面的项目。首先我们是先访问了 Nginx 服务器,通过 Nginx 的反向代理,最后访问到 tomcat 里面的资源。由此实现了反向代理,客户端无法感知到实际上访问到的服务器。
因为我们把 Nginx 和 tomcat 安装在了同一台服务器上,所以代理后的结果只是改了一个端口号。
3、修改本地的hosts文件
首先如何通过访问 www.123.com 能映射到我们的 Linux 服务器地址呢?此时我们修改本地 window 系统中的 hosts 文件。
hosts 文件的作用:用户在浏览器中输入一个网址时,系统会首先自动从本地的 Hosts 文件中寻找对应的IP地址,一旦找到,系统会立即通过对应的 ip 来打开对应网页。如果没有找到,则系统会将网址提交至因特网,由因特网中的 域名系统DNS 进行DNS域名解析,由此获得相应的IP地址。
所以我们在本地修改 hosts 文件,来将 www.123.com 映射到我们的 Linux ip 地址。本地访问 www.123.com 实际就能访问到 Linux 系统。
hosts 文件放在系统的 C:\Windows\System32\drivers\etc 目录下:

直接修改该文件,在该文件的后面添加从 www.123.com 到 Linux 系统的 ip 的映射,格式:ip 域名
如下:
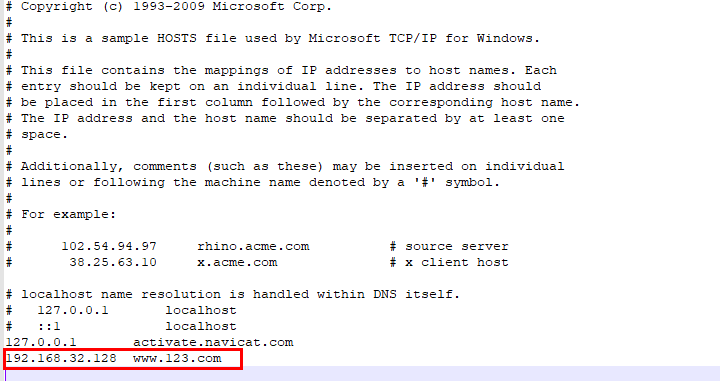
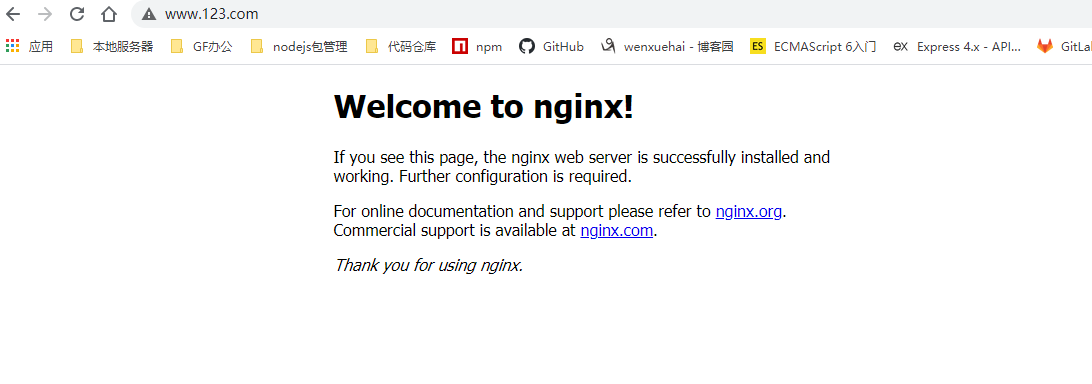
修改完之后,在 window 本地浏览器可以通过 www.123.com:80 访问到 Nginx:
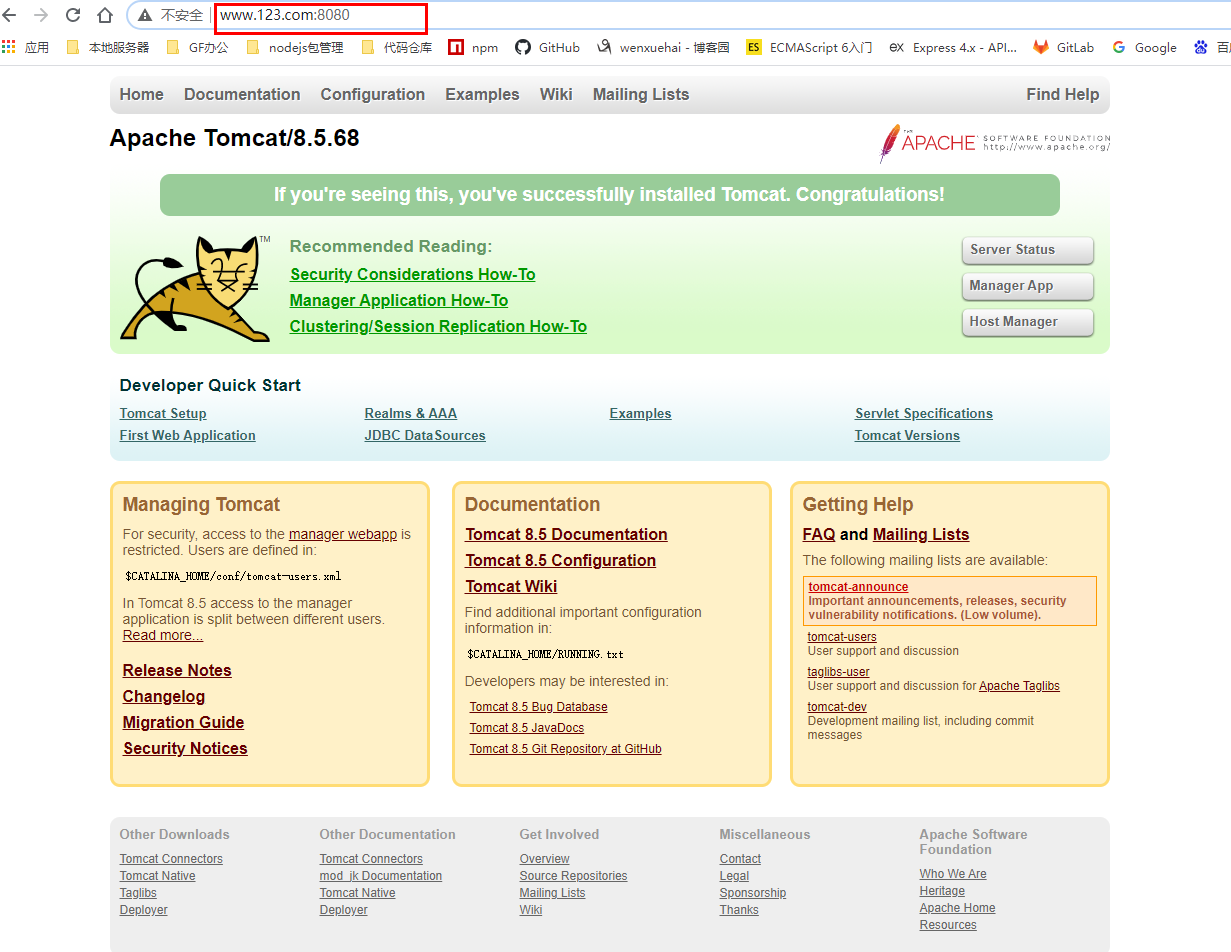
也可以通过 www.123.com:8080 访问到 tomcat 项目:
3.1、无法保存hosts文件
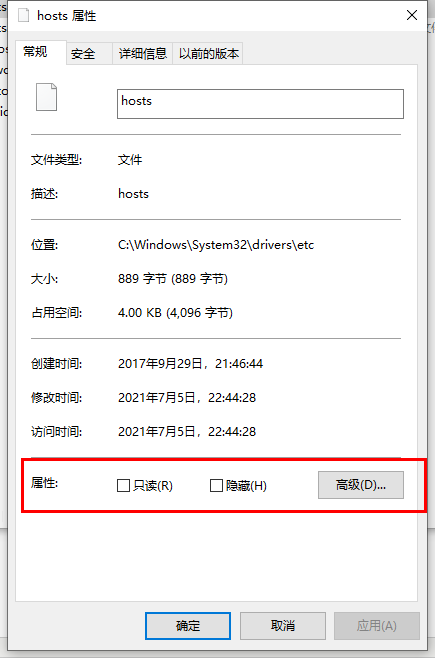
修改 hosts 文件可能无法保存或者提示没有权限,此时可参考:http://www.xitongcheng.com/jiaocheng/win10_article_12937.html 修改权限,然后还需在该文件的属性将只读选项取消掉,如下:
4、配置Nginx反向代理
通过修改 Nginx 的配置文件可以实现反向代理。
首先切换至 Nginx 的安装目录下。之前我们是把 Nginx 的安装包放在了 /usr/src 目录下进行安装操作,安装成功后 Nginx 的安装目录会在 /usr/local 上。Linux 系统中,一般程序安装完成后,都会安装在 /usr/local 目录下。
在 Nginx 的安装目录找到下 conf 文件夹,该文件夹下的 nginx.conf 文件即是 Nginx 的配置文件,通过 vi 来直接修改:

通过 vi 命令打开 nginx.conf 文件我们就可以进行修改。首先按 i 进行插入,然后进行修改,修改完成后通过 :wq 命令来保存并退出。
修改内容:
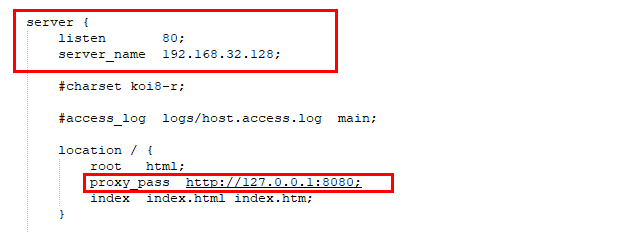
proxy_pass 后面配置的就是代理转发的路径,我们也可以将 proxy_pass 后面的一串改为: http://192.168.32.128:8080;
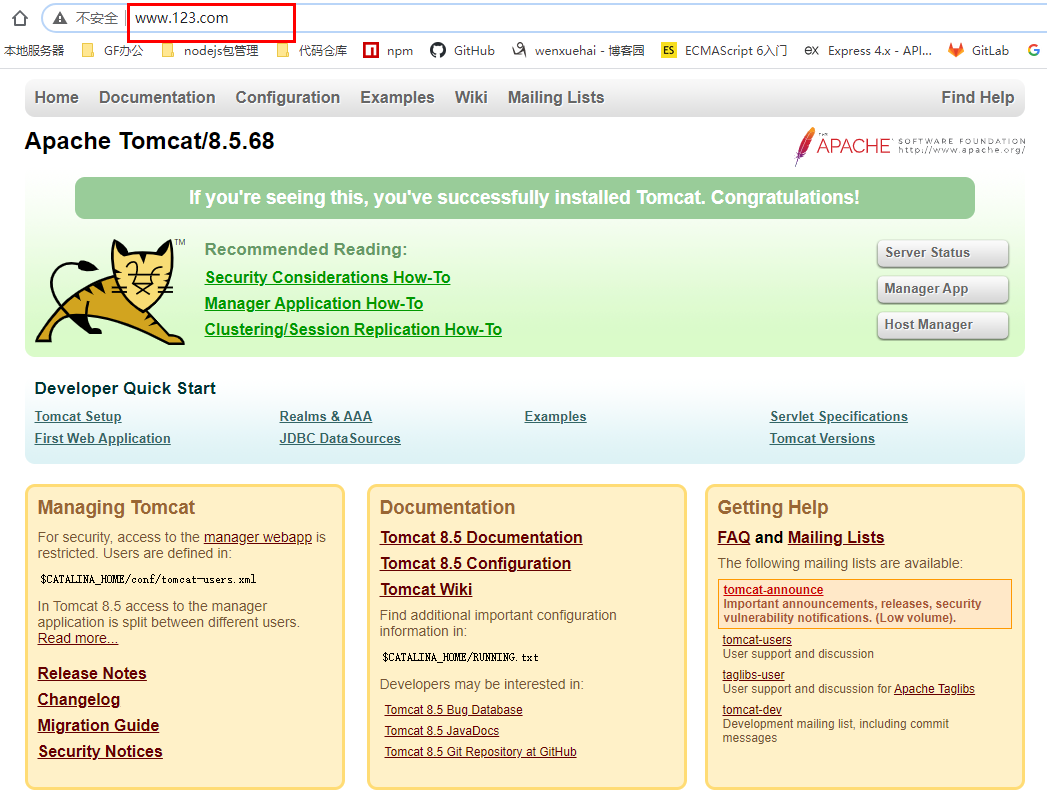
配置完之后,我们就可以通过 ww.123.com 来直接能访问到 tomcat 项目,而不是访问到 Nginx,因为此时已经经过了代理转发。
4.1、完整的nginx.conf配置文件
完整 nginx.conf 文件如下:
#user  nobody;
worker_processes  1;

#error_log  logs/error.log;
#error_log  logs/error.log  notice;
#error_log  logs/error.log  info;

#pid        logs/nginx.pid;


events {
    worker_connections  1024;
}


http {
    include       mime.types;
    default_type  application/octet-stream;

    #log_format  main  '$remote_addr - $remote_user [$time_local] "$request" '
    #                  '$status $body_bytes_sent "$http_referer" '
    #                  '"$http_user_agent" "$http_x_forwarded_for"';

    #access_log  logs/access.log  main;

    sendfile        on;
    #tcp_nopush     on;

    #keepalive_timeout  0;
    keepalive_timeout  65;

    #gzip  on;

    server {
        listen       80;
        server_name  192.168.32.128;

        #charset koi8-r;

        #access_log  logs/host.access.log  main;

        location / {
            root   html;
            proxy_pass  http://127.0.0.1:8080;
            index  index.html index.htm;
        }

        #error_page  404              /404.html;

        # redirect server error pages to the static page /50x.html
        #
        error_page   500 502 503 504  /50x.html;
        location = /50x.html {
            root   html;
        }

        # proxy the PHP scripts to Apache listening on 127.0.0.1:80
        #
        #location ~ \.php$ {
        #    proxy_pass   http://127.0.0.1;
        #}

        # pass the PHP scripts to FastCGI server listening on 127.0.0.1:9000
        #
        #location ~ \.php$ {
        #    root           html;
        #    fastcgi_pass   127.0.0.1:9000;
        #    fastcgi_index  index.php;
        #    fastcgi_param  SCRIPT_FILENAME  /scripts$fastcgi_script_name;
        #    include        fastcgi_params;
        #}

        # deny access to .htaccess files, if Apache's document root
        # concurs with nginx's one
        #
        #location ~ /\.ht {
        #    deny  all;
        #}
    }


    # another virtual host using mix of IP-, name-, and port-based configuration
    #
    #server {
    #    listen       8000;
    #    listen       somename:8080;
    #    server_name  somename  alias  another.alias;

    #    location / {
    #        root   html;
    #        index  index.html index.htm;
    #    }
    #}


    # HTTPS server
    #
    #server {
    #    listen       443 ssl;
    #    server_name  localhost;

    #    ssl_certificate      cert.pem;
    #    ssl_certificate_key  cert.key;

    #    ssl_session_cache    shared:SSL:1m;
    #    ssl_session_timeout  5m;

    #    ssl_ciphers  HIGH:!aNULL:!MD5;
    #    ssl_prefer_server_ciphers  on;

    #    location / {
    #        root   html;
    #        index  index.html index.htm;
    #    }
    #}

}
5、配置根据不同URL代理到不同路径
上面的 Nginx 配置将 Nginx 服务器的 80 端口的请求转发至 Nginx 服务器 8080 端口。实际上,在 Nginx 的配置当中,http 中可以有多个 server 选项,并且一个 server 选项中也可以有多个 location,可以配置不同的 location 代理转发至不同的路径。
比如想要代理多个项目,不同的 url 就代理转发至不同的项目的服务器地址。
下面的流程图是在跟同一台 Nginx 服务器上启动了两个 tomcat 来模拟两台不同的服务器:
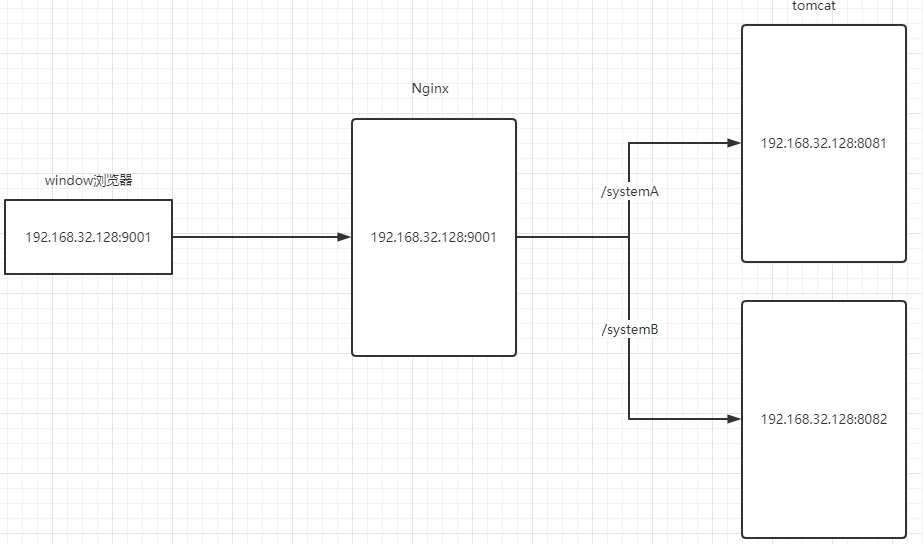
Nginx 作为代理服务器,我们希望达到的效果是 Nginx 匹配到不同的路径能代理转发至不同的地址。
实现步骤如下:
先在 Nginx 服务器上启动两个 tomcat,分别是 tomcatA 和 tomcatB。同台服务器上有多个 tomcat ,需要注意修改 tomcat 的端口以免冲突,不仅仅是 8080 端口,其他端口也需一并修改否则会有冲突。
然后我们在 8081 端口的 tomcatA 服务器的 webapps 新建一个 systemA 的项目,在 8082 端口的 tomcatB 服务器的 webapps 新建一个 systemB 的项目。
最后修改 Nginx 的配置,增加一个 server 模块,监听 9001 端口:
server {
    listen       9001;
    server_name  192.168.32.128;

    location ~ /systemA/ {
        proxy_pass  http://127.0.0.1:8081;
    }

    location ~ /systemB/ {
        proxy_pass  http://127.0.0.1:8082;
    }
}
此时,我们访问 http://192.168.32.128:9091/systemA 将会访问 tomcatA 的 systemA 项目,访问 http://192.168.32.128:9091/systemB 将会访问 tomcatB 的 systemB 项目。
我们可以发现,Nginx 在进行代理转发时,只是将配置的目标 url 替代监听 ip 地址和端口号,后面的路由等部分(比如上面的 /systemA)仍会拼接到浏览器最终访问的 url 中进行访问资源。
5.1、完整的配置文件
Nginx完整配置文件:
#user  nobody;
worker_processes  1;

#error_log  logs/error.log;
#error_log  logs/error.log  notice;
#error_log  logs/error.log  info;

#pid        logs/nginx.pid;


events {
    worker_connections  1024;
}


http {
    include       mime.types;
    default_type  application/octet-stream;

    #log_format  main  '$remote_addr - $remote_user [$time_local] "$request" '
    #                  '$status $body_bytes_sent "$http_referer" '
    #                  '"$http_user_agent" "$http_x_forwarded_for"';

    #access_log  logs/access.log  main;

    sendfile        on;
    #tcp_nopush     on;

    #keepalive_timeout  0;
    keepalive_timeout  65;

    #gzip  on;

    server {
        listen       80;
        server_name  192.168.32.128;

        #charset koi8-r;

        #access_log  logs/host.access.log  main;

        location / {
            root   html;
            proxy_pass  http://127.0.0.1:8080;
            index  index.html index.htm;
        }

        #error_page  404              /404.html;

        # redirect server error pages to the static page /50x.html
        #
        error_page   500 502 503 504  /50x.html;
        location = /50x.html {
            root   html;
        }

        # proxy the PHP scripts to Apache listening on 127.0.0.1:80
        #
        #location ~ \.php$ {
        #    proxy_pass   http://127.0.0.1;
        #}

        # pass the PHP scripts to FastCGI server listening on 127.0.0.1:9000
        #
        #location ~ \.php$ {
        #    root           html;
        #    fastcgi_pass   127.0.0.1:9000;
        #    fastcgi_index  index.php;
        #    fastcgi_param  SCRIPT_FILENAME  /scripts$fastcgi_script_name;
        #    include        fastcgi_params;
        #}

        # deny access to .htaccess files, if Apache's document root
        # concurs with nginx's one
        #
        #location ~ /\.ht {
        #    deny  all;
        #}
    }


    # another virtual host using mix of IP-, name-, and port-based configuration
    #
    server {
        listen       9001;
        server_name  192.168.32.128;

        location ~ /systemA/ {
            proxy_pass  http://127.0.0.1:8081;
        }

        location ~ /systemB/ {
            proxy_pass  http://127.0.0.1:8082;
        }
    }


    # HTTPS server
    #
    #server {
    #    listen       443 ssl;
    #    server_name  localhost;

    #    ssl_certificate      cert.pem;
    #    ssl_certificate_key  cert.key;

    #    ssl_session_cache    shared:SSL:1m;
    #    ssl_session_timeout  5m;

    #    ssl_ciphers  HIGH:!aNULL:!MD5;
    #    ssl_prefer_server_ciphers  on;

    #    location / {
    #        root   html;
    #        index  index.html index.htm;
    #    }
    #}

}

