使用vue-cli搭建前端环境
本实例是根据我司项目实际需求搭建,仅供参考, 本博主原创文章, 如有转载, 请备注原文链接
构建项目
- 全局安装vue-cli(本实例中使用的2.9.6)
$ npm install -g vue-cli

- 使用
vue init <template-name> <project-name>
- example
$ vue init webpack my-project

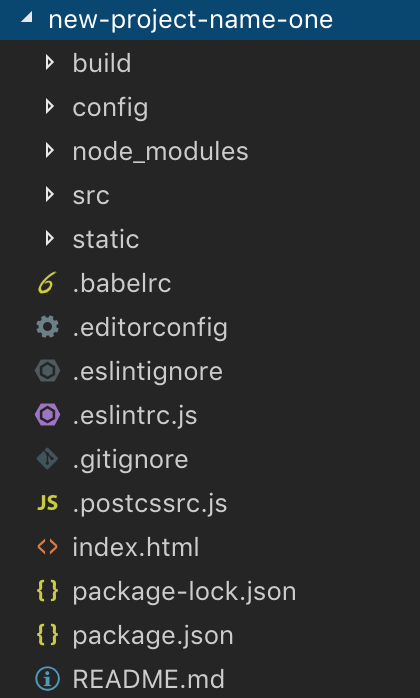
- 项目构建成功,目录如下
- 试运行 npm run dev,可以看到打开vue的欢迎页
按需引入依赖包并 使用
1. element-ui ----饿了么出品的vue2.0 pc UI框架
- 安装
$ npm install element-ui -S

- 使用 在src目录下的main.js引入
import ElementUI from 'element-ui'
import 'element-ui/lib/theme-chalk/index.css'
Vue.use(ElementUI)
2. normalize.css ----格式化css
- 安装
$ npm install normalize.css -S

- 使用 在src目录下的main.js引入
import 'normalize.css/normalize.css'
3. sass ----成熟、稳定和强大的专业级CSS扩展语
- 安装
$ npm install --save-dev sass-loader
//sass-loader依赖于node-sass
$ npm install --save-dev node-sass - 页面使用 ----app.vue中, 在style标签中,将lang="scss"就可以使用scss语法,参考官方链接
<style lang="scss">
备注: 此vue-cli版本,utils已经配置好了sass,勿须像之前的版本,在build文件夹下的webpack.base.conf.js的rules里面添加配置
- 全局配置sass,可使用全局变量
- --在build文件夹下下的utils文件下增加以下函数
  // 配置sass全局变量 全局文件引入 当然只想编译一个文件的话可以省去这个函数
  function resolveResource (name) {
    return path.resolve(__dirname, '../src/style/' + name)
  }
  function generateSassResourceLoader () {
    var loaders = [
      cssLoader,
      'sass-loader',
      {
        loader: 'sass-resources-loader',
        options: {
          // 多个文件时用数组的形式传入,单个文件时可以直接使用 path.resolve(__dirname, '../static/style/common.scss'
          resources: [resolveResource('theme.scss')]
        }
      }
    ]
    if (options.extract) {
      return ExtractTextPlugin.extract({
        use: loaders,
        fallback: 'vue-style-loader'
      })
    } else {
      return ['vue-style-loader'].concat(loaders)
    }
  }
- --在build文件夹下下的utils文件下修改return对象
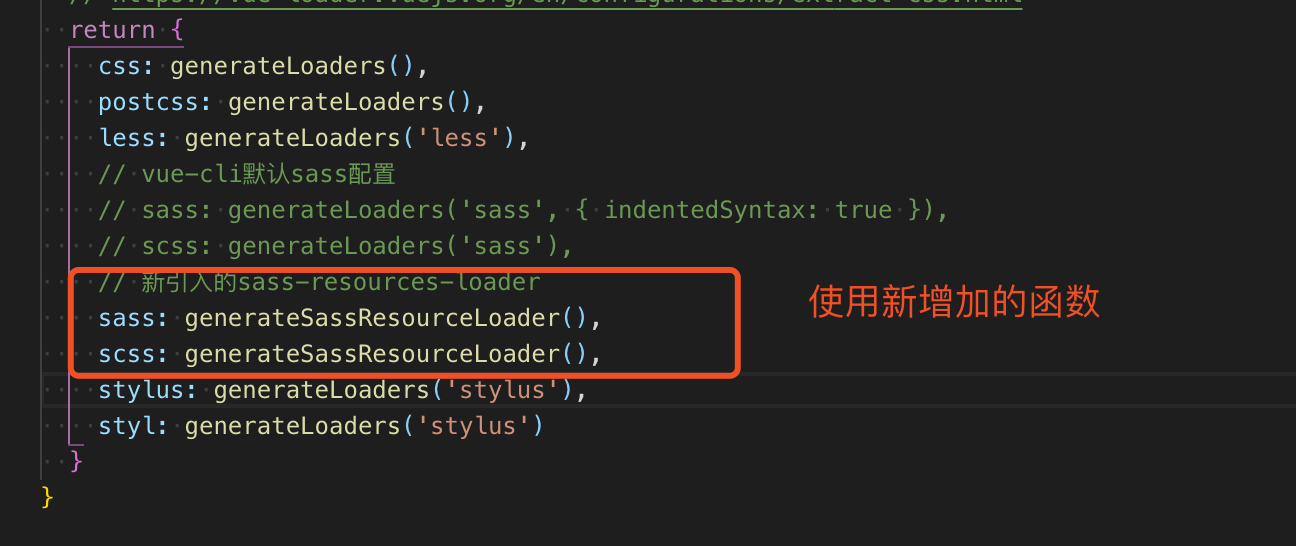
备注: 如果要在全局使用公共变量, 必须执行上面两步,设置全局scss环境
-
全局引用 ---- 在main.js文件中,引入theme.scss
import '@/style/theme.scss' -
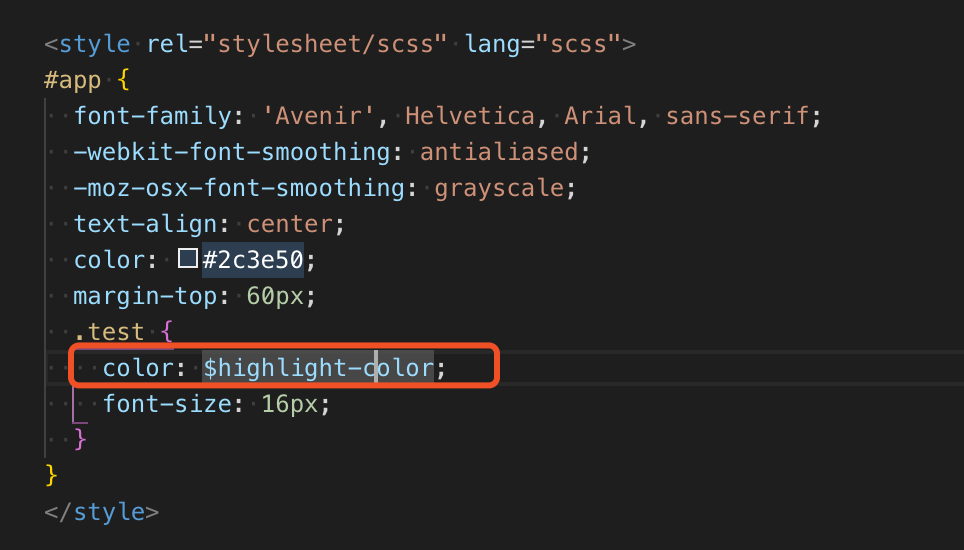
全局使用

- 在theme.scss中,设置一个主题色

- 在APP.vue中使用
4. 引入lodash ---一个一致性、模块化、高性能的 JavaScript 实用工具库 官网链接
-
安装
$ npm i --save lodash

-
引用 ---- 在main.js中引用
import 'lodash'
5. 引入echarts
-
安装
$ npm install echarts --save

-
引用---- 在main.js中引用
import echarts from 'echarts'
Vue.prototype.$echarts = echarts
- 使用

6. 引入axios ---- 一个现在主流并且很好用的请求库 支持Promise 官方链接
-
安装
$ npm install axios

-
使用 第一步 ----首先设置接口请求的反向代理
- 在config文件夹下新增proxyConfig.js文件
module.exports = {
  proxyList: {
    '/apis': {
      target: 'http://google.com/', // 设置你调用的接口域名和端口号 别忘了加http
      // secure: false,// 如果是https接口,需要配置这个参数
      changeOrigin: true,
      pathRewrite: {
        '^/apis': '' // 这里理解成用‘/api’代替target里面的地址,后面组件中我们调接口时直接用api代替, 比如我要调用'http://google.com/user/login',直接写‘/api/user/login
      }
    }
  }
}
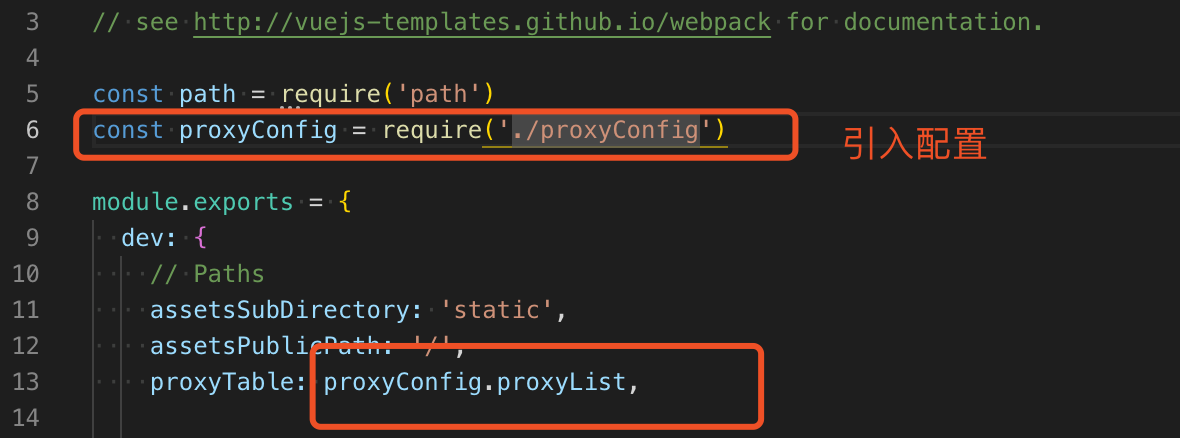
- 在config文件夹下,打开index.js,引入配置使用
- 使用 第二步 在src文件夹下,简历一个新的 api 文件夹, api文件夹下建立一个request.js文件, 用promise封装axios
import http from 'axios'
import router from '@/router'
import {Message} from 'element-ui'
import {loadingInstance} from '@/utils/promptsMethods'

http.defaults.headers = {'Content-Type': 'application/json;charset=utf-8'}
http.defaults.responseType = 'json'
http.defaults.withCredentials = true
http.defaults.timeout = 5000

// 添加请求拦截器
http.interceptors.request.use(function (config) {
  loadingInstance()
  // 在发送请求之前做些什么
  return config
}, function (error) {
  loadingInstance().close()
  // 对请求错误做些什么
  return Promise.reject(error)
})

/*
  // 拦截器可按需设置, 不需要可删除
  // 添加响应拦截器
http.interceptors.response.use(function (response) {
  loadingInstance().close()
  return response
}, function (error) {
  loadingInstance().close()
  // 对响应错误
  if (error.response && error.response.status === 1111) {
    Message.warning('登录已过期! )
    router.push({path: '/login'})
  } else {
    Message.warning('网络异常')
  }
  return Promise.reject(error)
})
*/
export function request (url, data = {}, method = 'post') {
  return new Promise((resolve, reject) => {
    const options = {
      url,
      data,
      method
    }
    http(options)
      .then(res => {
        resolve(res.data)
      })
      .catch(error => {
        reject(error)
      })
  })
}
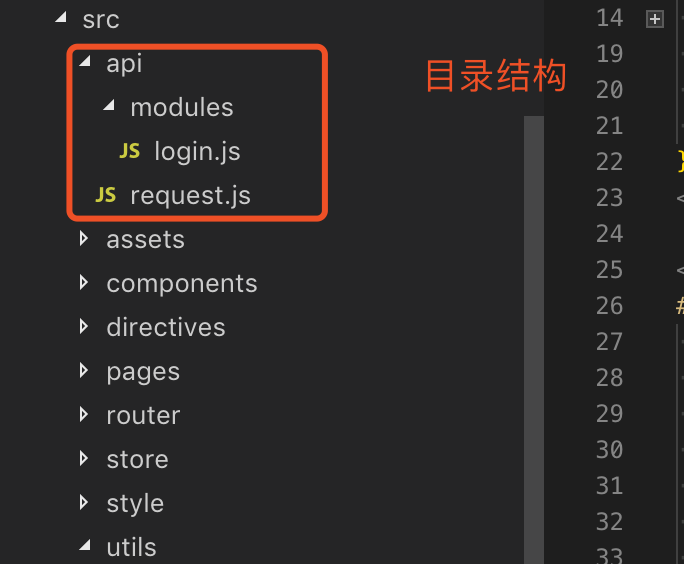
- 使用 第三步 在api文件夹下, 新建 modules 文件夹, 之下建立login.js
import {request} from '../request'

const api = {
  login (params) {
    return request('/apis/user/login', params)
  }
}

export default api
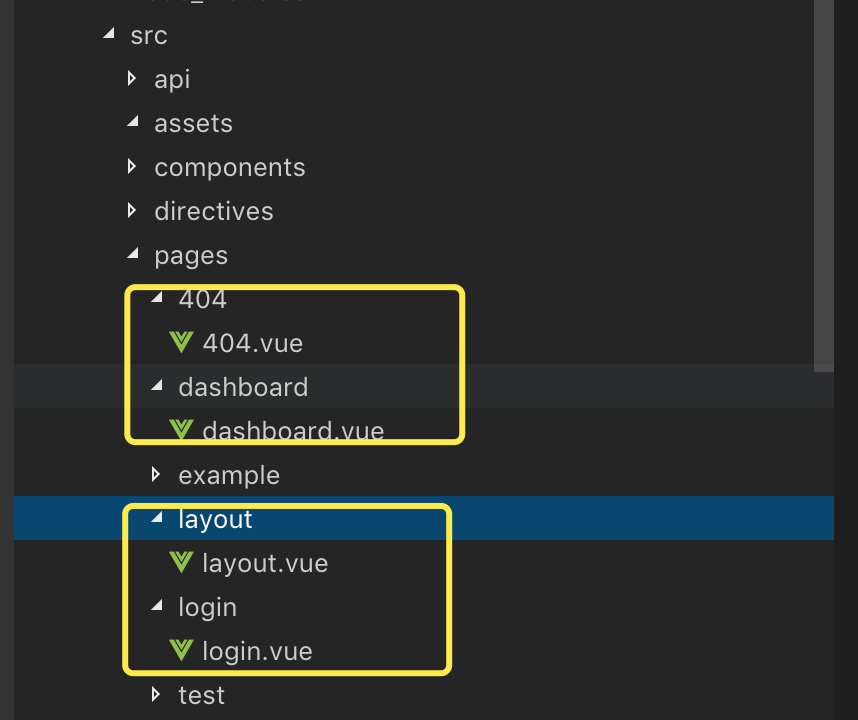
目录结构如下:
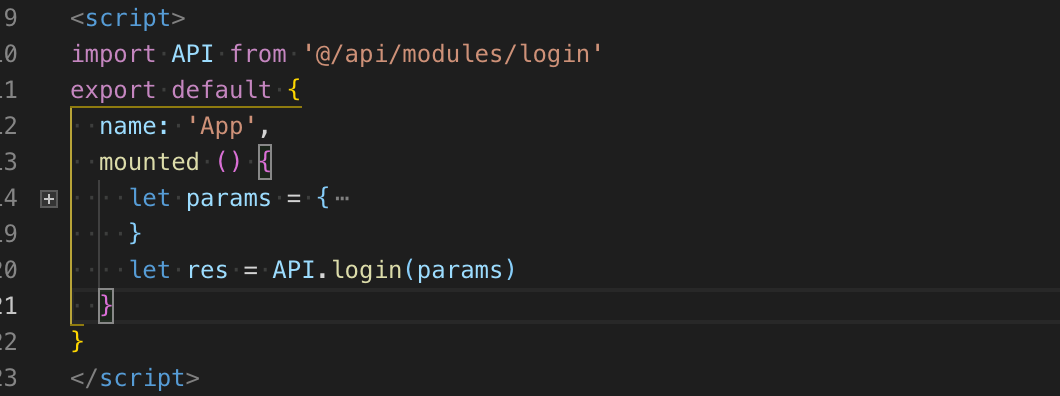
使用 在App.vue中使用
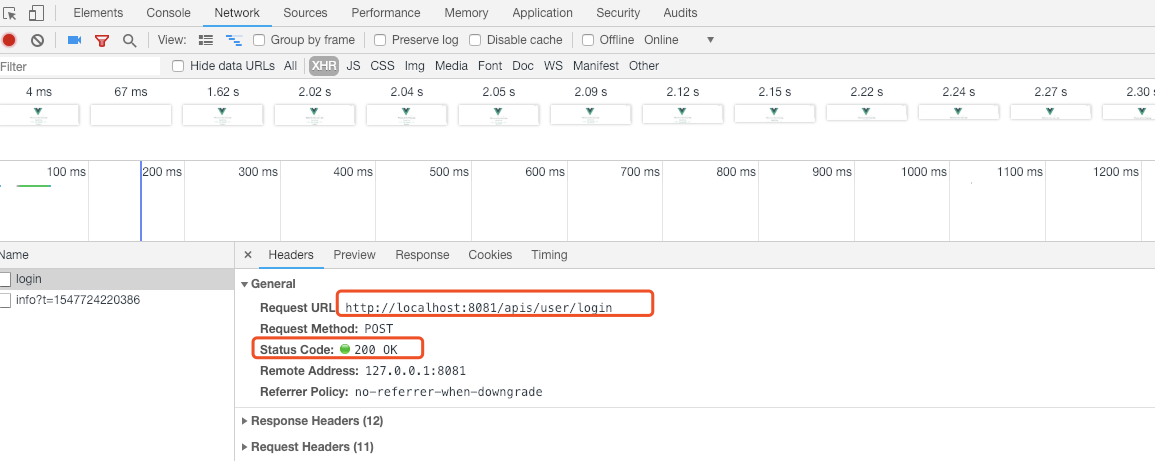
npm run dev 运行查看 login接口调用状态
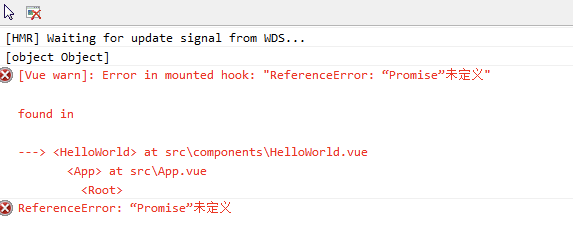
7. 使用 babel-polyfill 来兼容低版本浏览器 (IE 浏览器下)
原因, axios 是基于 promise 来实现的,IE 和低版本的设备不支持 promise。
- 安装
$ npm install babel-polyfill -S
使用, ---- //main.js中引用
import 'babel-polyfill'
在我这个项目当中对axios进行了封装, 所以,移动到 src/api/resuest.js

接着在 webpack.base.conf.js 中,将原来的
entry: {
  app: './src/main.js'
}
替换成
entry: ['babel-polyfill', './src/main.js'],
8. nprogress 进度条
- 安装
$ npm install nprogress

- 引入
配置路由 router
-
第一步: 在src文件夹下新建文件夹=->页面 login / dashboard / 404 /layout
-
第二步 配置路由
//src文件下, 新建router文件夹, 建立index.js
import Vue from 'vue'
import Router from 'vue-router'

import Layout from '@/pages/layout/layout'

/*
* hidden: true                   if `hidden:true` will not show in the sidebar(default is false)
* redirect: noredirect           if `redirect:noredirect` will no redirect in the breadcrumb
* name:'router-name'             the name is used by <keep-alive> (must set!!!)
* meta : {
    title: 'title'               the name show in submenu and breadcrumb (recommend set)
    icon: 'svg-name'             the icon show in the sidebar
    breadcrumb: false            if false, the item will hidden in breadcrumb(default is true)
  }
*/

export const constantRouterMap = [
  {
    path: '/login',
    name: 'Login',
    component: () => import('@/pages/login/login'),
    hidden: true
  },
  {
    path: '/404',
    component: () => import('@/pages/404/404'),
    hidden: true
  },
  {
    path: '/',
    component: Layout,
    redirect: '/dashboard',
    name: 'Dashboard',
    hidden: true,
    children: [
      {
        path: 'dashboard',
        component: () => import('@/pages/dashboard/dashboard')
      }
    ]
  },
  {
    path: '/external-link',
    component: Layout,
    children: [
      {
        path: 'https://panjiachen.github.io/vue-element-admin-site/#/',
        meta: { title: 'External Link', icon: 'link' }
      }
    ]
  },

  { path: '*', redirect: '/404', hidden: true }
]

Vue.use(Router)

export default new Router({
  // mode: 'history', //后端支持可开
  scrollBehavior: () => ({ y: 0 }),
  routes: constantRouterMap
})
- 第三步 配置路由权限
// 在src文件夹下, 新建 permission.js
import router from './router'
import NProgress from 'nprogress' // Progress 进度条
import 'nprogress/nprogress.css'// Progress 进度条样式

const whiteList = ['/login'] // 不重定向白名单
router.beforeEach((to, from, next) => {
  NProgress.start()
  // next()

  if (whiteList.indexOf(to.path) !== -1) {

    next()
  } else {
    next(`/login`) // 否则全部重定向到登录页
    NProgress.done()
  }
})

router.afterEach(() => {
  NProgress.done() // 结束Progress
})
- 第四步 执行命令 npm run dev 到登录页面

目录结构 (此时,上面未提及的未配置的文件夹是之后要继续配置的)
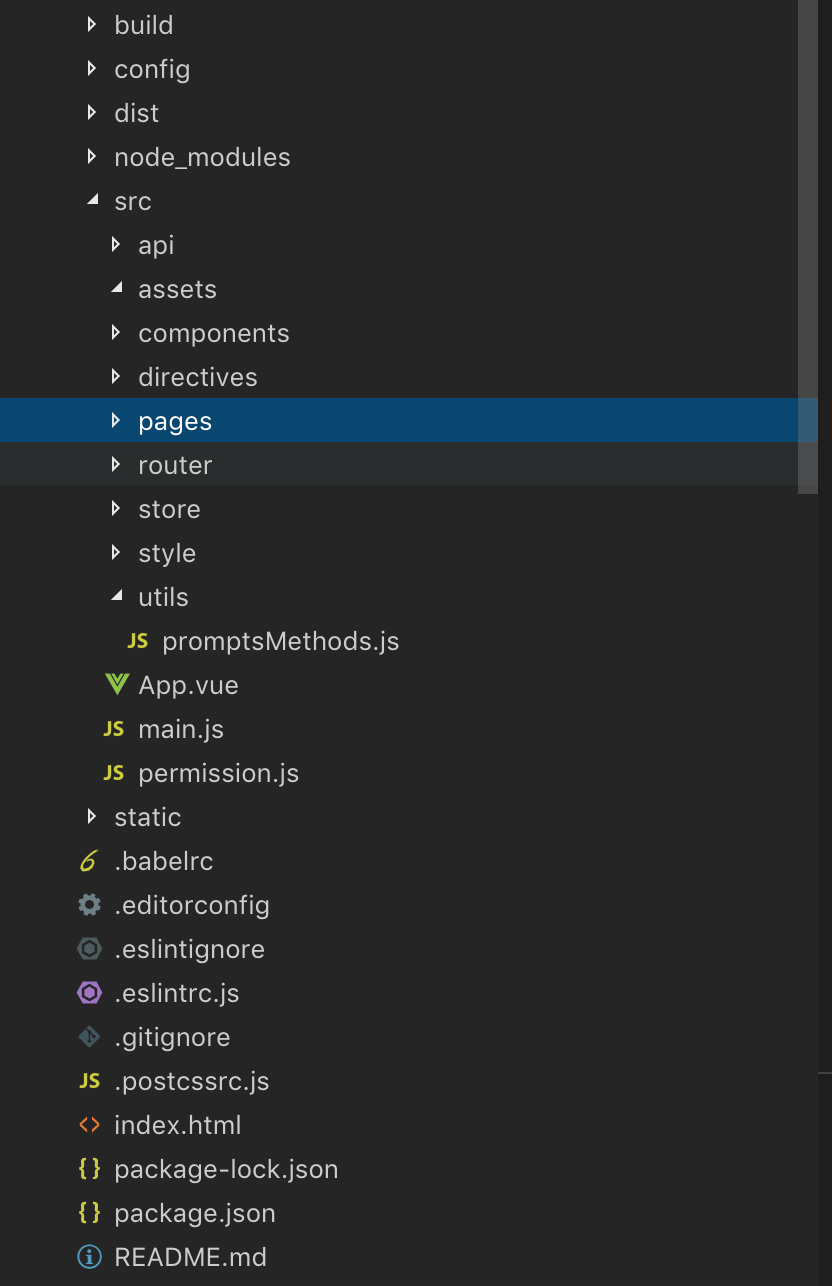
此时 简单的前端环境搭建完成 之后会持续更新, 权限控制和vuex的使用
------------------------------------------------------------------------------------------------------------------------------------
9. vuex ----数据状态管理, 官方参考连接
-
安装
$ npm install vuex

-
使用
生产环境移除console, debugger信息
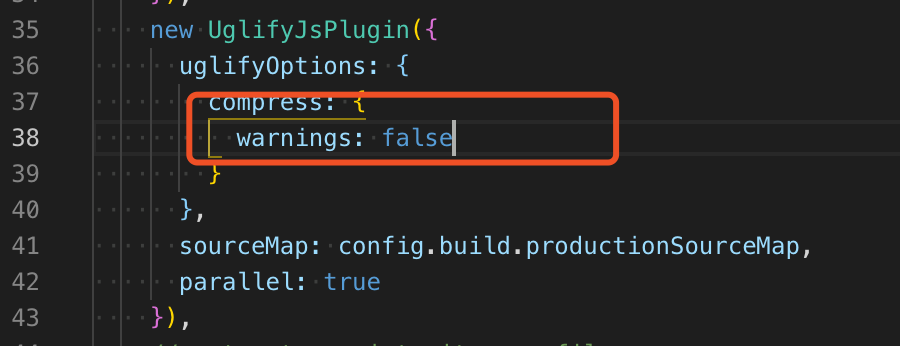
    new UglifyJsPlugin({
      uglifyOptions: {
        compress: {
          warnings: false,
          drop_debugger: true,
          drop_console: true,
          pure_funcs: ['console.log'] // 移除console.log
        }
      },
      sourceMap: config.build.productionSourceMap,
      parallel: true
    })
