【04】SpringBoot2核心技术-核心功能—高级特性_SpringBoot原理
6、高级特性
6.1 Profile功能
为了方便多环境适配,比如在测试环境和生产环境中的切换,Springboot简化了profile功能。
1、application-profile功能
在SpringBoot中,默认的配置文件是以application命名的properties或者yaml文件,针对不同的开发环境的相关配置,可以使用 application-***.yaml/yml/properties 的命名方式。

-
application.properties是默认的配置文件
-
如果需要切换到其他开发环境,使用其他开发环境下的配置文件,那么需要在application.properties中进行如下设置:
# 使用test环境 spring.profiles.active=test -
其他环境的命名application-***.yaml,例如test、prod
-
test环境配置:
person: name: test-张三 age: 18 server: port: 8000 -
prod环境配置:
person: name: prod-张三 age: 20 server: port: 8088 -
默认配置环境:指定使用test环境
spring.profiles.active=test -
测试类:
@Slf4j @RestController public class HelloController { @Value("${person.name:李四}") private String name; @Value("${person.age:10}") private String age; @GetMapping("/") public String hello(){ log.info(name + "今年" + age + "岁"); return "hello " + name; } } -
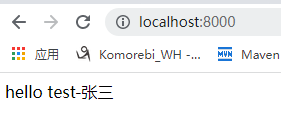
效果:控制台显示激活了test环境,并且初始化端口号为8000,输出效果也如下所示:


-
-
默认配置与环境配置同时生效,但修改配置文件的任意值时,环境配置优先
-
激活指定的环境:
-
配置文件激活
-
命令行激活:java -jar xxx.jar --spring.profiles.active=prod --person.name=haha
-
修改配置文件的任意值,命令行优先
-
-
2、@Profile条件装配功能
指定在什么环境下才生效,进行装配:
例如:在prod环境下,才对Worker类进行自动装配,从prod环境下的配置类中取person的值,并放入容器中
@Configuration(proxyBeanMethods = false)
@Profile("prod")
@ConfigurationProperties("person")
@Component
public class Worker implements Person {

    private String name;
    private String age;

}
例子:
@Configuration
public class MyConfig {

    @Profile("prod")
    @Bean
    public Color red(){
        return new Color();
    }

    @Profile("test")
    @Bean
    public Color green(){
        return new Color();
    }
}
3、Profile分组(多环境分组使用)
当有多个配置环境文件需要被激活使用时,就可以使用profile分组。
例:创建一个myprod的数组,里面含有ppd、prod两个环境配置文件,我们只需要激活myprod,就可以同时激活使用ppd、prod配置文件。
spring.profiles.active=myprod

spring.profiles.group.myprod[0]=ppd
spring.profiles.group.myprod[1]=prod

spring.profiles.group.mytest[0]=test
6.2 外部化配置
抽取一部分可变配置,形成一个文件,方便集中管理,比如数据库连接的相关信息等。(properties、yaml文件)
1、外部配置源
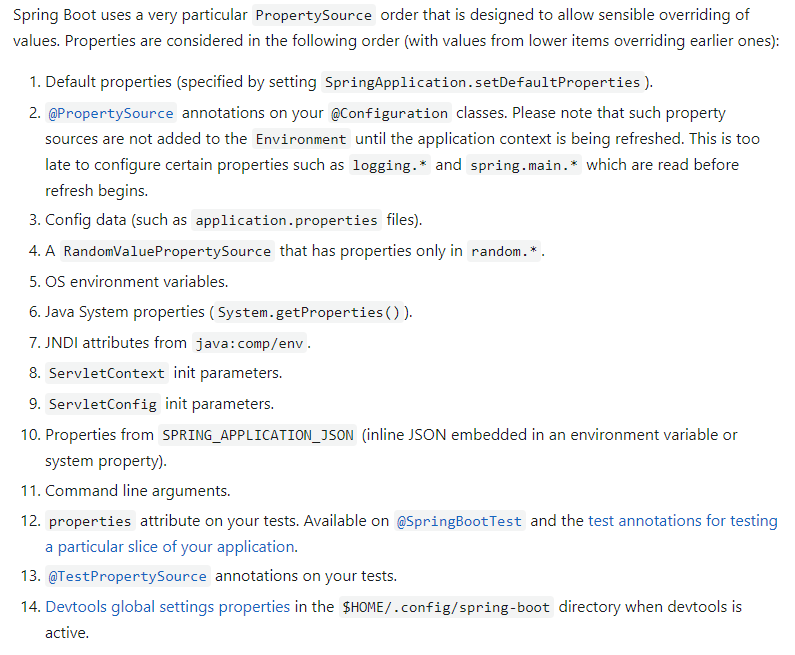
常用:Java属性文件、YAML文件、环境变量、命令行参数;
优先级:命令行 > 环境变量 > 配置文件,下图优先级中,数字越大优先级越高
2、配置文件查找位置与顺序
(1) classpath(resources文件夹) 根路径
(2) classpath 根路径下config目录
(3) jar包当前目录
(4) jar包当前目录的config目录
(5) /config子目录的直接子目录
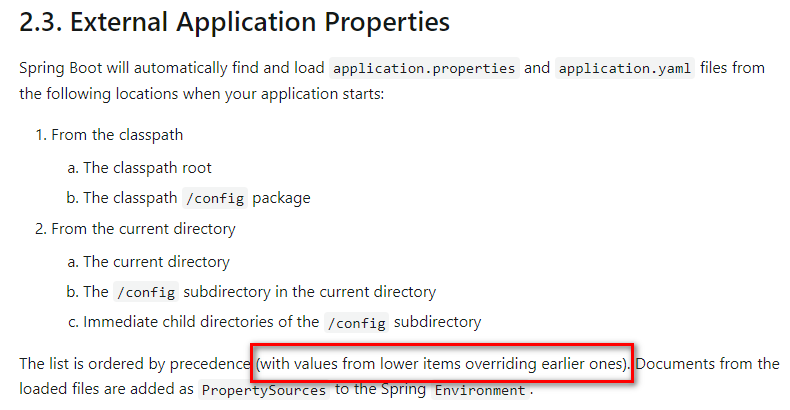
注意:配置文件的优先级的大小,从下往上,越往下优先级越高,会覆盖同名配置项。例如:类路径下的config文件夹中的application.yml文件优先级比类路径下的要高,即会使用config文件夹下的配置文件中的内容。
3、配置文件加载顺序
-
当前jar包内部的application.properties和application.yml
-
当前jar包内部的application-{profile}.properties 和 application-{profile}.yml
-
引用的外部jar包的application.properties和application.yml
-
引用的外部jar包的application-{profile}.properties 和 application-{profile}.yml
加载顺序从上往下加载,因此最后在外部的配置文件会进行覆盖。
4、总结
指定环境优先,外部优先,后面的可以覆盖前面的同名配置项的值。
6.3 自定义starter(重要)
1、starter启动原理
-
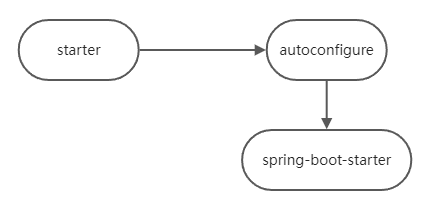
pom文件中引入某个starter,进入starter后可以发现,是引入其他的一些依赖,最重要的是引入相关的 autoconfigurer 包
-
autoconfigure包中配置使用 META-INF/spring.factories 中 EnableAutoConfiguration 的值,使得项目启动加载指定的自动配置类
注意是autoconfigure包下的

-
编写自动配置类 xxxAutoConfiguration -> xxxxProperties
-
- @Configuration
- @Conditional
-
- @EnableConfigurationProperties
- @Bean
-
- ......
引入starter --- xxxAutoConfiguration --- 容器中放入组件 ---- 绑定xxxProperties ---- 配置项
2、自定义starter
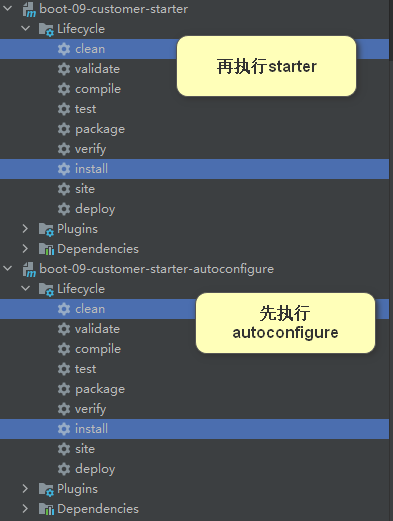
boot-09-customer-starter(启动器)
boot-09-customer-starter-autoconfigure(自动配置包)

在boot-09-customer-starter中引入autoconfigure
(1)starter-autoconfigure 自动配置包
负责向容器导入组件
-
pom文件
<?xml version="1.0" encoding="UTF-8"?> <project xmlns="http://maven.apache.org/POM/4.0.0" xmlns:xsi="http://www.w3.org/2001/XMLSchema-instance" xsi:schemaLocation="http://maven.apache.org/POM/4.0.0 https://maven.apache.org/xsd/maven-4.0.0.xsd"> <modelVersion>4.0.0</modelVersion> <parent> <groupId>org.springframework.boot</groupId> <artifactId>spring-boot-starter-parent</artifactId> <version>2.6.2</version> <relativePath/> <!-- lookup parent from repository --> </parent> <groupId>com.atguigu</groupId> <artifactId>boot-09-customer-starter-autoconfigure</artifactId> <version>0.0.1-SNAPSHOT</version> <name>boot-09-customer-starter-autoconfigure</name> <description>boot-09-customer-starter-autoconfigure</description> <properties> <java.version>11</java.version> </properties> <dependencies> <dependency> <groupId>org.springframework.boot</groupId> <artifactId>spring-boot-starter-web</artifactId> </dependency> </dependencies> </project> -
bean:bean对象与配置文件中的数据进行绑定
@ConfigurationProperties(prefix = "atguigu.hello") //与配置文件中的值进行绑定 public class HelloProperties { private String prefix; private String suffix; public String getPrefix() { return prefix; } public void setPrefix(String prefix) { this.prefix = prefix; } public String getSuffix() { return suffix; } public void setSuffix(String suffix) { this.suffix = suffix; } } -
service:业务逻辑操作
public class HelloService { // 默认不放在容器中 @Autowired HelloProperties helloProperties; //在主配置类时,已经导入过组件了 public String sayHello(String userName){ return helloProperties.getPrefix() + ": " + userName + "》" + helloProperties.getSuffix(); } } -
auto:负责将组件导入容器中,当容器中没有HelloService这个组件时,就导入一个新的组件
@Configuration // 向容器导入HelloProperties组件,无需在HelloProperties.class使用@Component注解修饰 @EnableConfigurationProperties(HelloProperties.class) // HelloProperties会默认与指定前缀的数据进行绑定,并添加到容器中 public class HelloServiceAutoConfiguration { @Bean @ConditionalOnMissingBean(HelloService.class) public HelloService helloService(){ return new HelloService(); } } -
在类路径下创建META-INF文件夹,创建spring.factories文件,指定项目启动后加载哪个自动配置类
# Auto Configure
org.springframework.boot.autoconfigure.EnableAutoConfiguration=\
com.atguigu.auto.HelloServiceAutoConfiguration
(2)starter 启动器
主要就是一个包的依赖的归纳,比如将一个开发Spring web应用所需的依赖准备好,并导入,起一个引导作用。
-
pom文件:注意dependencies导入了自动配置包
<?xml version="1.0" encoding="UTF-8"?>
<project xmlns="http://maven.apache.org/POM/4.0.0" xmlns:xsi="http://www.w3.org/2001/XMLSchema-instance"
         xsi:schemaLocation="http://maven.apache.org/POM/4.0.0 https://maven.apache.org/xsd/maven-4.0.0.xsd">
    <modelVersion>4.0.0</modelVersion>
    <parent>
        <groupId>org.springframework.boot</groupId>
        <artifactId>spring-boot-starter-parent</artifactId>
        <version>2.6.2</version>
        <relativePath/> <!-- lookup parent from repository -->
    </parent>
    <groupId>com.atguigu</groupId>
    <artifactId>boot-09-customer-starter</artifactId>
    <version>0.0.1-SNAPSHOT</version>
    <name>boot-09-customer-starter</name>
    <description>boot-09-customer-starter</description>
    <properties>
        <java.version>11</java.version>
    </properties>

    <!-- 导入了新定义的自动配置包 -->
    <dependencies>
        <dependency>
            <groupId>com.atguigu</groupId>
            <artifactId>boot-09-customer-starter-autoconfigure</artifactId>
            <version>0.0.1-SNAPSHOT</version>
        </dependency>
    </dependencies>

</project>
(3)向maven仓库引入
(4)测试
-
在一个新测试项目中的pom文件中,引入我们创建的starter启动器依赖
<dependency> <groupId>com.atguigu</groupId> <artifactId>boot-09-customer-starter</artifactId> <version>0.0.1-SNAPSHOT</version> </dependency> -
controller
@RestController public class HelloControllerNewStarter { @Autowired HelloService helloService; //自动注入容器中已经有的HelloService组件(得益于spring.factories中的自动导入设置) @GetMapping("/sayHello") public String sayHello(){ String s = helloService.sayHello("马云"); return s; } } -
配置文件中设置数据
atguigu.hello.prefix=Jack
atguigu.hello.suffix=Ma
7、SpringBoot原理
Spring原理【Spring注解】、SpringMVC原理、自动配置原理、SpringBoot原理
7.1 SpringBoot启动过程
启动类:
@SpringBootApplication
public class Boot09CorefeaturesProfileApplication {

    public static void main(String[] args) {
        SpringApplication.run(Boot09CorefeaturesProfileApplication.class, args);
    }

}
1、创建SpringApplication

/**
*	创建一个新的SpringApplication实例(创建springboot应用)。应用程序上下文将从指定的主要来源加载 bean(有关详细信息,请参阅class-level文档)。可以在调用run(String...)之
*	前自定义实例。
*  参数:
*	resourceLoader – 要使用的资源加载器
*	primarySources – 主要的 bean 来源(启动类)
*/
public SpringApplication(ResourceLoader resourceLoader, Class<?>... primarySources) {
    this.resourceLoader = resourceLoader;
    Assert.notNull(primarySources, "PrimarySources must not be null"); //断言,判断有无启动类
    this.primarySources = new LinkedHashSet<>(Arrays.asList(primarySources));
    this.webApplicationType = WebApplicationType.deduceFromClasspath(); //判断当前是响应式编程还是原生
    this.bootstrapRegistryInitializers = new ArrayList<>(
        getSpringFactoriesInstances(BootstrapRegistryInitializer.class));
    setInitializers((Collection) getSpringFactoriesInstances(ApplicationContextInitializer.class));
    setListeners((Collection) getSpringFactoriesInstances(ApplicationListener.class)); //获取启动引导器、IOC容器、监听器
    this.mainApplicationClass = deduceMainApplicationClass();
}
-
运行Spring应用程序,创建一个新的 SpringApplication(启动引导器、容器初始化器、应用监听器三个)
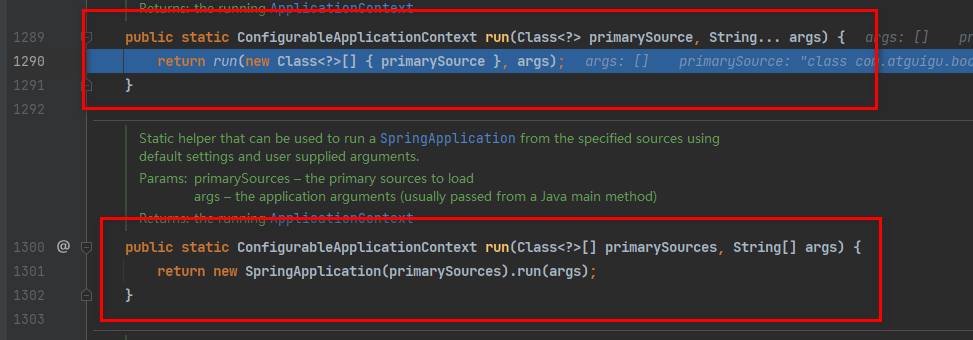
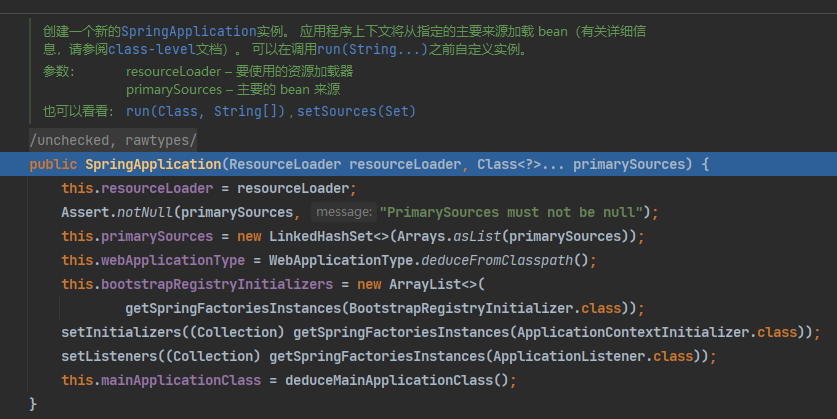
进入SpringApplication的构造器方法:

- 保存启动类的信息(PrimarySources)
-
这里就能发现primarySources就是指的SpringBoot的启动类(主类)

-
判定当前应用的类型,通过ClassUtils进行判断(是响应式编程还是原生Servlet)。这里当前是Servlet
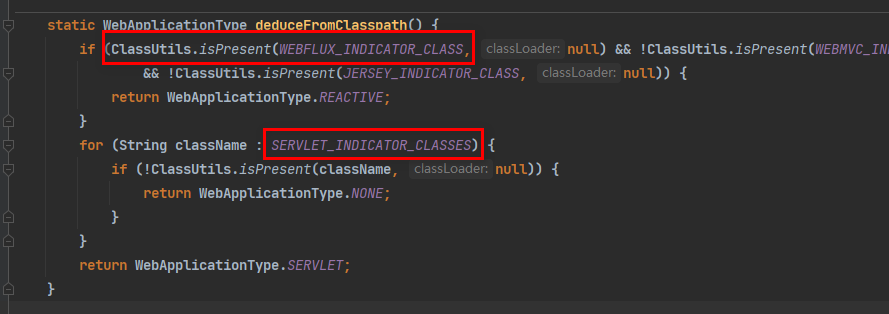

-
接下来是对三个模块的初始化操作:

-
bootstrappers:初始启动引导器(List
):去spring.factories文件中找 org.springframework.boot.Bootstrapper this.bootstrapRegistryInitializers = new ArrayList<>( getSpringFactoriesInstances(BootstrapRegistryInitializer.class)); -
找 ApplicationContextInitializer(容器初始化器);去 spring.factories 找ApplicationContextInitializer
- List<ApplicationContextInitializer<?>> initializers
-
找 ApplicationListener 应用监听器。去spring.factories 找 ApplicationListener
- List<ApplicationListener<?>> listeners
2、运行SpringApplication
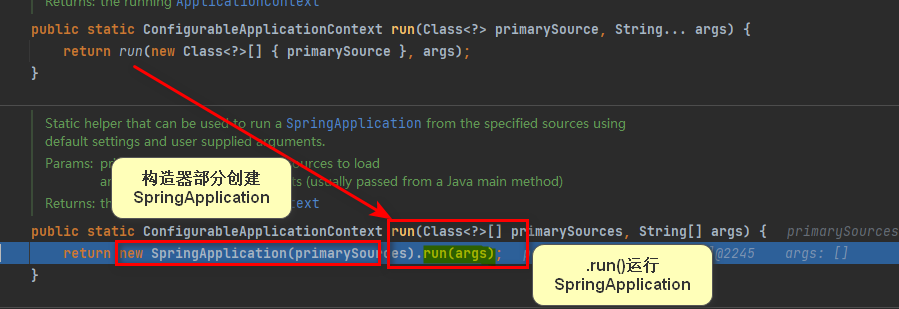

public ConfigurableApplicationContext run(String... args) {
    long startTime = System.nanoTime(); //记录起始时间
    DefaultBootstrapContext bootstrapContext = createBootstrapContext(); // 获得启动引导器,对上下文环境进行设置
    ConfigurableApplicationContext context = null;
    configureHeadlessProperty(); //当前应用进入headless模式
    SpringApplicationRunListeners listeners = getRunListeners(args); //获取所有运行监听器,为了保证监听器对当前应用状态进行感知
    listeners.starting(bootstrapContext, this.mainApplicationClass); //通知所有正在监听应用的监听器,项目正在启动
    try {
        ApplicationArguments applicationArguments = new DefaultApplicationArguments(args); // 保存参数
        ConfigurableEnvironment environment = prepareEnvironment(listeners, bootstrapContext, applicationArguments); //准备上下文环境(对环境进行配置,环境参数绑定等)
        configureIgnoreBeanInfo(environment); // 需要忽略的bean
        Banner printedBanner = printBanner(environment); //打印banner(SpringBoot应用启动时的banner)
        context = createApplicationContext(); // 创建IOC容器
        context.setApplicationStartup(this.applicationStartup);
        prepareContext(bootstrapContext, context, environment, listeners, applicationArguments, printedBanner); // 传入容器所需数据
        refreshContext(context); // 刷新容器,将剩余所有组件添加到容器中
        afterRefresh(context, applicationArguments);
        Duration timeTakenToStartup = Duration.ofNanos(System.nanoTime() - startTime); //记录时间
        if (this.logStartupInfo) {
            new StartupInfoLogger(this.mainApplicationClass).logStarted(getApplicationLog(), timeTakenToStartup);
        }
        listeners.started(context, timeTakenToStartup); //通知所有监听器,应用已经启动
        callRunners(context, applicationArguments); //调用所有的runner,便于应用启动的时候运行一些特定的代码(ApplicationRunner、CommandLineRunner)
    }
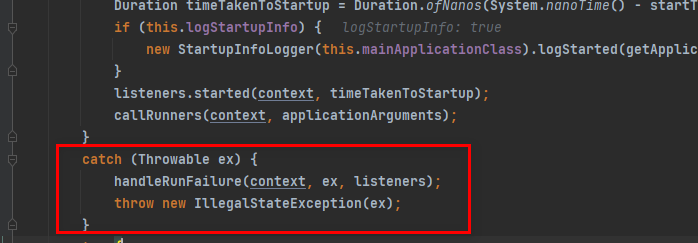
    catch (Throwable ex) { // 监控应用启动过程中,以上操作是否有报错
        handleRunFailure(context, ex, listeners);
        throw new IllegalStateException(ex);
    }
    try {
        Duration timeTakenToReady = Duration.ofNanos(System.nanoTime() - startTime);
        listeners.ready(context, timeTakenToReady); //通知所有监听器,springboot应用准备就绪,可以接收请求
    }
    catch (Throwable ex) {
        handleRunFailure(context, ex, null);
        throw new IllegalStateException(ex);
    }
    return context; // 返回上下文
}
-
运行 SpringApplication(run)


- 进入public ConfigurableApplicationContext run(String... args) {
-
-
记录应用的启动时间
long startTime = System.nanoTime();
-
-
-
创建引导上下文(Context环境)createBootstrapContext()
DefaultBootstrapContext bootstrapContext = createBootstrapContext();
-
-
-
-
获取到之前所有的引导器 bootstrappers ,并遍历挨个执行 intitialize() 来完成对引导启动器上下文环境设置

-
-
-
-
让当前应用进入headless模式。java.awt.headless
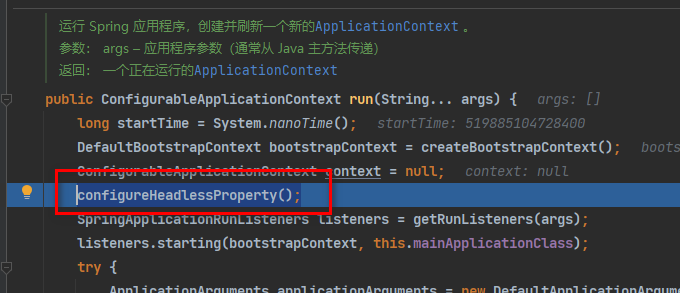
private void configureHeadlessProperty() { System.setProperty(SYSTEM_PROPERTY_JAVA_AWT_HEADLESS, System.getProperty(SYSTEM_PROPERTY_JAVA_AWT_HEADLESS, Boolean.toString(this.headless))); } -
getRunListeners(args) 获取所有运行监听器 RunListener【为了方便所有Listener进行事件感知】

-
-
-
-
通过getRunListeners(args)方法中的getSpringFactoriesInstances方法,去spring.factories 找 SpringApplicationRunListener
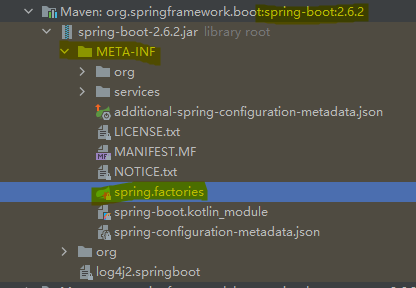

-
-
-
-
接着往下执行,调用listeners.starting(),遍历 SpringApplicationRunListener 调用 starting 方法;
listeners.starting(bootstrapContext, this.mainApplicationClass);
-
-
-

-

-
- 相当于通知所有正在监听系统启动过程的进程,springboot应用正在启动 starting。
-
-
-
保存命令行参数;ApplicationArguments

-
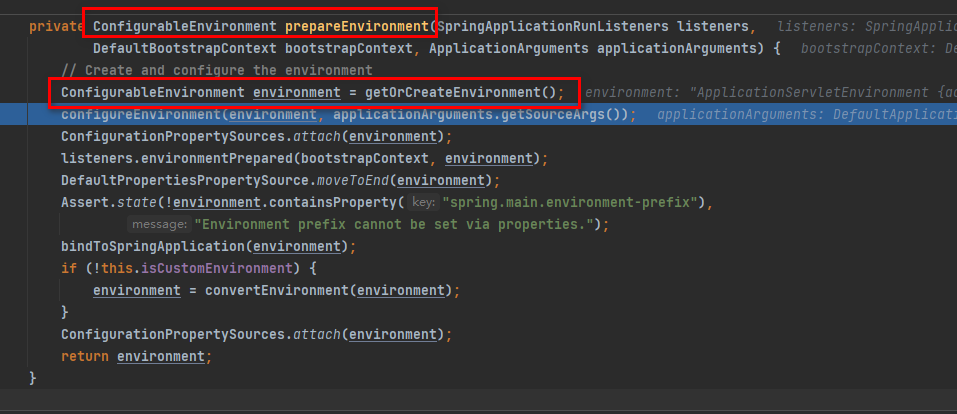
下一步,准备环境,调用 prepareEnvironment()方法;
ConfigurableEnvironment environment = prepareEnvironment(listeners, bootstrapContext, applicationArguments);
-
-
-
-
-
返回或者创建基础环境信息对象。ApplicationServletEnvironment(实现了StandardServletEnvironment接口)
ConfigurableEnvironment environment = getOrCreateEnvironment();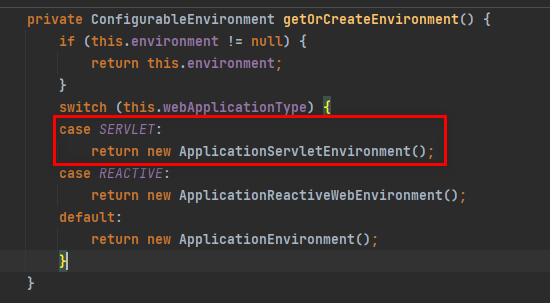
-
配置环境信息对象。
configureEnvironment(environment, applicationArguments.getSourceArgs());//传入了环境信息、命令行参数信息
-
-
-
-
-
- 读取所有的配置源的配置属性值。
-
-
-
-
-
绑定环境信息
ConfigurationPropertySources.attach(environment); -
监听器listeners调用 listener.environmentPrepared();通知所有的监听器当前环境准备完成
listeners.environmentPrepared(bootstrapContext, environment);
-
-
-
-
接下来,就是一系列环境信息的初始化和绑定,基础环境准备部分结束,最后返回环境对象

-
基础环境创建完成后,接着是忽略一些bean信息,以及打印banner

-
(重要)创建IOC容器 createApplicationContext()
-
-
-
-
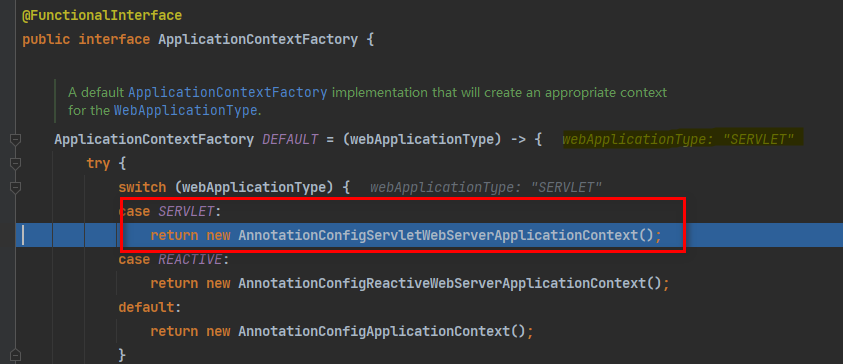
根据项目类型(Servlet)创建容器

-
所以当前会创建容器: AnnotationConfigServletWebServerApplicationContext
-
-
-
-
准备ApplicationContext IOC容器的基本信息;调用prepareContext()方法
prepareContext(bootstrapContext, context, environment, listeners, applicationArguments, printedBanner);
-
-
-
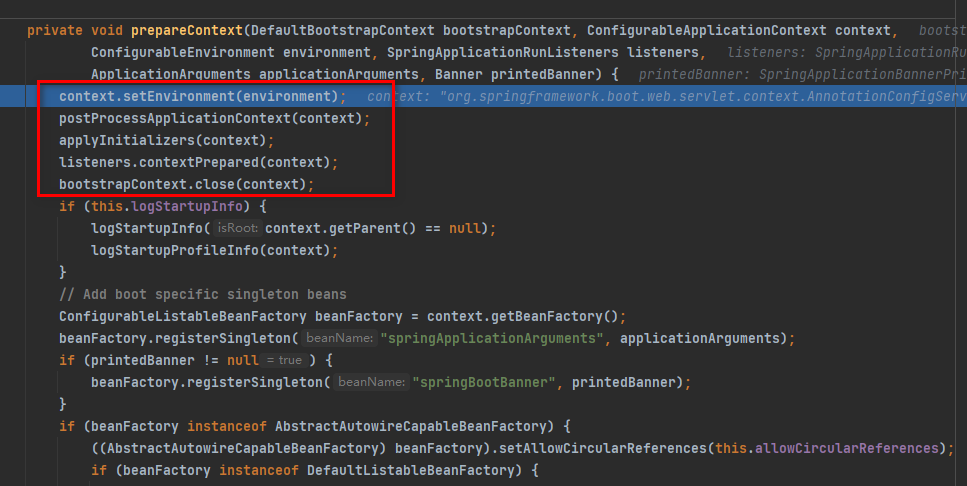
进入prepareContext():准备IOC容器的方法
-
注意:每当容器准备就绪、组件添加完成、加载完毕后,都要通知监听器相应阶段已经完成
-
-
- 保存环境信息:context.setEnvironment(environment);
- IOC容器的后置处理流程:postProcessApplicationContext(context);
-
-
-
- 应用初始化器:applyInitializers(context);
-
-
-
-
-
遍历所有的 ApplicationContextInitializer 。调用 initialize.。来对ioc容器进行初始化扩展功能

-
遍历所有的 listener ,调用 contextPrepared()方法进行遍历。EventPublishRunListenr来通知所有的监听器:容器上下文已经准备完毕(容器中并没有实例)
-
-
-
-
-
-
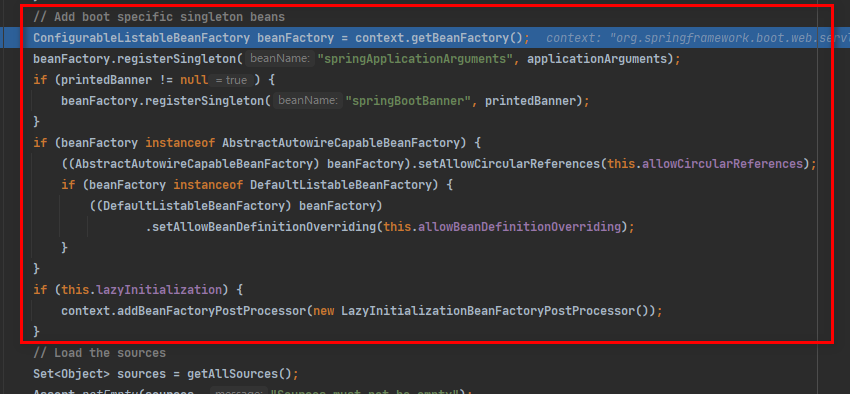
将启动所需的组件添加到容器中:比如banner
-
所有的监听器又调用 contextLoaded。通知所有的监听器 contextLoaded,也就是context(IOC容器)已经加载完成了

-
-
-
-
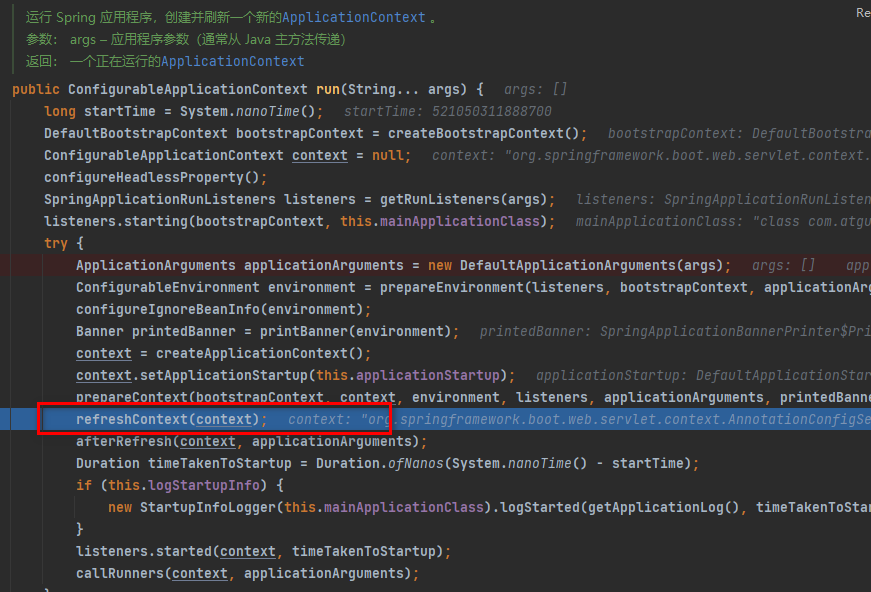
刷新IOC容器:refreshContext(context);
run方法当前已经执行到的位置如下:
-
-
-
- 一直step into就能到达最底层的refresh()方法,用来创建容器中的所有组件(往容器中加组件实例)
-
try {
    // Allows post-processing of the bean factory in context subclasses.
    postProcessBeanFactory(beanFactory);

    StartupStep beanPostProcess = this.applicationStartup.start("spring.context.beans.post-process");
    // Invoke factory processors registered as beans in the context.
    invokeBeanFactoryPostProcessors(beanFactory);

    // Register bean processors that intercept bean creation.
    registerBeanPostProcessors(beanFactory);
    beanPostProcess.end();

    // Initialize message source for this context.
    initMessageSource();

    // Initialize event multicaster for this context.
    initApplicationEventMulticaster();

    // Initialize other special beans in specific context subclasses.
    onRefresh();

    // Check for listener beans and register them.
    registerListeners();

    // Instantiate all remaining (non-lazy-init) singletons.
    finishBeanFactoryInitialization(beanFactory);

    // Last step: publish corresponding event.
    finishRefresh();
}
-
-
-
容器刷新完成后工作:afterRefresh(context, applicationArguments);
-
容器创建所需时间:Duration timeTakenToStartup = Duration.ofNanos(System.nanoTime() - startTime);
-
通知所有监听器,springboot应用已经启动了,并通知这一过程的所需时间:listeners.started(context, timeTakenToStartup); ,此时容器中有所有组件的实例。
-
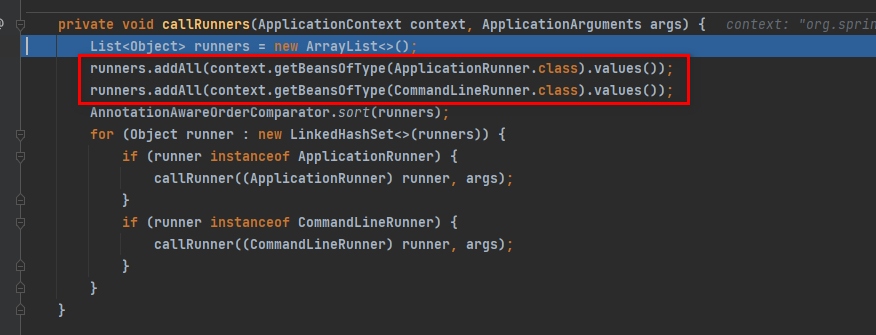
调用所有runners;callRunners(context, applicationArguments);
如果你想在Spring Boot启动的时候运行一些特定的代码,你可以实现接口
ApplicationRunner或者CommandLineRunner,这两个接口实现方式一样,它们都只提供了一个run方法。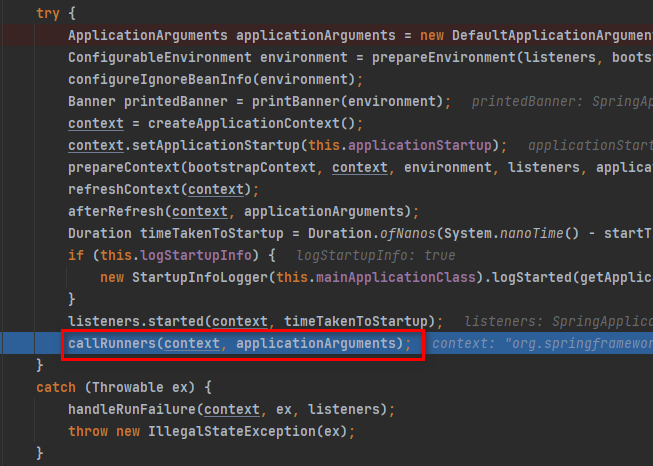
-
-
-
- 获取容器中的 ApplicationRunner:启动获取命令行参数
- 获取容器中的 CommandLineRunner:启动获取应用启动的时候参数
-
-
-
- 合并所有runner并且按照@Order进行排序
- 遍历所有的runner。调用 run 方法
-
-
- 有一个异常监听器,如果以上有异常,就会调用Listener 的 failed
-
-
-
如果没有异常的话,就又会通知所有监听器,springboot应用准备就绪,可以接收请求,ready
try { Duration timeTakenToReady = Duration.ofNanos(System.nanoTime() - startTime); listeners.ready(context, timeTakenToReady); } -
**running如果有问题,继续通知 failed **
- 调用所有 Listener 的failed;通知所有的监听器 failed
catch (Throwable ex) { handleRunFailure(context, ex, null); throw new IllegalStateException(ex); } -
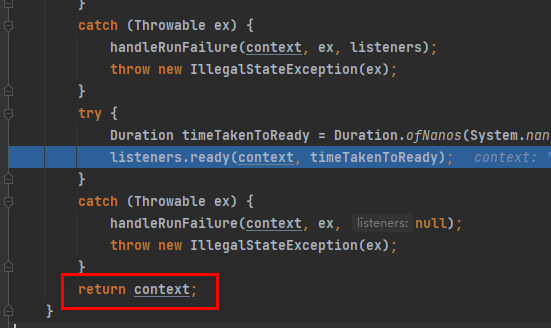
就绪,返回容器:上下文context
-

