【原】Github系列之一:一起做仿天气类应用中的实时模糊效果LiveBlur
从本文开始,我将专门开辟一个Github Code系列,开源自己写的一部分有意思而且实用的demo,共同学习。以前都发布在git OSChina上,后面有空会陆陆续续整理到Github上。OSChina最大的优点是可以免费托管私有项目,服务器在国内速度快,这些是Github所比不了的。不过Github优势在于开源氛围浓烈,有利于向各位开源大牛学习交流。长话短说,just do it!
本文只要实现随滚动实时模糊(或称为动态模糊)的效果(请见文章末尾处),这种效果被广泛应用于各大天气类APP中,如墨迹天气、黄历天气、雅虎天气等。随着scrollView向上滚动,背景逐渐模糊,二者是相互联动的,实现起来很简单。在文章的后半部分我们尝试用两种方法实现这种效果。不过我要强调的一点是,我的一些文章的方法思路虽简单,但我更注重这个过程中对一些“坑”的处理,这是个融汇贯通的过程。比如预告一下,本文提到了几个坑:KVO陷阱、autoRelease坑、drawRect坑...
首先,我们利用KVO将scrollView的contentOffset与Image的模糊度进行绑定,这样我们就能实时检测到scrollview(本文为tableview)的滚动偏移量,从而改变image的模糊度。
在此之前,我们从UIImageView派生出子类WZLLiveBlurImageView来实现图像的模糊改变,先看头文件不管实现:
 1 #import <UIKit/UIKit.h>
 2 //default initial blur level
 3 #define kImageBlurLevelDefault          0.9f
 4 @interface WZLLiveBlurImageView : UIImageView
 5
 6 /**
 7  *  set blur level
 8  *
 9  *  @param level blur level
10  */
11 - (void)setBlurLevel:(CGFloat)level;
12
13 @end
setBlurLevel:是唯一的方法接口给调用者调用。接着我们在一个ViewController中把这个WZLLiveBlurImageView显示出来。在ViewController中还应该有一个tableView用于模拟天气类应用的使用场景。那WZLLiveBlurImageView要放在哪里比较合适呢?tableView有一个subView叫做backgroundView,就选它了。以下是初始化代码,放在ViewController的viewDidLoad方法中:
 1    //generate item content for tableView
 2     _items = [self items];
 3     self.tableView.dataSource = self;
 4     self.tableView.delegate = self;
 5     self.tableView.separatorStyle = UITableViewCellSeparatorStyleNone;
 6     self.tableView.separatorColor = [UIColor clearColor];
 7     _blurImgView = [[WZLLiveBlurImageView alloc] initWithImage:[UIImage imageNamed:@"bg.jpg"]];
 8     _blurImgView.frame = self.tableView.frame;
 9     self.tableView.backgroundView = _blurImgView;
10     self.tableView.backgroundColor = [UIColor clearColor];
11     self.tableView.contentInset = UIEdgeInsetsMake(CGRectGetHeight(self.tableView.bounds) - 100, 0, 0, 0);
那我们怎么知道tableview到底滚动了多少呢?答案是KVO。KVO的使用当中是有坑的,写出一个健壮稳定的KVO需要注意很多细节,比如要小心崩溃问题,要防止KVO链断开等...对KVO不熟的同学请移步我的另一篇博文:《KVO使用中的陷阱》。 紧接着上面的代码,我们继续配置KVO,"contentOffset"字符串必须与tableview的属性值完全一致才有效:
1     //setup kvo on tableview`s contentoffset
2     [self.tableView addObserver:self forKeyPath:@"contentOffset"
3                         options:NSKeyValueObservingOptionNew
4                         context:(__bridge void *)(kWZLLiveBlurImageViewContext)];//kWZLLiveBlurImageViewContext是一个全局的字符串
注册与注销要成对出现,尽管是ARC,但在dealloc也要清理现场:
1 - (void)dealloc
2 {
3     [self.tableView removeObserver:self forKeyPath:@"contentOffset"
4                            context:(__bridge void *)kWZLLiveBlurImageViewContext];
5 }
添加KVO的默认回调函数,当前类的所有KVO都走的这里,建议KVO都写成如下这样,注意对super以及context的处理:
 1 #pragma mark - KVO configuration
 2 - (void)observeValueForKeyPath:(NSString *)keyPath ofObject:(id)object change:(NSDictionary *)change context:(void *)context
 3 {
 4     if (context == (__bridge void *)(kWZLLiveBlurImageViewContext)) {
 5         CGFloat blurLevel = (self.tableView.contentInset.top + self.tableView.contentOffset.y) / CGRectGetHeight(self.tableView.bounds);
 6         [_blurImgView setBlurLevel:blurLevel];
 7     } else {
 8         [super observeValueForKeyPath:keyPath ofObject:object change:change context:context];
 9     }
10 }
以上代码基本就形成了实时模糊的整体框架了,现在还差WZLLiveBlurImageView中对模糊图像的实现。对UIImage进行模糊处理的代码网上有很多,基本都是同一个版本,这里我们就站在巨人的肩膀上,用一下这个算法,使用 - (UIImage *)applyBlurWithRadius:(CGFloat)blurRadius; 方法对image进行模糊处理:

 1 //
 2 //  UIImage+Blur.h
 3 //  WZLLiveBlurImageView
 4 //
 5 //  Created by zilin_weng on 15/3/23.
 6 //  Copyright (c) 2015年 Weng-Zilin. All rights reserved.
 7 //
 8
 9 #import <UIKit/UIKit.h>
10
11 @interface UIImage (Blur)
12
13 - (UIImage *)applyBlurWithRadius:(CGFloat)blurRadius;
14
15 @end

 1 //
 2 //  UIImage+Blur.m
 3 //  WZLLiveBlurImageView
 4 //
 5 //  Created by zilin_weng on 15/3/23.
 6 //  Copyright (c) 2015年 Weng-Zilin. All rights reserved.
 7 //
 8
 9 #import "UIImage+Blur.h"
10 #import <Accelerate/Accelerate.h>
11
12 @implementation UIImage (Blur)
13
14 - (UIImage *)applyBlurWithRadius:(CGFloat)blur
15 {
16     if (blur < 0.f || blur > 1.f) {
17         blur = 0.5f;
18     }
19     int boxSize = (int)(blur * 40);
20     boxSize = boxSize - (boxSize % 2) + 1;
21
22     CGImageRef img = self.CGImage;
23     vImage_Buffer inBuffer, outBuffer;
24     vImage_Error error;
25     void *pixelBuffer;
26
27     //create vImage_Buffer with data from CGImageRef
28     CGDataProviderRef inProvider = CGImageGetDataProvider(img);
29     CFDataRef inBitmapData = CGDataProviderCopyData(inProvider);
30
31     inBuffer.width = CGImageGetWidth(img);
32     inBuffer.height = CGImageGetHeight(img);
33     inBuffer.rowBytes = CGImageGetBytesPerRow(img);
34
35     inBuffer.data = (void*)CFDataGetBytePtr(inBitmapData);
36
37     //create vImage_Buffer for output
38     pixelBuffer = malloc(CGImageGetBytesPerRow(img) * CGImageGetHeight(img));
39
40     if(pixelBuffer == NULL)
41         NSLog(@"No pixelbuffer");
42
43     outBuffer.data = pixelBuffer;
44     outBuffer.width = CGImageGetWidth(img);
45     outBuffer.height = CGImageGetHeight(img);
46     outBuffer.rowBytes = CGImageGetBytesPerRow(img);
47
48     // Create a third buffer for intermediate processing
49     /*void *pixelBuffer2 = malloc(CGImageGetBytesPerRow(img) * CGImageGetHeight(img));
50      vImage_Buffer outBuffer2;
51      outBuffer2.data = pixelBuffer2;
52      outBuffer2.width = CGImageGetWidth(img);
53      outBuffer2.height = CGImageGetHeight(img);
54      outBuffer2.rowBytes = CGImageGetBytesPerRow(img);*/
55     //perform convolution
56     error = vImageBoxConvolve_ARGB8888(&inBuffer, &outBuffer, NULL, 0, 0, boxSize, boxSize, NULL, kvImageEdgeExtend)
57     ?: vImageBoxConvolve_ARGB8888(&outBuffer, &inBuffer, NULL, 0, 0, boxSize, boxSize, NULL, kvImageEdgeExtend)
58     ?: vImageBoxConvolve_ARGB8888(&inBuffer, &outBuffer, NULL, 0, 0, boxSize, boxSize, NULL, kvImageEdgeExtend);
59
60     if (error) {
61         NSLog(@"error from convolution %ld", error);
62     }
63
64     CGColorSpaceRef colorSpace = CGColorSpaceCreateDeviceRGB();
65     CGContextRef ctx = CGBitmapContextCreate(outBuffer.data,
66                                              outBuffer.width,
67                                              outBuffer.height,
68                                              8,
69                                              outBuffer.rowBytes,
70                                              colorSpace,
71                                              (CGBitmapInfo)kCGImageAlphaNoneSkipLast);
72     CGImageRef imageRef = CGBitmapContextCreateImage (ctx);
73     UIImage *returnImage = [UIImage imageWithCGImage:imageRef];
74     //clean up
75     CGContextRelease(ctx);
76     CGColorSpaceRelease(colorSpace);
77     free(pixelBuffer);
78     //free(pixelBuffer2);
79     CFRelease(inBitmapData);
80     CGImageRelease(imageRef);
81     return returnImage;
82 }
83
84
85
86 @end
接下来有两种思路可供参考:(1)直接法;(2)间接法
(1)直接法
从字面上看直接法可以理解为直接改变图片的模糊度,也就是在KVO响应函数中根据tableView偏移量算出一个模糊目标值,每次目标值更新了,就做一次图像模糊处理算法。这种方法简单粗暴,思路直接。由于滚动过程中对模糊处理调用非常频繁,这个时候要特别注意性能问题。在这里影响性能问题主要有两个因素:内存跟绘图。如果内存在短时间内不能及时释放,则在小内存设备上将显得很脆弱!在内存问题上,注意到上述图像模糊算法返回的是一个autoRelease类型的对象,但是autoRelease对象并不会在作用域之外就自动释放的(what?如果你觉得惊讶,说明你对autoRelease认识还不够,建议你看看我的另一篇文章:《你真的懂autoRelease吗?》)。解决办法就是使用autoReleasePool手动干预对象的释放时机。内存问题解决了,接着是绘图问题。很多文章都说使用比UIKIt更底层的CGGraphy绘图可以达到更高的效率,于是我们写出如下代码:(函数内的单元检测是必须的)
 1 #import "WZLLiveBlurImageView.h"
 2 #import "UIImage+Blur.h"
 3
 4 @interface WZLLiveBlurImageView ()
 5 {
 6     UIImage *_originImage;
 7     CGFloat _blurLevel;
 8 }
 9 @end
11 @implementation WZLLiveBlurImageView
18 - (void)setBlurLevel:(CGFloat)level
19 {
20     if (!self.image) {
21         NSLog(@"image is empty!");
22         return;
23     }
24     _blurLevel = level;
25     [self setNeedsDisplay];
26 }
27
28 #pragma mark - private apis
29 - (void)drawRect:(CGRect)rect
30 {
31     @autoreleasepool {
32         if (_originImage) {
33             UIImage *blurImg = [_originImage applyBlurWithRadius:_blurLevel];
34             [blurImg drawInRect:self.bounds];
35         }
36     }
37 }
38 @end
是不是觉得很完美,该考虑的都考虑到了。运行一下发现,图像模糊度没发生改变。为啥?因为drawRect函数根本没调用到!按command+shift+0打开APPLE文档查看UIImageVIew发现以下的描述:

苹果说的很清楚了,意思是UIImageView类已经做了优化,如果你子类化UIImageView是不会调用drawRect的!只有从UIView派生的类才允许走drawRect。虽然遇到了坑,不过我们可以放心地直接使用 self.image = xxxBlurImage; 这样的方法来更新模糊图像了。同时,为了避免 self.image = [_originImage applyBlurWithRadius:level]; 方法太耗时从而阻塞UI,我们使用GCD去处理模糊操作,处理结束后回到主线程更新image。使用GCD过程中要防止循环引用(点我点我),下面就是完整的代码:
 1 #import "WZLLiveBlurImageView.h"
 2 #import "UIImage+Blur.h"
 3
 4 @interface WZLLiveBlurImageView ()
 5 @property (nonatomic, strong) UIImage *originImage;
 6 @end
 7
 8 @implementation WZLLiveBlurImageView
 9 /**
10  *  set blur level
11  *
12  *  @param level blur level
13  */
14 - (void)setBlurLevel:(CGFloat)level
15 {
16     if (!self.image) {
17         NSLog(@"image is empty!");
18         return;
19     }
20     level = (level > 1 ? 1 : (level < 0 ? 0 : level));
21     NSLog(@"level:%@", @(level));
22     //self.realBlurImageView.alpha = level;
23     @autoreleasepool {
24         if (_originImage) {
25             __weak typeof(WZLLiveBlurImageView*) weakSelf = self;
26             __block UIImage *blurImage = nil;
27             dispatch_async(dispatch_get_global_queue(DISPATCH_QUEUE_PRIORITY_DEFAULT, 0), ^{
28                 blurImage = [weakSelf.originImage applyBlurWithRadius:level];
29                 //get back to main thread to update UI
30                 dispatch_async(dispatch_get_main_queue(), ^{
31                     weakSelf.image = blurImage;
32                 });
33             });
34         }
35     }
36 }
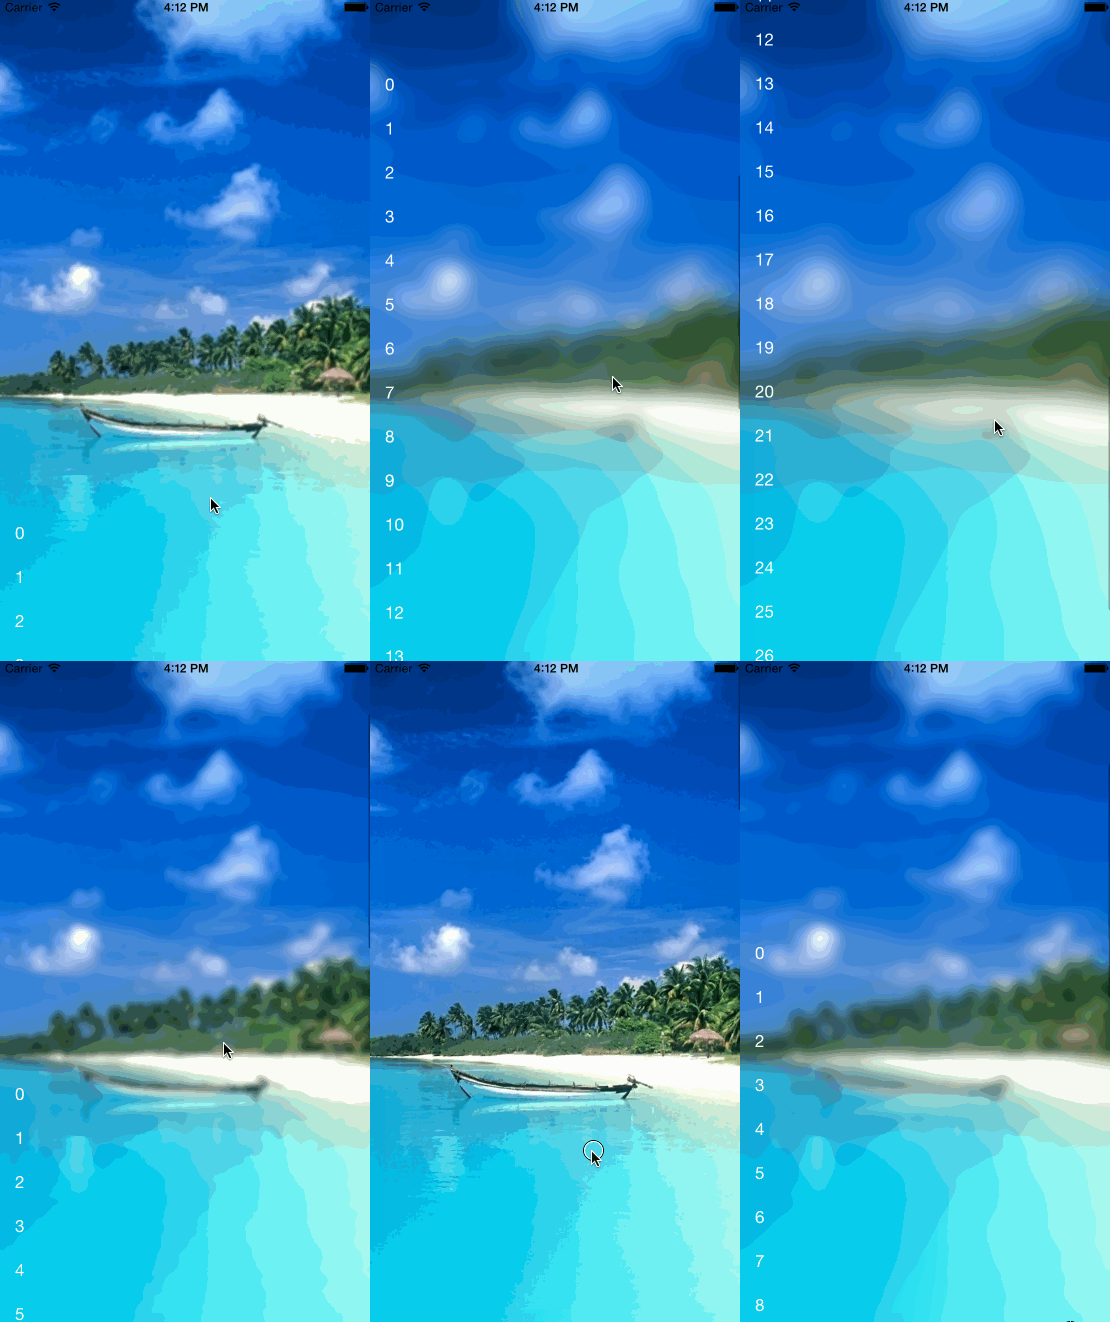
缺点是:在低性能设备上虽然可以实现滚动流畅,但由于CPU性能捉急,导致tableView已经滚动了,image才慢慢模糊,这种延时给人很差的体验。如果去掉GCD,则延时消失,但滚动卡顿严重。在写这篇文章时最新设备是iphone6p,iphone4基本淘汰。用iphone4s真机调试时,直接法hold不住。当然,模拟器无压力妥妥的,不过那又怎样!附直接法在模拟器的效果,录制过程失真了导致模糊效果看起来不自然:

========================
(2)间接法
既然直接法暂时做不了,那我们可以考虑曲线救国。我的策略是在WZLLiveBlurImageView上添加一个UIImageVIew,称为 realBlurImageView ,用 realBlurImageView 来实现真的模糊,但是只模糊一次。在tableview滚动过程中只改变 realBlurImageView 的透明度alpha。此法可谓移花接木。
 1 #import "WZLLiveBlurImageView.h"
 2 #import "UIImage+Blur.h"
 3
 4 @interface WZLLiveBlurImageView ()
 5 @property (nonatomic, strong) UIImage *originImage;
 6 @property (nonatomic, strong) UIImageView *realBlurImageView;
 7 @end
 8
 9 @implementation WZLLiveBlurImageView
10
11 - (void)setBlurLevel:(CGFloat)level
12 {
13     if (!self.image || !self.realBlurImageView) {
14         NSLog(@"image is empty!");
15         return;
16     }
17     level = (level > 1 ? 1 : (level < 0 ? 0 : level));
18     NSLog(@"level:%@", @(level));
19     self.realBlurImageView.alpha = level;
20 }
21
22 #pragma mark - private apis
23
24 - (void)setImage:(UIImage *)image
25 {
26     [super setImage:image];
27     if (_originImage == nil && image) {
28         _originImage = image;
29     }
30     if (!self.realBlurImageView) {
31         UIImage *blurImage = [image applyBlurWithRadius:kImageBlurLevelDefault];
32         self.realBlurImageView = [[UIImageView alloc] initWithImage:blurImage];
33         self.realBlurImageView.backgroundColor = [UIColor clearColor];
34         self.realBlurImageView.frame = self.bounds;
35         self.realBlurImageView.alpha = 0;
36         [self addSubview:self.realBlurImageView];
37     }
38 }
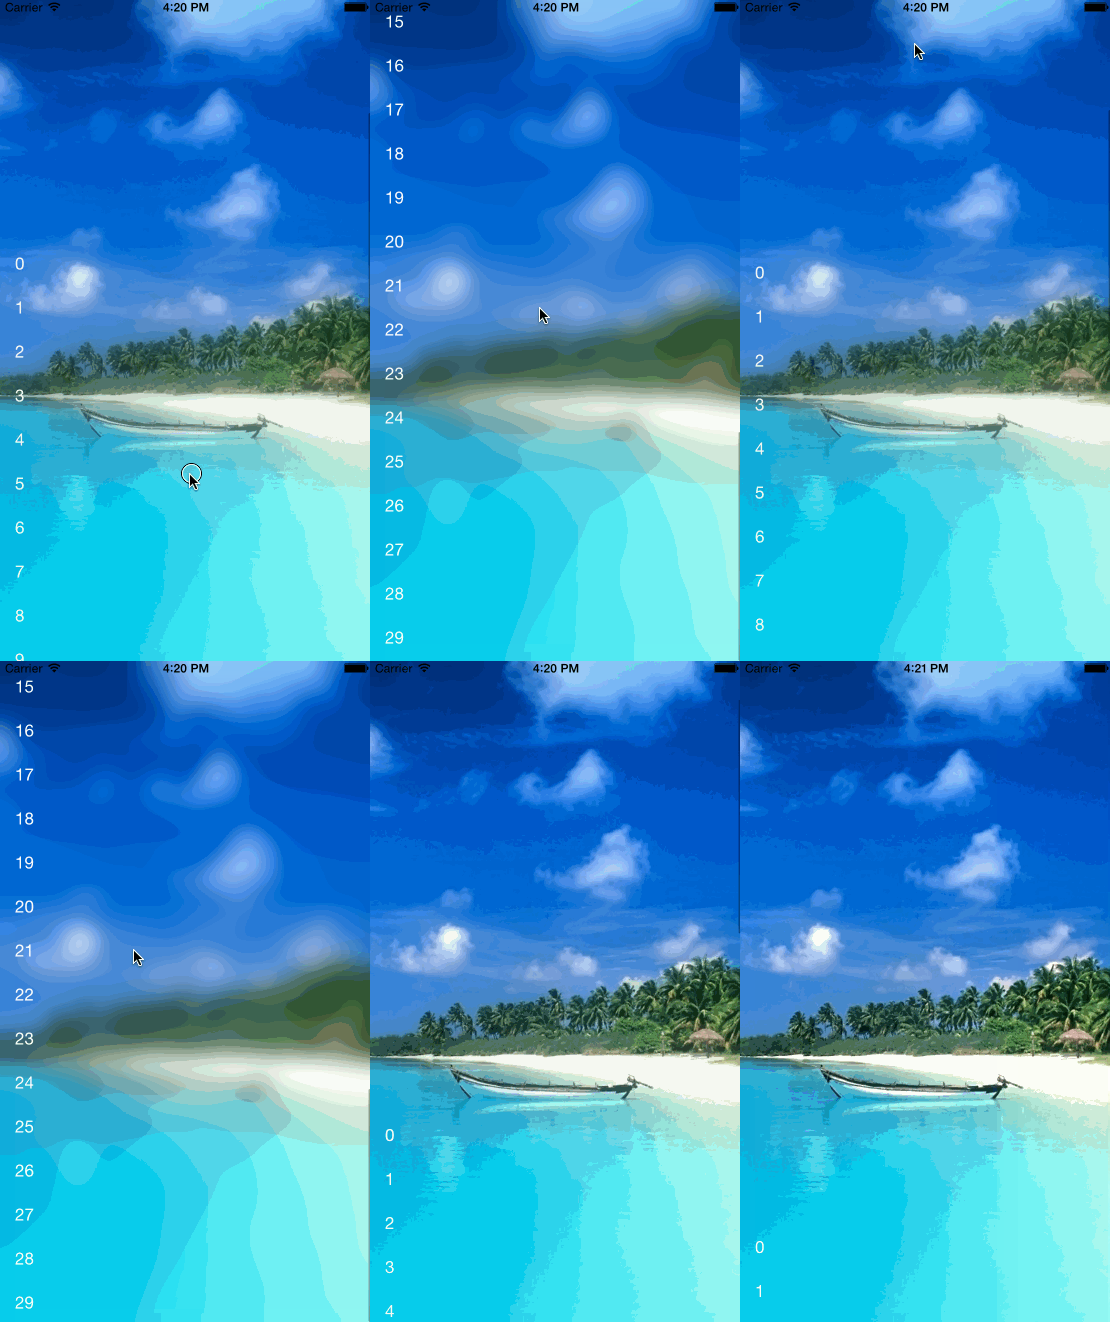
间接法虽然引入了新的对象,但换来了性能上的完美折中,我认为是值得的。不管是模拟器还是低性能真机,调试都OK,实时性很好:

我们抛出的问题都完美解决了,也顺带解决了一些坑。方法虽简单,但过程还是比较有意义的。最后附上整个demo的github地址.
=======================================
原创文章,转载请注明 编程小翁@博客园,邮件zilin_weng@163.com,微信Jilon,欢迎各位与我在C/C++/Objective-C/机器视觉等领域展开交流!
======================================


