Nginx 进行性能配置
总所周知,网络上我们购买的服务器的性能各不相同,如果采用 Nginx 的默认配置的话,无法将服务器的全部性能优势发挥出来,我们应该选择适合自己需求的配置。
当我们默认安装后 Nginx 后,我们便得到 Nginx 的默认配置 nginx.conf ,这个文件默认放在 /usr/local/nginx/conf 中(若通过 apt-get install nginx 安装,则在 /etc/nginx/ 目录下),只需修改目录下的 nginx.conf 文件。
以我的云主机为例(低流量配置:2核 CPU,2GB RAM,请求 ~1s),没办法,作为学生党,我穷(/_\)。
实例文件如下:
user ubuntu ubuntu;     # 创建用户和用户组
worker_processes 2;        # 开启2个工作进程(2 核 CPU,至少应该为 CPU 的每一个核分配一个工作进程)
worker_priority 0;         # worker 进程会在一个适当的优先级启动。值的范围为 -20(优先级最高)~19(优先权最低),设置的值不应该低于-5,因为它是内核进程的默认优先级
error_log logs/error.log error;
log_not_found off;        #该指令指定 Nginx 是否记录404错误。推荐设置为 off,然而不要在 server级别将 log_not_found off 的值设置为 off。

events {
    multi_accept on;
    worker_connections 128;
}

http {
    include mime.types;
    default_type application/octet_stream;
    sendfile on;
    server {
        listen 80;
        server_name localhost;
        location / {
            root html;
            index index.html index.html
        }
        error_page 500 502 503 504 /50x.html;
        location = /50x.html{
            root html;
        }
    }
}
Nginx 的默认安装包中,有一个简单的测试页,在 html 目录中(/usr/local/nginx/html/index.html),我们可以通过访问该网页来测试我们的配置是否生效。
改完 nginx.conf 文件后,我们直接浏览器中访问服务器器 IP 地址,如果浏览器能正确输出下列界面,即证明我们的配置文件是有效的,否则重新检查配置文件,修改配置,直到能正确访问。

接下来我们可以来进行服务器性能测试,来评估服务器性能。
这里我使用的是 httperf 模块,Ubuntu 自带,没有的话通过下列指令安装。
sudo apt-get install httperf
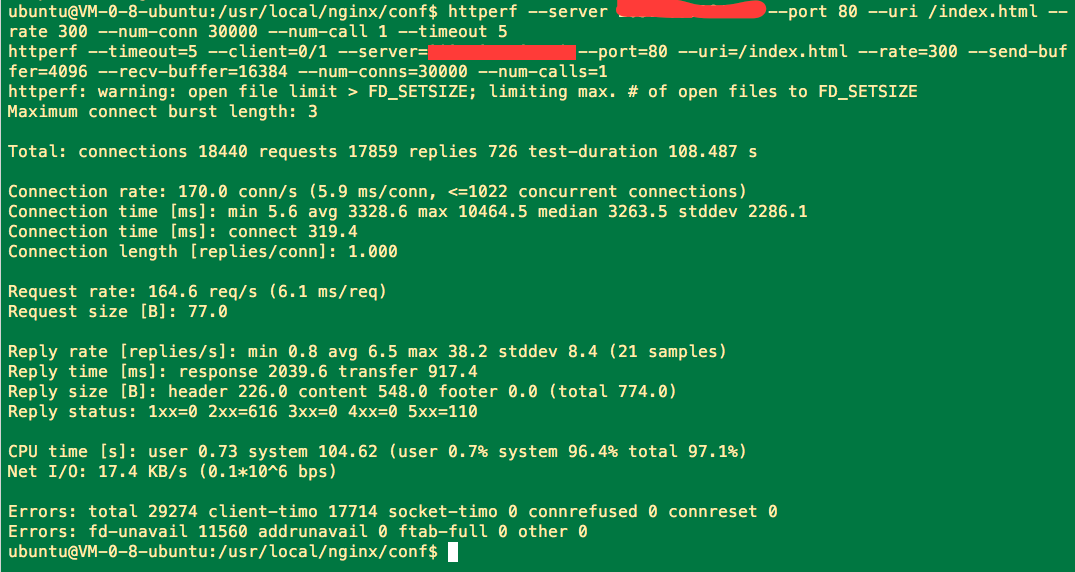
这里我以重复下载我服务器中的 index.html 为例,每秒300次,总共请求30000次。
httperf --server your domain --port 80 --uri /index.html --rate 300 --num-conn 30000 --num-call 1 --timeout 5
输出如下:

我们可以在其中看到响应时间和成功请求的次数。当然我们是希望成功率为100%或响应时间为0ms 的,我们可以不断测试,增加请求,适当调整配置,使成功率接近 100% ,这时候我们的Nginx 配置就是比较完美的了。


