
ubuntu18.04安装ROS Melodic(二)
⒈ 添加ROS软件源
国外的ROS软件源:
1 sudo sh -c 'echo "deb http://packages.ros.org/ros/ubuntu $(lsb_release -sc) main" > /etc/apt/sources.list.d/ros-latest.list'
国内的ROS软件源,速度快:
1 sudo sh -c '. /etc/lsb-release && echo "deb http://mirrors.ustc.edu.cn/ros/ubuntu/ $DISTRIB_CODENAME main" > /etc/apt/sources.list.d/ros-latest.list'
清华的软件源:
1 sudo sh -c '. /etc/lsb-release && echo "deb http://mirrors.tuna.tsinghua.edu.cn/ros/ubuntu/ $DISTRIB_CODENAME main" > /etc/apt/sources.list.d/ros-latest.list'
选择其中的一个软件源即可,本教程选择的第二个。输入命令后,会提示输入用户密码,输入密码即可。
2. 设置密钥
1 sudo apt-key adv --keyserver keyserver.ubuntu.com --recv-keys F42ED6FBAB17C654
会有以下输出信息:
1 Executing: /tmp/apt-key-gpghome.mlvFNotKlF/gpg.1.sh --keyserver keyserver.ubuntu.com --recv-keys F42ED6FBAB17C654
2 gpg: 密钥 F42ED6FBAB17C654:“Open Robotics <info@osrfoundation.org>”未改变
3 gpg: 合计被处理的数量:1
4 gpg:              未改变:1
5
6 密钥是 F42ED6FBAB17C654
3.更新
1 sudo apt-get update
确保 apt-get 是最新版本的。如果需要更新apt,就用sudo apt update。两条命令相似,但是sudo apt update 命令不仅更新存储库索引,还告知存储库中是否可用软件以及有多少新版本可用。
apt-get和apt的命令对比:
| APT-GET | APT | 功能 |
|---|---|---|
| apt-get | apt | 安装软件包 |
| apt-get remove | apt remove | 删除软件包 |
| apt-get remove | apt remove | 更换所有包 |
| apt-get purge | aptpurge | 移除软件包及配置文件 |
| apt-get upgrade | apt upgrade | 更新所有软件包(自动处理依赖项) |
| apt-get autoremove | apt autoremove | 自动删除不需要的包 |
| apt-get dist-upgrade | apt full-upgrade | 在升级软件包时自动处理依赖关系 |
| apt-cache search | apt search | 搜索应用程序 |
| apt-cache show | apt show | 显示装细节 |
| 新的APT命令 | 功能 |
|---|---|
| apt list | 列出包含条件的包(已安装,可升级等) |
| apt edit-sources | 编辑源列表 |
参考博客:https://www.eet-china.com/mp/a36246.html
3*安装最新版cmake
首先,检查cmake的版本:
1 cmake --version
然后,如果已经安装了cmake并且版本较低,需要卸载:
1 sudo apt-get autoremove cmake
接下来,安装最新版本cmake:
1 sudo apt install cmake
最后,通过cmake版本号检查一下:
1 cmake --version
4. ROS-Melodic 桌面完整版安装
1 sudo apt-get install ros-melodic-desktop-full
这条命令需要执行很久,可能需要3小时吧,我当时前前后后好像有3小时左右。
此时,我们需要学习如何挂起进程和解除挂起:
1 ctrl + z #挂起进程 2 3 fg %1 #解除挂起
还需要把ubuntu设置为屏幕常量:
ubuntu18.04的中文版设置方式是:设置--电源--空白屏幕 ,隐私--自动锁屏。
桌面完整版安装成功后,顺便安装一下 rqt 工具:
1 sudo apt-get install ros-melodic-rqt*
5. rosdep初始化
先安装 rosdep 命令,确保有 rosdep :
1 sudo apt install python-rosdep
然后进行初始化:
1 sudo rosdep init
5* rosdep 更新
1 rosdep update
亲测多次后,发现 终端有梯子后,以上这句命令直接一次性通过!!
以下这种方法,多次运行 rosdep update 我也成功过:
当出现time out 错误的时候,可以考虑用手机热点连接运行以上这句命令,会出现以下错误:
ERROR: unable to process source [https://raw.githubusercontent.com/ros/rosdistro/master/rosdep/osx-homebrew.yaml]:
<urlopen error [Errno 111] Connection refused> (https://raw.githubusercontent.com/ros/rosdistro/master/rosdep/osx-homebrew.yaml)
ERROR: unable to process source [https://raw.githubusercontent.com/ros/rosdistro/master/rosdep/base.yaml]:
<urlopen error [Errno 111] Connection refused> (https://raw.githubusercontent.com/ros/rosdistro/master/rosdep/base.yaml)
ERROR: unable to process source [https://raw.githubusercontent.com/ros/rosdistro/master/rosdep/python.yaml]:
<urlopen error [Errno 111] Connection refused> (https://raw.githubusercontent.com/ros/rosdistro/master/rosdep/python.yaml)
ERROR: unable to process source [https://raw.githubusercontent.com/ros/rosdistro/master/rosdep/ruby.yaml]:
<urlopen error [Errno 111] Connection refused> (https://raw.githubusercontent.com/ros/rosdistro/master/rosdep/ruby.yaml)
ERROR: unable to process source [https://raw.githubusercontent.com/ros/rosdistro/master/releases/fuerte.yaml]:
Failed to download target platform data for gbpdistro:
<urlopen error [Errno 111] Connection refused>
Query rosdistro index https://raw.githubusercontent.com/ros/rosdistro/master/index-v4.yaml
ERROR: error loading sources list:
<urlopen error <urlopen error [Errno 111] Connection refused> (https://raw.githubusercontent.com/ros/rosdistro/master/index-v4.yaml)>
方法:可以修改resolv.conf文件的服务器信息,再更新 apt-get 和 rosdep 即可:
1 sudo gedit /etc/resolv.conf
将原有的nameserver这一行注释,并添加 google 域名服务器:
1 nameserver 8.8.8.8 #google域名服务器
2 nameserver 8.8.4.4 #google域名服务器
保存文件并退出,执行更新命令,不报错就成功了:
1 sudo apt-get update
2 rosdep update
参考博客:https://blog.csdn.net/mrh1714348719/article/details/103803110
6. 添加 ROS-Melodic 环境变量(跳过,后面再运行)
1 echo "source /opt/ros/melodic/setup.bash" >> ~/.bashrc
2 source ~/.bashrc
7.安装rosinstall
为了管理我们自己的ROS-Melodic工作空间,需要安装rosinstall:
1 sudo apt-get install python-rosinstall python-rosinstall-generator python-wstool build-essential
安装成功后,再安装一下ROS插件(包括3D包围框):
1 sudo apt install ros-melodic-jsk-rviz-plugins
8. 小海龟实例
第一次启动ROS之前,必须进行ROS-Melodic 环境变量的配置,执行如下命令:
1 echo "source /opt/ros/melodic/setup.bash" >> ~/.bashrc
2 source ~/.bashrc
在第一个终端里面运行:
1 roscore
在第二个终端(打开第二个终端的方法是点击终端左上角 文件--新建标签页)里面运行,会出现一只静止的小海龟:
1 rosrun turtlesim turtlesim_node
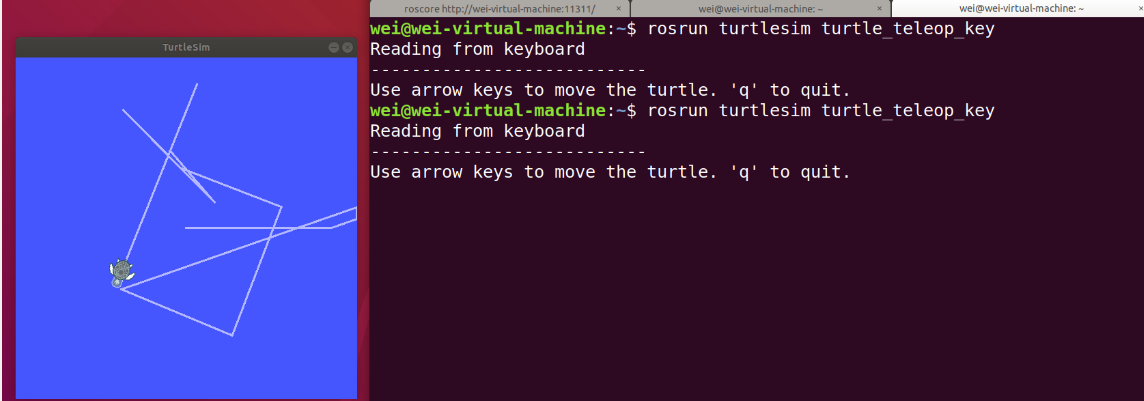
在第三个终端里面运行让海龟可以移动:
1 rosrun turtlesim turtle_teleop_key
rosrun是运行单个节点,turtlesim是文件夹,里面含有turtle_teleop_key。
| 键盘上面的“上下左右” | 小海龟移动情况 |
|---|---|
| 上 | 前进 |
| 下 | 后退 |
| 左 | 原地向左转 |
| 右 | 原地向右转 |
运行成功截图如下:
卸载ROS-Melodic
1 sudo apt-get remove ros-melodic-*
参考博客:

 浙公网安备 33010602011771号