二进制安装MySQL
1.准备环境

#my.cnf
[client]
port            = 3306
socket          = /tmp/mysql.sock
[mysql]
prompt="\\u@\\h:\p  \\R:\\m:\\s [\\d]>"
#tee=/data/mysql/mysql_3306/data/query.log
no-auto-rehash
#[mysqld_multi]
#mysqld = /usr/local/mysql/bin/mysqld_safe
#mysqladmin = /usr/local/mysql/bin/mysqladmin
#log = /opt/mysql/mysqld_multi.log
[mysqld]
#misc
user = mysql
basedir = /usr/local/mysql
datadir = /data/mysql/mytest_3306/
port = 3306
socket = /tmp/mysql.sock
event_scheduler = 0
#timeout
interactive_timeout = 300
wait_timeout = 300
#character set
character-set-server = utf8
open_files_limit = 65535
max_connections = 100
max_connect_errors = 100000
skip-name-resolve = 1
#logs
log-output=file
slow_query_log = 1
slow_query_log_file = slow.log
log-error = error.log
log_warnings = 2
pid-file = mysql.pid
long_query_time = 1
#log-slow-admin-statements = 1
#log-queries-not-using-indexes = 1
log-slow-slave-statements = 1
#binlog
binlog_format = mixed
server-id = 203306
log-bin = mybinlog
binlog_cache_size = 4M
max_binlog_size = 1G
max_binlog_cache_size = 2G
sync_binlog = 0
expire_logs_days = 10
#relay log
skip_slave_start = 1
max_relay_log_size = 1G
relay_log_purge = 1
relay_log_recovery = 1
log_slave_updates
#slave-skip-errors=1032,1053,1062
explicit_defaults_for_timestamp=1
#buffers & cache
table_open_cache = 2048
table_definition_cache = 2048
table_open_cache = 2048
max_heap_table_size = 96M
sort_buffer_size = 2M
join_buffer_size = 2M
thread_cache_size = 256
query_cache_size = 0
query_cache_type = 0
query_cache_limit = 256K
query_cache_min_res_unit = 512
thread_stack = 192K
tmp_table_size = 96M
key_buffer_size = 8M
read_buffer_size = 2M
read_rnd_buffer_size = 16M
bulk_insert_buffer_size = 32M
#myisam
myisam_sort_buffer_size = 128M
myisam_max_sort_file_size = 10G
myisam_repair_threads = 1
#innodb
innodb_buffer_pool_size = 100M
innodb_buffer_pool_instances = 1
#innodb_data_file_path = ibdata1:1G:autoextend
innodb_flush_log_at_trx_commit = 2
innodb_log_buffer_size = 64M
innodb_log_file_size = 100M
innodb_log_files_in_group = 3
innodb_max_dirty_pages_pct = 50
innodb_file_per_table = 1
innodb_rollback_on_timeout
innodb_status_file = 1
innodb_io_capacity = 2000
transaction_isolation = READ-COMMITTED
innodb_flush_method = O_DIRECT
[mysqld3306]
port =3306
server-id=203306
basedir= /usr/local/mysql
datadir = /data/mysql/mysql_3306/data
socket          = /tmp/mysql_3306.sock
innodb_buffer_pool_size = 100m
#transaction_isolation = REPEATABLE-READ
[mysqld3308]
port=3308
server-id=203308
#binlog-do-db=db01
basedir= /usr/local/mysql
datadir = /data/mysql/mysql_3308/data
socket          = /tmp/mysql_3308.sock
innodb_buffer_pool_size = 100m
innodb_flush_log_at_trx_commit = 2
sync_binlog = 0
[mysqld3309]
port=3309
server-id=203309
#binlog-do-db=db01
basedir= /usr/local/mysql
datadir = /data/mysql/mysql_3309/data
socket          = /tmp/mysql_3309.sock
innodb_buffer_pool_size = 100m
innodb_flush_log_at_trx_commit = 2
sync_binlog = 0
实验要求centOS 6.X 64位
MySQL-5.6.22(之后的版本)
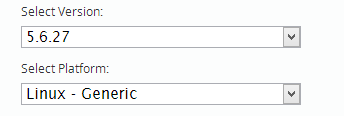
mysql-5.6.27-linux-glibc2.5-x86_64.tar.gz
也可以使用国内mirrors下载
PS: 头等大事: 把selinux禁掉 把iptable也关掉
永久方法 – 需要重启服务器
修改/etc/selinux/config文件中设置SELINUX=disabled ,然后重启服务器。
临时方法 – 设置系统参数
使用命令setenforce 0
iptables开机自动启动:
开启: chkconfig iptables on
关闭: chkconfig iptables off
iptables关闭服务:
开启: service iptables start
关闭: service iptables stop
2.解压二进制安装包创建硬链接
#mkdir /opt/software
#tar xvf /opt/software/mysq-5.6.27-linux-glibc2.5-x86_64.tar.gz
#cd /usr/local/
#ln -s /opt/software/mysql-5.6.27-linux-glibc2.5-x86_64 mysql
3.新建mysql用户,用户组,指定datadir
#groupadd mysql
#useradd -g mysql -M -s /sbin/nologin mysql
尽量不要用root启动
4. 创建mysql数据文件和日志存位置并赋予权限
5.编写配置文件my.cnf#mkdir -p /data/mysql/mysql3316/{data,logs,tmp} #命名 项目+端口号#chown -R mysql:mysql /data/mysql/mysql3316/#chown -R mysql:mysql /opt/software/
#chown -R mysql:mysql /usr/local/mysql
确认权限
vi %s/3306/3316/g 改变下配置文件
#cd /usr/local/mysql/
#chown -R mysql:mysql *
#./scripts/mysql_install_db
PS:输出两个OK表示初始化成功
Installing MySQL system tables...2016-05-12 10:08:01 0 [Note] ./bin/mysqld (mysqld 5.6.27-log) starting as process 25305 ...
#echo $path 查看当前的环境变量#echo "PATH=$PATH:/usr/local/mysql/bin" >>/etc/profile#source /etc/profile
#cp /usr/local/mysql/support-files/mysql.server /etc/init.d/mysql
#/etc/init.d/mysql start9.安全加固
#service mysql start
#/usr/local/mysql/bin/mysqld_safe --defaults-file=/etc/my.cnf &#/usr/local/mysql/bin/mysqld --defaults-file=/etc/my.cnf &
10.怎么确认mysql是正常启动的删除匿名账户
>delete from mysql.user where user!='root' or host!='localhost';
处理无用的数据库表
>truncate table mysql.db;
>drop database test; 对test授权太宽泛
刷新权限库
#/usr/local/mysql/bin/mysqladmin -S /tmp/mysql.sock shutdown
A.查看进程是否存在
#ps axu | grep mysqld
B.查看端口是不是正常监听正确
#ss -tlnp
#netstat -nalp | grep mysqld
C.看错误日志是否有异常
#vim 或者 tail
TIPS:
启动报错解决思路看有没有error 防火墙 权限# cat /etc/sysconfig/iptables
初始化要有2个ok的输出
--datadir --basedir 也是从配置文件读
--user可以从配置文件读取
常用的命令
mysqlmysqlbinlogmysqldmysqld_safeperrormysqldump


