
centos7 安装gitlab
零 修订记录
| 序号 | 修订内容 | 修订时间 |
|---|---|---|
| 1 | 新增 | 2021/2/22 |
一 摘要
本文主要介绍centos 上安装gitlab
二 环境信息
(一) 操作系统
[root@webmysql1 ~]# lsb_release -a
LSB Version: :core-4.1-amd64:core-4.1-noarch
Distributor ID: CentOS
Description: CentOS Linux release 7.3.1611 (Core)
Release: 7.3.1611
Codename: Core
[root@webmysql1 ~]# unama -a
-bash: unama: command not found
[root@webmysql1 ~]# uname -a
Linux webmysql1 3.10.0-514.26.2.el7.x86_64 #1 SMP Tue Jul 4 15:04:05 UTC 2017 x86_64 x86_64 x86_64 GNU/Linux
[root@webmysql1 ~]#
(二)gitlab 信息 及下载地址
企业版下载地址:https://packages.gitlab.com/gitlab/gitlab-ee
社区版下载地址:https://packages.gitlab.com/gitlab/gitlab-ce
官方安装文档:https://about.gitlab.com/install/#centos-7
我安装的版本:gitlab-ee-12.7.7-ee.0.el7.x86_64.rpm
wget --content-disposition https://packages.gitlab.com/gitlab/gitlab-ee/packages/el/7/gitlab-ee-12.7.7-ee.0.el7.x86_64.rpm/download.rpm
三 实施
(一)安装步骤
3.1.1 关闭防火墙及selinux
略
3.1.2 安装依赖包
    [root@webmysql1 ~]# yum install -y curl policycoreutils-python openssh-server

    [root@webmysql1 ~]# systemctl enable sshd
    [root@webmysql1 ~]# systemctl restart sshd
    [root@webmysql1 ~]# systemctl status sshd
    ● sshd.service - OpenSSH server daemon
       Loaded: loaded (/usr/lib/systemd/system/sshd.service; enabled; vendor preset: enabled)
       Active: active (running) since Thu 2020-03-12 09:56:00 CST; 6s ago
注:官网提供安装邮件server,一般企业都有自己的邮件服务器,这一步可以跳过去。
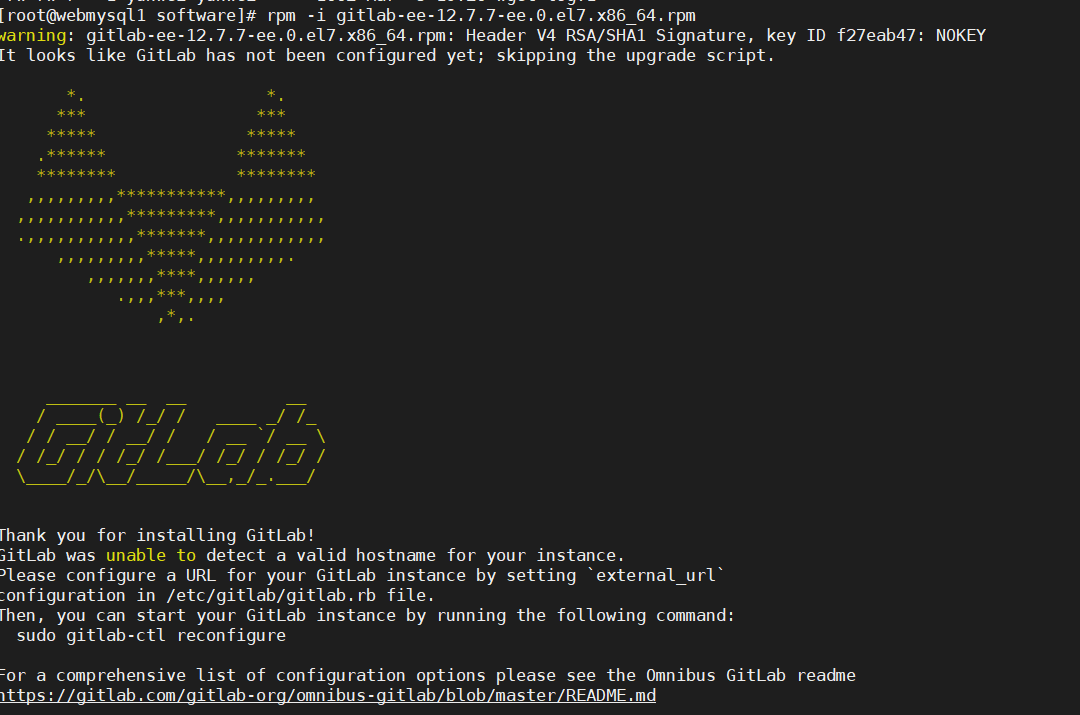
3.1.3 安装gitlab
rpm -i gitlab-ee-12.7.7-ee.0.el7.x86_64.rpm
安装好了如下图:
3.1.4 配置gitlab 外部访问地址
修改/etc/gitlab/gitlab.rb 文件里external_url
    [root@webmysql1 gitlab]# cp gitlab.rb gitlab.rb.bak.`date +%y%m%d%h%m%s`
    #external_url 'http://gitlab.example.com'
    external_url 'http://你的域名orip:9200'
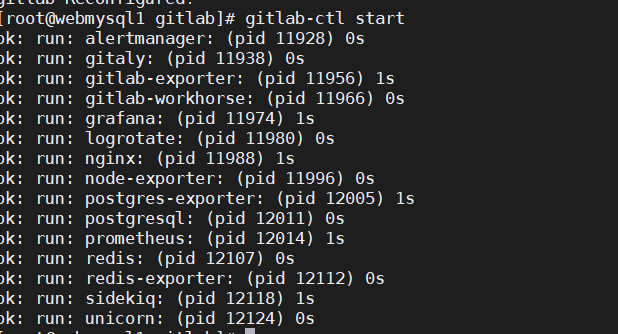
3.1.5 配置生效及启动
[root@webmysql1 gitlab]# gitlab-ctl reconfigure
执行成功后

gitlab-ctl start
启动成功后
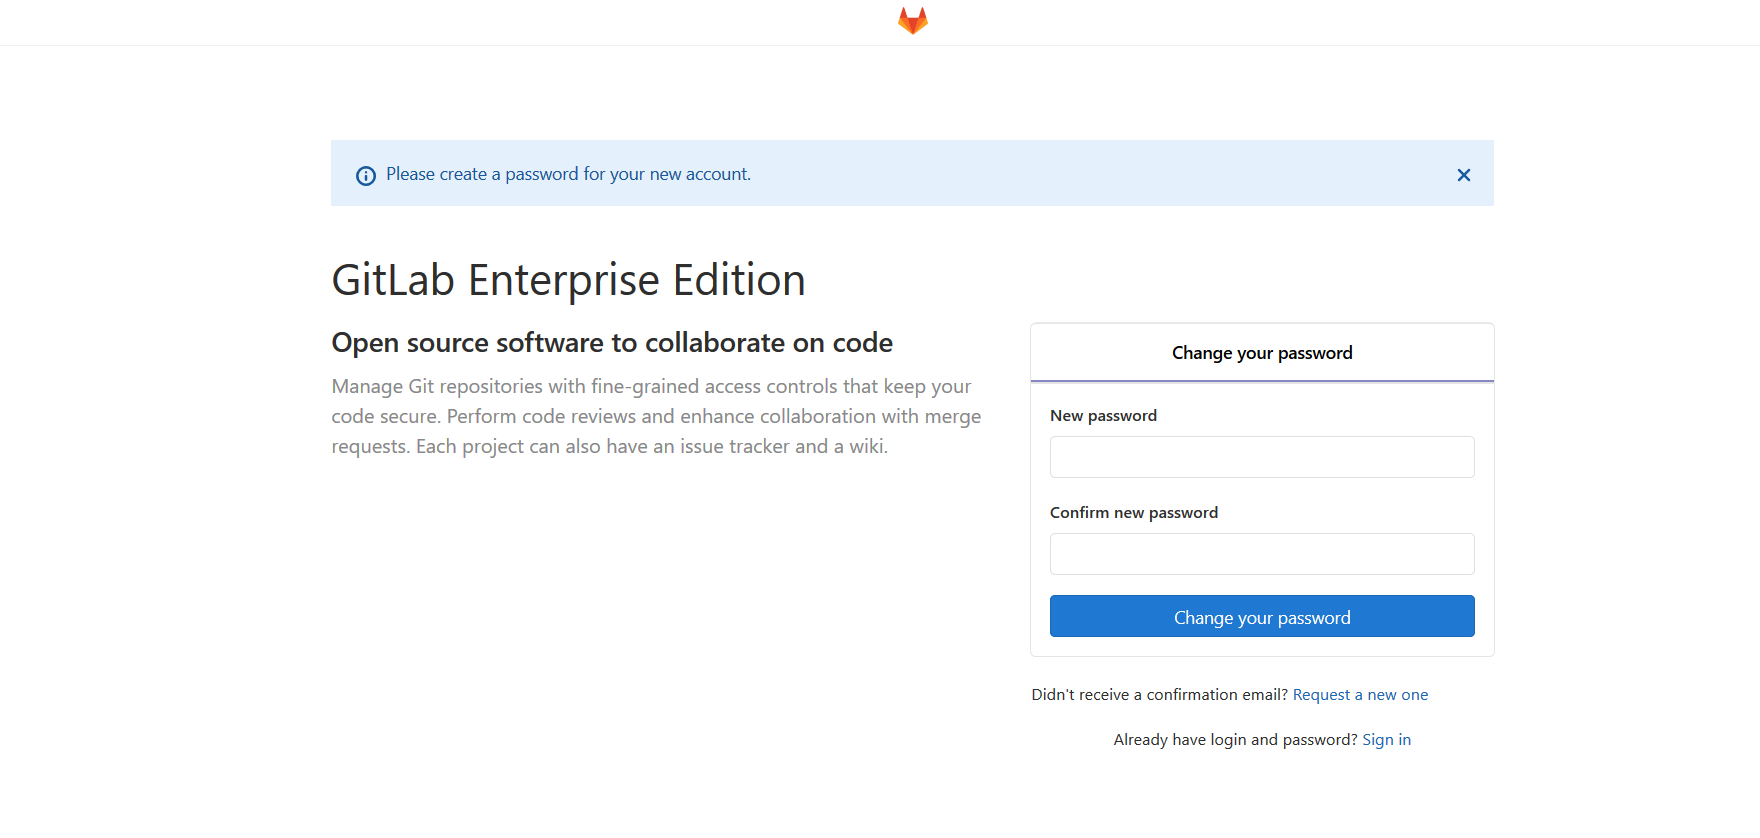
访问页面
3.1.6 常用命令
启动
gitlab-ctl start
停止
gitlab-ctl stop
重启
gitlab-ctl restart
配置生效
gitlab-ctl reconfigure
posted on 2021-02-22 09:06 weiwei2021 阅读(300) 评论(0) 收藏 举报

 浙公网安备 33010602011771号